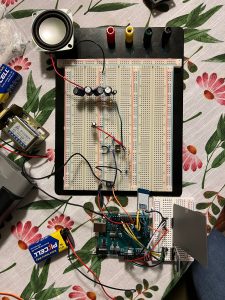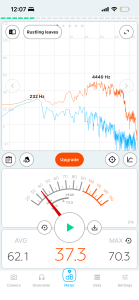
For the past two weeks, I have ordered additional parts that should bring the lock sub-system to completion. This included amplifier transistors, more robust speakers, and servo motors. Addressing the most pressing issue of the lock over the last two weeks, the lack of speaker amplification, I used an example circuit, the amplifier transistor I ordered, and various resistors and capacitors sourced from the 18-220 lab to build an amplifier circuit, modifying the resistance and capacitance values in attempts to improve the overall sound quality and volume. There is still some room for improvement here, and I hope to reach out to Prof. Sullivan to discuss possible adjustments if time permits. If I don’t have time, and since this is now a lower-priority item, the current speaker setup is sufficient for the final demo. I also added an elementary “song selection” function to the main lock code to select from different songs that are stored on the microSD card. In terms of testing the speaker, I downloaded a decibel reader onto my phone and checked for a safe reading (<75dB) at 6″, 1′, 2′, and 3′ away from the speaker, uncovered. All were under 75dB, and the 6″ reading is included in the images below.
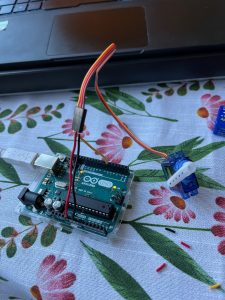
Addressing the issue of the solenoid lock not having sufficient power and being an unclear indicator of the lock being locked or unlocked, the servo motor will soon replace the solenoid. The servo requires much less power and does not need constant power to be “unlocked”, meaning the system can be more efficient. It is also easy to make more clear with the servo what is “locked” and what is “unlocked.”
Another key item I began was testing possible coverings for the keypad to add another layer of security. With Brooke’s help, I was able to 3D print a 0.5mm thick sheet to tape over the keypad and hide the numbers. While the keypad still functions fully with this cover, I am unsure if it will be implemented in the final demo.
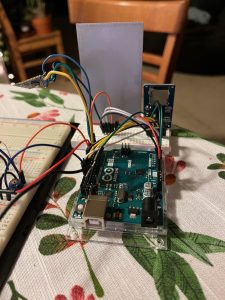
Every module needed for the lock is now physically added to the main circuit, aside from the servo which will replace the solenoid tomorrow. My next steps will be to move the amplifier circuit to a much smaller breadboard to consolidate space, solder any connections that I haven’t done yet, laser cut a box to act as a housing for the lock electronics, and 3D print a small part to connect to the servo and act as the lock piece that moves in and out. I am not a mechE, however, so I doubt I will be able to create a simple box or door to accompany the lock in a sufficiently short amount of time.
All of these tasks can be completed in this upcoming week, so I feel that I am on track to completing my tasks for the project. However, I am concerned about testing the full BeatLock system, as we are still working on connecting the three sub-systems. To catch the team up this week, I’m hoping to have the lock completely ready at the beginning of the week for Zoe to work on the Bluetooth functionality when she is ready to work on the connection between the mat and the lock.
Additional Considerations: Learning Strategies
As I have gone throughout this process of creating the lock subsystem this semester, I have gained new knowledge about how to work with Arduino, specifically the Uno R3, its specific architecture, and how to be flexible with finding modules to accommodate it, such as the Bluetooth and microSD card reader modules. My strategy throughout the semester for each new addition has been to read datasheets when available to get a sense of different design parameters and how the item generally functions, then to move from that to looking for examples of the item being used, either through reading through example code to get an idea of function or through videos of someone walking the viewer through an example circuit with the item used. From here, I tend to debug and optimize, using strategies such as googling Arduino IDE errors for understanding, reading forums when I run into specific hardware issues, and even downloading multiple libraries to try to get a specific component working. I have also learned through the short time span of this class that while certain ideas in theory will work best, when trying to debug for two weeks leads nowhere, it is time to pivot and choose another plan; this can specifically be seen in my attempts at getting the Seeed Xiao to work and switching to the Arduino Uno R3 after being unsuccessful.