This week I worked with the team to make final video and poster. I also reviewed for the final presentation.
Next week, I plan to refine the video and poster and prepare for the poster session.
Carnegie Mellon ECE Capstone, Spring 2021 [Alvin Shek, Vedant Parekh, Siddesh Nageswaran]
This week I worked with the team to make final video and poster. I also reviewed for the final presentation.
Next week, I plan to refine the video and poster and prepare for the poster session.
This week, I worked with Sid and Alvin on integrating all the systems together and debugging all the issues that came with integration. There were many issues we faced such as losing drone communication with the remote controller and the drone radio, flight commands using code broke down which we had successfully tested before, etc. Debugging and getting necessary data for our requirements was everything that I worked on this week. After taking our aerial shot, I helped code calculating the false positives and false negatives of the object detection code. everything together and debugging issues with drone communications. We faced a lot of strange setbacks this week. In the previous week, we were able to easily control the drone with remote control and even control the drone via code.
For next week, I am swamped with class work and most probably will work a little on trying to debug why the code functions sent for flight are not working.
This week was a lot of integration and working as a team. I got the switches working and coded up with the TX1 to start/stop flight. The LED in red indicates start and off is stop:
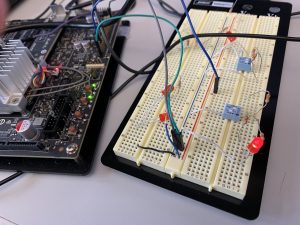
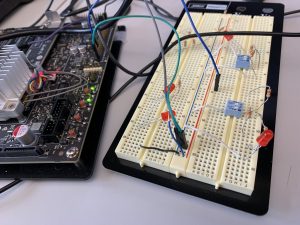
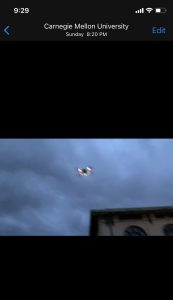
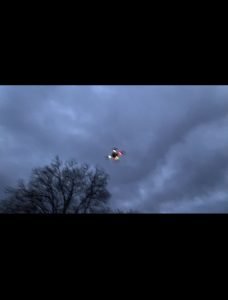
I also helped with debugging while we got our first test up autonomously: without the remote control. Some of the debugging included miscommunication from TX1 to Pi (and vice versa), adjusting camera filtering, camera calibration. Here are couple of images from one of our flights:
This week I worked on making the streaming work between the RPi and TX1. Rather than using raspicam_node package in ROS, which was giving too many errors for raspberry, I decided to use cv_bridge. Alvin and I worked on creating the script to convert the Pi camera image to a OpenCv image to then a ROS type image using cv bridge. Here is a picture of an image that was taken on the camera streamed to the TX1:
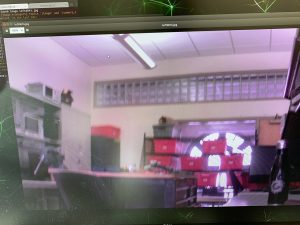
There is a 2-3 second delay between capturing frame and streaming it to the TX1 . One of the problems we are having is the TX1 is not receiving good WiFi strength. I also worked with the team to do various other tasks like testing out the buck convertor which will be used to power the RPi. I also worked on the camera calibration so the images that will be captured by camera can be converted to real work coordinates.
On schedule, next week plan to access the issue with Wifi connectivity of TX1, improve the latency between capturing and receiving the image. Also, planning to access how the running the algorithms on these frames will impact the latency when images send back to RPi.
This week most of the time was spent debugging the camera with the Raspberry Pi 3. The camera doesn’t capture the image properly:
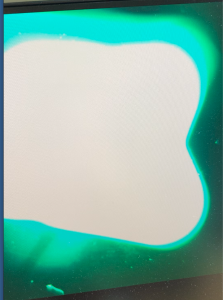
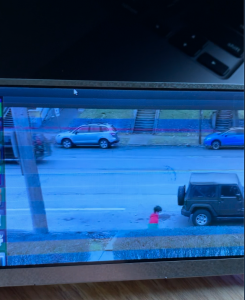
This is suppose to be a white ceiling. From extensive debugging, we figured out that a Raspberry Pi 4 will be necessary as the camera needs kernel 5.4. We tried updating the kernel to 5.4 with Raspberry pi 3 but that was not stable. We tried many libraries from Arducam (https://github.com/ArduCAM/MIPI_Camera/tree/master/RPI) and this other than raspistill. None of these solved the problem. Therefore, we have ordered a Pi 4 and the necessary cables. Also I got the wearable display working with the TX1, here is an image of our test video shown on the wearable display:
I am not behind schedule and next week the plan will be to get the camera working with raspberry pi 4 and stream the video captured to the tx1 using ROS so that I can integrate my object detection code.
This week I worked on testing the computer vision algorithm I implemented last week. The test setup was a stationary 12 MP camera (to simulate the one we will use) at an approximate height of 20ft recording a person walking and running wearing a red hoodie (our target) under sunny and cloudy environment:
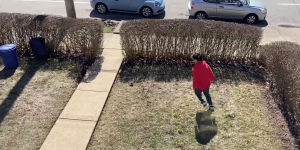
Sunny condition
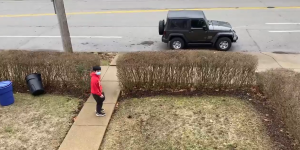
Cloudy condition
The algorithm did not work well for the cloudy condition (where the target is walking) as it picked up the blue trash can and car that was parked:
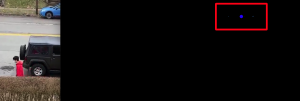

Note the blue dot in the center of the red bounding box is the center of the tracked object. In the first picture, the algorithm switches from tracking the person to tracking the blue car parked
Under the sunny conditions (where the target is jogging), the algorithm was perfect in tracking the person:

As seen from the above picture, the blue car and garbage can are filtered out.
To better the algorithm for not well lit conditions, I used rgb filtering rather than converting to hsv space:
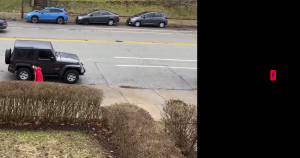
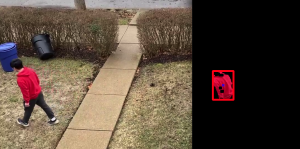
In the first picture, the new algorithm is still tracking the person and has filtered out the blue vehicle in the background. In the second picture, the new algorithm also filters out the blue garbage can unlike the old algorithm.
The new algorithm also worked in the sunny conditions:
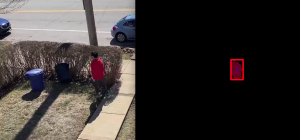
Therefore, the algorithm using rgb filtering will be used. I also calculated the x, y position of the center of the target’s frame which will be used by Sid for his sate estimation algorithm.
We are on track with our schedule. Next week, I will shift my focus on developing the circuitry for the buttons, and if I get the camera we ordered, I will run the computer vision on the TX1.
Since the TX1 ran out of internal memory, we weren’t able to download OpenCV on it, so I worked on my laptop using the built in camera to implement a color filter to detect a red shirt. I placed a dynamic bounding box on the object that is being filtered to see if it matches the object we want to track. Here is a picture of the filter working at a 10 feet distance from camera:

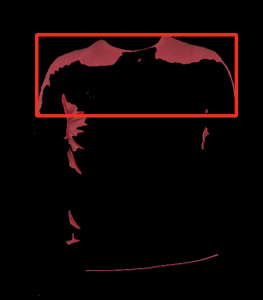
The filter had some issues detecting the shirt at a closer distance, which I am assuming is due to the shadows caused by the light coming from the window that is directly in front of me. Since I am closer to the window I think the light is having a more prominent role on the filtering algorithm. However, I am still able to detect the correct object that I want to track as shown by the bounding box:
One more concern is that the filtering algorithm seems to not be able to filter out blue. My quick fix for now is to store the biggest contour I can detect and calculate the center-point of that rectangle to get the (x, y) position of the object I want to track:

This way, even though there is some noise, I am still able to get the right object to track.
I also worked on the design presentation this week and helped the team finalize components and place orders.
I am not behind schedule and next week I plan to test the filtering algorithm on an aerial footage to see how the algorithm performs and if I need to improve it. Sid will help me get the aerial footage. I am also meeting the team tomorrow to finish setup of the TX1.
Last Sunday we confirmed our Gantt chart and schedule. Then we divided up the components we planned on using to research so we could place an order . I researched the display we would use and how we can integrate the start/stop button with the TX1. For the display, I concluded we should buy a small 5 inch HDMI display from Adafruit.

The display can be powered by micro USB. The TX1 has an HDMI port and a micro USB that can supply the 500 mA current required by the display. This display was ideal as it is small, so it can be something we can wear on our arm, and requires no custom power management circuity as it can be powered through USB. Since right now we are planning to place the TX1 in a backpack and display on the arm, it is important to minimize the wiring between the two components.
Next, I created a simple circuitry to connect our start/stop button to the TX1.
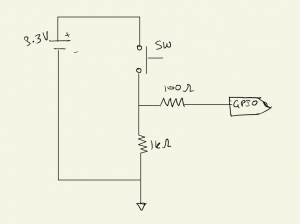
The J21 header pin 13 on TX1 has a pull down network which will complete the circuit when the button is pressed. The 3.3V is provided by the TX1 GPIO pin 1. I initially plan to have this circuitry on a small breadboard next to the display for testing and later transitioning to through hole assembly. I plan to get all the components for the button circuitry from the ECE lab.
I also researched a JTAG debugger we can use for the TX1 as the kit we have did not come with a JTAG debugger.
Next week I hope to start researching on the color/blob filtering. I want to get a basic filter implemented on the TX1 using the built in camera to detect a bright orange sticky note. Since we do not have the camera we will use on the drone, I am using the TX1 built in camera as the processing will be done by the TX1 in any case. I also plan to help my team place the order for some of our critical components like the camera and display.
I helped write and discuss the abstract for all our ideas (bluetooth triangulation and drone tracking system) to aid us in mapping out the feasibility of each. For both of them, I worked with the team to identify the challenges that would be involved and how to solve them (like finding if there is an existing API for bluetooth angle of arrival for BLE direction finding). This information allowed us to understand if the drone or bluetooth localization problem was more feasible. After we picked our final project, I helped brainstorm the goals that we can achieve for the MVP and what we can aim for as stretch goals. Finally, I am also working on creating the proposal presentation. Next week, I will start researching the microcontroller and on ground compute that we can use. I will also work on the schedule. I will also work with the team to determine how we can mount our extra hardware on the drone.