Siddesh’s Status Report- 4/24/2021

(This status report covers the last two weeks since no reports were due last week).

At the start of two weeks ago, we all met in the lab but were struggling to get the drone flying and our camera image was entirely red tinted. Apparently, the auto white balance on the camera was completely screwed up. I created a main Python function on the Jetson that would automatically receive the images streamed by the Raspberry Pi, run the object detection and display the results on the monitor screen. I modified the main function so we could manually send white balance values to the Raspberry Pi and have it change these values for the camera on the fly so we could adjust the white balance of the photos. Still, the image was extremely desaturated no matter what we tried.

Eventually, we decided to get a new camera (and a Wi-Fi radio we could hook up to the drone to receive error messages while attempting to fly). While waiting, Alvin and I tackled drone motion planning- each one of us using a separate approach. The idea behind drone motion planning is that we already have a target detection algorithm and a target state estimator that can model the future movement of the target. We now need to model the future movement of the drone and create a motion plan such that:

  1. The target stays close to center of frame.
  2. The drone doesn’t have to make extreme movements

For my approach, I created a 3D simulator that simulated the target’s motion, the drone’s motion (based on our motion plan) and the drone camera output (based on the camera’s internal matrix). The simulator is pictured here:
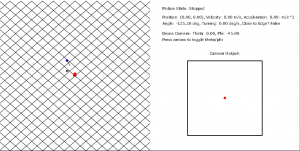
My approach to motion planning was to run optimization on an objective function, trying to minimize the following two quantities:

  1. The negative dot product between the unit vector of the camera orientation and the unit vector from drone to target. Basically, the higher the dot product, the closer the target is to center. Since this is a minimizer I took the negative dot product.
  2. A regularization term that aims to minimize the sum of the squared velocities in the drone’s motion plan (basically try and make the drone move as slowly as possible to accomplish our goals)

The relative proportions of these two can be tweaked. In our Google Drive folder, I’ve attached video of when we only try to minimize 1) and when we try to minimize both 1) and 2). The first case has more accurate tracking, but the drone’s movements are jerky and unrealistic. The second case has slightly less accurate tracking, but much smoother and achievable motion.

Finally, we received the new camera and Wi-Fi radio and began to set the groundwork for autonomous flight. First, we met in lab and actually got the drone to fly under manual control. We took test video, and to make things easier, I modified the main functions of the Jetson and the RPi so that the Jetson can send commands to the RPi that can handle events such as starting the camera or stopping the camera. I then modified the RPi’s config files so that the video streaming program would run at boot. This enabled us to easily start our video streaming. As soon as we connected the RPi to the drone’s battery it would start up the program headlessly, and then we could send it commands through the Jetson to start the video streaming.

After getting the drone to fly manually, I helped setup mavros on the RPi so we could connect via serial and finally start sending autonomous commands to the drone. Today, we were finally able to start sending basic autonomous commands to the drone and have it hover to a set position and remain there.
Alvin’s Status Report – 4/24/21

I finished the following this week:

  • Set up our new wifi module for the drone and successfully used it to receive telemetry and error messages from the drone.
  • Overall get the drone flying with remote control.
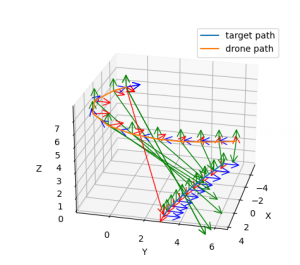
  • Implement a first attempt at motion planning that uses MPC to solve for optimal viewpoint (keep target centered in image as target moves) with the drone flying to keep up. A picture of the resulting plan is shown below. The green arrows show the vector from the camera center to the ground. You can see how initially, the drone’s camera is not centered on the target, but over the next 10 steps, the drone executes a maneuver to properly focus on the target.

  • Calibrate new camera’s intrinsic parameters
  • Successfully send motion commands to drone through code. To do this, I set up UART communication between the drone and the flight controller and adjusted the flight controller’s baud rate to transmit messages fast enough.
  • Set up safety protocols for the drone including low battery failsafe and boundaries for where the drone can fly. Currently, if the drone flies out of the boundary, it immediately enters  a “Hold” flight mode and immediately stops moving and holds its current position in the air.

TODOs Next week:

  • Get motion planning working on the physical drone. This means speeding up the code a lot (the above motion plan took 12 seconds to solve for, which is way too slow. We need to send motion commands at least every 0.5 seconds as a hard restriction by the flight controller).
  • Calibrate the full 3D target pose estimation on the real drone. Conduct tests and verify performance

Team Status Report

We achieve many milestones in these two weeks:

  • Successfully conducted manual test flights with a remote control. This means we fixed our connection issues with the drone.
  • Made automated scripts that launch on startup for the raspberry pi. This includes automatically starting a video stream and publishing images over ROS as well as automatically shutting down the video stream with a simple ROS message
  • Created draft user interface with buttons on breadboard to change drone flight modes. This involves programming interrupts on the Jetson TX1 to trigger the sending of ROS messages to the drone.
  • Tested a new camera, which finally works as expected, and calibrated both the color filters for target detection and the intrinsic parameters with a chessboard.
  • Implemented two different motion planners and verified performance in simulation.
  • Successfully controlled the drone fully with code today. The code only told the drone to fly up to a certain height, but this means we fixed all other communication issues and verified that we can both stream commands to the drone and receive pose updates from the drone fast enough.

TODOs:

  • We need some more buttons and a longer cable connecting the TX1 to our user interface board. We then need to integrate this with sending ROS messages.
  • Integrate motion planning with drone
  • Test and verify 3D target estimation on the real system, not just simulation.

Vedant’s Status Report 4/24/21

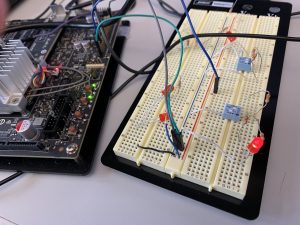
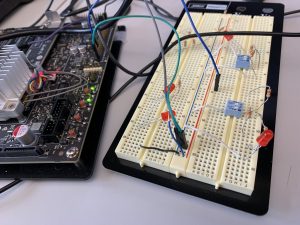
This week was a lot of integration and working as a team. I got the switches working and coded up with the TX1 to start/stop flight. The LED in red indicates start and off is stop:

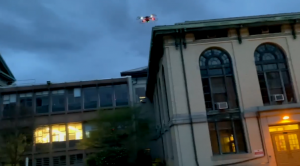
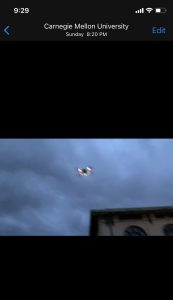
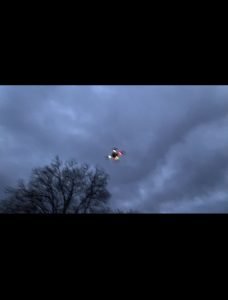
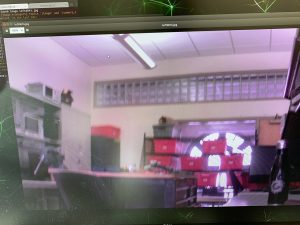
I also helped with debugging while we got our first test up autonomously: without the remote control. Some of the debugging included miscommunication from TX1 to Pi (and vice versa), adjusting camera filtering, camera calibration. Here are couple of images from one of our flights:

Siddesh’s Status Report- 4/10/21

This week I worked with the team to help the drone get up in the air in the lab. Unfortunately, we ran into a few setbacks during the process that we had to overcome. The first hurdle was that the Raspberry Pi 4 unexpectedly stopped working and gave us the “green light of death” where the green light consistently remained on rather than blinking as it was supposed to, and the Pi wouldn’t boot. I researched the issue, and there were a number of possible causes such as the SD card reader being faulty or a fuse tripping (which would take a few days to reset). I contacted various professors and organization, and eventually we were able to secure a replacement one from the RoboClub.

In addition, I worked with Alvin to get build the proper firmware to upload to the PixHawk flight controller in order to interface with the sensors, and to connect all the sensors together to the flight controller. There were again a few setbacks here, as the internal flight controller’s flash memory was too small to handle the firmware, and we had to constantly adjust the build ourselves and try and get rid of certain firmware features that we didn’t need in order to get the build to the right size. After a long while of tweaking, we were successfully able to upload the firmware successfully to the Pixhawk and setup the proper sensors and airframe.

I also worked with the group to try and test out how we would power the Raspberry Pi by using the LiPo battery on the drone as a power supply and sending it through a buck converter to regulate the voltage sent to the Pi. In addition, I helped with the testing of the camera to get a script that can automatically record video to an external flash drive, and successfully debugged an issue we had where when running the script from boot, the script would run before the OS had detected the external flash drive, leading to an error where the file location would not exist.

Tomorrow, we aim to get our drone flying successfully, as all the infrastructure for integration is finally in place. We plan on working on getting everything prepared for our demo, and going for our first test flights.

Alvin’s Status Report – 4/10/21

This week, I spent most of my time working with the team to set up various components for integration. We aimed to get the drone flying with at least video recording,  but various unexpected issues popped up.

Our raspberry pi 4 suddenly broke, so we were unable to get the drone flying with the video recording. Only today(4/10) were were able to borrow a new one,  and with this I was able to calibrate the extrinsic and intrinsic matrices for our camera opencv and a chessboard printout. At the same time, I helped Vedant set up ROS video streaming from the raspberry pi to the jetson tx1. I also spent a long time with Sid trying to connect our lidar laser sensor and px4flow optical flow camera. Unfortunately we had issues compiling the firmware on our version 1 pixhawk flight controller given its limited 1MB flash.

This upcoming week, I will focus on making sure our drone is up in the air. This involves solidifying our flight sequence from manual position control to autonomous mode and hammering out other weird bugs. Otherwise, basic autonomy involves flying up to the specific height and turning in a specific direction. This upcoming week will be extremely busy with other projects and exams, so the full motion planning may not be finished yet.


Team’s Status report 4/10/21

This week we focused on getting all the remaining parts integrated for our test flight. We completed the calibration and setup of the firmware for all the sensors. We also got the streaming to work. This allowed us to have our first test flight which will serve as our interim demo.

On target, next week, we plan to improve on some of the issues we saw with our test flight the biggest being some latency issues while streaming. We also have to improve on our communication with the drone via the button which is having some issues being streamed via ROS.

Vedant’s Status report 4/10/21

This week I worked on making the streaming work between the RPi and TX1. Rather than using raspicam_node package in ROS, which was giving too many errors for raspberry, I decided to use cv_bridge. Alvin and I worked on creating the script to convert the Pi camera image to a OpenCv image to then a ROS type image using cv bridge. Here is a picture of an image that was taken on the camera streamed to the TX1:

There is a 2-3 second delay between capturing frame and streaming it to the TX1 . One of the problems we are having is the TX1 is not receiving good WiFi strength. I also worked with the team to do various other tasks like testing out the buck convertor which will be used to power the RPi.  I also worked on the camera calibration so the images that will be captured by camera can be converted to real work coordinates.

On schedule, next week plan to access the issue with Wifi connectivity of TX1, improve the latency between capturing and receiving the image. Also, planning to access how the running the algorithms on these frames will impact the latency when images send back to RPi.

Team Status Report- 4/3/21

This week we focused on getting everything in perfect order before integration. First, we assembled the drone’s sensors and camera onto the adjustable mount and adjusted the hardware and tolerances until everything fit properly, the wires could connect safely and the sensors and proper line of sight.

Then, we focused on other miscellaneous tasks in preparation for full integration. We got the camera configured and working with the new RPi4, and started prototyping the circuitry for the passives for button control. In addition, we worked on the calibration of the camera in simulation (and measuring the actual position/pose of the real thing from our CAD design). Using this, we were able to perfect the transformation from 2D pixel coordinates to 3D coordinates in simulation and integrate the state estimator into the simulation. The successful integration of the state estimator into the simulation signaled that our drone tracking pipeline was finally complete.

Finally, we worked to start calibrating the LIDAR and optical flow sensor for drone flight. For next week, we plan to get the drone up in the air and perform rudimentary tracking. In preparation for this, we plan to write the ROS scripts to successfully communicate between the RPi and the TX1, fully calibrate the drone’s sensors and implement the button control to start and stop the main tracking program on the TX1.

Siddesh’s Status Report- 4/3/2021

This week I worked on the assembly of the drone apparatus, the calibration of the sensors and the integration of the state estimator into the simulator.

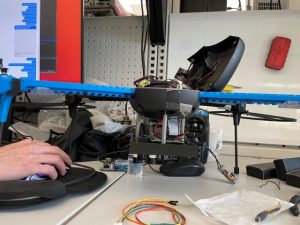
First, I went into the lab with the group to gather hardware and assemble the sensors and camera onto the configurable mount we 3D-printed. I finished mounting all the sensors and the Raspberry Pi, tested the tolerances, and ensured we had enough space for all the wires and the ribbon cable. Here is a picture below:

I also modified the CAD design to include the entirety of the IRIS drone rather than just the bottom shell. This is important because in order to convert the 2D image coordinates to absolute 3D coordinates, we need to know the exact position and pose of the camera relative to the internal Pixhawk 3 flight controller. Thus, I also added a CAD model of the flight controller to the assembly in the correct position so we could properly measure the position and pose in order to calibrate the drone’s sensors. This final 3D assembly can be found as “Mount Assembly 2” in the Drone CAD subfolder of the shared team folder.

Finally, I worked with Alvin to integrate the state estimator into the simulator. First, I had to modify the state estimator to work with 3D absolute coordinates rather than 2D pixel coordinates relative to the position of the drone. In order to do this, I added a z position, velocity and acceleration to the internal state model and modified the transformation matrices accordingly to account for this change. I then debugged the estimator with Alvin as we integrated it into the simulator in order to track the simulated red cube across a variety of different motions. A demonstration of this can be found in kf_performance.mp4 in the share folder. The target red cube’s position is marked by the thin set of axes. It accelerates and decelerates in extreme bursts to simulate a worst case (physically impossible) target motion. The noisy measurements captured by the camera and target detection are modeled by the small, thicker set of axes. Finally, the smoothed out motion from the state estimator’s motion plan is modeled by the larger, thicker set of axes. While the motion plan drifts slightly when the target accelerates rapidly, it does a successful job of smoothing out the extremely abrupt motion of this cube.

For next week, I plan to work with the team to get the drone fully into flight. I plan to help Vedant write the scripts for ROS communication between the RPi and the TX1 and finish calibrating the drone’s internal flight sensors with Alvin.