Current Project Risks
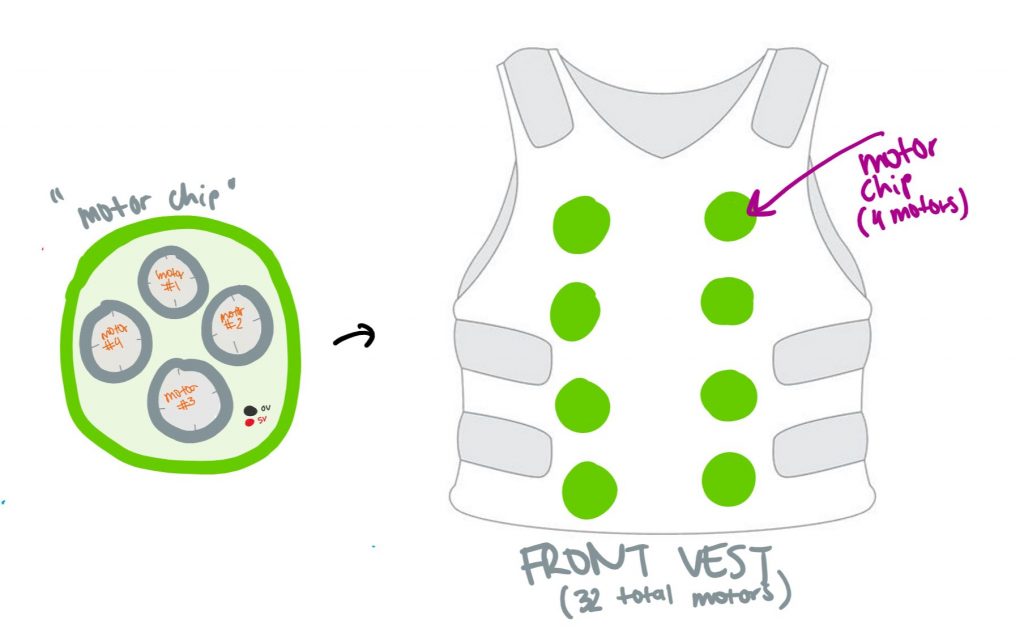
Currently, the most significant risks that could jeopardize the success of the project revolves around our individual tasks. While we may find challenges within our individual tasks, those will be covered by our personal status reports. The main risks are: Sophia figuring out how to drive 2-wire vibration motors with the 3-wire PWM pins, Bethel tracking the actions and coordinates of the enemies within The Last Spartan game, and Amelia with pinpointing where to package the vibration motors in the vest that corresponds with existing spatial acuity data. To manage these risks, each member will focus on fitting their part. Sophia will stagger between testing the motors and determining if a PCB board could be configured to convert the necessary power. Amelia will continue reading existing research on vibrotactile stimuli on the torso as well as making sure the Arduino Wifi Uno is able to receive information seamlessly without noise interruption. Bethel will identify the event handlers dedicated towards different types of enemies within the game.
We also foresee integration as a possible risk. To mitigate this, we plan to do basic integration tests next week. These tests will include sending data from NodeJS server to Arduino and packaging a single coin motor in the vest to ensure it does not move beyond our constraint of 1” radially once on.
Changes to Existing Design
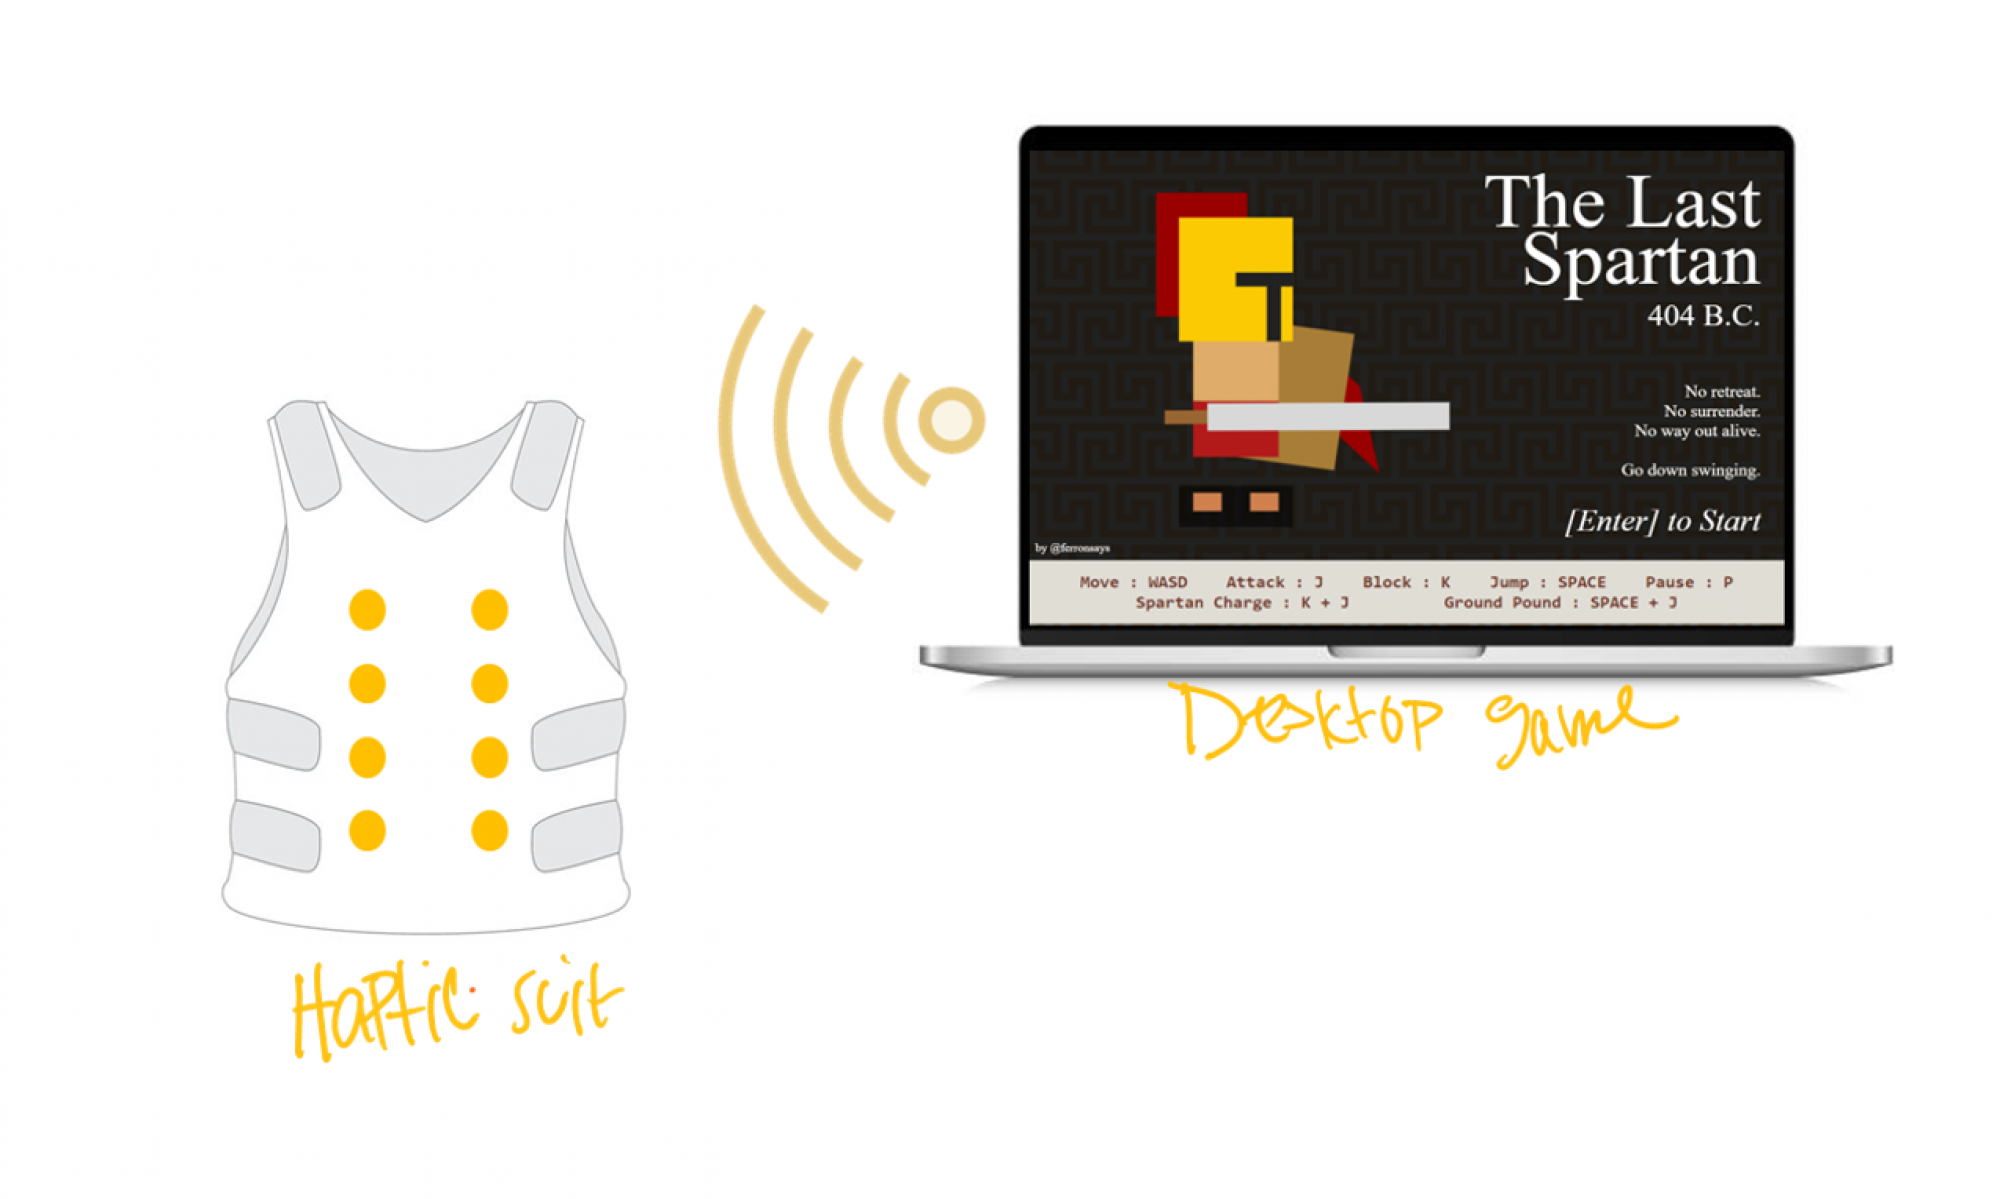
We’ve been thinking about how we could make the experience of a haptic suit more seamless, namely with a keyboard-free experience. Our first idea was to build a joystick input device with an accelerometer that a user could use to swing vertically up and down in order to “attack” enemies in the game. After surveying various gamers and doing our due-diligence with our own research, we found that this type of input is called a “waggle controller”. The waggle controller was popularized by Ninetendo in the early 2000s, being a common feature in games such as Wii Sports, Super Mario Galaxy, Donkey Kong Country Returns, The Legend of Zelda: Twilight Princess, and Rayman: Raving Rabbids. It’s highly unpopular amongst gamers because of the general “lack of skill” it requires out of the user, only random movements to get it to work. Instead, we will be using a wireless xbox controller that a user can use to control their in-game actions. This is the most popular and well-known type of controller because of its ease of use and affordability, running around $50 for a wireless option. We will be mapping the keys on the controller to the keys on the keyboard using the platform “Steam”. We will also be changing the in-game instruction graphics to reflect the controller being the input device instead of the keyboard.
We also spent a lot of time thinking about our design implementation block diagram. This helped us understand the interdependencies of our tasks. This will allow us to move forward with our parallel tasks knowing what has to be done to integrate the system.

As we’ve proven, moving forward, the best way to vet our design and implementation changes is to survey our users. Ask them what they want in order to improve their experience. Being that we are not gamers ourselves, we aren’t reflective of a typical user and thus can’t speak to what they would like. We can only implement changes and bring the system to life.
Principles of Engineering Utilized in Project
We utilized multiple principles of engineering, science and mathematics to develop our design solution including I2C protocol, server design, researching spatial acuity in the body, event handling in JavaScript and Circuit design using an Arduino.
We are employing the engineering design process in every aspect of our project. We have focused on ensuring our project is very modular with lots of parallel tasks which can be completed by our group simultaneously. We are currently working on the research and prototyping phases of the engineering design process.