Updates for the week
This week, I worked on getting the RGB lights (Adafruit DotStrips) to turn on in a specific pattern, placing them inside the vest, laser cutting the motor mounting plate, integrating the wifi REV with Bethel, and integrating the light system wiring to the vest with my entire team.
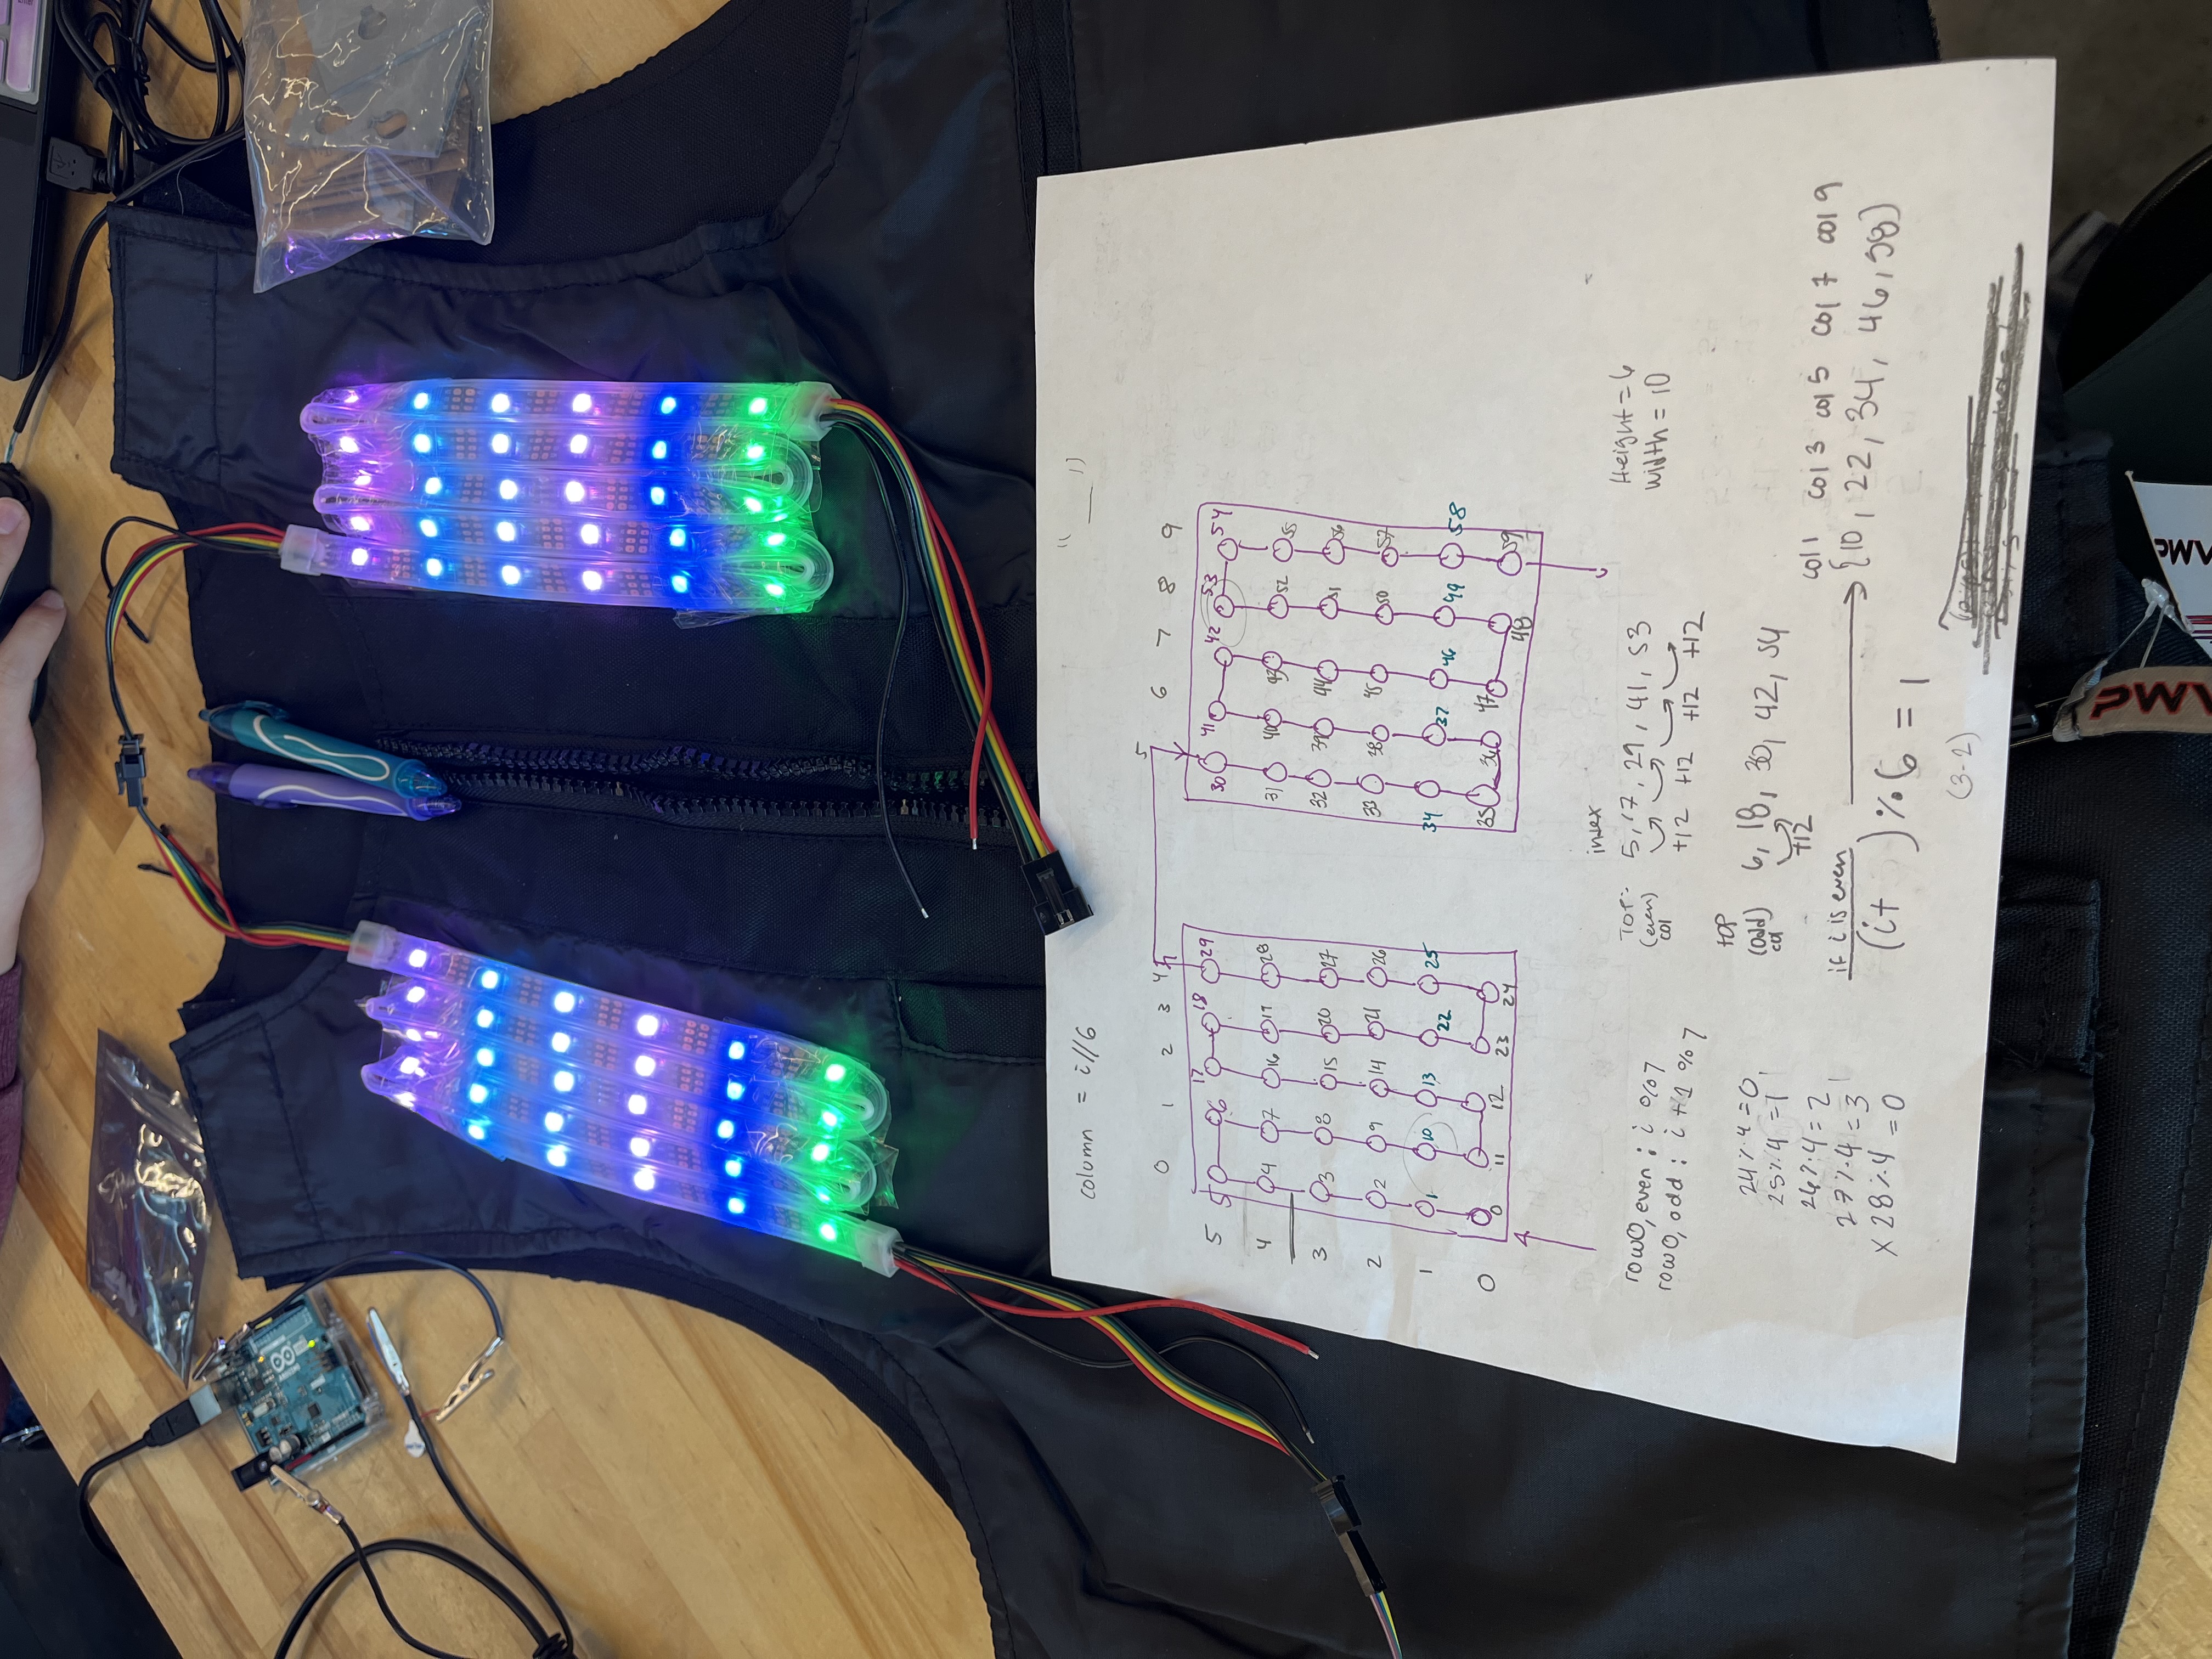
To turn on the lights, I used the Adafruit_DotStar library on the Arduino IDE and connected the datapin to 4, clockpin to 5, power to Vin, and ground to GND on the Arduino. Next, I set the all the LEDs’ red channel to high. From there I did a simple flashing motion to simulate a “low health” event. The low health light show only turns on when a user is below 25% health. As the user’s health decreases from this threshold, the faster it will flash red until the user dies, upon which the LEDs will stay red. For the forceful light response, we will have a cascading wave moving up then down to showcase this event occurred. I isolated the light indexes into rows/cols and which can be shown in the figure below (60 LEDs, 30 on the left and 30 on the right).
Next, I worked on de-threading the bottom of the vest so that I could put the LEDs inside the lining of the vest and see how they shine. A video of this can be seen here. Since the lights need to be accessible to me (so that I could move them in/out of the vest as need), this meant that I also need a way to open and close the part of the vest I just de-threaded. For this, I placed Velcro strips on the inside lining that I could just pull/push together in order to open/close. I found this made the design still look seamless, and I could apply this solution to securing the light/motor systems to the vest, rendering my “pocket” solution I brainstormed in earlier weeks obsolete.
I also began experimenting with a different material for the motor mounting plate. I landed on rubber since it is cheap and flexible. I worked on laser cutting the .dxf file I made last week on this material, and the output of that can be seen in Figure X and X+1. I added additional space to the right of the motor holes so that we can place the PCB once it’s ready.

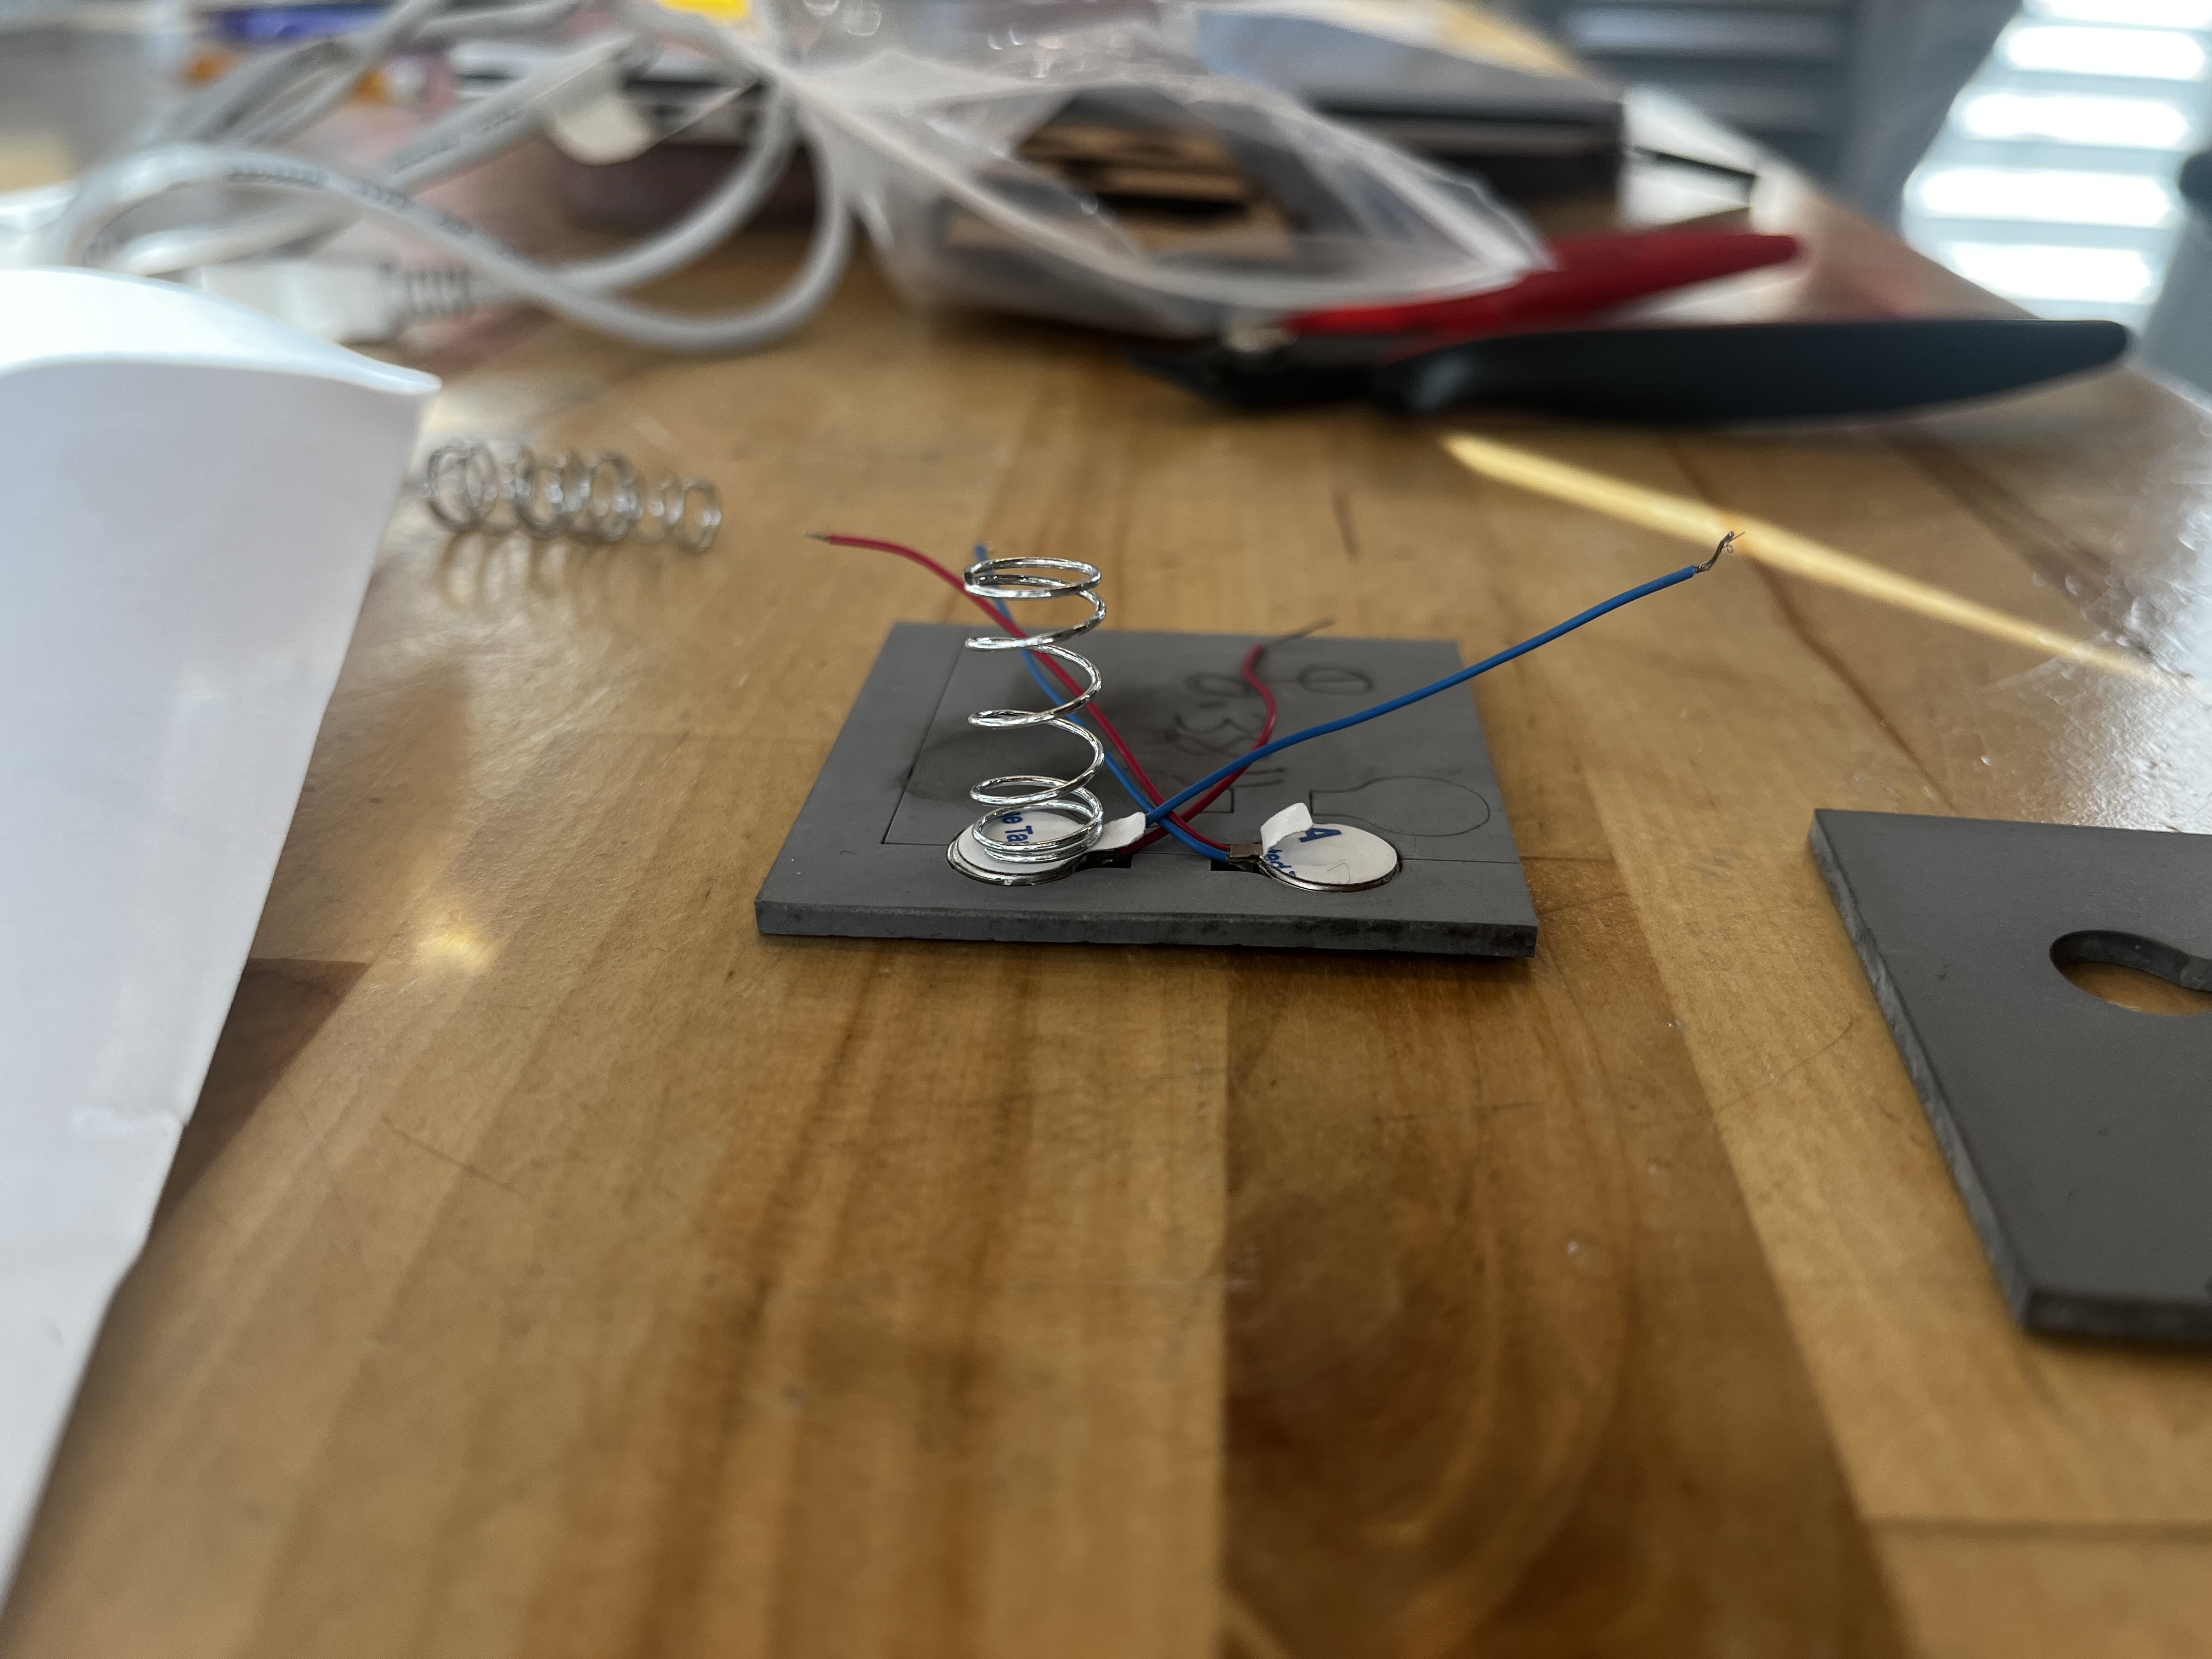
Eventually, the motors will have a spring attached to the back that will make sure there is contact with the motors and the torso of the user, regardless of their size. A rough idea of it is shown in the figure below.
Lastly, I worked with Bethel this week to ensure her part of the project was working with the Arduino Wifi Rev. We worked together so that she didn’t have to repeat any code that’s already written and so that we are able to see if the Arduino is able to receive a simple JSON message (“1” or “0”) she is sending. We were able to see the message, but need to work on sending more information-rich messages that explain an event like forceful jump, low health, getting hit by a small enemy, etc. etc. that are relevant for motor and light responses. After talking it through, we decided the simplest message that the JSON could send are 2, 1-hot vectors since her event precedence algorithm will mean that only one event is registered at a time .This moves away, but has the same essence of the message I worked on parsing last week.
Progress On Schedule
I’m still on schedule, especially now that I’ve gotten the light system up and working. I have also been integrating more with my team, which is a good sign as interim demo is coming up in the next two weeks.
Deliverables for next week
Next week, I plan on finalizing the forceful jump and low health light show timings with Sophia’s motor responses for the same events. The idea is that they last about the same amount of time with their respective motor event.
I will also continue working with Bethel to ensure the Wifi Rev is responding to her message wirelessly and with minimal latency that is within our design requirements.
I will also laser cut a set of motor mounts using cardboard to have ready for the interim demo. If the PCB arrives before Thursday, I will laser cut the mounts using the rubber material.