Meobot

Meobot is a “Desk Companion Pet” which is inspired by Anki’s Vector robot. It is a small cute robot that can get familiar with its surroundings, execute voice commands, display important information via its LCD “face”, and most importantly, be your friend.

Just by saying “Hi Meo”, it will stop what it is doing and listen to your command. You can ask it to do a variety of things like setting a timer, asking about the weather, taking a photo of you, and even playing mini-games. It will respond you with a combination of voice and visual content, and you can feel its mood simply by checking out its “facial expression”.


Status Report #11 (May 5)

Haohan Shi

This week I mainly worked on finalizing our project and making improvement on our demo experience.

First I made further adjustments to our hotword detection model so that it not only worked on my voice but also worked on the other teammates’ voices. Also, I made adjustments to our code flow so that every time the robot can’t understand the input command, it will directly ask for a new command instead of waiting for hotword detection.

Also, I added voice commands so that we can turn on/off facial recognition by voice commands so that we don’t need to adjust code during demo day.

Finally, I adjusted our robot case, especially head angle so that the camera will face towards human faces directly given the height of our demo table.

Yanying Zhu

During the last week, we majorly worked on finalizing the appearance of the robot as a team. The major challenge we solved is to stabilizing weights of the components in the robot case so that it doesn’t mess up the center of gravity and disrupt moving It has been an issue when we kept adding weights on to the robot.

I also did some minor fix on the code that involves serial communication with the pi. As we are approaching the end of the term, we are also finishing the rest of the testing on movement, facial recognition for documenting and analyzing in the final report.

Olivia Xu

The last week of our capstone project consists of testing every function to decide if we want to include it in the final version. One problem was the robot was tipping over with all the components, especially the heavy portable battery, inside. I made new parts out of foamcore to act as an internal support that stops the components from shifting towards the back. I went ahead a spray painted the outer case into a more aesthetically pleasing black. The matte effect covers up the 3D-printed imperfections.

Team Stautus

We are ready for demo!

Status Report #10 (Apr 27)

Haohan Shi

This week I mainly worked on improvement and assembly of our case. The initial design of our outer case lacks mounting mechanics and relies only on mechanical hooks, and it turns out to be fairly unstable since the 3D printing isn’t accurate enough, and the laser-cut material such as wood or acrylic sheets are too heavy and thick. In addition, laser-cutting cannot make curvature surfaces easily so that the initial design doesn’t look very nice when we assembled.

For our second edition, we added the mounting holes which matched the screws holes on the robot platform and used glue guns to seal all the connection parts.

Then I conducted several tests with my teammates to find out what parameters work best for our hot word detection.


Sensitivity Gain Distance (from mic) Noise False Alarm time Hotword Success Speech-Recognition Success
0.4 1 5 None 0 0%
0.4 1 10 None 1 66.7% 100%
0.4 1 15 None 0 80% 62.5%
0.4 1 25 None 0 0%
0.5 1 5 None 4 50% 50%
0.5 1 15 None 3 10% 100%
0.5 1 25 None 0 10% 100%
0.4 3 5, 15 None 0 0%
0.4 3 25 None 0 71.4% 70%
0.4 3 35 None 0 90% 66.7%
0.4 3 45 None 0 0%

Sensitivity Gain Distance (from mic) Noise False Alarm time Hotword Success Speech-Recognition Success
0.4 5 5, 15 None 1 0%
0.4 5 25 None 1 29.4% 71.4%
0.4 3 5, 15 Noisy 0 0%
0.4 3 25 Noisy 0 66.7% 58.4%
0.4 3 35 Noisy 0 38.5% 70%
0.4 3 5, 15, 35 Very Noisy 0 0% 0%
0.4 3 25 Very Noisy 0 9.1% 100%

The result provides a lot of insights that we didn’t think of initially. It turns out 0.4 and 3 are optimal parameters currently because the ambient noise may be very loud and we are ~25 inches away from the robot during the demo. But more data needs to be collected during a noisy and very noisy environment.

Olivia Xu

Designed new case for the robot with all the information from test runs from last week. Need a good way to mount things and need larger space. So I made a bottom with tabs that have hole for mounting with screw onto the robot, this also allows a much larger design above. Surprisingly weight isn’t much of a problem when the speed is turned up.

Notable constraints:

  • Have to adjust camera angle with different table height. The head has to stay movable since the demos take place on different tables.
  • 3D printing is expensive and support materials tend to be a lot, and often times the support materials fail to print well. So I sliced up the model I made into pieces that could be printed with close to zero support material.
  • 3D printers tend to break too quickly for the staff to service all of them, and there are a lot of people trying to use them during final weeks
  • Need to make sure weight distribution is ok for the rear to protrude by this much. will place portable battery relatively close to front, and the head has torque.

still needs paint

Yanying Zhu

During this week I worked on conducting structured tests with teams and preparing for the final presentation. For movement system, the testing metrics for obstacle avoidance algorithm and edge detection are basically letting it run on the table and record the failure number. The goal for movement system is to achieve 100% success rate on avoiding obstacles and prevent falling. And I think test result shows that we are pretty close to our goal. For speech recognition and hotword detection, we tested on different sets of parameters: distance from mic, gain, sensitivity level and noisy environment to figure out best set of parameters that we would choose and also to document data  for future analyzation. We would do test on facial recognition next week. Facial recognition hardly have any parameters to play around because the altering frame rate would greatly affects processing time, so we might just record success rate and see how it performs. Finally after we glue the case and every hardware component within, we would probably run demo tests as an entire process. 

Team  Status

We are almost done with our project. The next thing to do is to make sure everything is configured and runs smoothly with our case and parts assembled together. In addition, we need to run more tests to check the success rate of each functionality, both the software side and the hardware side.

Status Report #9 (Apr 21)

Haohan Shi

This week I worked on implementing the facial detection on our robot. The complete procedure consists of four parts: facial detection, data gathering, training, and prediction.

The first step is to use openCV to capture the camera image and try to find the faces that are used for recognition. I used openCV’s built-in Haar Cascade Classifier for facial detection:

cascadePath = "haarcascade_frontalface_default.xml"

faceCascade = cv2.CascadeClassifier(cascadePath)
The pre-trained classifier turns out to work very well when the room is bright enough so that the faces can be clearly detected in the images.
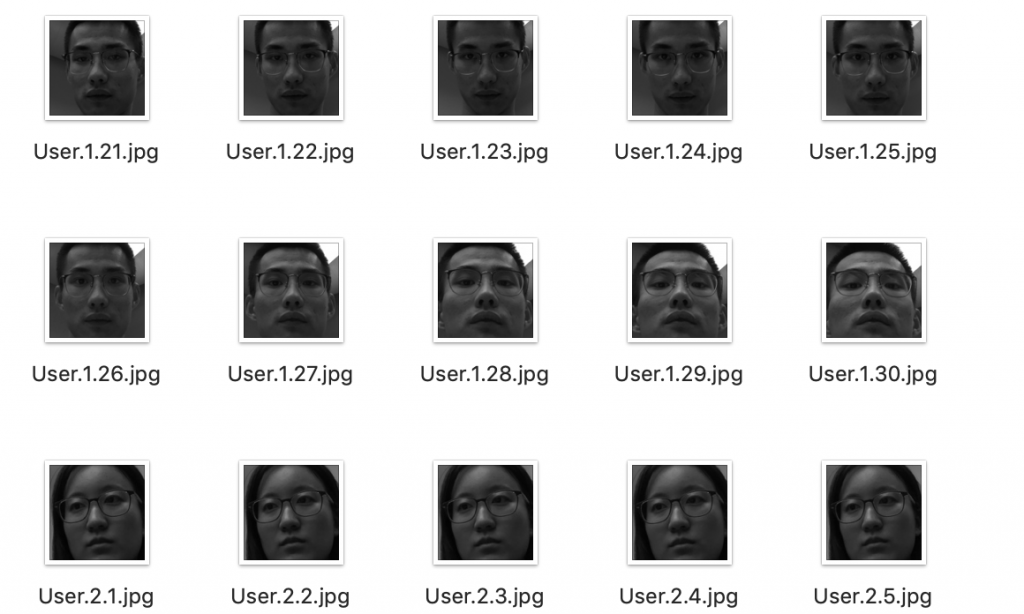
The second step is to gather training data for our prediction model. Based on the previous step, I write a script that can continuously capture 30 images and crop out the non-face part of the image. Thus the data set looks like this:
The third step is to train the model on our dataset to learn our faces. For training, I am using a simple and effective algorithm, LBPH (Local Binary Pattern Histogram), which is also included in openCV.
The last step is to use the same LBPH recognizer, loaded with our training result, to predict the who the faces in the image belongs to. My algorithm is to run prediction on 30 consecutive frames, and if there are more than 15 frames with >15 confidence that has someone’s face, it means that person is in front of the camera. The whole prediction process takes about 3-4 seconds, and the result is stable and meets our expectation.

Yanying Zhu

This week I worked on finalizing the following state and moving state. Due to the limitation of the sensor on the robot, it cannot follow in a very precise way, what it can do is roughly follow a very close object in front of it (the object cannot move away suddenly), turning left or right at a speed while avoiding falling down the table. I have implemented these two states and waiting to integrate these states with voice command through serial.

We also integrated Meobot’s movement with face recognition. Meo would slowly turns around to search for the people calling his name and stop. There are two major issues that we are currently solving: one is the latency between facial recognition executes and Meo actually stops. The other is that we are also trying to put all devices (raspberry pi, battery, microphone…etc) on Meo’s back. This greatly affects the motor speed that I previously set.

Olivia Xu

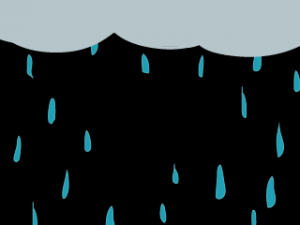
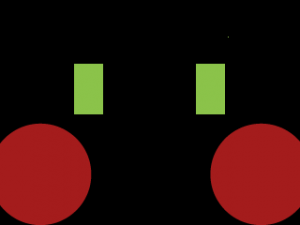
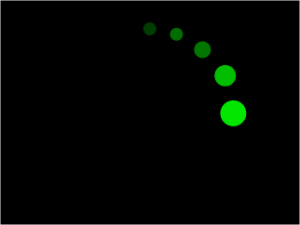
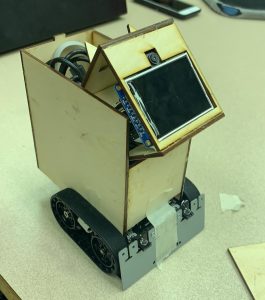
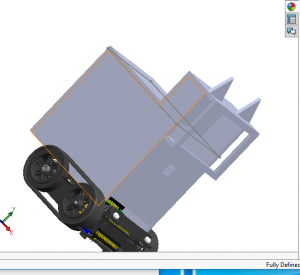
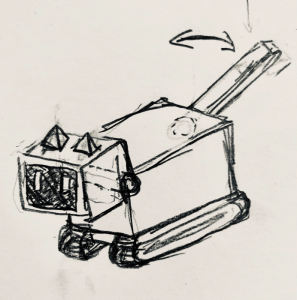
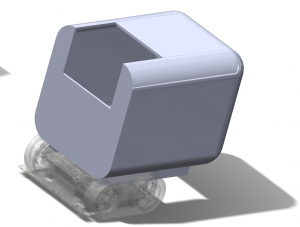
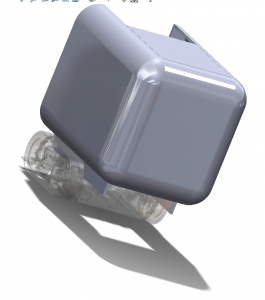
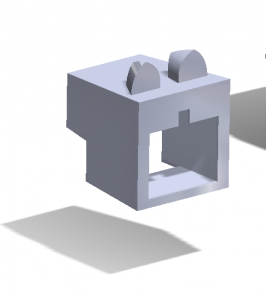
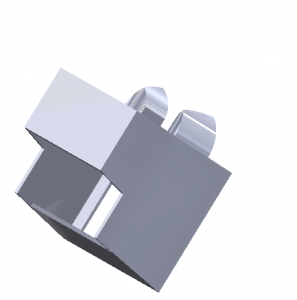
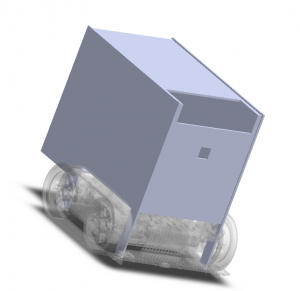
Drew more images for showing dynamic weather. Not sure if this will slow down performance by too much. Tried 3D printing multiple times, was not fully prepared for unfortunate circumstances like the shop failing/losing parts without notification. Had to redesign laser cutted model for inlab demo.

Team Status

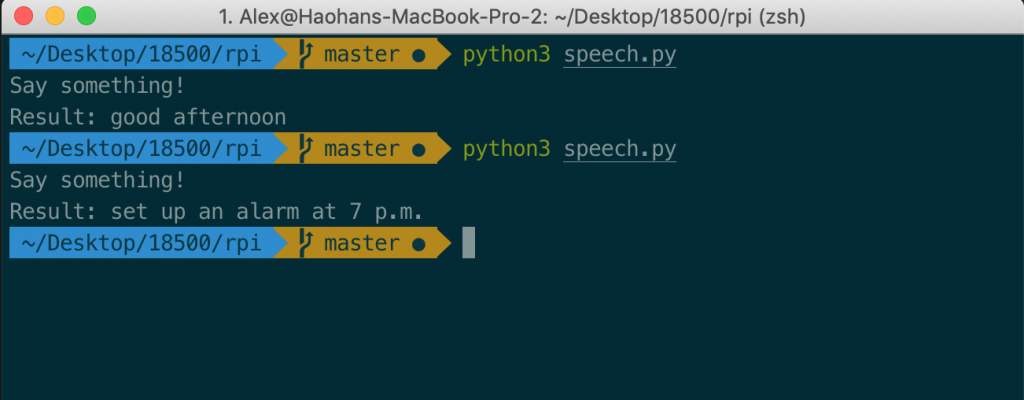
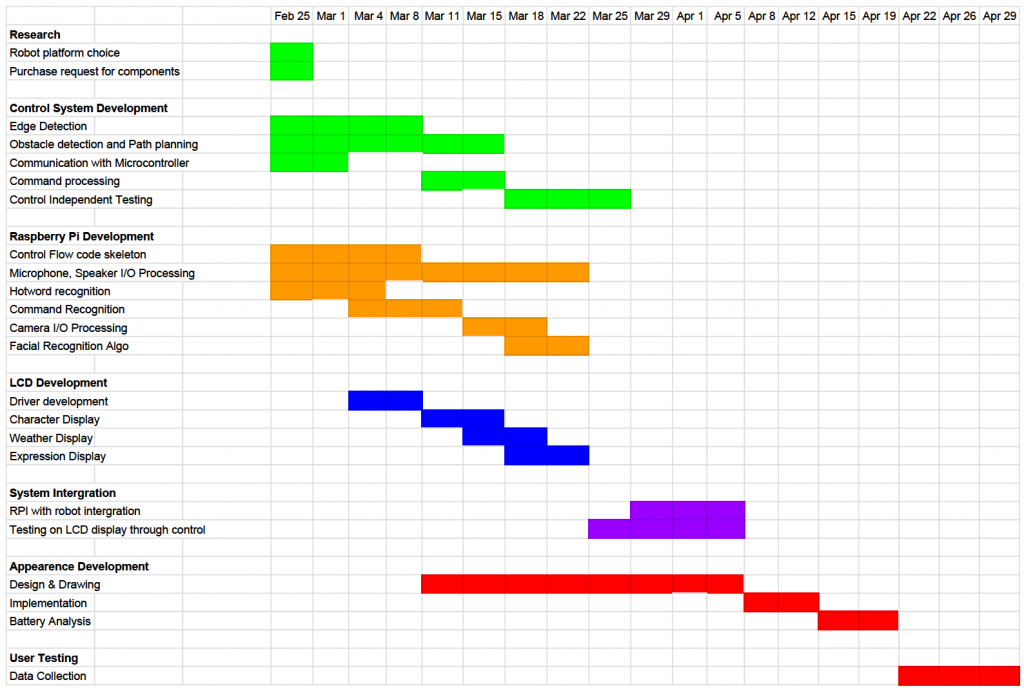
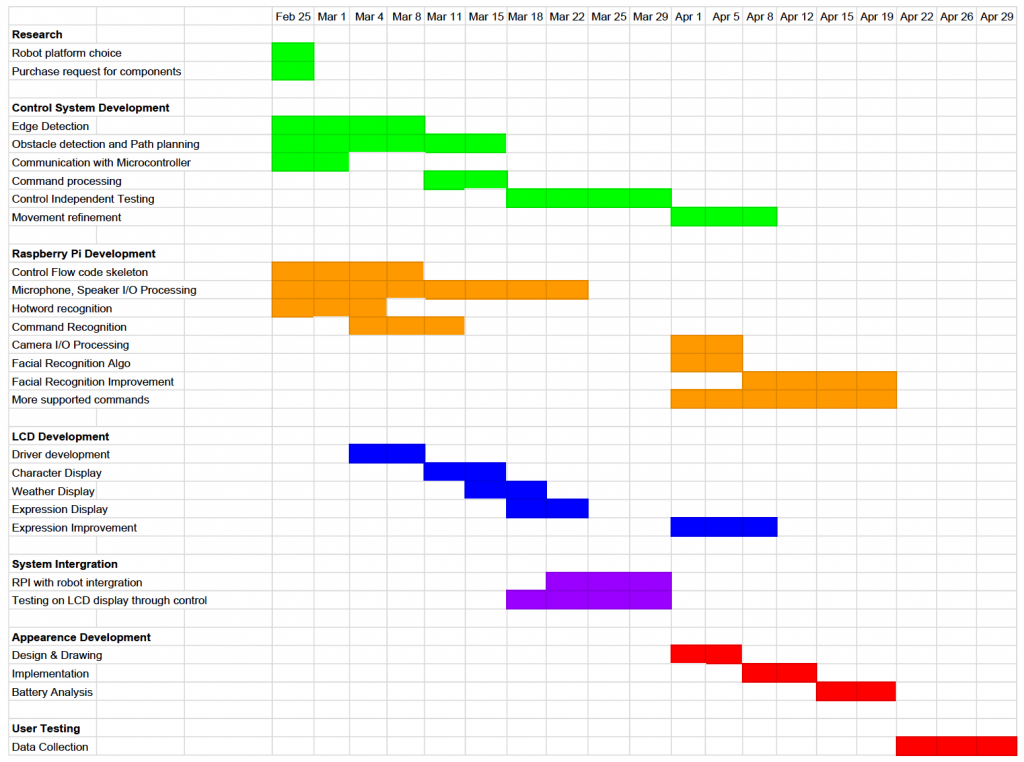
We are almost done with our coding part. We are still waiting for our cases to be printed since the makerspace staff lost a few parts that we previous taken to print. The next step is to further calibrate the parameters such as hotword detection sensitivity, input gain, movement speed, etc after we assemble everything together. Also, some procedure refinement needs to be done such as directly asks for user input again when the command can’t be understood so that the user doesn’t need to call the hotword again and again for the same command.
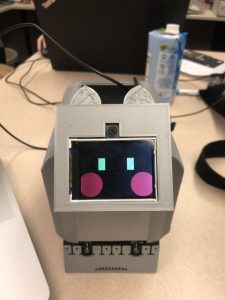
Status Report #8 (April 13)

Haohan Shi

This week I was working on setting up the object detection on Raspberry Pi using openCV, the building process takes an extremely long time than expected. It took the raspberry pi around 1.5 hours to build on 4 cores with increased swap size and the build failed 3-4 times due to race condition. Thus I had to rerun the build several times and it caused the SD card to be corrupted.

Using a swapfile this large will allow the operating system to (potentially) run rampart writes to your SD card. Which is bad for a flash-based storage as it’s more prone to corrupting your SD card/filesystem. (link)

I have purchased a new SD card but I need to re-install all our previous system library and setup, also, some of my test scripts for object detection is also lost. I plan to first recover all our previous setup on the new SD card and try to build openCV using only 1 core with small swap size, but longer build time (~6 hours).

Olivia Xu

Done with first meobot box prototype. The mechanism is all parts slide together, with the two sides “clipping” onto each side of the robot body, and the front and back panels using extra extruded pieces to hold both sides together. Smallest body thickness is 0.3mm. I will be using Ultimaker 3 Extended printers in HH Makerspace. For the sake of time I chose 0.15 mm layer height. Total time 11 hours, 76 grams of plastic.

Carved out space for camera, LCD screen in “head” area (leaving head empty for now and 3D print & super glue later if this model works). Need to get the prints on Monday and see what fits and what doesn’t.

Yanying Zhu

This passing week I worked on the “following user” feature, which is basically an opposite algorithm of obstacle avoidance. Currently it works in a not so perfect way. Since is designed to recheck the state and distance of the obstacle ahead of it every computer cycle, it oscillates frequently when the obstacle moves. I am unsure how good it could end up, but I’m currently calibrating on the best turn speed. Another option is to redefine its behavior: it can face the user at first without moving, and then sprint to the user if the user stand still for a certain seconds.

The future schedule would be further polishing the movement of the robot. It’s also possible to add more features if we can come up with interesting ideas.

Team Status

Our moving and case design is still on the schedule this week, we already have our first version of the outer case so we can print out and test on next week. However, the main functionality of facial and object detection should be done this week, but due to the wasted long build time and corrupted SD card, the main functionality is pushed back to next week.

Our experience from this incident is always keeping several spare parts and backups on the project if possible. So far we have encountered Raspberry Pi failure, camera failure and this time SD card failure. Having backup component and setup will save lots of time if this kind of incident occurs.

Status Report #7 (April 6)

Haohan Shi

This week I worked primarily on adding additional supporting commands for our robot and start working on the facial recognition feature on Raspberry Pi. Also, I helped with the design of the appearance of the final robot, such as where to put each component and what’s the dimension of each part.

There are three main features that I put into this week. First is time display, which is to get the current time in current timezone and translate it into audio and corresponding lcd display. Second is the weather information. We used a free API to get temperature, current weather, etc, and pass this information on to the lcd display. The third one is the automatical/manual stop when listening to the user command or when the user specifically tells the robot to “stop moving”. This involves serial communication between the Pi and the robot.

Olivia Xu

This week I focused on getting a case for our robot. Out of customizability, weight,  and appearance considerations. We’ve decided to 3D print a box. I’ve measured around our robot with all its expected parts connected (RPi, portable charger for RPi, LCD, camera, mic, speaker) and downloaded the CAD file for the Zumo robot and started constructing the box in solid works. Knowing the approximate space above and behind the robot, I’m going to make side panels with small ledges to clip onto the robot, connected front panel, and slide-in back and top panels. Also, there needs a way for RPi to sit above the robot, we could use mounting screws or I could organize slide-in slots for more panels inside the case.

Yanying Zhu

So as demoed in lab, meobot is able to complete stay at a wandering state as it moves, stop randomly, avoids obstacles and edges on the table. Serial communication with raspberry pi is also set up so that meobot stops when serial command is received and resumes to this self-moving when raspberry processing ends. There is a small bug in the current self-moving state that if it is in the process of turning it is not able to edge detect. This can be fixed next week.

Another major thing that I will be working on in the next week is adding more features to the movement system. One possible feature is following people. We discussed on following people using face recognition before, I think I can do a basic version first, which is follow people using sensors.


Team Status

After discussion, we have the following changes to our schedule

Original:

New:

We moved the facial recognition part after the interim demo so that we can have time to polish the existing features, and we will start working on the outer appearance design next week.

Status Report #6 (Mar 30)

Haohan Shi

This week I primarily worked on the improvement of text-to-speech functionality and the integration of LCD screen for next week’s demo.

In order to correctly send the instruction to LCD screen without waiting in our main control system. I designed a non-blocking structure for LCD control class so that the main control system can send signals to the LCD at any moment and the LCD will react accordingly.

Also, I implemented two major functions, countdown, photo taking, and some simple control commands, and I need to add serial communication to the robot base so that the robot will follow the movement instructions accordingly. In addition, some simple commands will also be added such as displaying current time, etc.

Yanying Zhu

This week I continued working on the movement system. The edge detection system worked out well and the robot is now able to move without falling. I also changed the wait time, turn angle a bit in order to make the turning more smooth.

Next step is to integrate the robot’s movement system with serial command from raspberry pi.

Olivia Xu

  • In the process of integration I found out that it’s necessary to combine my individual .py files for each screen-function (countdown.py, loading.py, blinking.py, etc) to a single file because the individual while loops are becoming a real problem with blocking other things, and I don’t want a global “interrupt” variable. So major code edits to get one single giant nested while loop. Some more efforts in self-learning python from scratch.
  • completed more / fixed previous cut-scenes/loading scenes and facial expressions to get better fake-gifs made a time display
  • Working on transition design from one display image to another, knowing the specific workings, responses, response times of the mic, speaker, API, etc


Team Status

We are currently on the first integration stage so that the demo can run smoothly. But a lot of functions such as motion control and hot word detection still need polishing.

Our camera died suddenly during tests on Saturday, we need to purchase another one next week. We will borrow one from one friend for Monday’s demo.

Status Report #5 (Mar 23)

Yanying Zhu

I worked on the movement system which involves obstacle detection and path planning and edge detection. The majority part of the obstacle detection works. It was able to turn right and left when there is obstacle ahead and was able to back up when the obstacle is too close ahead. The main issue was that the sensor is very sensitive to objects far away and has a high environment requirement. I spent most of the time collecting sensor data with respect to different obstacle position.

The major steps next week is to work on edge detection and improve on current path planning algorithm, which involves figuring out the best turning angle, turn speed…etc.

Olivia Xu

  • Used python Image library to effectively display my images and texts while taking up as little space and time resources as possible.
  • Facing issues with the image display functions blocking other threads while running and ultimately getting everything stuck.
  • Drew more images and designed layout for combination of images and texts such as weather and time. 
  • finished up facial expressions image line-up for fake-gifs on our robot face 
  • load scenes


Status Report #4 (Mar 9)

Haohan Shi

This week I worked on setting up Google cloud application and corresponding python code for us to do speech-to-text so that we can analyze what the user said and give the correct response.

One major issue I noticed is the delay of the response comming from Google cloud, from Google cloud console I’m seeing an average of ~1s latency:

The latency can be much worse if the network traffic is busy in a public area such as demo room, so our current workaround can be adding a “processing” screen on the lcd so that the user can know the command is being processed.

My next focus is to combine our hotword detection and the speech-to-text together, so that the STT functionality can be successfully invoked by the hotword. After this, I should start working on processing the input text and finalize all the “supported commands” of our robot.

Yanying Zhu

I mainly worked on the control: obstacle avoidance system of the robot. There are several research paper that demonstrates sensor based path planning algorithm for small robot. I aim to use simplified version of such algorithm and apply it to our robot. I have created a base code for the robot control system which contains basic states: wait , scan and move. It should be able to do simple obstacle avoidance based on that.  The next steps would be improving the complexity of the code by adding more states, for example backing up when the distance is too short and hard to turn.

Olivia Xu

self-learned python Image library to effectively display my images and texts while taking up as little space and time resources as possible. Facing issues with the image display functions blocking other threads while running and ultimately getting everything stuck. Drew more images and designed layout for combination of images and texts such as weather and time.

Status Report #3 (Mar 2)

Haohan Shi

Our USB microphone, speaker and RPi camera arrived this week. I mainly worked on these tasks this week:

  1. Setup USB microphone and speaker on Raspberry Pi. RPi uses headphone jack and HDMI as default sound output. I consulted several guides such as Snowboy document and Google Assistant  SDK document to properly set up our USB microphone and speaker as default sound input and output device.
  2. Setup hotword detection on RPi with our microphone and speaker. It took me a significant amount of time to correctly install all required library and packages, and fix some build errors.
  3.  Hotword detection adjustment. Consider the fact that the ambient noise will be very high during the demo, we need to make sure that the program will still achieve a pretty high detection rate and not give a lot of false alarms. Thus I adjust the sensitivity and input gain on the microphone and tested under simulated environment by playing loud crowd noise and running the program
  4. Camera input. I researched the basics of getting video input and capture images from the camera. Also, I tried some simple integration by putting together hotword detection and image capture.

My goal next week is to start adding command recognition to our system, and ask for more input to our hotword detection model.


Yanying Zhu

  1. Currently working on the movement control system but have not tested any of these on the robot. The idea it to set a time interval and get the proximity sensor value every interval. And let the robot turns around to a different direction and then go straight whenever a obstacle at a direction is detected. There’s six values total for all of the proximity sensors together so still have to find a algorithm to fully integrate these data.
  2. Future goal is that if obstacle detection works out, I can work on edge detection which avoids falling. Another workaround is to draw lines around its moving area so line detection can be used which will be straightforward.

Olivia Xu

  1. Got LCD connected to Pi. spent a lot of time finding a solution as it turns out Adafruit’s given library has a bug in GPIO. used pip instead
  2. got sample image code running
  3. drew some static images specifically to the size of 320*240 pixels to use

Team Status

We are currently on schedule, camera input and speaker + microphone in/output is correctly configured. And our movement control is also in progress.

We encontered dead Raspberry Pi this week, luckily we still have a backup RPi but we may consider order one more. Which is something we need to take care of in our project management.