Tushhar’s Status Report for 04/30

For this week, I worked on our testing for the mat, poster and the box housing Arduino and the perfboard.

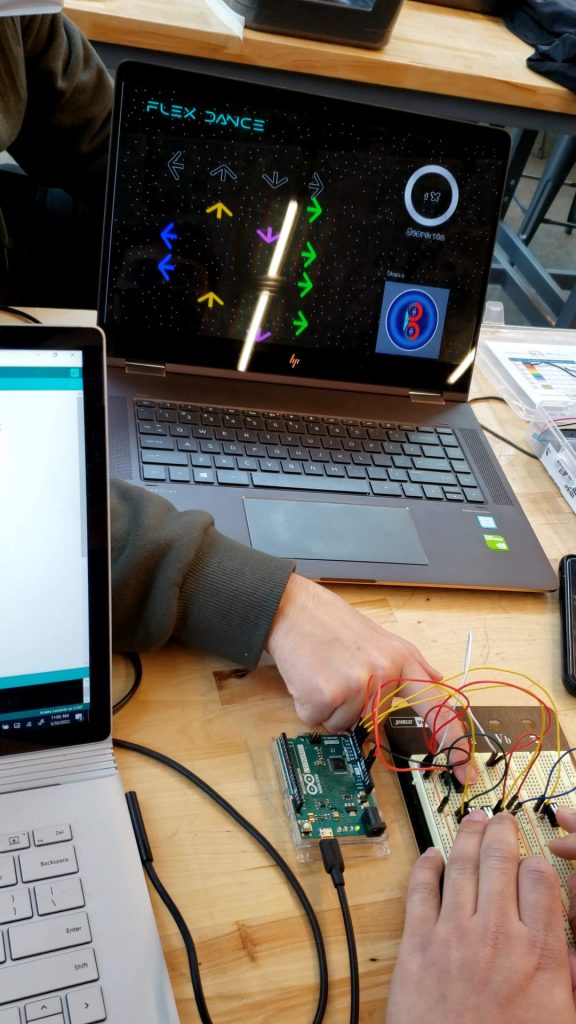
On Wednesday, we tested our game properly with everything working for the first time. While the game worked generally, there were many times where presses weren’t being detected. I worked on it to make it so that the Arduino calibrates the thresholds on startup. Caio helped me to get that code working properly. This seemed to help a bit but due to reasons mentioned in the team report, it still seems to be unreliable at times. A strategy we came up with to deal with this problem is to have a button that we ask the user to press before every game. This will set the thresholds according to what is measured at the time of the button press. We hope that this will make our game more reliable.

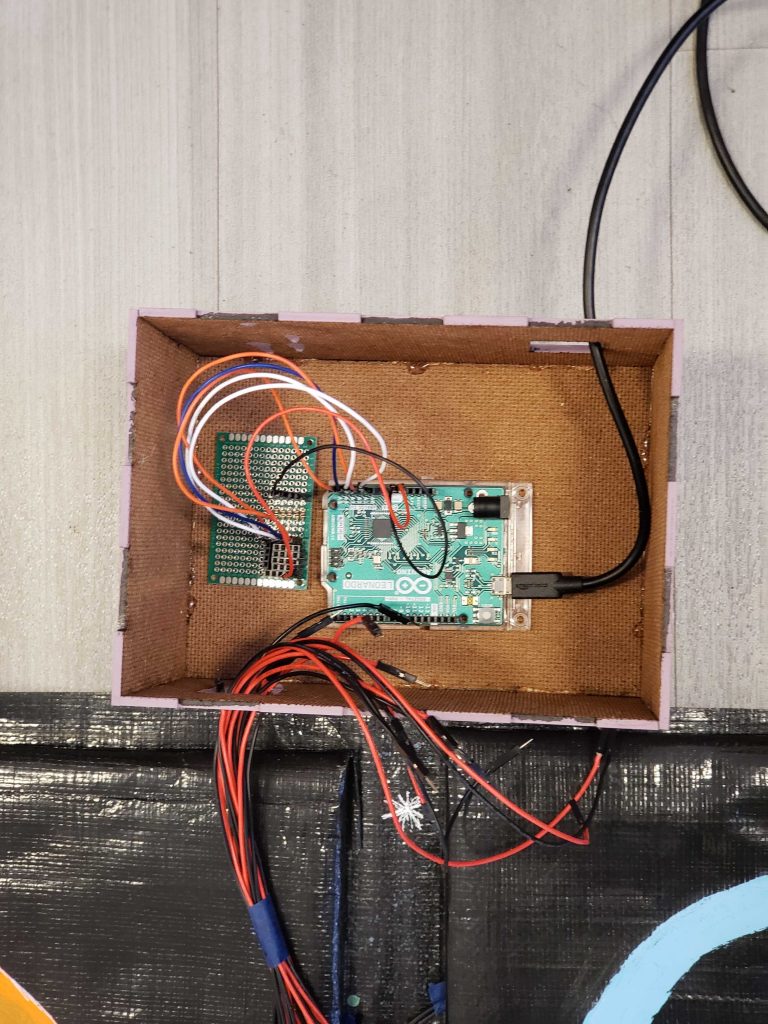
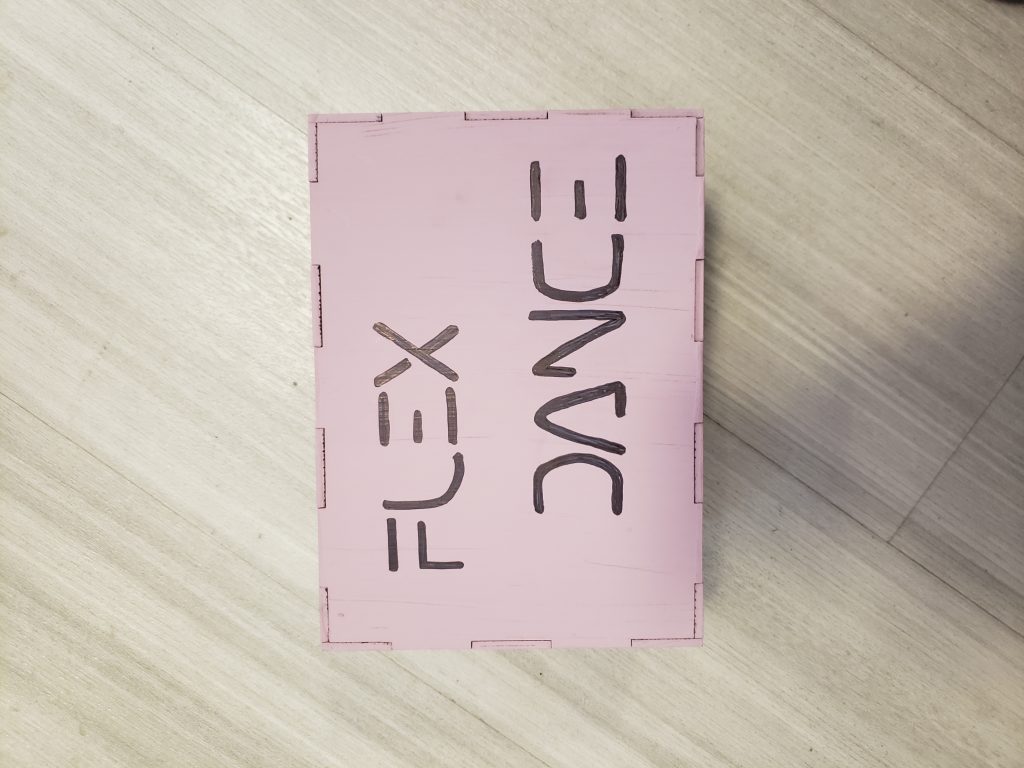
I also spent time on Friday working on laser cutting and putting together a big enough box to house our Arduino and perfboard. It has holes to let wires from the FSRs  and the USB cable from the Raspberry Pi into the box. The Arduino and the perfboard will be fastened to the base of the box. It’s pictures are shown below. Big thanks to Spandan for putting in the time and effort to paint the box and make it look beautiful!

The rest of the time in the week was spent on designing and writing some of the content for the poster.

For the last week, I plan to implement the button press to let the Arduino calibrate the thresholds. Other than that, I will be working on the other submissions for our project.

Tushhar’s Status Report for 04/23

This week, I was able to complete my part of the presentation, help with making the physical mat, and gather testing data.

Collectively, we planned out our final presentation on Monday, and figured out the necessary information we needed. This helped us plan our testing for Wednesday as well. I was particularly involved with FSR error rate and coverage testing. While Spandan or Caio stepped on the mat, I took down the number of missed hits and recorded data in a table. This data will be shown in the final presentation. On Friday, I was also involved in the planning of the top layer of the mat, as well as making necessary physical measurements.

Individually, I worked on the slides for ‘use case requirements’, ‘complete solution’ and FSR testing. I also learnt how to crimp connector pins to awg wires. After watching some videos on it and practicing it on spare wire, I was able to get the hang of it. I spent a lot of time on Friday learning this and attaching male connector pins + housing to 20 wires coming out from the FSRs. This will allow us to easily connect and debug the FSRs to the female headers on the perfboard. With this the circuit layer is completely ready.

As per my plans last week, I was able to complete my goals for this week. For the upcoming week, I will be contributing to finishing whatever’s left for the physical mat. I am hoping that we are able to test the entire system after the completion of the mat.

Tushhar’s Status Report for 04/16

For this week, I spent most of my time working on the circuit layer of the mat. I was able to achieve all of my last week’s goals.

For many of the components I soldered, Caio and Spandan helped with gathering, planning and holding the components. Having an extra pair of hands really helped speed up the process. On Monday, we were able to solder and label the FSRs to appropriate length of wires based on where they are to be positioned. We also tested them individually to make sure they worked after soldering. On Wednesday, I was able to design the layout for the circuit. Its picture is shown below.

  • A5 to A1 refer to the analog pins that they will connected to on the Arduino.
  • The letters represent the following
    • U: Up FSRs
    • L: Left FSRs
    • R: Right FSRs
    • D: Down FSRs
    • P: Pause FSRs
  • The number 1 corresponds to the first pins for both FSRs in parallel (for corresponding arrow) and the number 2 corresponds to the second pins.

On Friday, we soldered female headers to the perfboard according to the layout above. The reason we decided on female headers instead of direct soldering is because the connections to the FSRs won’t be permanent and can be debugged/replaced more simply if need be. The perfboard was tested with buttons and works properly (similar to how it was tested on breadboard). Here is the picture of how the connections look.

I also learnt how to use the sewing machine in Techspark alongside Spandan from a nice person there. For the upcoming week, I am planning to attach male headers to the ends of FSR wires so they can be put into the female headers easily. With this the circuit layer of the mat should be good to go. I will also be working with Spandan to cut and sew the tarp for the mat. Rest of my effort will be put towards the final presentation.


Tushhar’s Status Report for 04/09

This week, I was able to properly demonstrate the Arduino and plate working in unison with the game in action for the Interim Demo. Before the demo, we made sure the plate replacing the button from last week worked properly. The following picture is taken from a video in action.

Rest of the work mentioned below has mostly been in conjunction with Caio. Upon moving on to the next step of soldering, we found that the Z shape FSR was unresponsive for the sections after the fold. This also resulted in many foot orientations not working. We decided to thoroughly test other possible options for the FSRs. Ultimately, we came to the choice of using the FSRs in parallel (both in arrangement and the circuit). In terms of response, this worked the best. The FSRs can also be cut from the 2ft length and still work properly. For the best results, the plates will be placed such that the FSRs are perpendicular to the the up arrows.

After this issue was dealt with, we soldered some of the FSRs to properly measured length of stranded wires. We also used heat shrinks to prevent the two open ends of soldered wires to touch each other and short circuit. After doing so, we tested the FSRs again to make sure that the heat from the soldering iron did not damage it.

For the next week, I aim to finish soldering rest of the FSRs. I will also try to secure a perfboard from IDeATe. If unable to do so, we will order some. I will design the layout for the perfboard connections and solder the circuit accordingly. With this, the circuit layer of the mat should be mostly complete.

Tushhar’s Status Report for 04/02

For this week, I was able to work further on the plates of the mat and have the Arduino communicate with the python program. This was especially the focus as it also allowed to have something ready to show for the interim demo.

I was able to laser cut the files from last week. We have decided to use Masonite as the material for our plate and Z shape. Furthermore, our discussion with the professor and TA helped me realize that ends of the Z-shape could be left open to allow the sensor to fold. The files for laser cutting will be adjusted accordingly.

Fortunately, the Arduino Leonardo with headers arrived at the start of the week. Not only did that allow me to test the Arduino program but also integrate it to Python programs with the help of Caio. The testing was first done with lever switches replicating the different arrows.

This testing helped me find out errors and fix my Arduino file. Once it was working on the Arduino Serial Monitor, we tried it out with Caio’s game screen and made further changes to the Arduino file including accounting for holding down the button and setting thresholds. The new file and picture of our testing is down below.

https://github.com/CaioA1516/Capstone/blob/main/ardToRaspPi.ino

Lastly, Spandan and I were able to make one plate integrated with the FSR. We have tested it with Caio’s game screen and will have it ready for the Interim Demo. In terms of progress, a good amount of work was done this week. Since I wasn’t able to make the circuit layout this week, I plan to make it next week. I will also laser cut pieces for rest of the mat, as well as get started on soldering some FSRs.

Tushhar’s Status Report for 03/26

For this week, I was unable to continue to test the Arduino program with the Python minigame as the Arduino Leonardo board we ordered has still not arrived. However, the materials for the mat arrived. Therefore, I was able to work on some of the things we need for that.

Upon discussing some points on what we need to do for the mat, one of the first steps that we need to get done is laser cutting the correct plate shape and size, as well as a Z shape for the FSR. I was able to take measurements and model it on Solidworks. The pictures below shows what I have been able to make so far.

The second picture is the Z shape. The following 3 pictures is the Z shape broken down into pieces so that it can be laser cut more easily without waste. This was an informed decision. Using a whole 1 ft by 1 ft board per Z shape would not only waste a lot of materials but also be expensive. Breaking it down eliminates this issue. Since this is a busy week for me, I wasn’t able to do more. However, I can make much more progress now with the mat materials here.

Next week, I am aim to laser cut the pieces in the picture above and test the configuration of the mat with the necessary layers just for one square. I will also make a layout for the wires in the circuit layer. Furthermore, I am hoping to test the Arduino file when the Arduino Leonardo arrives. Any other things I will do will depend on further discussions about building the mat with my team.

Tushhar’s Status Report for 03/19

Since the last report, I was able to further test the sensors and work on Arduino communicating with Python.

In class, I was able to take some measurements with the help of my teammates. We tested the viability of bending the FSR into a Z shape. The circuit we used was similar to the one in the last status report.

The above image is a screenshot of the Serial Plotter from the Arduino during the measurements. The peaks represent taps by the foot on the FSR, while the plateau represents keeping the foot there for a period of time. The results seemed to be quite reliable. More details about the results are discussed in the team’s status report.

The next thing I worked on was the Arduino file which would relay the values from the FSR to the Python file. Caio showed me a really good resource which showed how analog values could be mapped on to keyboard buttons. Registering FSR hits as keyboard buttons would make integrating the game much easier. Using that file as a reference, I was able to write Arduino code that should work for our purposes. The code is in the following link.

https://github.com/CaioA1516/Capstone/blob/main/ardToRaspPi.ino

We were going to test it with 4 simple buttons and the minigame that Caio developed. However, we found out that Arduino Uno doesn’t use the Keyboard library. We have taken steps to solve that issue which is described in the team’s status report. Once the Arduino Leonardo with headers arrive, this code can be tested and modified accordingly.

The next week, I should be able to further work on this once the Arduino arrives. Furthermore, I will get very involved with the construction of our mat once the parts arrive. I believe I am one week behind schedule due to not having ordered materials for the mat earlier. However, there should still be time to make progress on that in the upcoming weeks.

Tushhar’s Status Report for 02/26

This week, I worked on two tasks in particular. The first task was to divide up what needed to be done for the report and make some progress on it. We divided up the necessary sections amongst us, and I am taking the parts with Architecture and System Implementation. I have already started working on some of its content in order for it to be ready by Wednesday’s deadline.

The second task that I accomplished was testing the long force sensitive resistor. First, I will present my data and circuit. Then, I will talk more about how this information will be used to further our project.

While trying to test the sensor at my home, I realized that I didn’t have a way to measure weights of objects. Therefore, ‘force applied’ and ‘sensitivity’ columns are blank for now. I will measure the objects I used later in lab.

  • FSR is finnicky at smaller amounts of force. However, we don’t need to worry about that for our application which will have comparatively larger forces.
  • Small movements change the values by <100. This is most likely due to weak connections on the breadboard. These errors can be eliminated when we solder the sensor.
  • The sensor needs to be as flat as possible for reliable results.
  • As shown in the data, smaller resistor results in lower measured values. This will be ideal for the big forces like a person’s weight.
  • It is not foldable in the circle shape. Z shape might be possible but can end up damaging the component.
  • I will discuss this more with my team, and we will probably end up using more and smaller sensors per square. This will also mean that we use the digital pins of the Arduino and set threshold using the appropriate resistors rather than on the software.

I will gather more testing data with people stepping on it in the future. This will probably be done after the switch to the other smaller sensors. For next week, I will figure out how Arduino should send data to python. So far, I am on track with my schedule.


Tushhar’s Status Report for 02/19

This week, most of my time and focus was spent on two tasks. The first task was the Design Review presentation. We worked on a document together to write down everything we needed for this design review including notes from the peer reviews and the helpful meeting with the professor and TA. A lot of individual time was spent by each of us filling out this document. We designed our presentation based off this document. I particularly took the responsibility of the slides related to the use case, use case requirements and implementation plan. I will also be the one presenting this following week. Therefore, I have already started preparing notes for what I will talk about during the presentation. I will rehearse it a couple of times alone and in front of my group mates to get feedback tomorrow (Sunday).

The next task that I worked upon was researching how circuits with the force-sensitive resistors and Arduino worked. I particularly found this website which gave clear instructions about what connections to make-

https://lastminuteengineers.com/fsr-arduino-tutorial/#:~:text=Force%20Sensing%20Resistors%20are%20also,pressure%2C%20squeeze%2C%20and%20weight.

I have already put some time into thinking about how I can modify the above circuit to fit our needs with the DDR mat, including adding a variable resistor to adjust the threshold. Unfortunately, the sensor that we ordered did not arrive yet so I was unable to test them. However, it should be here next week, and I will be able to test it with the modified plan.

If there are still issues with the sensor not being available next week, I plan to research more into how the Arduino would communicate with python and relay the necessary data.

Tushhar’s Status Report for 02/12

For this week, I was particularly involved with the ordering of our necessary parts. As per our Gantt chart, my tasks for the next two weeks will involve testing out the force-sensitive resistors with the Arduino, and finding a way for it to communicate the information to the raspberry pi and Pygame. Both these tasks required us to have the necessary components by the upcoming week. Therefore, a good amount of time was spent choosing the right Arduino board (without headers which we could solder wires to) and the right force-sensitive resistor.

For now, we have decided to go with Arduino Leonardo without headers and 2 feet long force-sensitive resistors (FSR). For the FSRs, I plan to utilize the IDEATE resources to test out other smaller FSRs they already have available. After researching for a bit, the ones I plan to test are:

0.5 inch round FSR available in IDEATE
1.5 inch square FSR I have to look around for
2 ft long FSR we ordered

As for Pygame, I am definitely behind schedule for learning it by this week. Although I am mostly involved with the circuits in the project, I still want to contribute to programming the interface towards the later half of the semester. As such, I have reorganized my schedule next week to completely devote couple of hours to understanding how Pygame works. I will mostly be using resources on Youtube and documentation on Pygame.

I am aware that the Design Review Presentation is due by the end of next week, and I will also be the one presenting. As this will take an ample of time, it may result in the delay of testing the sensors. I plan to make up for it in the following week by allocating more hours to it.