This week we believe the most significant risk is that we will not be able to get enough 3D printed housings to enclose every switch. So far, we have not been able to get the settings down so that the switches housings will not fall apart during or after the print. Additionally, even if we were able to get the prints to work, we would need to print 16 housings without issue. If we end up not having enough time to print all the housings, then the rest of the housings can be made out of paper or cardboard as a last ditch replacement.
We had to change the 3D housing design slightly, making the housing skinnier and with less wall thickness. However, this ended up causing the 3D prints to fail more often, so we had to redesign the housing a third time with the original 2mm wall thickness. These did not incur any additional costs besides the increased 3D printing costs from the prototyping. In fact, since the overall housing is smaller, it would actually be slightly cheaper due to the reduced
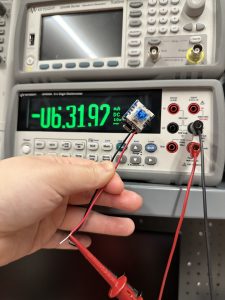
The schedule remains the same. Attached below is a picture of the reading of the current the switch draws once the switch is on. This week, we also performed almost all of the testing required to verify that our use case requirements were met. The only test that we did not perform was the test of whether or not the switch would be stable on the base, as we did not have the 3D printed housings or the 3M Dual-Lock on hand. However, this test will be performed next week as soon as we have both of the items.

