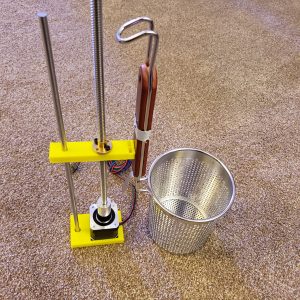
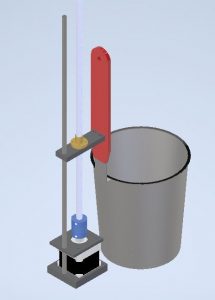
Since our last status report, we met up to record some more sample videos for our Computer Vision. While we met up, we were also able to settle some hardware issues together. We confirmed the need for two Arduinos instead of one, mostly due to a need for more I/O pins. We also exchanged parts that came in. For example, we have three motors, so we decided it would be a good idea to have Isabel, who is working on the Arduino firmware, and myself, working on the strainer arm mechanism, a motor each. We also exchanged LED strips and other various parts. I was a bit delayed due to setting up an account for 3D printing, but I was able to get my initial parts for the strainer mechanism printed this week. I was expecting the parts to not work perfectly, as I did not know the tolerances of these specific 3D printers. I used this first prototype to gauge the tolerances of the printers, and to fix some small mistakes on the CAD models. I also realized that the leadscrew connecting to our motor is attached to a flexible coupler, which allows the leadscrew to wobble similar to a ball and socket joint. In addition to updating the models to fix issues, I also added another part to the model in order to add another constraint on the degrees of freedom. There is a good chance of having a working mechanism by next week, from which point I could focus more on incorporating the parts into the larger system, and also on the control tower. In addition, I discovered that we may have to change our approach on the control tower. From my past experience with 3D printing, I was used to buying a roll of plastic filament for $10-13, and including electricity costs, a 3D print would cost about 1-2 cents a gram. However, the on-campus 3D printing services charge at minimum 50 cents a gram, likely due to overhead costs. This makes 3D printing a large tower not necessarily feasible. Although the control tower is not an immediate concern and thus does not change the timeline, I am looking into alternative structures for the tower while we prototype the design, and then maybe 3D print once we get close to finalizing it. Although there are some changes in our design, this was all factored into our prototyping stage and there is not increase in risks.
Our 3D printed mechanism based off the original CAD:

Our updated CAD model:

