Pratyusha’s status report for 05/03/2020

And we’re done! This week, I worked on building a qsys project for the SDRAM controller from scratch to integrate memory management and attempt game switching on the FPGA.

By the end of the project, for the SoC, we have the controller driver working, SoC and FPGA running simultaneously, as well as the SDRAM (Nios ii) tests working! That comprises the unit tests, and while we got FPGA, SoC to run programs a the same time, we only couldn’t integrate game switching with fpga.

For the rest of the time, I worked with Adolfo and Tess on the final report and demo video, and added my project and code samples to the repo.

You can find SoC code and resources + code with documentation at

https://github.com/tchannn/Game-Boi/tree/SoC

Thanks!!

Pratyusha’s status report for 4/26/2020

This week, I worked on integrating the HPS controller code with FPGA program. I created a guide to do the installation and porting over of code to the SoC, and we were able to transfer and run the controller binary on Adolfo’s board, and the controller unit tests worked on his board.

Adolfo and I ran into unforseen problem where we couldn’t flash the FPGA without stopping the program on SoC , or have the program on FPGA keep running while executing the SoC program. We expected the HPS program and the FPGA program to both proceed simultaneously and talk to fpga peripherals.

To fix this, we first tried to get qsys, a system design integration tool, running on Adolfo’s laptop, but due to a bug with Windows/Qsys we couldn’t run Qsys on his laptop. For this temporary hitch, they used an RPI to processor controller inputs while I worked on Qsys.

I managed to integrate the HPS and FPGA parts of the board, with programs running on each of them, through understanding, working with, and writing a program on qsys. Now, we can run a program on SoC while flashing FPGA with a different program.

I also worked on the final presentation and delivery of the same.


Pratyusha’s Status Report for 4/19/20

This week I had two objectives

  1. To get the USB Controller driver working
  2. To get the SDRAM NIOS test running on the board

For 1. as per last week’s meeting, the last approach I was going to attempt before switching over to USB/ps2 keyboards was to checkout into the linux kernel version of the angstrom distribution, specifically to the unofficial commit of the drivers, compile the module with the linux source tree of that version, figure out the special flags needed for compilation, and then port over that driver to the board, load it without conflict to existing linux code and drivers, and then attempt to identify the controller through the driver.

There was an initial conflict with compiling both joypad and hid-dr modules, but after realizing that we could make do with just hid-dr, I chose to stick with that, and it ran with the existing linux source code, and I was able to retrieve bytes form the controller.

To make the NES-controller….controller, I had to understand the event structures, types and linux/input.h, details linked here. I then composed code to handle multiple presses and releases of the controller inputs, where the button packets were of different lengths, so I implemented a variable length buffer to handle this.

All in all, the end result is as shown here. Each button press and release maps to the respective led being on and off.

2. The next goal was to get qsys running on the VM, and compile a basic program. The manual also had an example of an SDRAM test, with installation setups, unique to Windows, so after finding workarounds for the linux VM, I got the SDRAM NIOS2 test to work on the FPGA board. This means we can copy over information to the SDRAM from the SoC, and read back from it and compare the bytes, to check if they are the same. Still have to implement checking the sums being equal for the bytes on FPGA and SoC.

Thus, this weeks goals were achieved. The goal for this week is to read from USB storage, and write those bytes to SDRAM, read them back and store it on the USB flash. I expect working with Qsys to be non-trivial for the same :'(.  Using USB instead of micro SD card because currently the board boots from the micro SD card and I don’t want to mess with it.


Pratyusha’s Status Report for 4/12

The first thing I did this week was to get internet (WiFi from MaC) working on the board, so I could use okpg (the Angstrom package manager) to install basic commands and kmod.

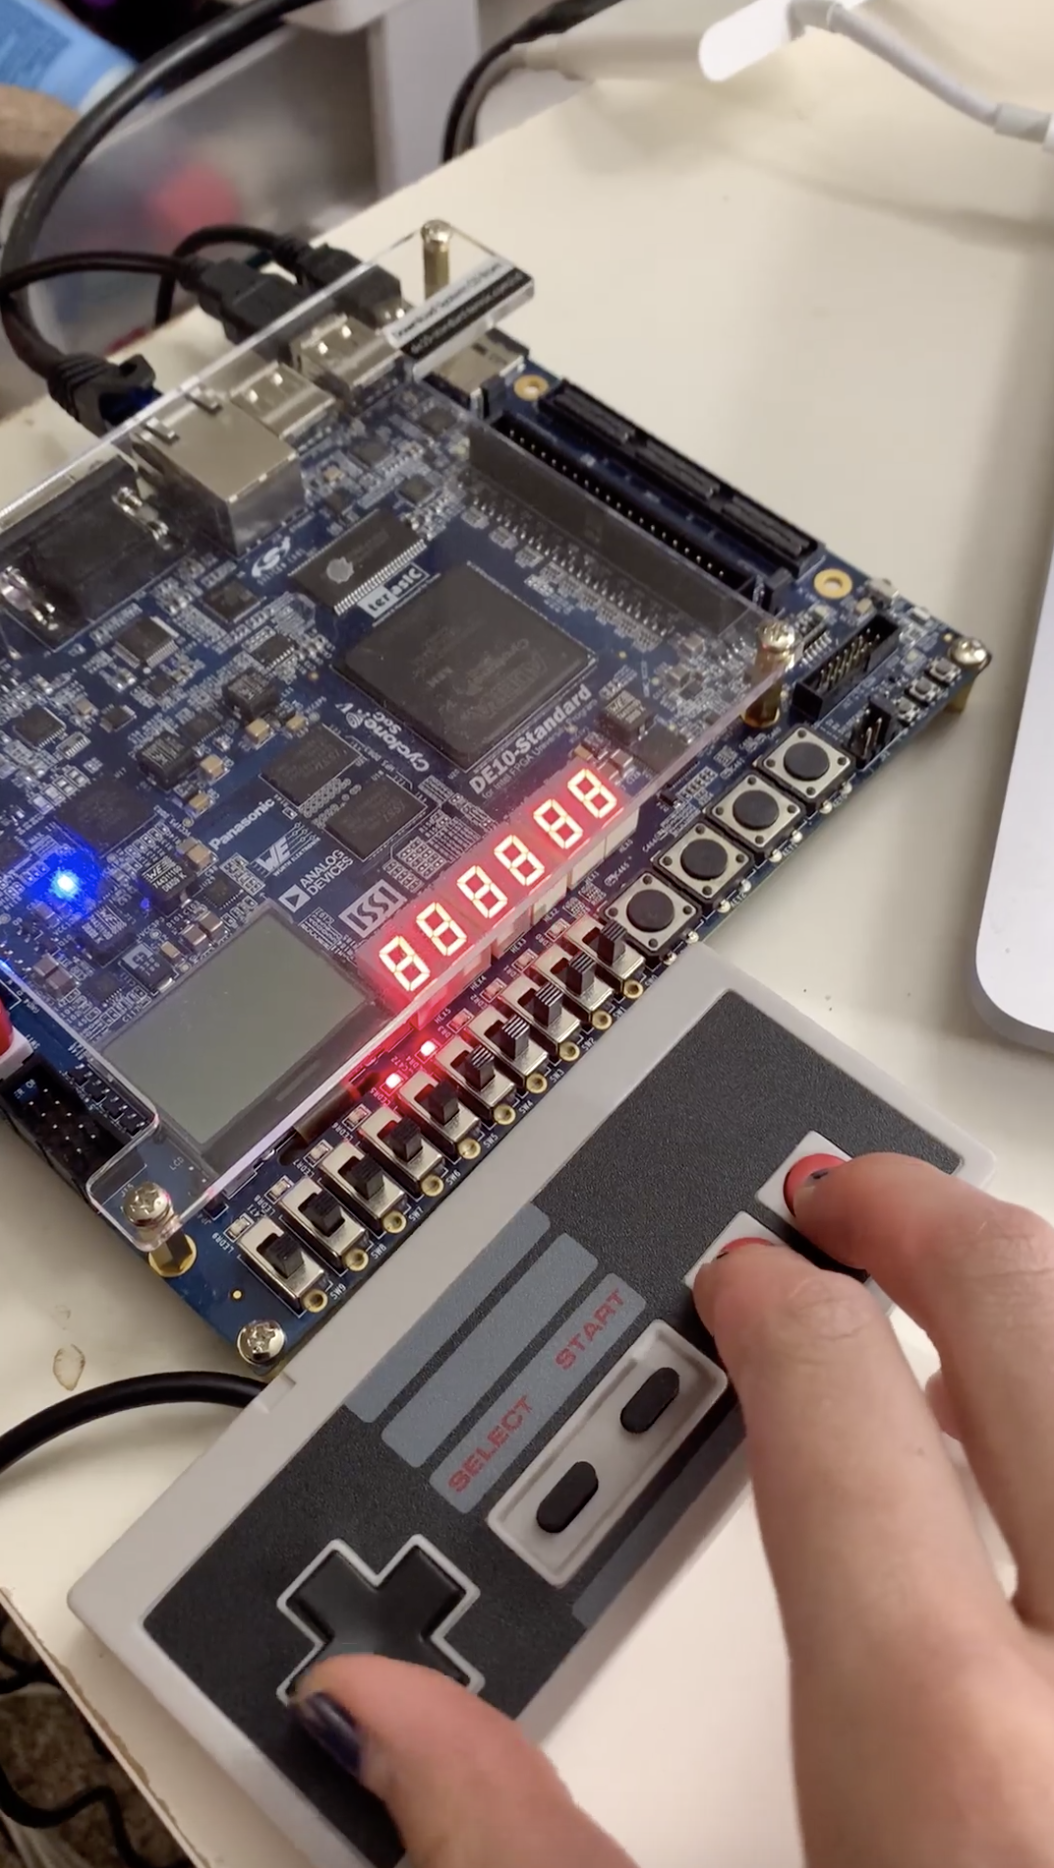
Then, I tried meddling around with connecting the NES USB controller to the board, but I couldn’t see any additions in /dev/input. To start simpler, I acquired a wired mouse, and added it on the second port, though couldn’t find it either. However, lsubs and fsdisk showed the devices.

After figuring out which device was the addition, I looked into the events in /proc/bus/input/devices and found the mouse event. It then also appeared in /dev/input.

I later realized that the NES Controller wasn’t going to appear in /ttyUSB* because it wasn’t a serial device, and thus the approaches outlined in here  wouldn’t work.

After isolating the character event through dmesg and simple hacks like printing out system state at various points of plugging and removing the attached device, I couldn’t read legible data from the device.

The kernel modules that would’ve made it easier to read the usb input weren’t compiled into this distribution of the Angstrom kernel.  So I tried to compile the missing kernel modules that would enable me to read human-readable signals, (modules – xpad/joydev). I am currently attempting that.

In the meantime, I have started reading up accessing the SDRAM. I will use a USB storage device to store memory instead of flash (or so is the plan, for now), because the board is still booting off of the Linux console version on the flash storage media (mirco SD card), and as far as I can tell, the guide doesn’t have a way of flashing the board, but I’ll keep searching for one. It is not a priority if the USB storage device can store persistant memory.

However, I’ve to understand how Qsys works, because from the SOC community, it seems like using qsys to initialize the AXI bridges is the best way to communicate with the SDRAM on the fpga side. I don’t have a Windows machine, and System Builder needs a Windows machine to generate the basic template (figuring that out).

Goals for next week include getting further along with saving data from USB storage to SDRAM, and making sure data integrity is persevered. I also hope to get NES controller unit tests working.


Some relevant sources:

  • https://www.raspberrypi.org/forums/viewtopic.php?t=160400
  • https://stackoverflow.com/questions/15949163/read-from-dev-input
  • https://stackoverflow.com/questions/3737655/reading-usb-input-stream-on-linux
  • https://forums.nesdev.com/viewtopic.php?f=9&t=19698 + latching????
  • https://stackoverflow.com/questions/3737655/reading-usb-input-stream-on-linuxhttps://stackoverflow.com/questions/15949163/read-from-dev-input

Pratyusha’s Status report for 04/05/2020

The goal for this week was to set up a network, a way to transfer files, run a c program that uses the fpga peripherals, and have a program for the controller to talk to the soc.

I spent  the initial phases of the week setting up minicom and transferring files. Ideally, I’d be able to scp files from the linux vm to the board and vice versa, but there was no means of setting up a network, which is why I ordered the ethernet peripherals.

In the meantime as a backup, I set up minicom. Since the board had no internet or network, there was no way of downloading any software onto and any other source of obtaining files other than direct serial com, I had to figure out a way to transfer files that didn’t involve xmodem or another decoding service. After much trial and error, I decided to go with base_64 as a primitive decoding service to transfer basic c files.

I then set up cross compilation and download intel fpga embedded suite which didn’t have a lite version as claimed in the guide :(. However, I found out about community version that some older versions came with and got it installed instead, and fixed issues with paths and root permissions as ece341.

Unfortunately, the ece341 VM comes with the memory portions pre-segmented and frozen, though I gave the VM extra gigs, it went towards an unallocated pool since the swap memory followed the /sda disk space. I installed gparted and though possibly jank, booted the ece341 VM onto the linux OS image that acts as host for gparted, and reassigned disk space by manually moving the swap memory placement. This took me quite a while to figure out.

Today, finally managed to set up ethernet connection. Getting right parameters configured, understanding network interfaces and different parameters, /etc/ folders relating to startup scripts and network and device dir, various commands relating to networking..

Now i can scp files, and set have run scp’d a c file compiled binary that I used to talk to the HPS peripherals.

Goals for next week include receiving signals from the USB hub and looking into Memory mapped RAM and game state saving.


Team Status Report 04/05/2020

This week Tess and Adolfo worked on implementing the CPU in simulation. They had to polish each component in the CPU and finish implementing all the instructions. Once they implemented everything, they wrote unit tests for each instruction to assure the system worked. Adolfo found a compiler to convert from .asm to .gb to .h so we were able to easily write unit tests.

After this, Tess worked on creating a memory controller that would handle the DMA process and manage access. A majority is done but she still needs to research memory bank switching. Since that was not a priority for getting the overall system running right now, since Tetris doesn’t use a memory bank controller, she started working on the timer. Her and Adolfo are working on getting that finished before the demo tomorrow.

Adolfo also worked on finishing the PPU. He is currently focusing on displaying a background image as the first layer of the display. He has the PPU FSM working correctly and fetcher. He was able to get VGA test running again on the new board. In addition, he was able to upload FPGA files and set pin assignments, which will be make it easier for the team to transition from simulation in the near future.

Pratyusha set up minicom to transfer files to the SoC, in the initial absense of a network and internet for the board. She then set up a network to talk to the board, and ethernet connections on either side (VM and Soc). She also rearranged memory of the VM by booting VM OS onto another linux OS to repartition and rearrange memory. After creating the cross compiled binary of a HPS program ,she scp’d it onto the board, and can now use ssh. The program uses HPS key to light the HPS led. Her next goal is to interpret USB signals from the hub controller, and understand memory mapped RAM.

Pratyusha’s status report for 03/28/2020 + update for 03/29/2020

03/28

This week, I focused on flashing the micro sd card and booting the board.

I chose to work with the console BSP instead of the LXDE version. This is because the former is more lightweight, and (in theory) should be all we need to run a program that doesn’t involve SOC graphics. It is slightly harder to configure than the Linux Desktop that connects the different FPGA peripherals with the SOC.

I managed to boot the board with the console version and ran a hello world program so far. I’m figuring out how to transfer files to the SOC.

The guide on the terasic website details setup on a Windows machine. I faced some challenges along the way, such as using mac and linux instead of windows for each of the steps to get the img configured and running on the board.

This involved installing putty and figuring out device manager and communication settings Windows equivalent on Linux. I also had to expand the partition space to be able to fit more programs on the micro SD card.

I had to figure out how to load the config .sof files and configure the soc with the default settings to be able to talk to the fpga peripherals and set up the bridges to talk to the fpga. This wouldn’t be a problem if we used the linux LXDE image/deskop, because it comes with the default settings, but is also much heavier than the console version for the purposes of this project.

All in all, there isn’t much documentation for using linux VM/ mac for setup and it was interesting to search for other resources and try options that didn’t work for booting the soc.

Update 02/39

Ran a hello world program, configured fpga trough soc and turned on leds. Next goal is to transfer files to the SoC, look into Memory mapped RAM and controller driver.


Pratyusha’s Status Report 03/21/2020

After spring break, I worked with the team on alternative project ideas. We considered switching to a software emulator, and I began looking into the requirements/languages used/ benchmarks, etc. I also looked up sample projects and test suites.

However, after Jens mentioned Professor Nace would potentially ship us each boards, we collectively considered and are now scrapping the audio portion of GameBoi.

I thought through tests to verify that the game switching and controller driver work.

As mentioned in the Statement of Work, (taken from the SOW)

“since the SoC will house the persistent memory, it will hold game state and will need to transfer the game bits depending on the game that the user wants to play. To check this, once we transfer the bits, we will sum all of the stored bits in both the FPGA and persistent memory. If the sums are the same, we can reasonably assume that none of the information was corrupted. Additionally, we will attempt to read in a game to the FPGA, then the FPGA will read the information back to the SoC untouched. If the bits all match, then we have proven that two way communication between the FPGA and SoC are correct. To test our game switching, we will run the above test consecutively, but use a different game in each iteration. “

“To test the controller driver, we will map each button of the controller to an LED. The LEDs that correspond to the pressed buttons must be on until the buttons are released. This will prove that we are able to receive the right signals from one or more buttons of the controller at any time. “

I (hopefully for good) sorted out connection problems between my VM on mac and the DE10-Standard Board. I managed to run a simple program on the DE10-standard board.

I was debating between using a Linux Desktop Environment and a Linux Console BSP, but I’ll probably go with the latter, as there seems to be no need for a Desktop Environment.

I am waiting on an SD card to be able to flash the image onto the card and the SOC.

For the upcoming week, I hope to

  • Get the ConsoleLinux booted onto the SOC
  • Run a basic MMIO program such as writing to the LED/ using switches to communicate to LED through SOC
  • (Stretch) Reading button presses from NES controller.

Team Status Report 03/21/2020

This week, we primarily focused on figuring out how to proceed with the project, what changes we’d need to make, and reevaluated our unit tests. We decided to cut out the audio portion of our project, since we will no longer have access to the tools we would need to get the audio circuitry working.

Professor Nace ensured each one of us has a board (thank you!), so we will still be able to make significant headway towards the project, and work on each individual component of the system independently. However, as a consequence of scratching out the audio functionality, Tess will be working primarily on the CPU, giving Adolfo and Pratyusha more time to work on the PPU/graphics and SOC/Controller-Driver.  Integration is going to be harder since we cannot work on the project synchronously. To counter this, our goal is to come up with fully functional components and good unit tests, to prove that each component worked even if integration fails.

Attached herewith is our statement of work.

Statement of Work