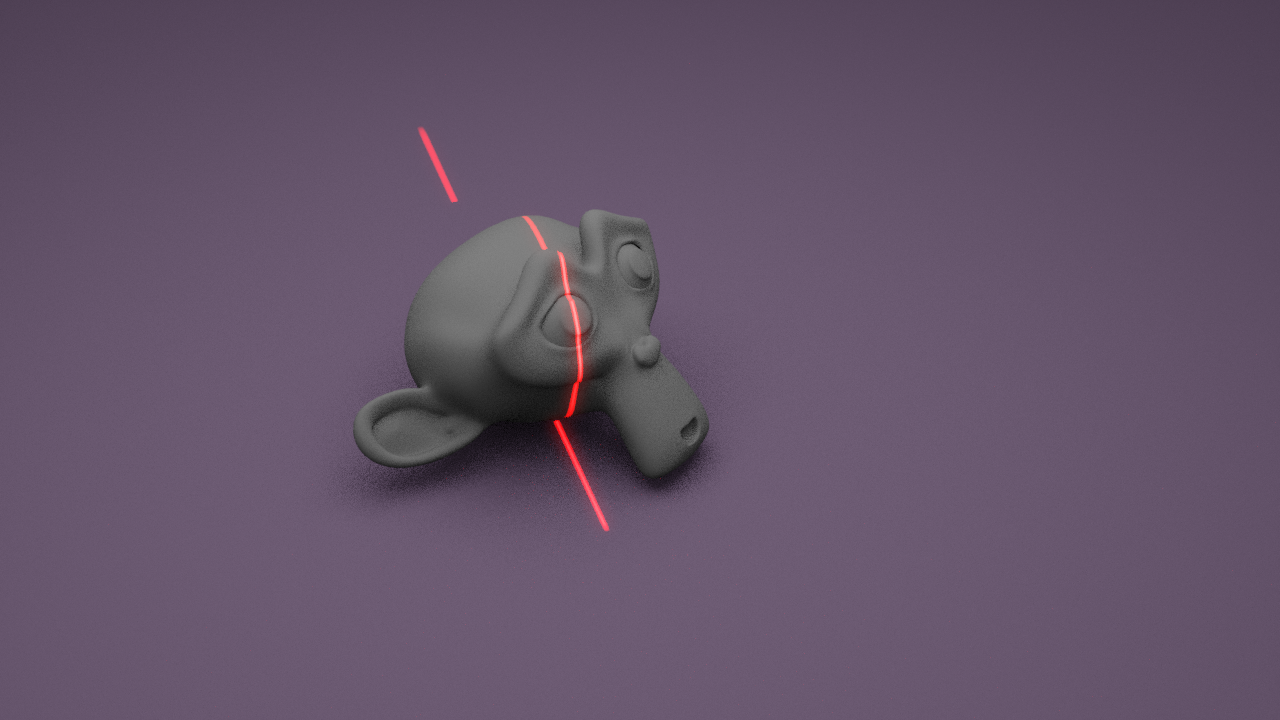
As mentioned in the team status update, we are switching our project to simulate or generate images that we would normally get from the camera and laser setup instead of building a physical piece of hardware. I started to explore options to do this, and I will be using Blender modeling software to generate these images. In these few days, I successfully projected a laser stripe onto the default Blender object Susanne the monkey.
This is a sample of the laser stripe projected onto the object. I will add a cylindrical platform with a wood texture and tune the background to be dark grey or something so we can see the laser better.
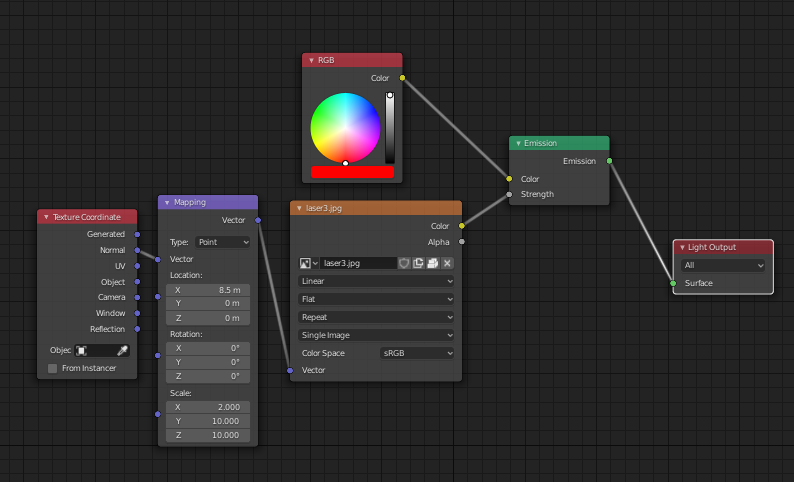
This is the shading setup I used for the laser projection. I used an image with a white line of a few pixels wide down the middle and actually projected the image shaded with a red tint to resemble a laser stripe. I can tune how white or red the laser stripe is with the power parameter in Blender (set to 70,000W in the render above). I can also control how much red diffuses from the laser by tuning how many light bounces there will be in the render.
Moving forward, I will be using keyframe animations to rotate an object around the z-axis and generate images resembling what we would get in our physical setup. I will need to first acquire our old materials from Quinn so I can assemble a basic non-moving version of our previous design to check how well my simulated images resemble it, and also get the camera parameters of our USB camera to calibrate those in Blender.