Lucas Status Update: Printer Tuning and Repair

After restoring the PrintrBot’s z probe and getting it operational, I had to tackle the issue of still having relatively poor print quality. Several issues presented almost simultaneously. First of all, various prints had pretty severe layer shifts along the x-axis. More perplexing was the observation that print quality suffered when run through the Octoprint system rather than directly from a laptop.

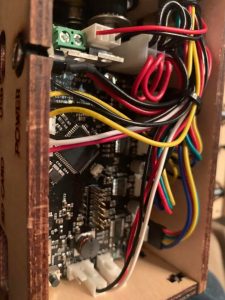
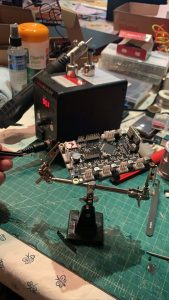
After some digging around and more test prints, it became clear that the problem of shifting layers was due to a mechanical failure: the set screw in the gear driving the x-axis timing belt had come lose. This problem was remedied by completely dismantling the entire printer – sides, bed plate, top, and all – and then tightening the set screw.

The second issue of varying print qualities seemingly depending on the host software was a bit more curious. Despite the printer being fed the exact same g-code, the prints faired better when being run from my laptop via programs such as Pronterface, Repetier-Host, and Cura rather than from the Octopi operating system on the raspberry pi. More digging on the matter brought up the issue that Octoprint really was sending commands at a slightly slower rate from the raspberry pi than a different host software from a laptop or desktop. This slower communication rate, paired with a tiny instruction buffer, was causing starvation issues. Essentially, the printer would occasionally execute all of the instructions in its small USB input buffer faster than Octoprint could fill it leading to short pauses between movements – these in turn would result in physical artifacts and gaps in the print layers. Changing the firmware’s default ASCII input buffer from 4 bytes to 32 largely solved the issue and resulted in much cleaner prints.

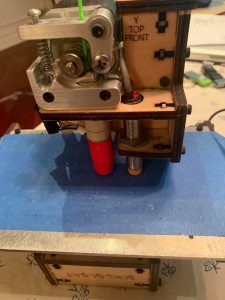
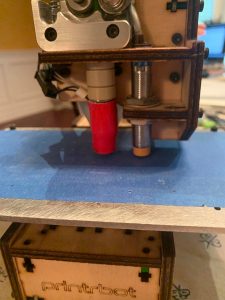
Finally, I used the repetier-host software to better calibrate the printer’s starting height by running short test prints and then adjusting the z offset height accordingly.

After all of these changes were said and done – tightening set screws and belts, changing the input buffer size, and calibrating the z probe offset – the printer was finally producing high quality prints consistently.

Lucas’s Status Update, 4/12 -4/26

So my laptop finally croaked last week – it crashed, had a kernel panic, and subsequently entered a boot loop. After a weekend spent trying and failing to fix it or at least get a backup, I sent it in for repairs. It is currently still sitting there, as the shop says the Covid-19 situation has seriously impacted their repair/diagnosis timeframes.

Big oof
My daily driver experiencing a kernel panic

I was able to dig up a couple ancient and broken Macbook Pros from 2010/2012 and spent the next few days fixing them up with what few parts I could find at the shop:

yikes
One of the laptops literally had its battery swell up to the point of bulging out the top case…


I removed the logic board from another to better clean up what appeared to be some very old gunk…

I gave them some ram and replaced the hdd’s with ssd’s; at least one seems to work ok for now…the other two are waiting for new batteries to get shipped.

That’s not all though – the 3D printer broke again. Once again, the z probe was not registering. Previously, the printer was broken because it was registering that the z limit was triggered no matter what state the inductive probe was in. This time, it had the opposite issue of never triggering the z limit even though the probe looked to be working just fine.

One thing I did not realize is that the Printrbot was totally open source. I was able to find the schematics and board diagram:

Notice that the Z endstop (in the upper box second from the right) is tied to a transistor
The endstops are the three, three pin connectors at the bottom left

Thinking it was once again an issue with the z probe transistor, I replaced it. And I took pictures this time:

Last time, the transistor had an internal short, meaning that the z limit line was always held High. This time it seemed like it had internally blown open such that the z limit line was always held Low. Without a multimeter, it was very difficult to diagnose.

My rough setup of what parts and tools I could scrounge around the house. I’ve got a reflow station but no multimeter or solder wick…go figure.
Sop-23-3 packages are a pain to reflow…especially when they’re located right next to a bunch of easily-meltable plastic connectors…

I replaced the original mosfet with an MMUN2211LT3G NPN BJT. Having nothing other than that, I replaced the BJT with another of the same kind.

After manually testing the z probe trigger by jumping 12V to the input of the transistor, I confirmed that the printer was correctly registering the z open and closed states. Curiously, the z did not trigger with the inductive probe plugged in even though the probe’s led correctly lit up when it got within range of the metal build plate.

Within range of the build plate, the inductive probe correctly turned on its signal LED
When it was far enough off the build plate, the probe also correctly turned off its LED…

After some more digging, I learned that it was totally possible and even somewhat common to have this kind of inductive probe break without destroying the LED signal function. Essentially, the probe was registering the build plate proximity correctly, but couldn’t generate enough voltage to flip the state of the transistor on the board.

I have ordered several more probes on Amazon but they will take another 1-2 weeks to arrive 🙁

I have also explored running the printer without a hardware limit for the Z, but I am having trouble generating the right hex files for the printer. There are a number of pre-existing firmware hex files and I have been able to upload them to the printer, but they all have specific configurations. I need to find a way to edit the configuration file and generate a new hex file. Then I can possibly manually level and home the printer, and then set up a software limit for the z.

A Rough Patch:

I’ve been dealing with a lot of family issues lately that really put a strain on the project. Among those were my mother being bedridden for a couple weeks with Covid-19  as well as a family friend recently passing away from of the virus.

In a way, my laptop  exploding and the 3D printer fiasco let me escape it for a bit, but on the other hand these issues also made me realize how much farther along we’d be if I had gotten things together sooner. This past month has been incredibly taxing but I shouldn’t have let that keep me from having my head in the game.