What did you personally accomplish this week on the project? Give files or photos that demonstrate your progress. Prove to the reader that you put sufficient effort into the project over the course of the week (12+ hours)
I solved a few problems mentioned in the previous status report.
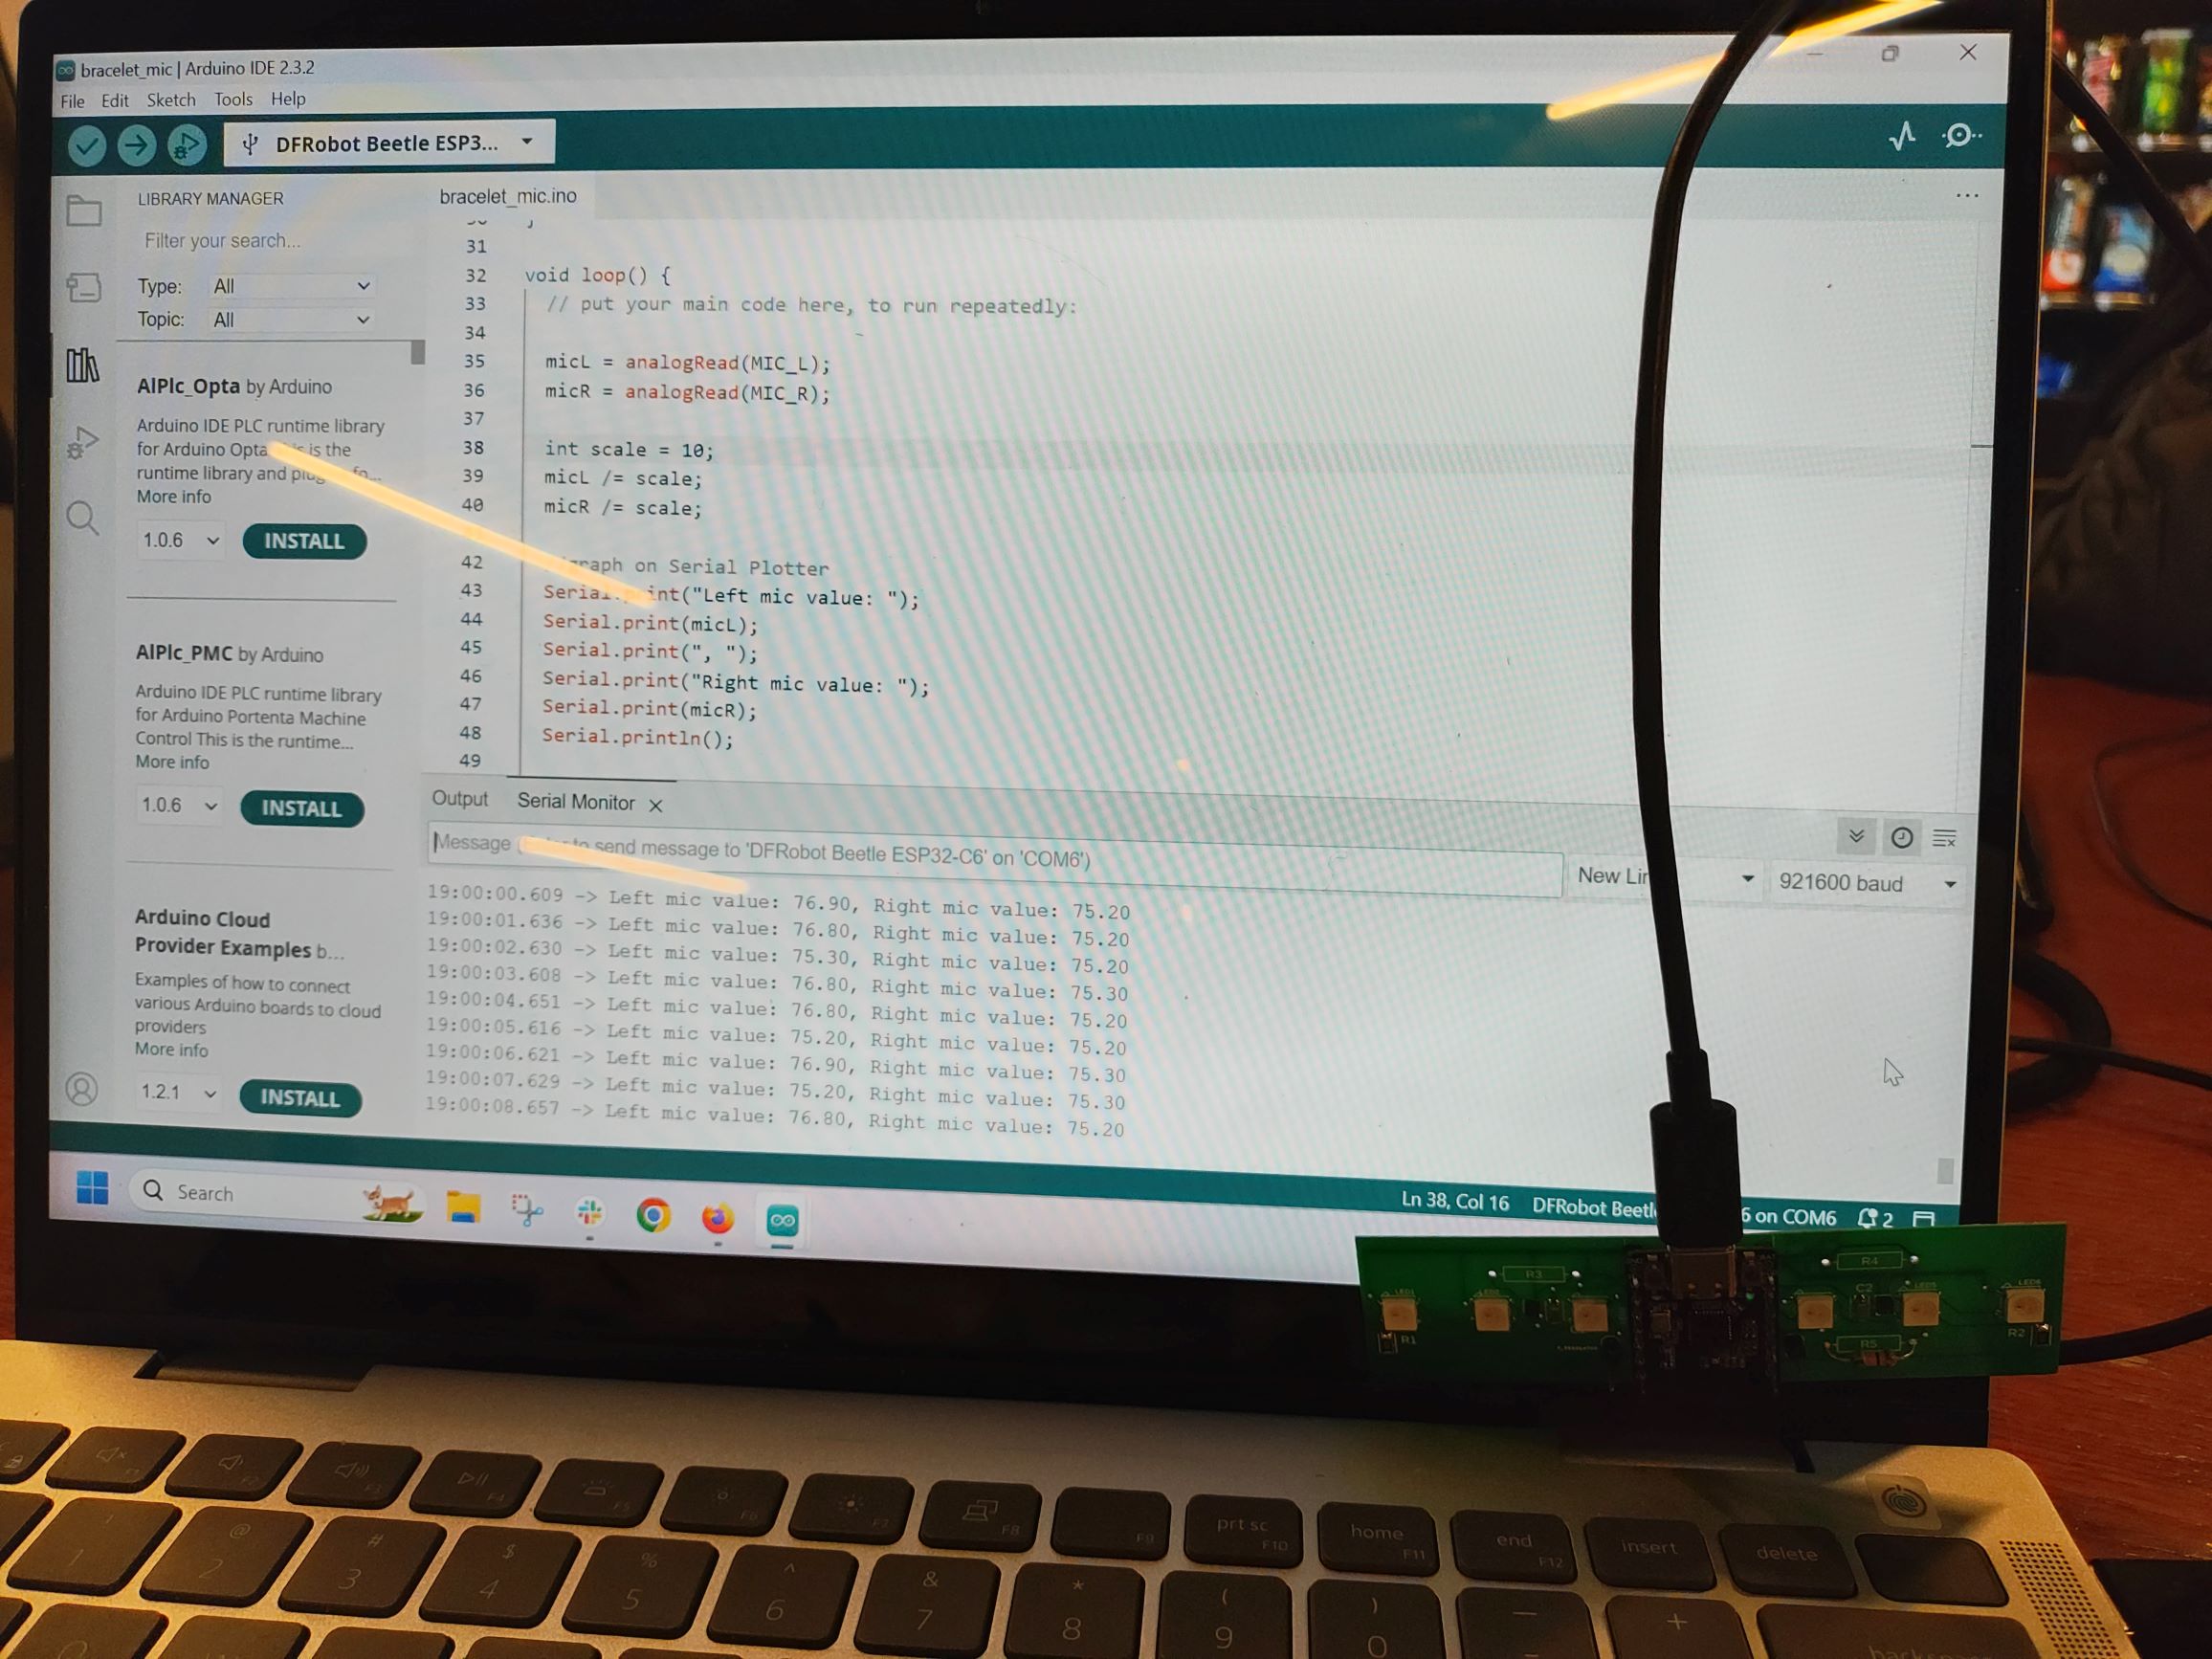
- Nothing prints in the Serial Monitor: in Arduino, go to Tools -> USB CDC On Boot “Enabled”. If “Disabled”, nothing prints.
- Beetle connection isn’t recognized/won’t upload code: often, when I switch out a Beetle and/or data cable (we have 2 of each), the upload process will fail. Sometimes it fails because the port is grayed out and won’t allow you to connect, or sometimes it’ll say some Serial data error. Here are solutions I do to fix this:
- Unplug/replug Beetle, restart Arduino/computer
- Spam the Beetle buttons for boot/reset during compilation. You should hear the USB connect/disconnect sounds if your computer has those. It might not work the first time, but eventually you get the timing right and it’ll finally agree to upload. I usually do the blink test for this, since it’s pretty easy to tell if it worked. If the Arduino IDE says “upload successful”, but you still don’t see any light, click the reset button once (right button), and then the light should start blinking.
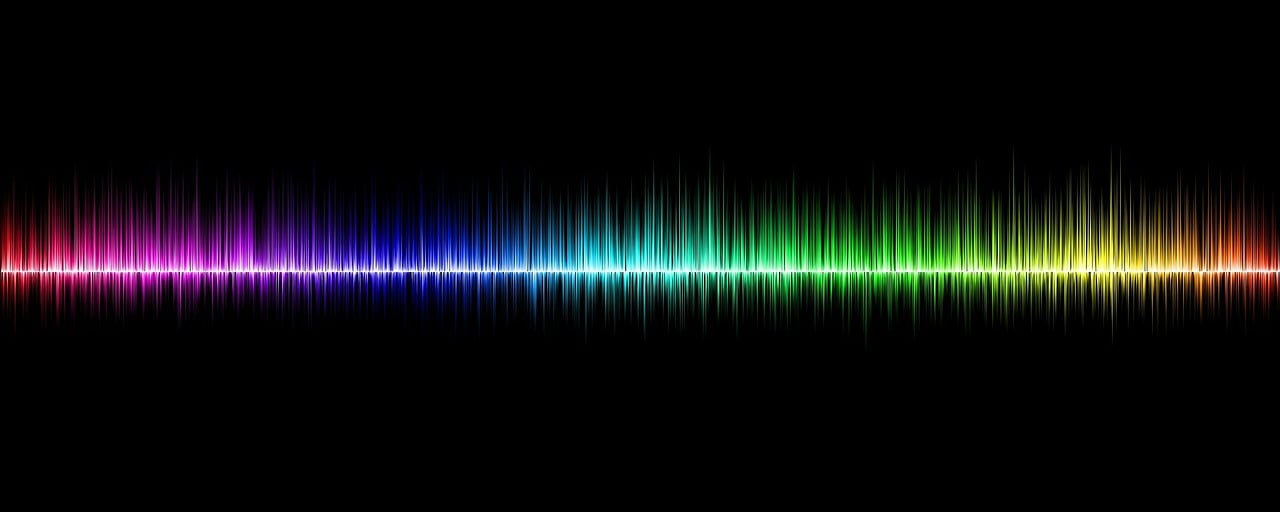
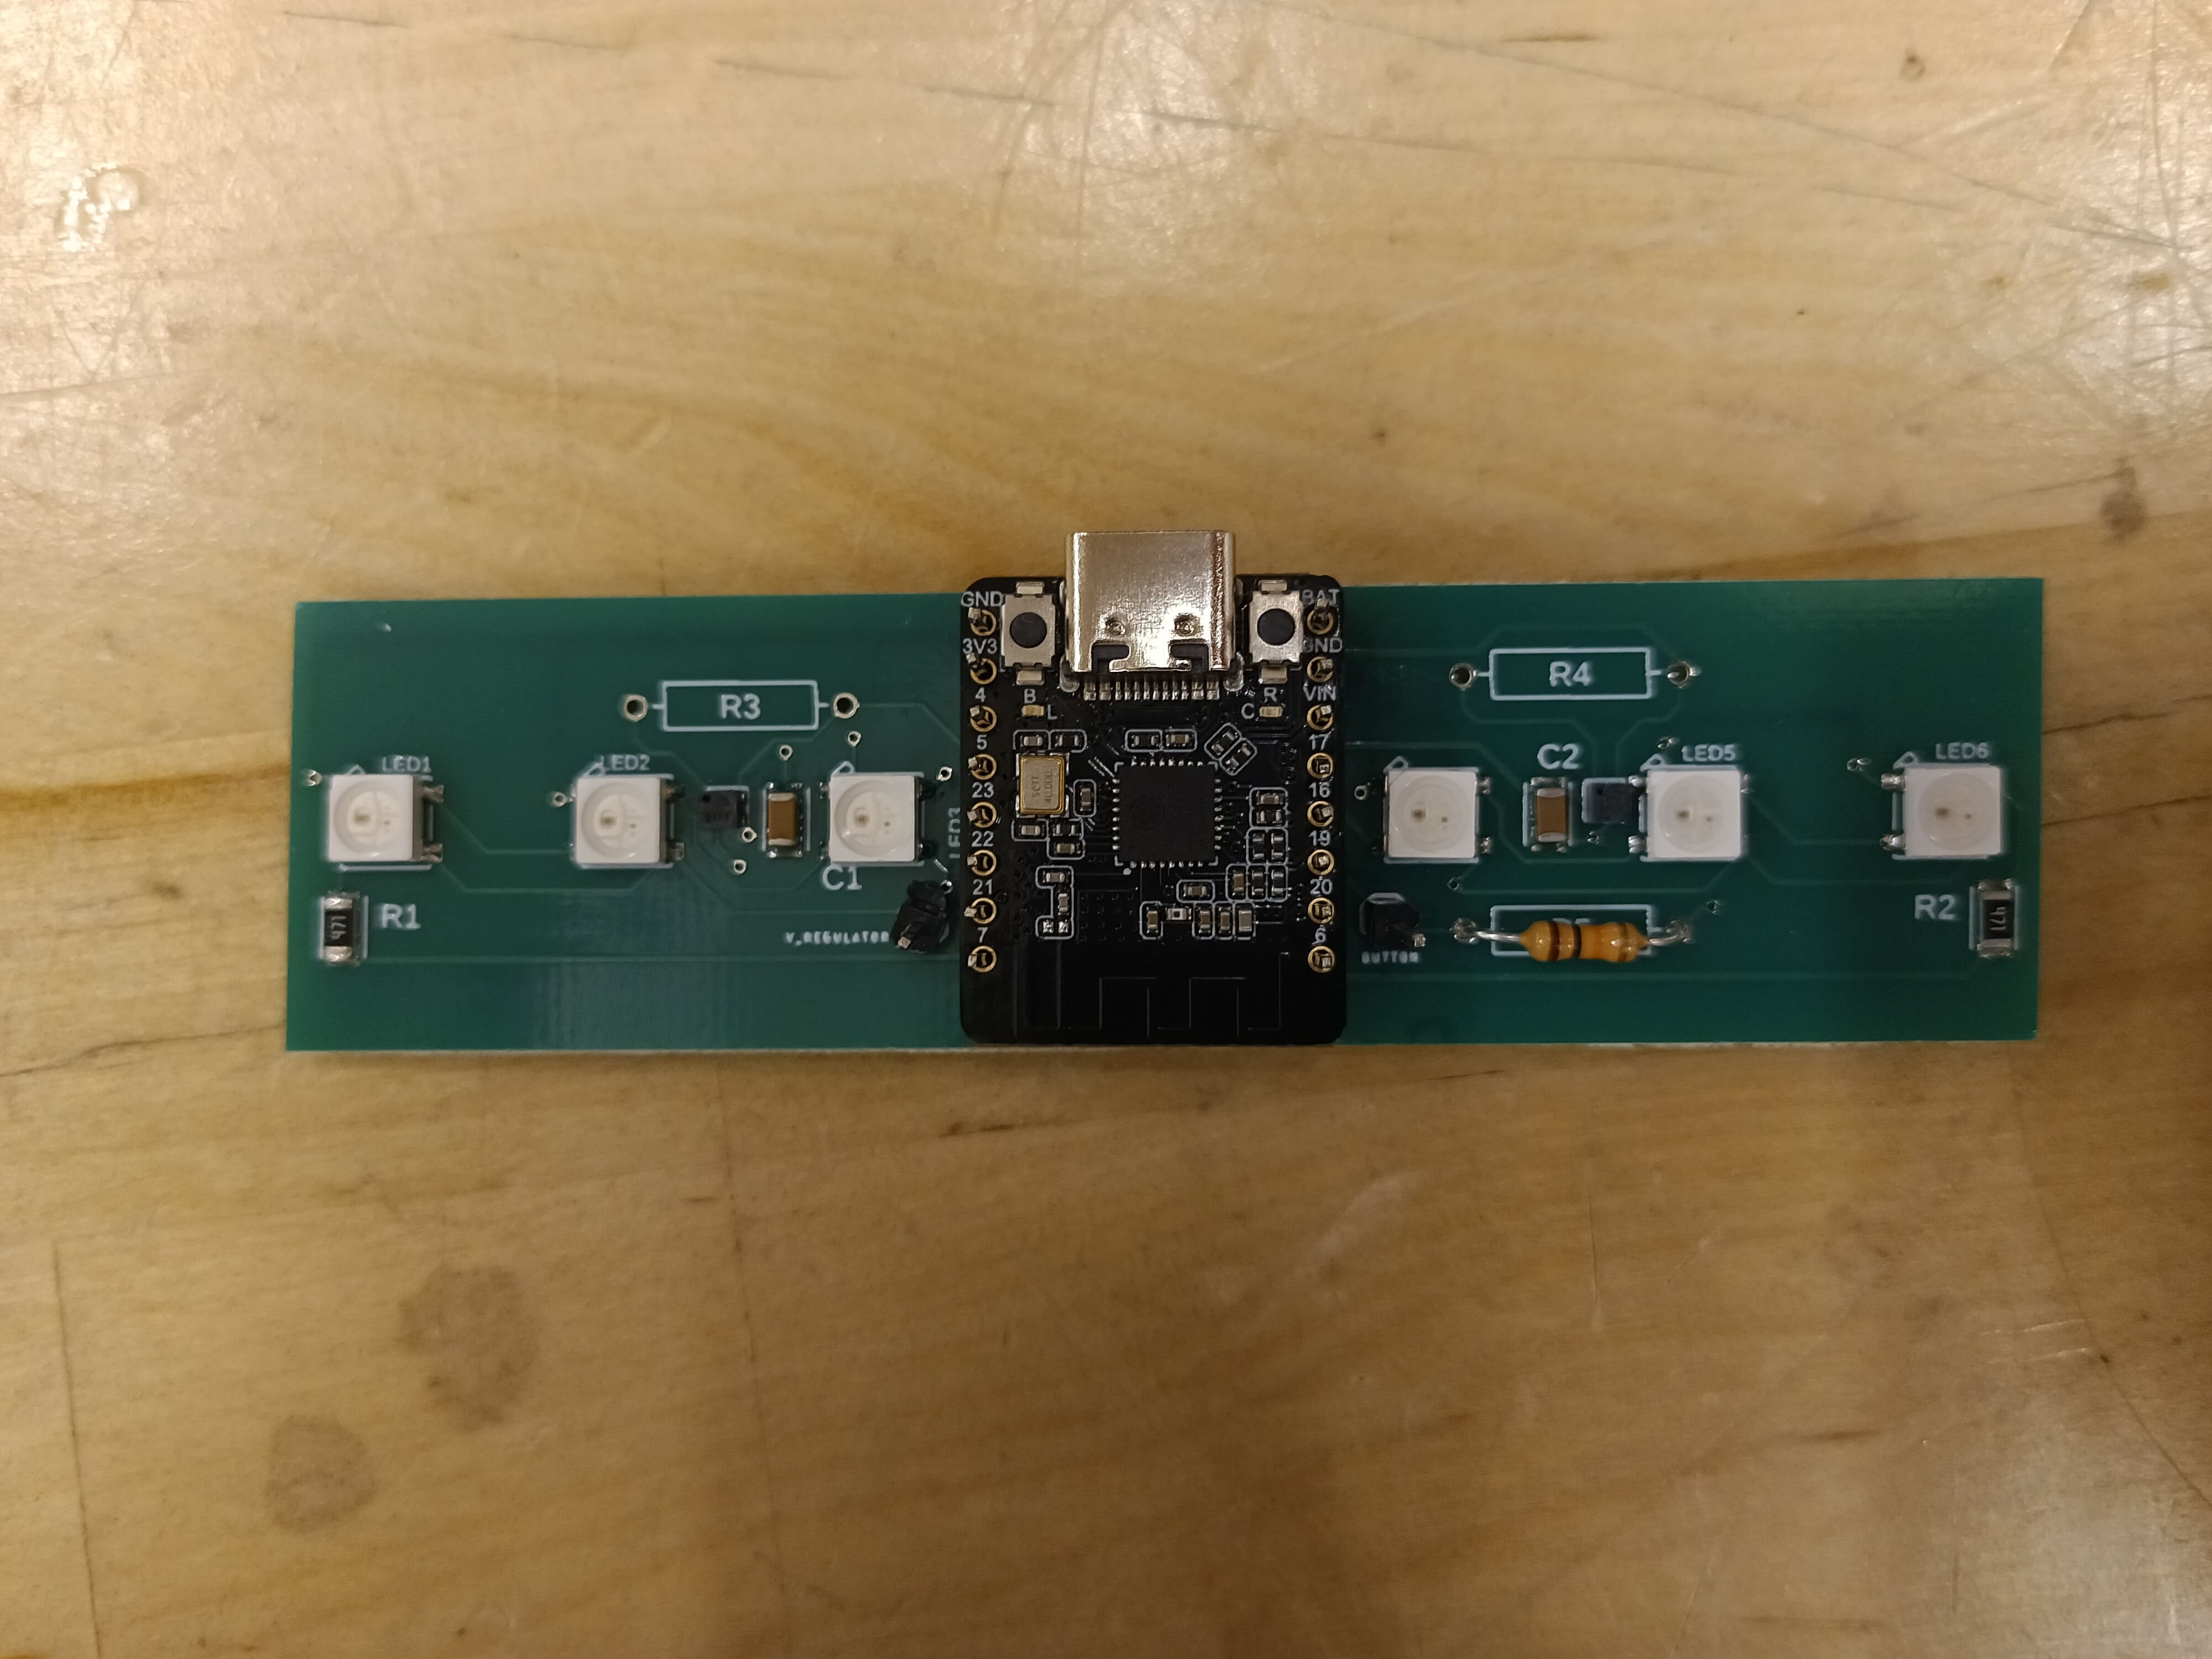
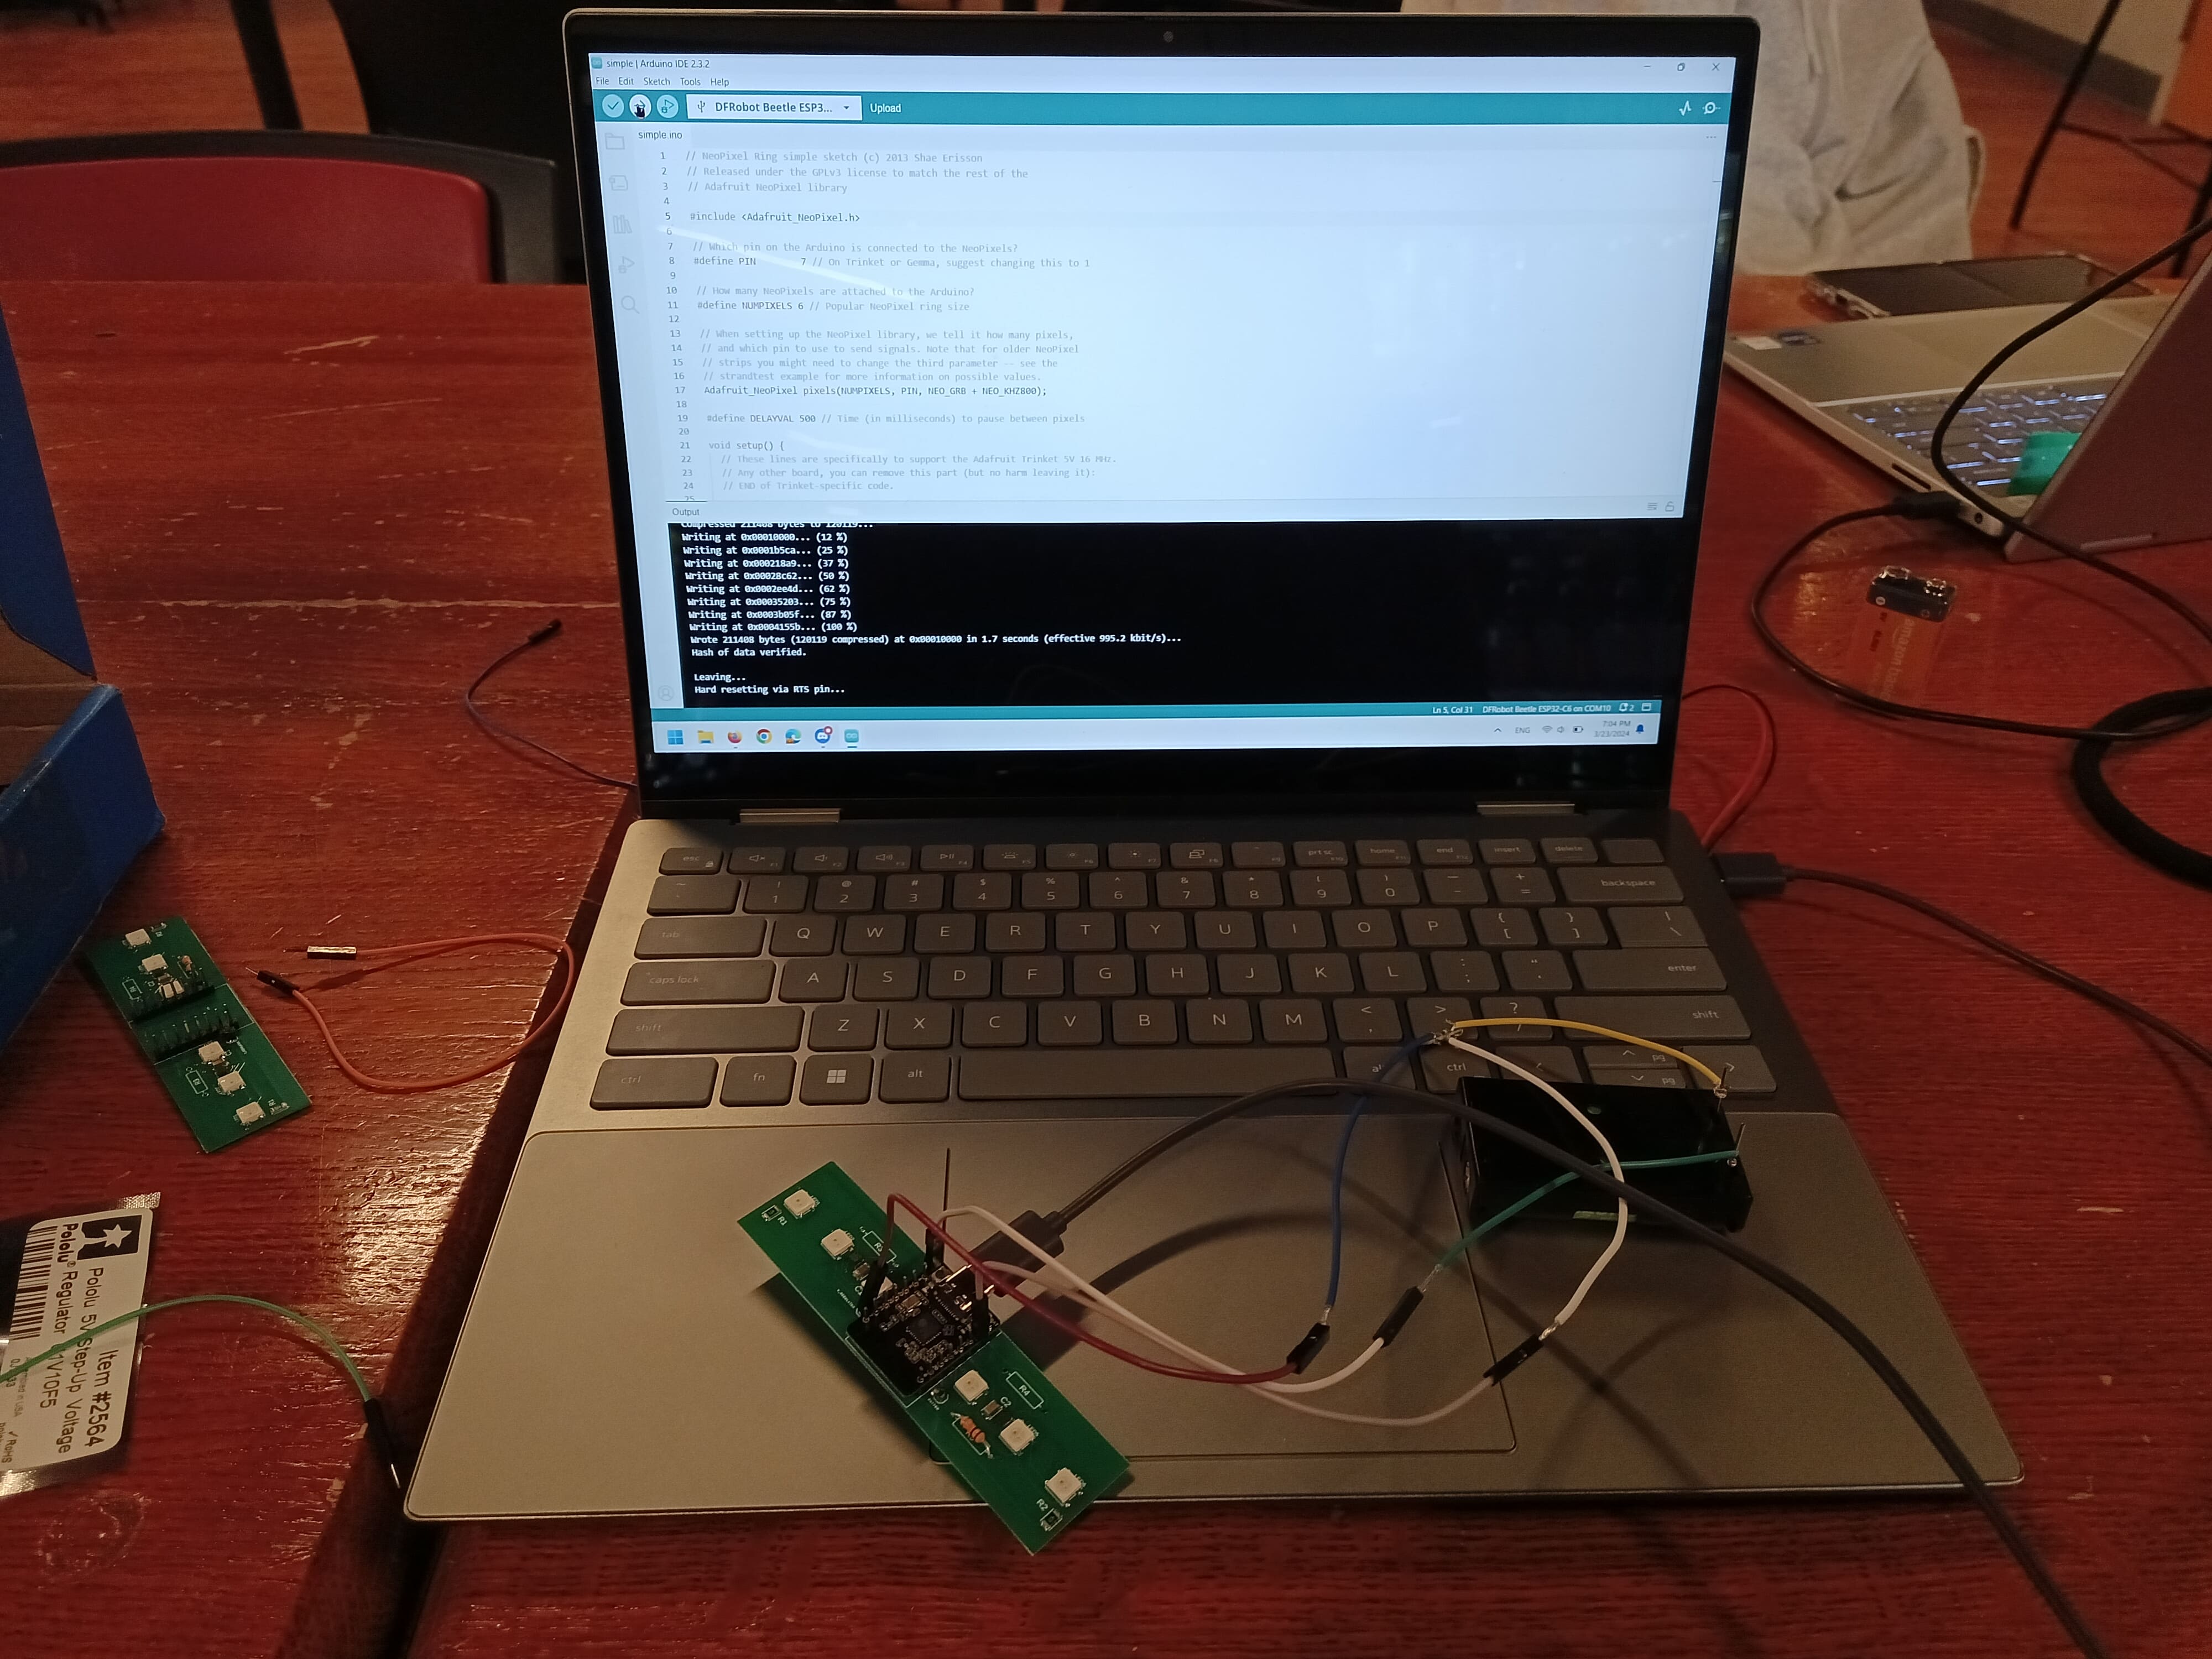
- Lights not lighting up: at first we thought it was the Polulu boost converter not boosting our voltage to 5V correctly, because we triple checked all our connections and they looked correct. So the next solution was to find a 5V supply directly and skip the Polulu middle-man. Techspark has some of those, so after connecting the Beetle to common ground, as soon as the 5V probe touched the V_regulator pin I set up, we were treated to a glorious array of wonderful colors! They were bright and rainbow and all we could’ve ever hoped for!*
*We actually were hoping that all the boards would have working lights, but when we tested boards 3 and 4, there was no reaction from applying the 5V. It’s pretty strange, since the Neopixels are bigger and thus easier to place and solder correctly compared to the mics. We also placed all the Neopixels in the same orientation, so wrong connections shouldn’t be an issue. Our success rate for lights is 3 out of 5 boards, so 60%.
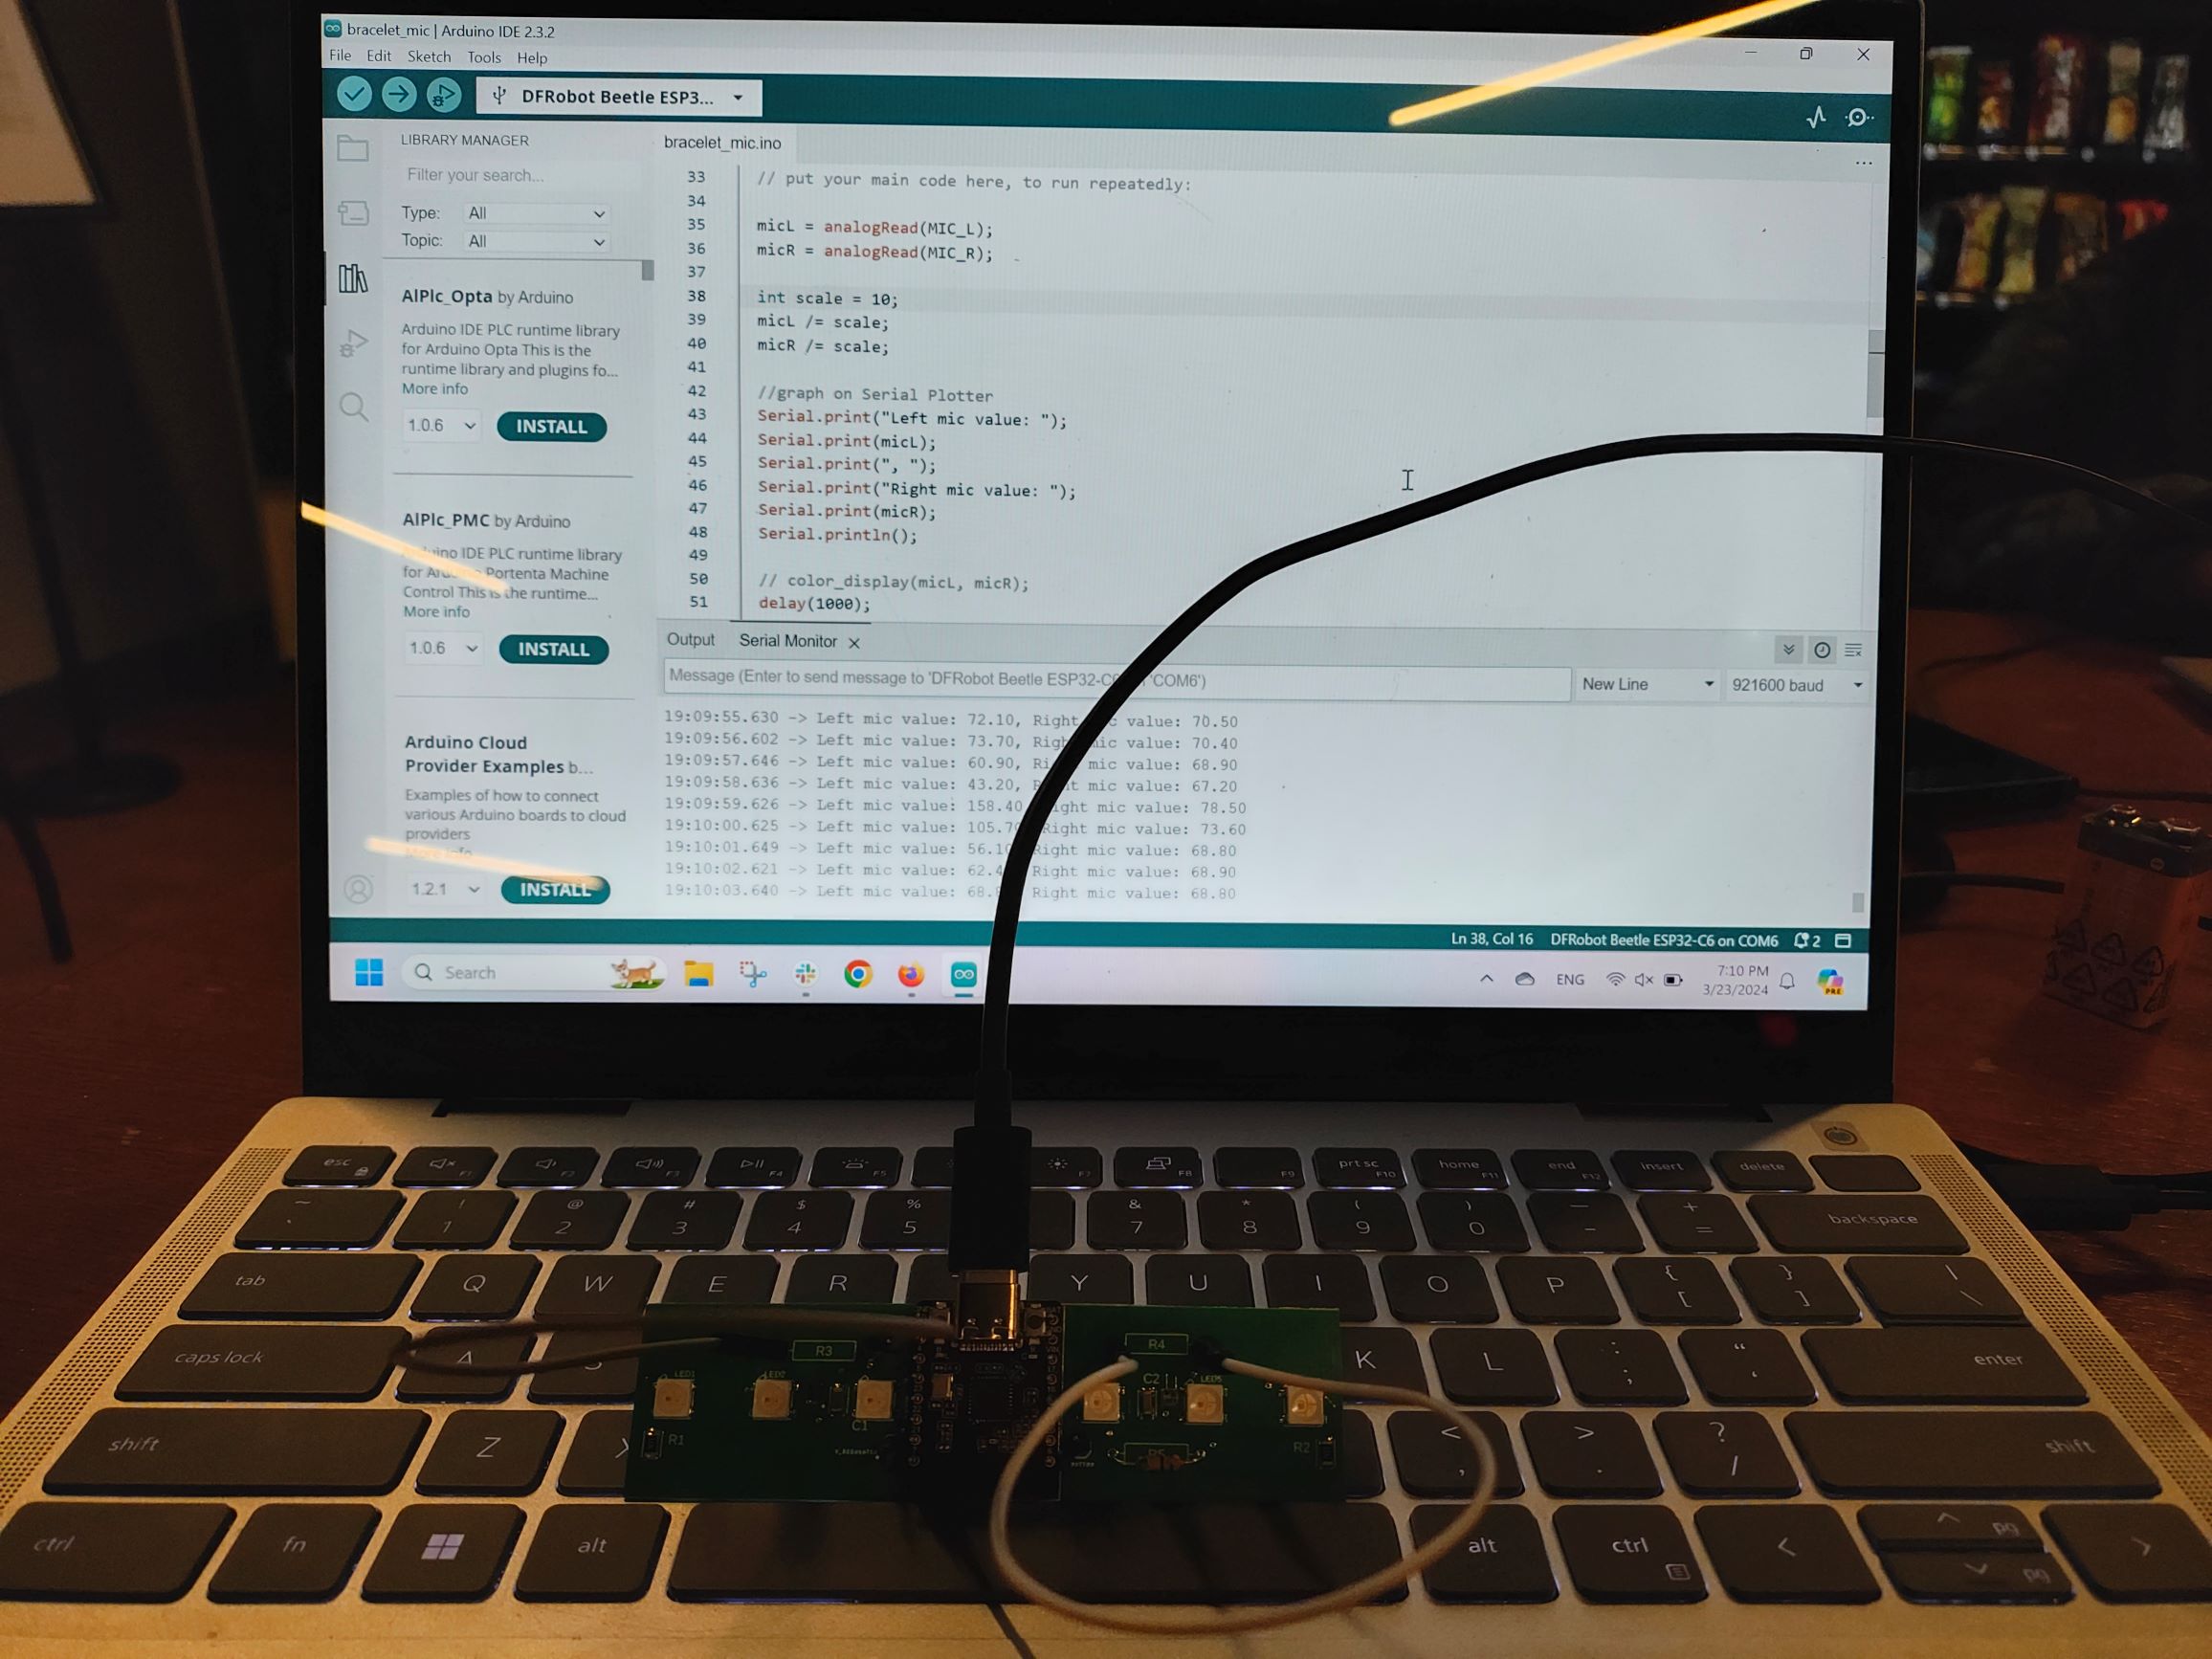
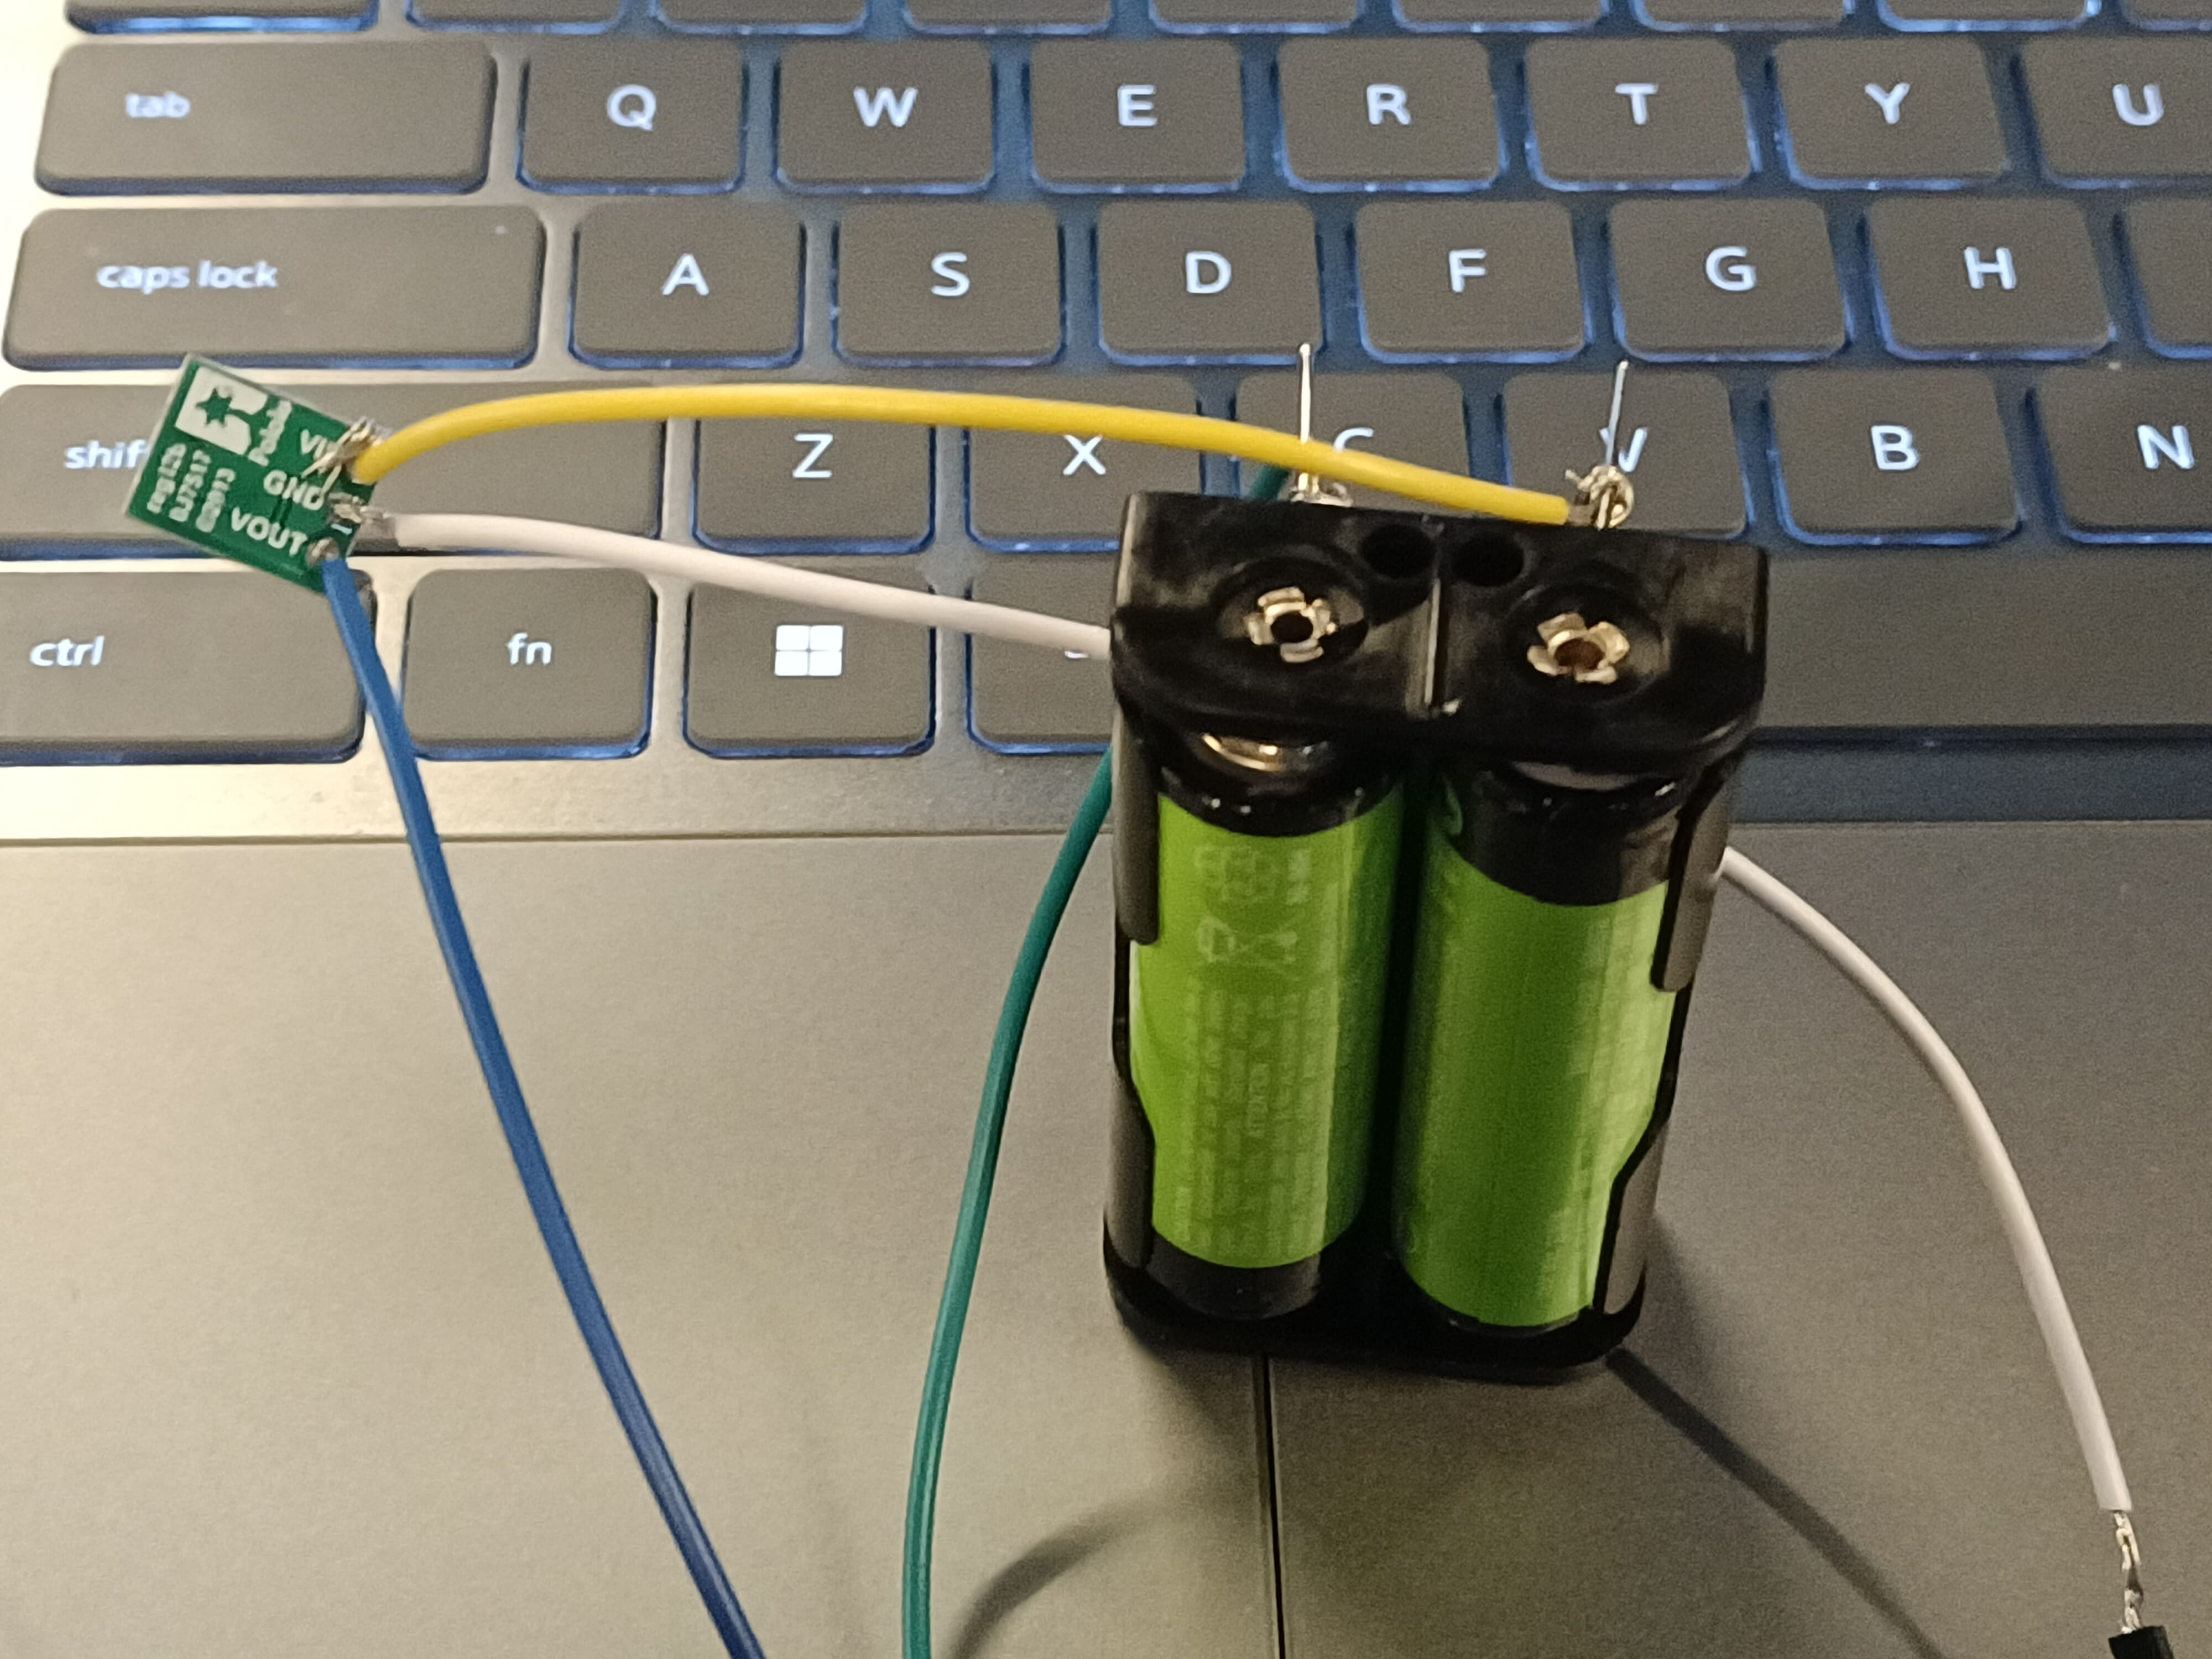
Turns out, it was just a poor connection issue with the Polulu, because if you press on the boost converter at a certain angle, the lights will turn on. We also transferred all our wiring to header pins/breadboard connections to be more stable instead of just floating around. We will be soldering it on for the final product, so that won’t be an issue. We’re just hesitant to solder things on now because things aren’t finalized and soldering is a pain to undo.
Light video
After that, we tested all the mics with Prof Fedder’s tutelage. He explained that the mics DC voltage was around half of our power supply of 3.3V (so about 1.1V). So we first use the oscilloscope to measure our mic output pins to see if we get anywhere in that range. (Unfortunately, we can’t check the mic pins directly because they’re SMD, and thus directly under the mic.) Once we have a confirmed reasonable voltage (the bad mics register voltage levels in the mV), we move on to AC voltage. The test here is to play a tone near the mic and test different distances: we should see the amplitude of the sine wave on the oscilloscope change accordingly. For the non-working mics, we just saw “noise”.
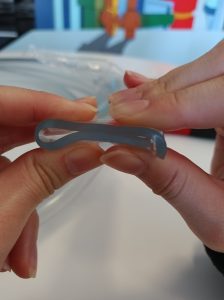
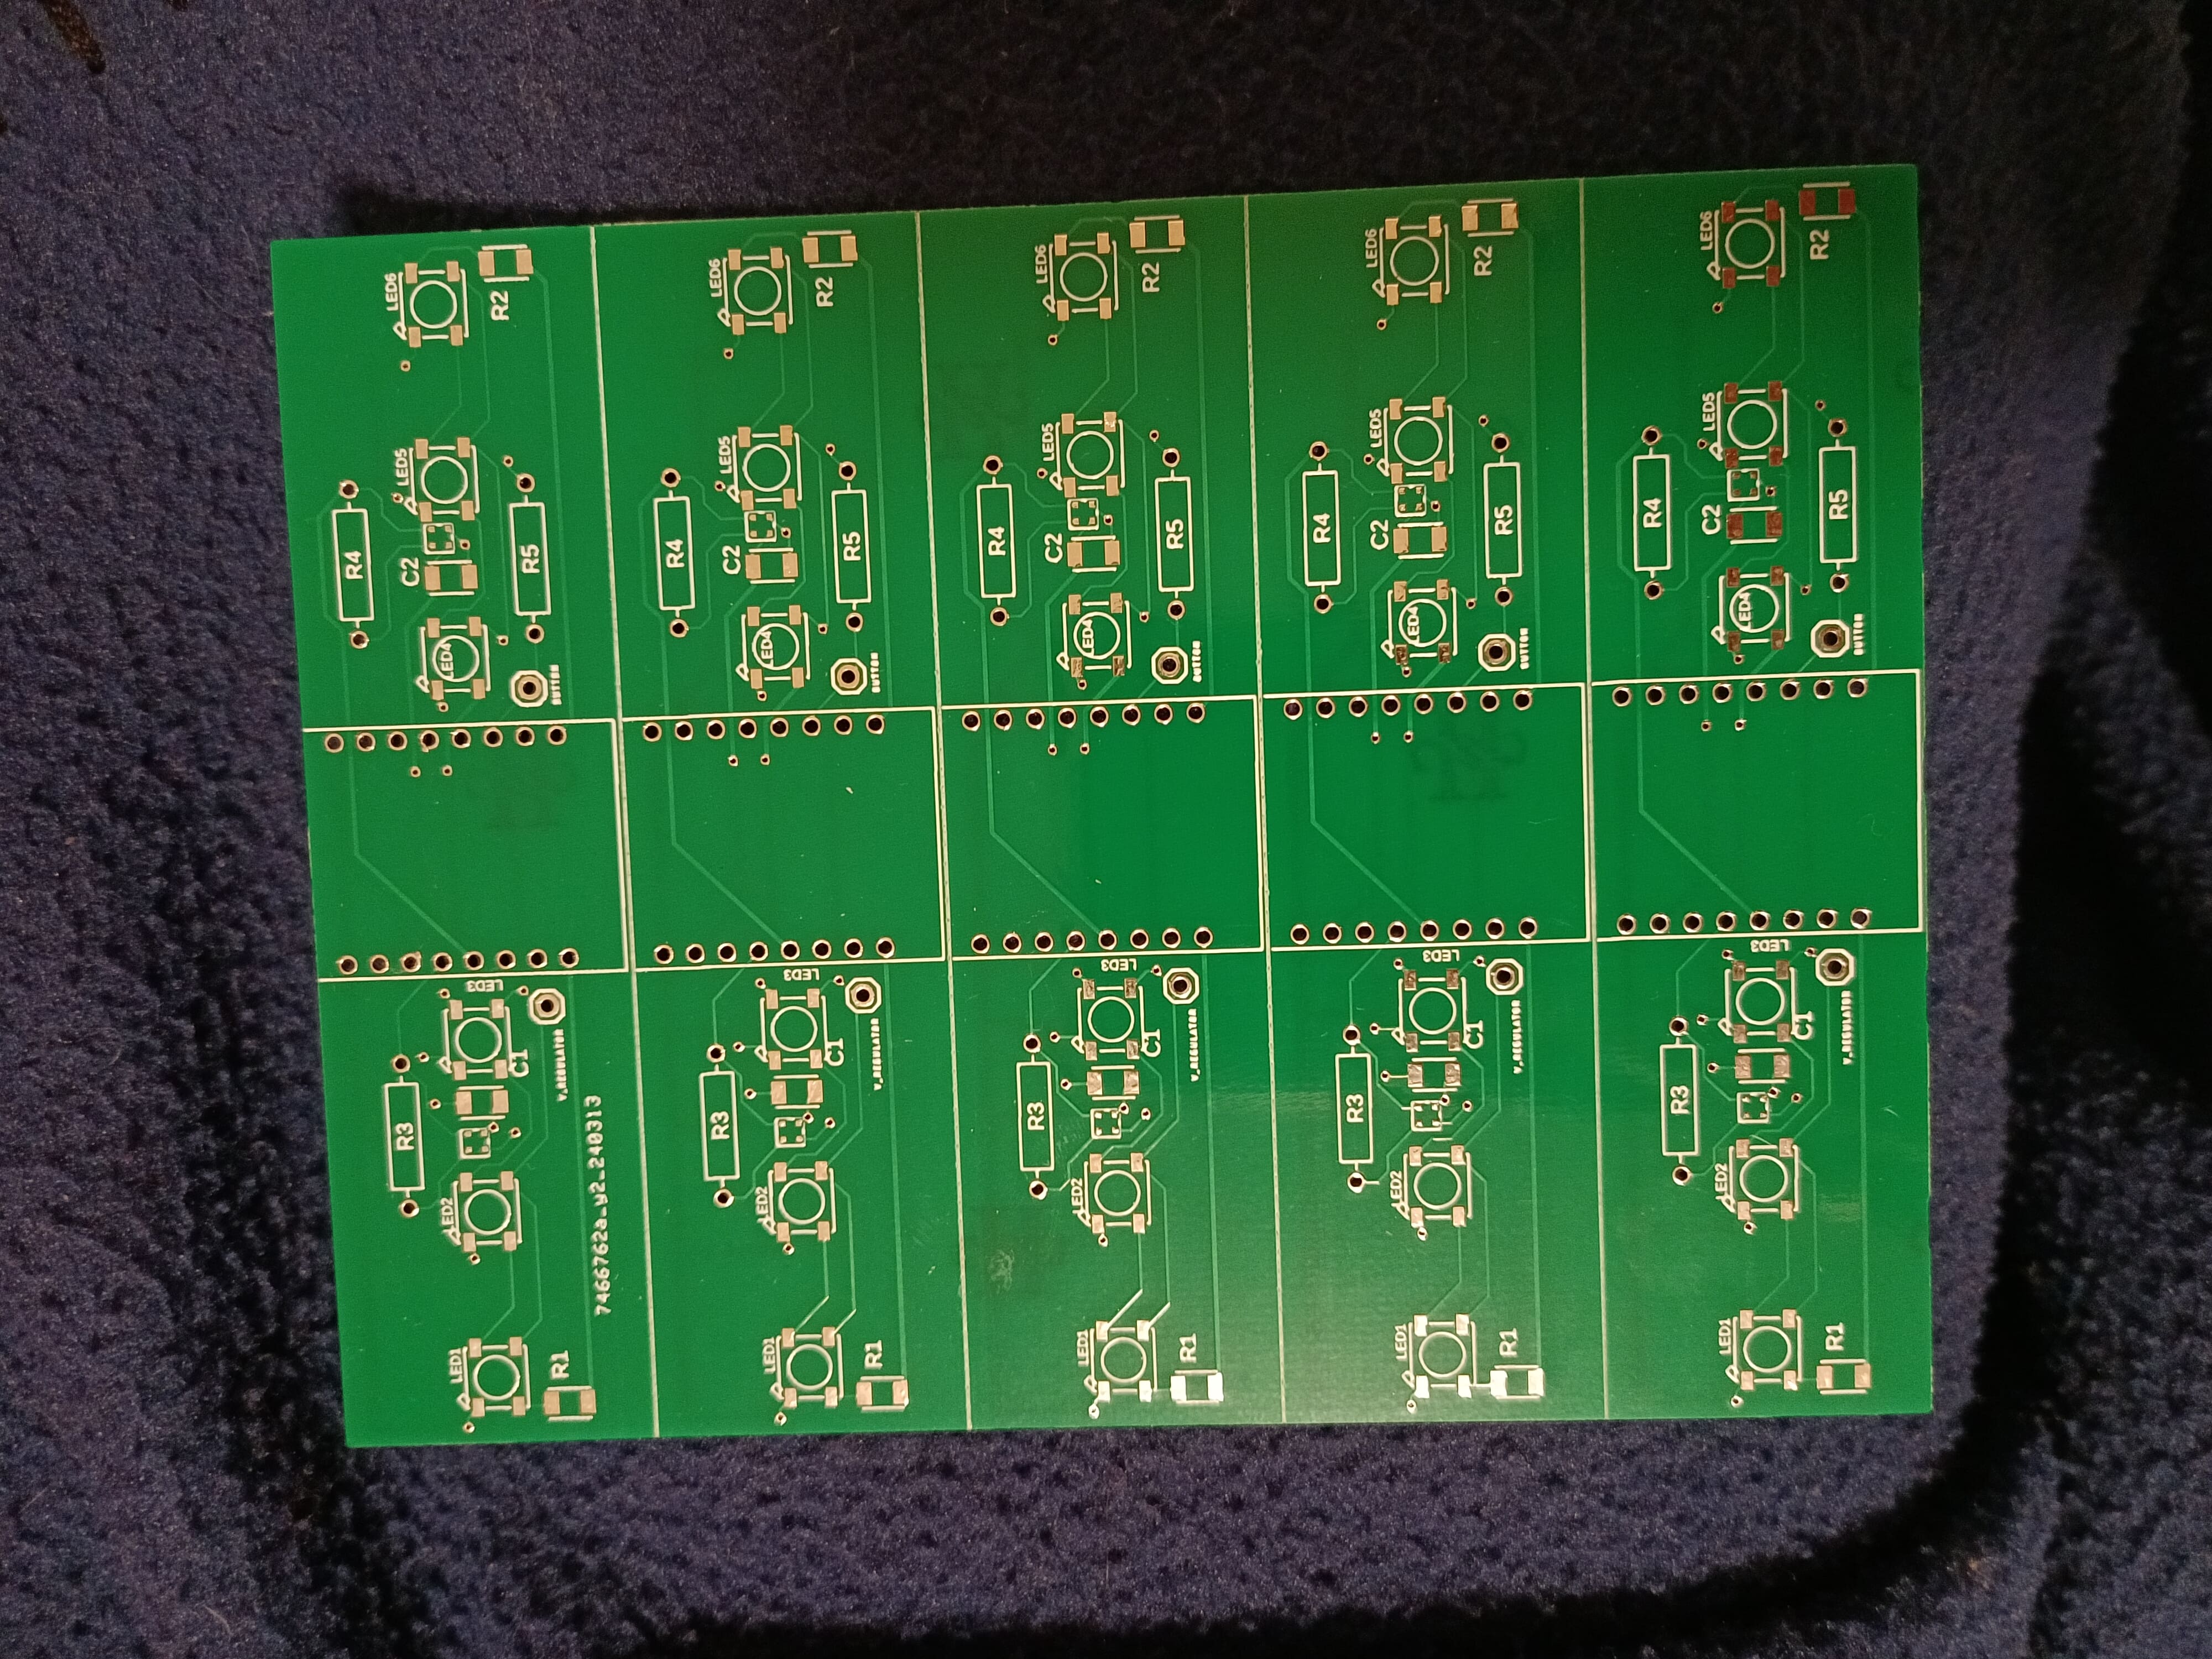
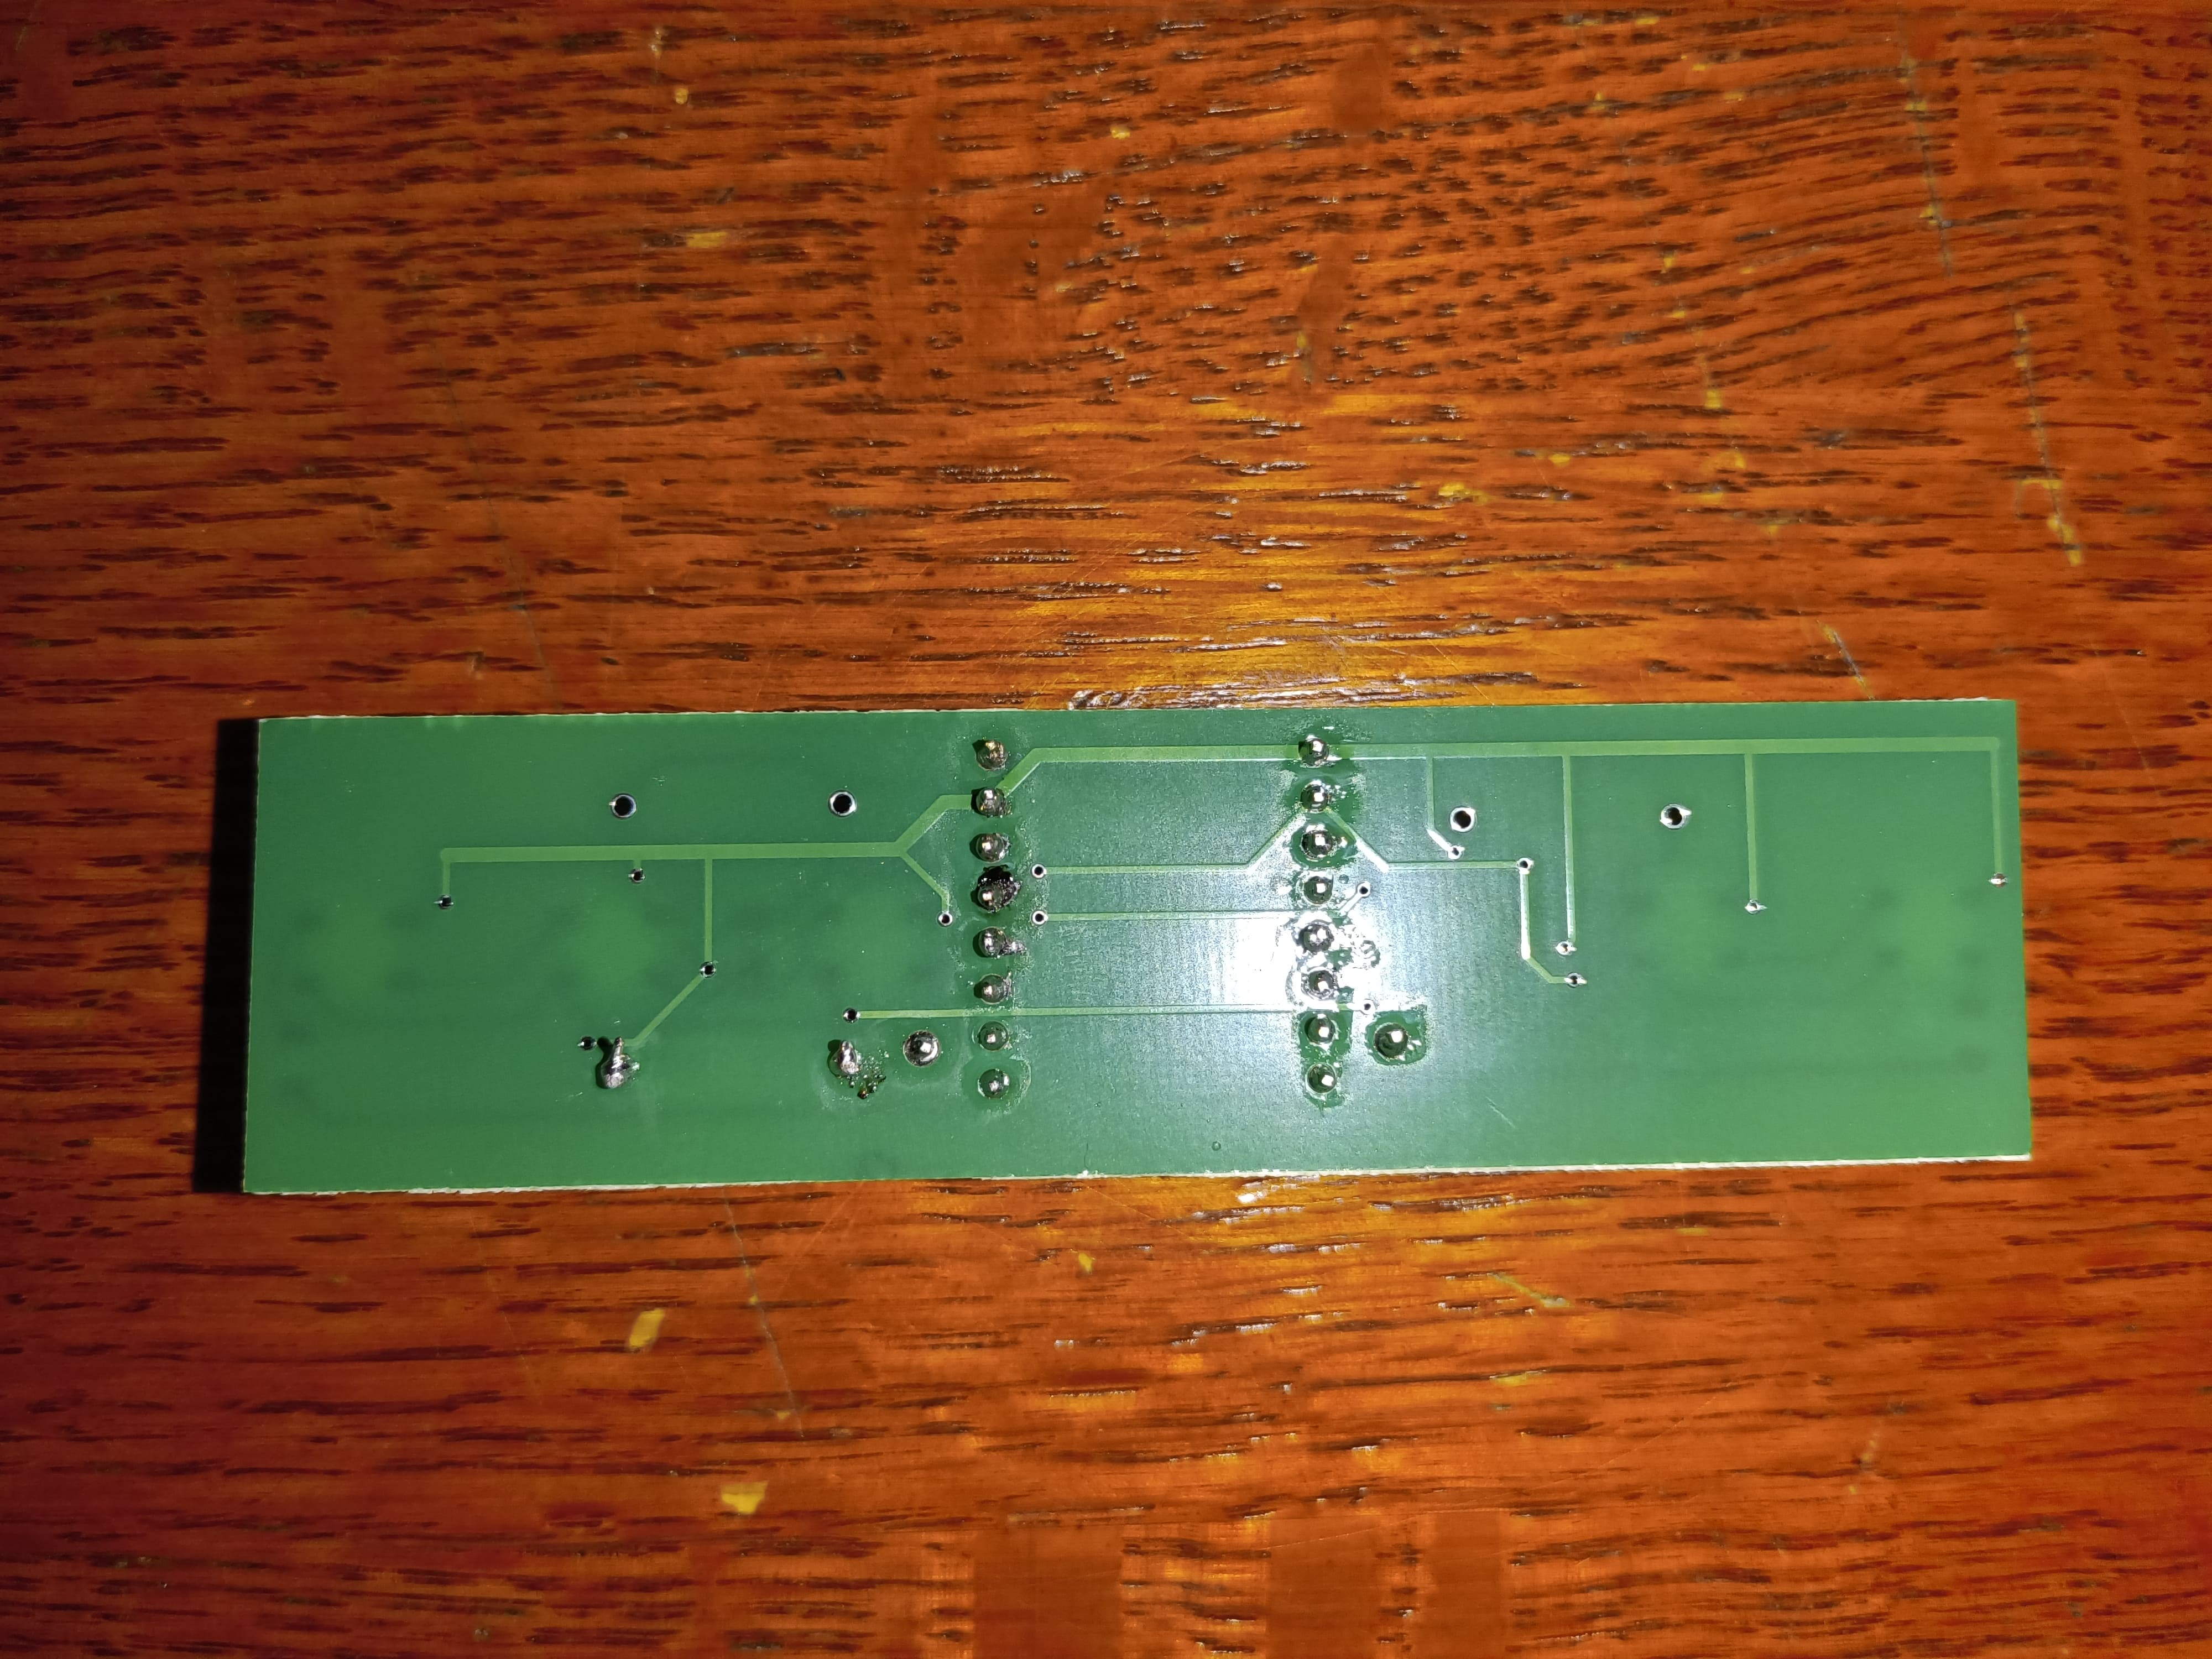
Since the mics are so tiny, it’s very hard to apply solder on them to balance between falling off from not enough solder, or shorting all the connections because the solder reflow was too much. During the PCB assembly, we tried 2 methods; on the left side (mostly likely) of each board, Lucy applied a bit of extra solder manually to help the mics stick better. On the right side, I set the mics with just the initial amount of solder that made it through the solder mask. Here are the results for the boards’ mics that made the cut.
1: both mics work
2: right mic only
3: right mic only
4: left mic only
5: neither
It looks like the right mic technique may have had a bit of a slight advantage over the left mic, but honestly since the sample size is so small I’m not sure we can derive statistical significance from this. The survival rate of mics is 50%, but if we want both mics to work, the survival rate drops to 20%.
Since LED survival rate is 60%, the overall board success rate would be 30% if optimistic, and 12% if not optimistic (multiplying the survival rates because “and” condition). So optimistically we’ll need to build 4 boards, and non optimistically, 10 (expected value math). Then we apply backup calculations by doubling these amounts to get 8 or 20 boards. They will probably all cost the same amount so it’s not much of a cost thing as it is more of a “we need to make sure we have enough of the other components”. For example, our LEDs deplete the fastest since there’s 6 per board. We used up 30 of them for the prototype boards, so we have 70 left in our pack. If we are optimistic, we would have enough if we built 8 boards, but not enough if we want to build 20 boards. Prof Fedder gave us more microphones and says he has many more, so that probably won’t be our limiting factor. We also grabbed a bunch of the SMD resistors and capacitors, and only use like, 2 per board so we should be good there too.
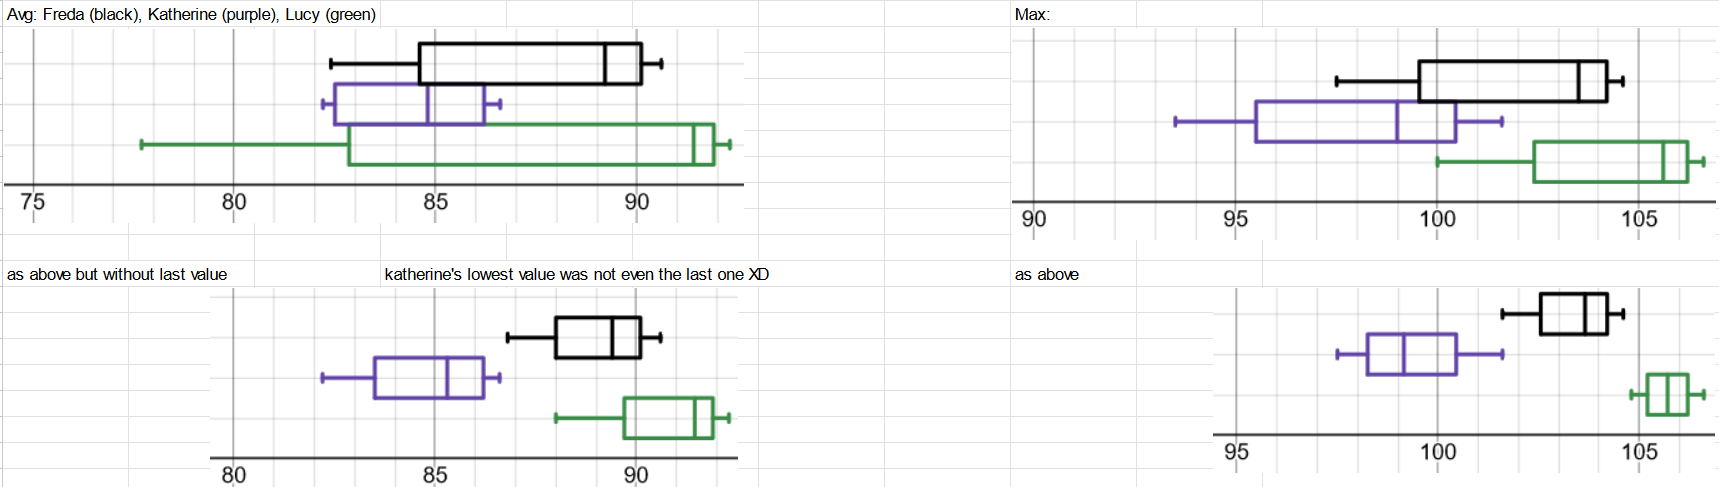
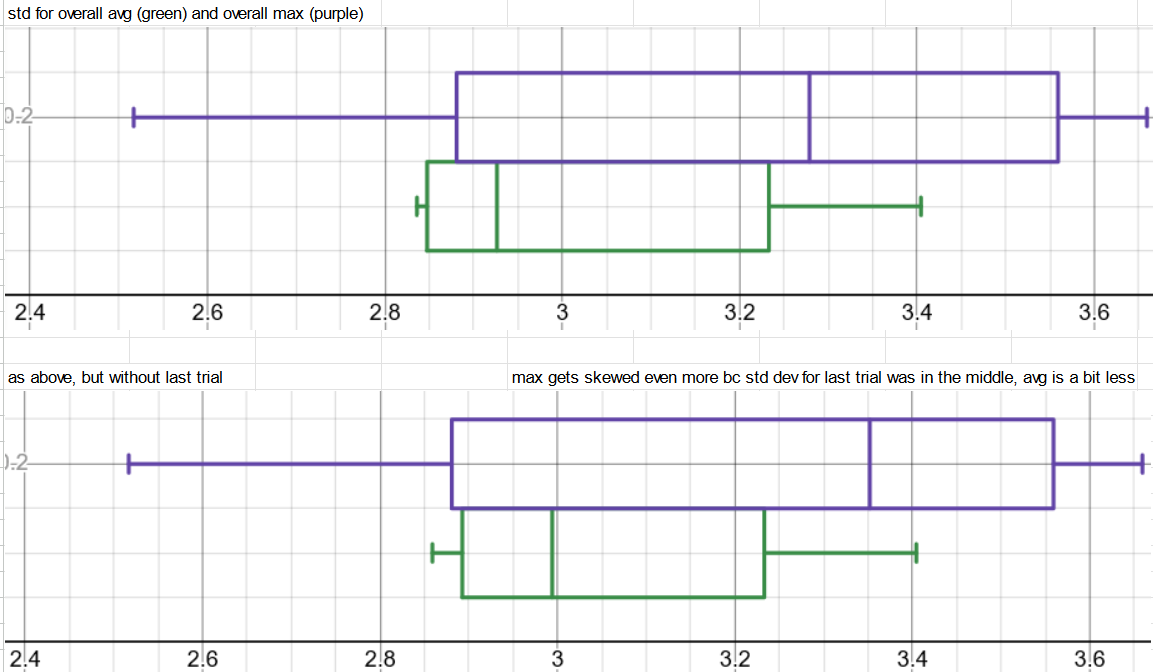
Then was the music recording session where, for the first time, we had both the professional decibel meter and our own DIY mics (uncalibrated). Hopefully, we would see some trends between them so we could have an idea of what kind of math is needed to calibrate our mics. I used board 1, since we established that both mics were supposed to work, and put the decibel meter and board right next to each other on the music stand in the middle between the piano and singer. Observations:
- FAST, Lo, dbA settings: during ambient noise, it’s pretty close (both in the 40’s), but when music starts, the professional mic picks up the noise way better than the board mics; think i spotted around 60 on the board mic when I moved it closer, which is still less than the 70s to 80s that the decibel meter says.
- FAST, Hi, dbC settings: ambient now around 60 on the decibel meter instead of 40, and music is around 80s to 90s. Board values still stay around the same range as last time though.
- Something a bit concerning: the left mic seems to be more sensitive and goes up to 60, but the right mic stays solidly at 48-49 the whole time, even though both of them are supposed to work and I assumed they’d be around the same sensitivity level? They have the same resistors at least. The left mic is closer to the singer, the right mic is closer to the piano, but that shouldn’t make that much of a difference? Maybe the decibel meter mic was nearer to the right mic which may affect things.
The code was sampling with delays at this point so we’d know the sampling frequency exactly. Later we just got rid of the delay to sample as fast as possible, and based on the timestamped CSV logs, it calculated about 1200 readings per second, which is abysmally slow compared to the range that singers and pianists use. So perhaps that’s why the mic readings were suffering from such a limited range/sensitivity during the music session. Katherine can tell you more about her plans for fixing this in her section.
Is your progress on schedule or behind? If you are behind, what actions will be taken to catch up to the project schedule?
Amazingly, I have actually finished all my tasks on time for once! I also have code that changes the color of lights based on mic readings. Since the mics are uncalibrated, the thresholds are bogus, but as a proof of concept, you can see the video in the team report where clapping changed the light color from yellow to red. We could add gradient colors to interpolate smoothly between the yellow and red (orange) through HSV conversions to show the user more precision in the readings instead of just “buckets”, but when we were testing, we noticed the lights were sometimes flashing between yellow and red so quickly that it looked orange already due to persistence of vision, so perhaps gradient is unnecessary and we can keep the code simple.
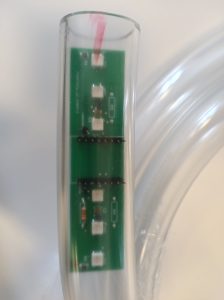
What deliverables do you hope to complete in the next week?
I can try physical fabrication of the bracelet with the hard PCB, just to have some practice. Perhaps I’ll run into surprise issues that I didn’t know were going to be a thing. In particular, since our plastic sheet got lost to the void, we only have plastic tubing right now, so I can experiment with how viable of an option that is or if we really need the plastic sheet instead. We can also test how much the mics are affected by being in plastic; although depending on how noisy the uncalibrated data is, I’m not sure if we’ll be able to derive meaningful results if testing uncalibrated.