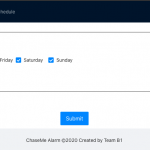
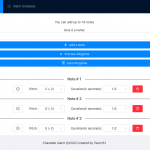
This week I finished all the other essential web app UI development(“create ringtone” page ). I also enabled local data to pass through between components(e.g. when you clicked submit on the form on “create alarm” page, it shows up on “alarm schedule” page, etc) by the use of component states and local storage. This means all pages can now load alarm/ringtone data dynamically.
This also means I am currently on schedule and the web app is ready for backend integration next week as planned.
Scroll down to the bottom to see screenshots of all 3 pages of the web app. But since there are musical components to the web app(e.g. when you create the ringtone, you can preview your ringtone or individual note; you can also preview the ringtone on “alarm schedule” page, etc, like what a normal built-in phone alarm would let you do), clone to this github repo(email me to grant you access), do “npm install” and “npm start” to locally host the web app. I realize ec2 instance shuts down my web app hosting after a while so if you want to interact with the web app, you need to clone the repo.
Here are a few things that did not really go as planned:
- Right now the “create ringtone” page supports a more narrow range of notes(6 octaves) than create 2 robot base can support(8 octaves). This is due to some problems with the audio playing library chosen, that after the 6th octave, it stops playing audible sounds. I did not have time to investigate into the reason yet, but since 6 octaves should suffice, I will look into this after backend integration, if I have the time.
- I wanted to make a more intuitive interface for “create ringtone page”, but since there is not enough time for it, I also have to put it in the backlog and look into it after backend integration(with database for permanent storage and with Pi).
My schedule(same as last week’s):
- week 8 (this week):
- create ringtone UI
- pass alarm data from create alarm page to alarm schedule page
- pass ringtone data form create ringtone page to create alarm page
- week 9 (next week):
- backend set up
- connect UI with backend
- connect web app with Pi


