Stephen’s Status Report for 4/30

The last task I need to finish before the public demo is the completion of the central module for our project, which will isolate the ESP32 and supporting circuitry from the user while they play the game. I spent several hours trimming down some wire headers and soldering them to a general-purpose through-hole breadboard which will help reduce the over size of the circuitry and also fix the connections in place so they cannot be jostled loose. Currently, I’m about 70% of the way done with this soldering, and this video shows the current functionality of that board:

Other than this, all I need to do is 3D print a small housing for the board once I’ve finished soldering it. This box shouldn’t be very expensive compared to the drums, as it doesn’t need to withstand any significant forces, which permits the use of thin walls. I’m expecting this module to cost around ~$15 when printed.

Regarding where I am in regards to completing these tasks, I’m confident I’ll be able to wrap everything up every next week. Most of my classes finished up this recent week with their last exam or a final project, so I have little else to work on other than these tasks, as well as the final report due at the end of next week.

Team Status Report for 4/23

This week was primarily spent performing our testing and making any last minute improvements that would be needed going into the final presentation. Each of our group members spent time improving/testing their individual portions of the project, but we also had a user feedback session Wednesday night with CMU’s Game Creation Society so that we could get user input into the state of our game.

During this session, users play-tested the game in a fashion similar to how the final product would be used and gave their opinions on what they felt could be improved on. Some examples of feedback included user’s feeling specific drums were less responsive and that the scroll speed/note density of the game was too much for the average (or even experienced) rhythm gamer.

Receiving user feedback in this fashion was also needed for some of our specific use case requirement tests, such as the set-up time of the game, so we gathered that information as well so that it could be presented during the final presentation next week.

Following the final presentation next week, the majority of the changes we still need to make to our game are just improvements or to already implemented features (such as the game’s graphics and drum-game communication), many of which are aesthetic in nature. As such, we should be on pace to finish this project by the upcoming final demo.

Stephen’s Status Report for 4/23

The majority of this week was spent on finishing the 4 drum modules and starting my testing in preparation for the final presentation on Monday. The following video shows the current state of the drum setup:

The main takeaways from this demo are that all 4 drums have had their PCBs soldered, and are situated within the drum modules. Furthermore, the wooden bases and rubber pads on top of the modules have been placed as well (although I have opted to only secure the bases in place with tape for now in case I need to disassemble and repair anything inside).

One thing I’d like to highlight is that the rubber pads do not depress heavily when pressure is applied, which is important for maintaining a good “bounce” when the drums are hit by the user.

Additionally, the other primary task for this last week was performing the testing needing for out final presentation this upcoming week. Between the user feedback session we held on Wednesday and specification testing I’ve performed on my own, I have almost all the data I need for the report. To recap, the 4 categories of testing related to the drums are user set-up time, compactness, latency, and recognition accuracy.

The user-setup time and compactness tests had good results, however I did have some issues regarding drum recognition and latency. Regarding recognition, some of the drums were noticeably less responsive than others (which was feedback I received during our user testing session) and to remedy this I placed small paper squares in the main force bearing column of the drum.

These paper squares bring the sensor and rubber pad ever so closer together, which increased the sensitivity greatly.

Regarding the latency, the main issue I encountered was not with the latency itself, but with measuring the output, as the serial monitor I used to check for messages from the drum only outputs results every 60 ms or so, which means I can’t reliable use it to check for latency around the 30 ms mark. I’m going to try a similar test using an oscilloscope tomorrow in the hopes that this will provide better results, however if that doesn’t pan out we may need to use a full latency test from drum to program instead of measuring the drum and program latencies in isolation.

Regarding where I am in the project, I feel confident in my ability to finish the product before the final demo, as most of the remaining tasks I have are mainly aesthetic improvements, such as gluing the drum bases on firmly and printing a module for the ESP32 to be placed in to isolate it from the user. Everything regarding the functionality of these drums is working, although I may be able to make some marginal improvements, and both of those tasks I mentioned earlier will be tackled next week.

Stephen’s Status Report for 4/16

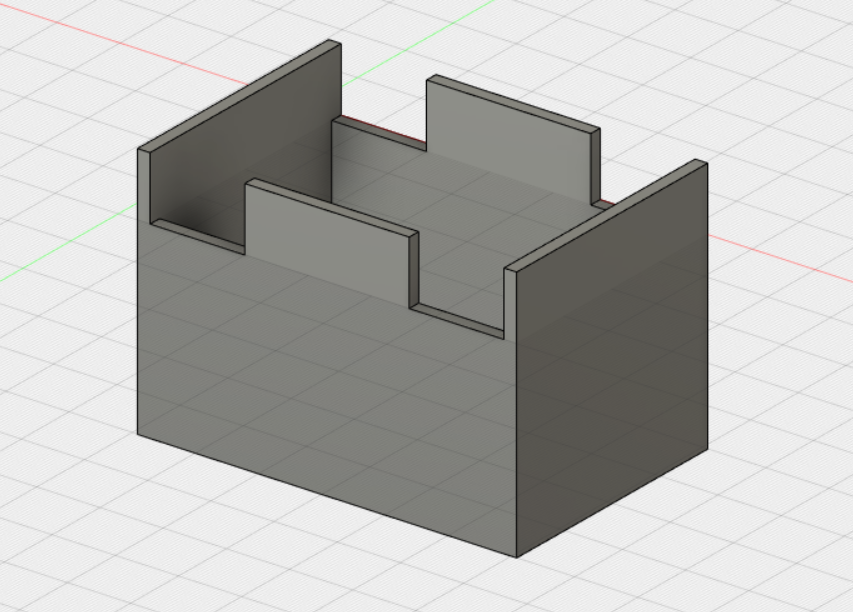
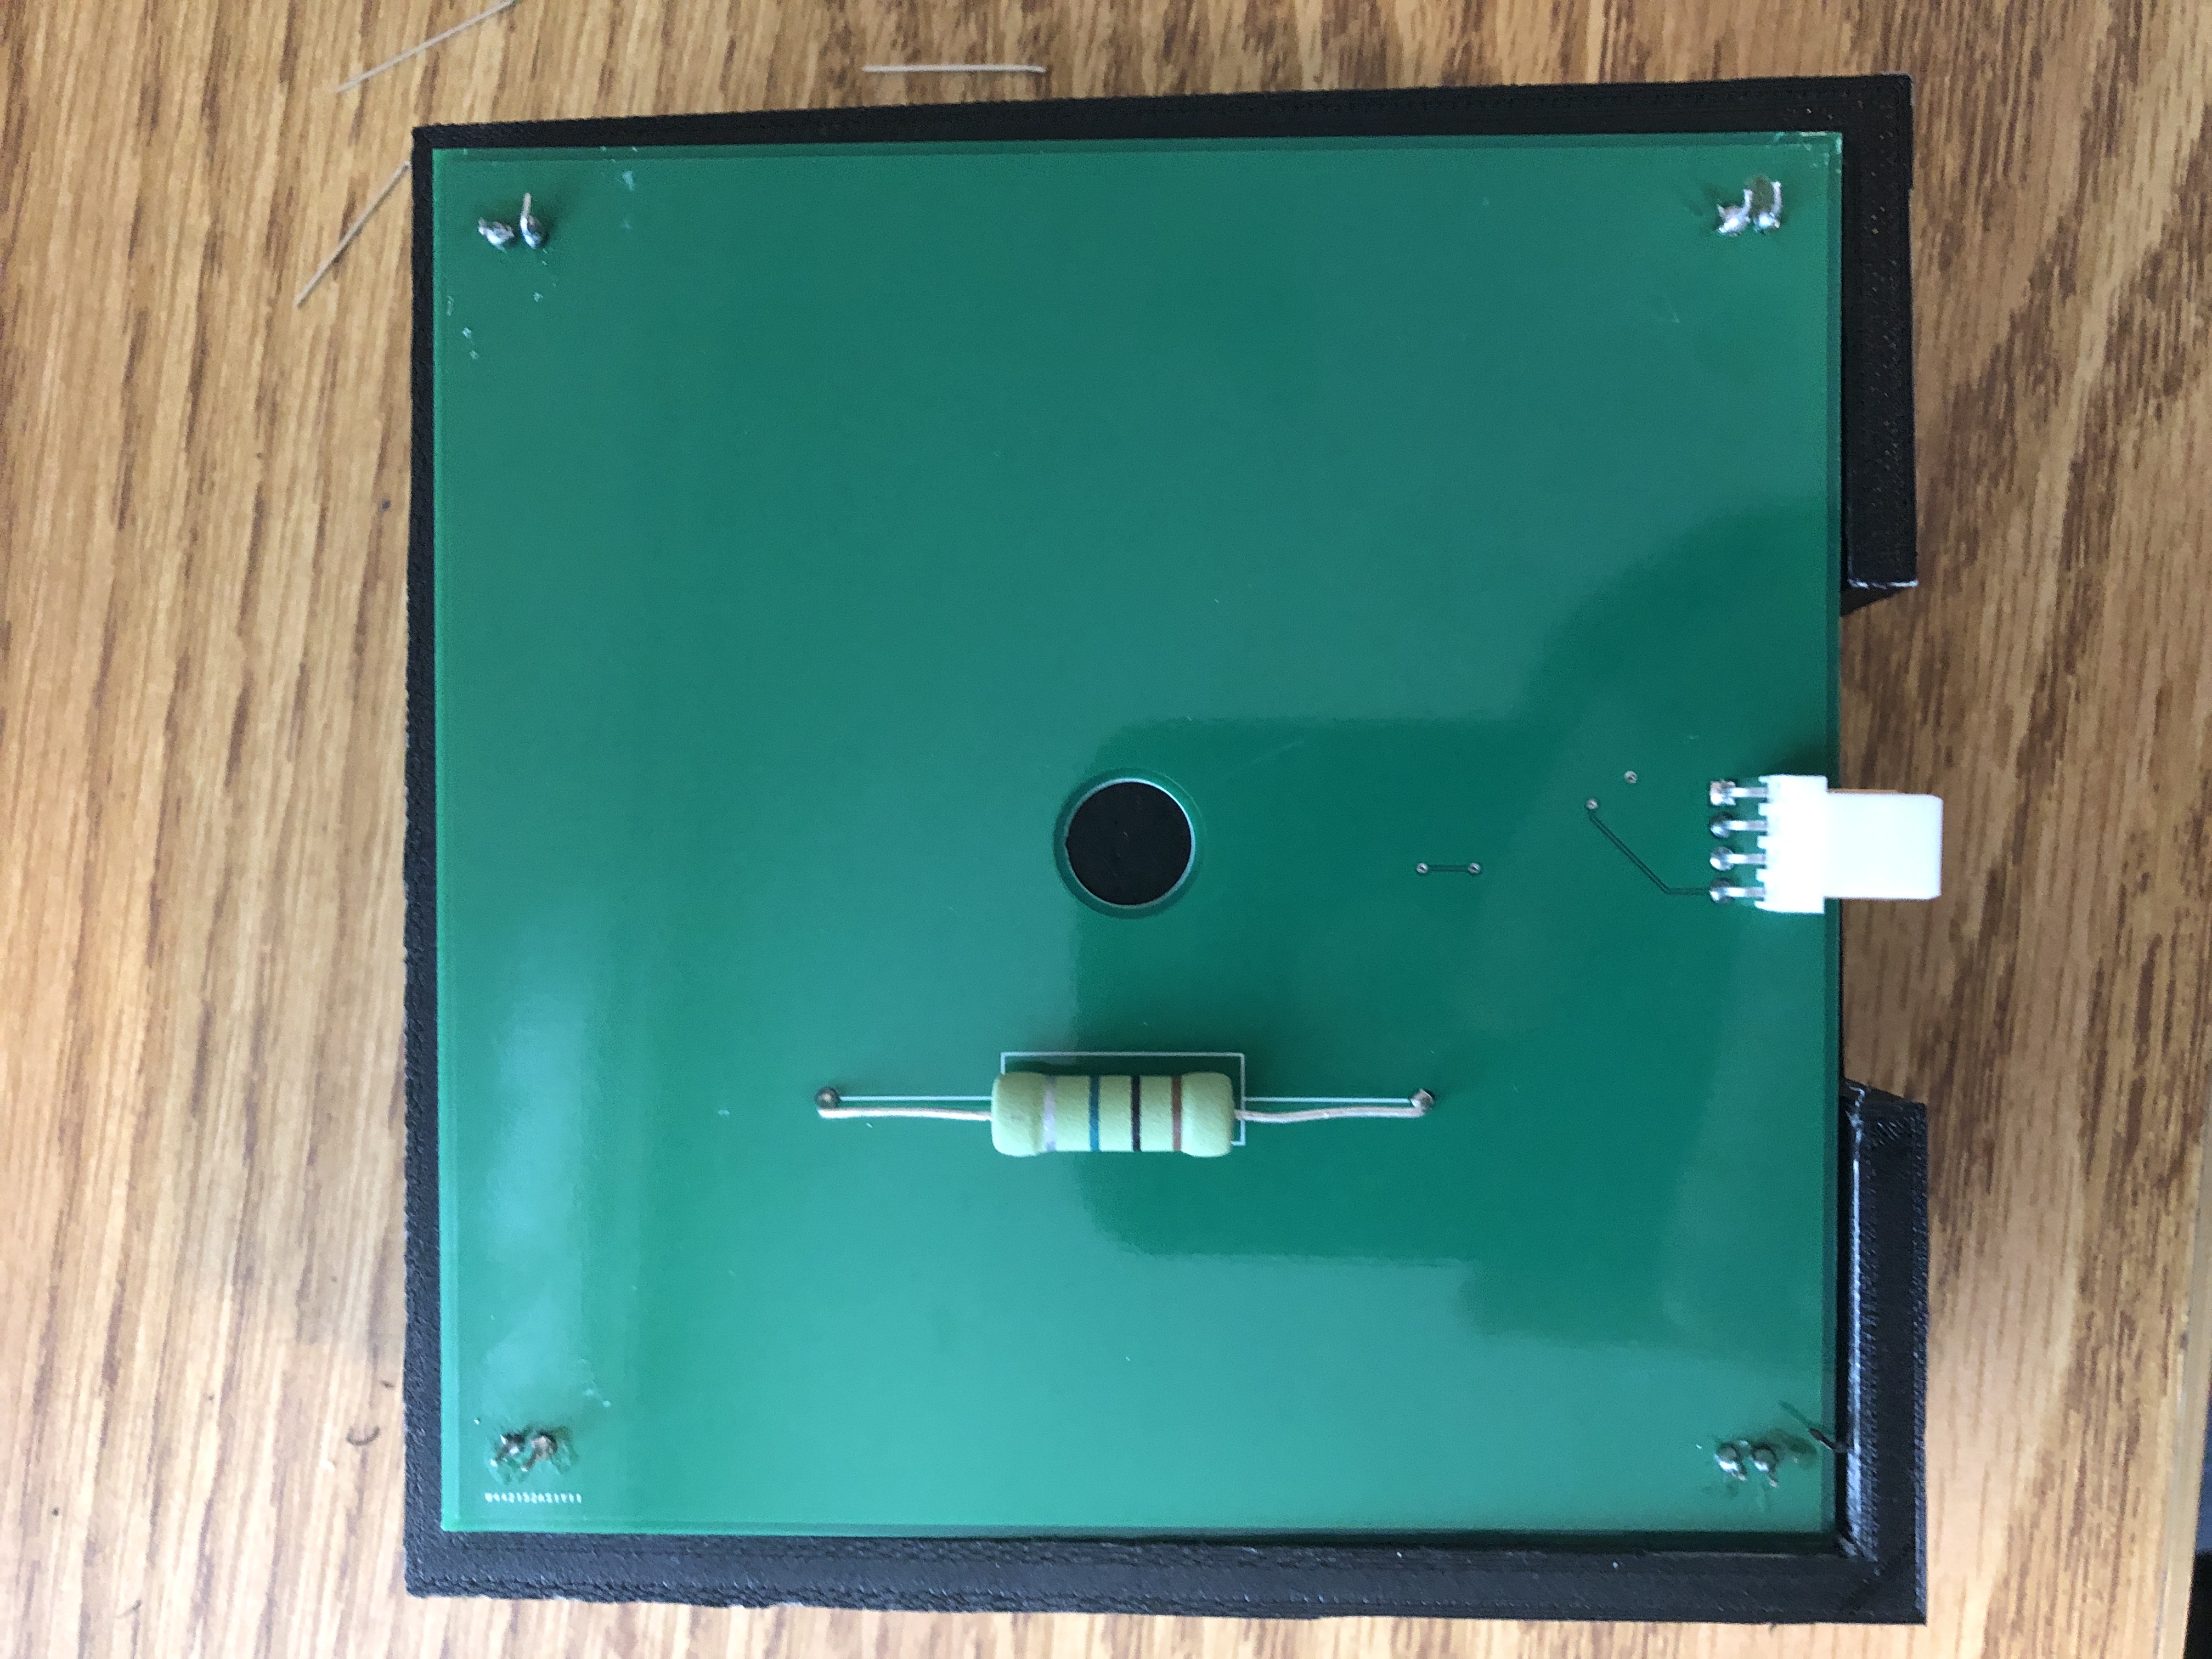
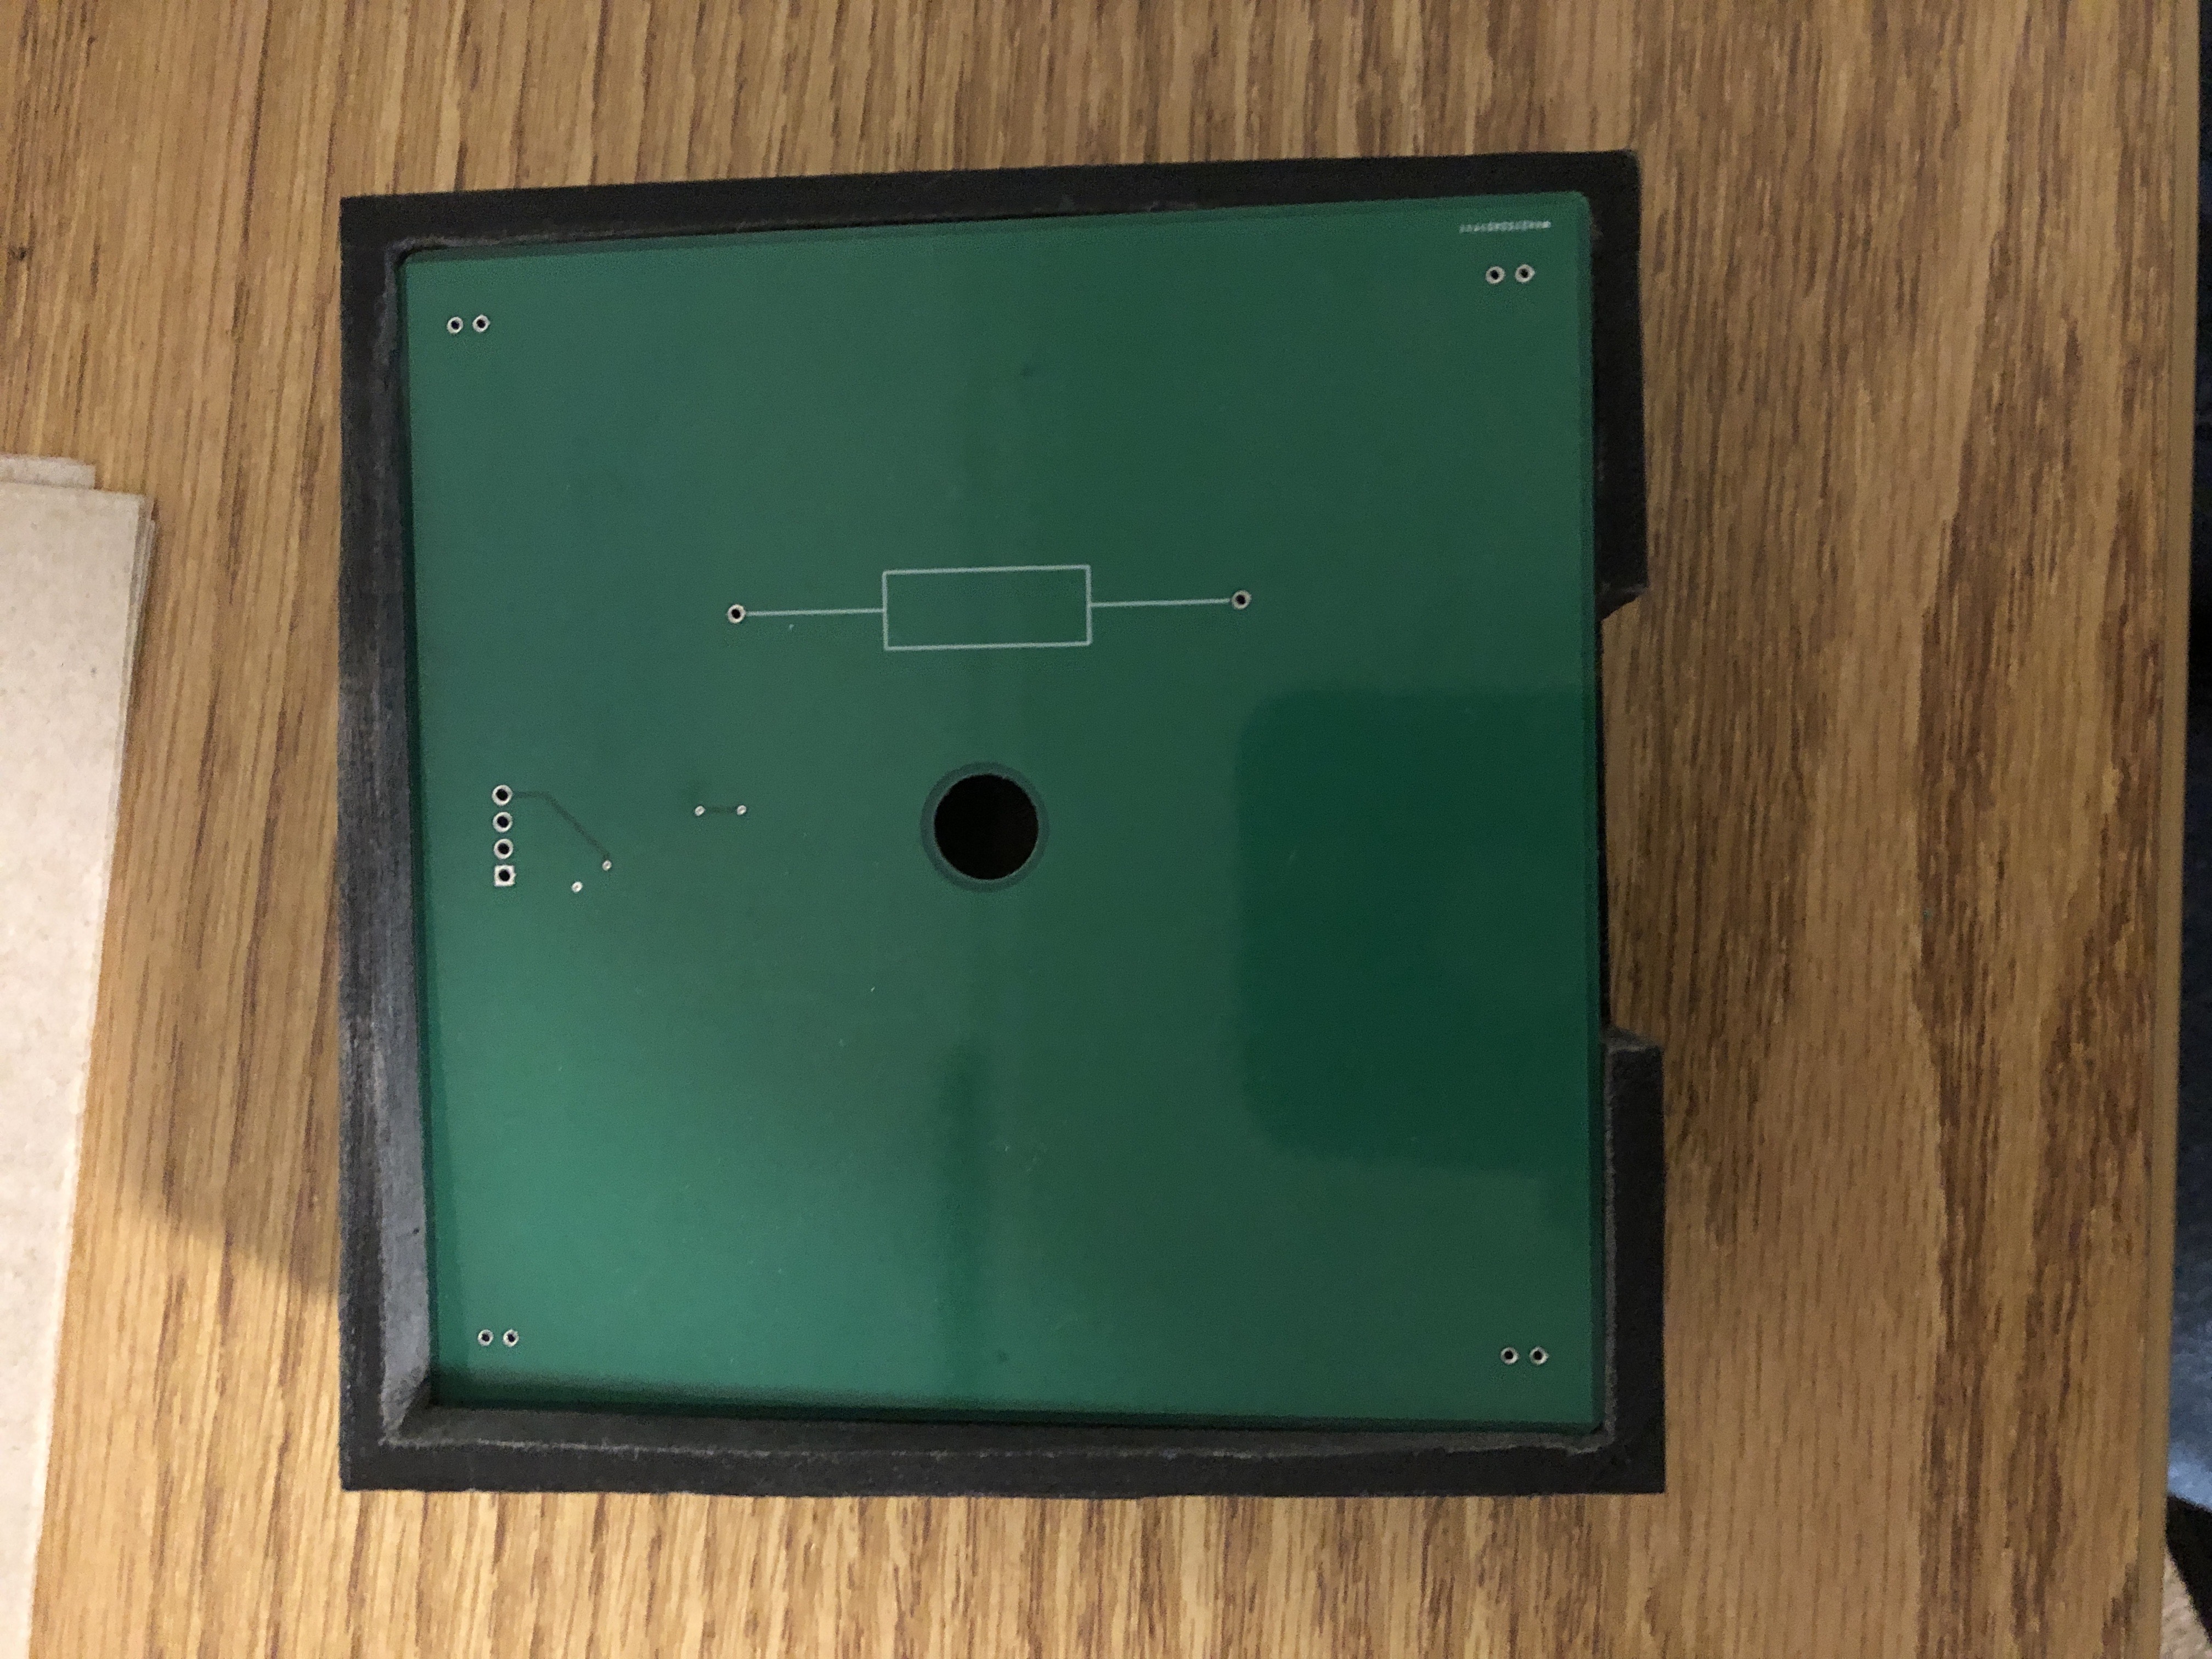
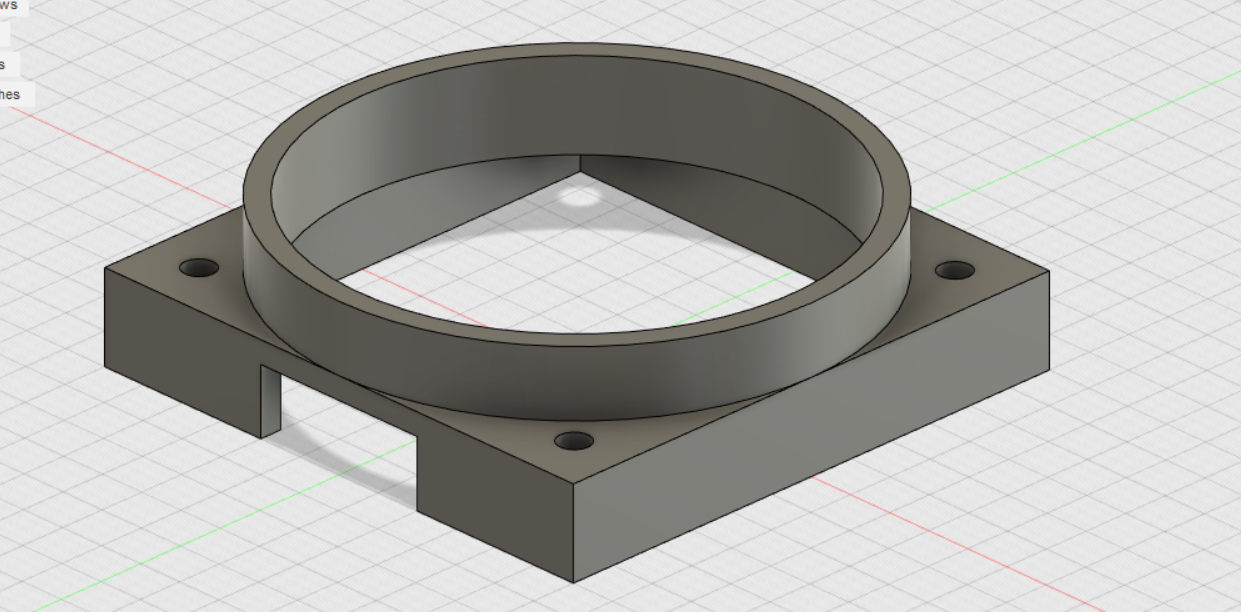
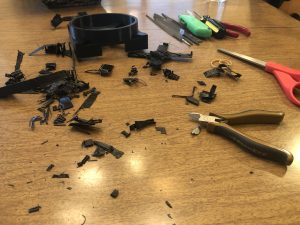
The majority of this week was spent creating the 4 final drum modules, which included soldering each of the PCBs and 3D printing the drum housings. As of right now, all of the PCBs are soldered and (mostly) functional and I’ve printed 3 of the 4 total drums (the dremel printers in TechSpark were occupied most of this week so I’m printing the last one this weekend).

https://drive.google.com/file/d/1T9HWiaXTrl7rABxwUqzvM6yQnoAtga9A/view?usp=sharing

https://drive.google.com/file/d/1MaeZnkecdY8ms-ItmZ9qRBaB1ymTffSX/view?usp=sharing

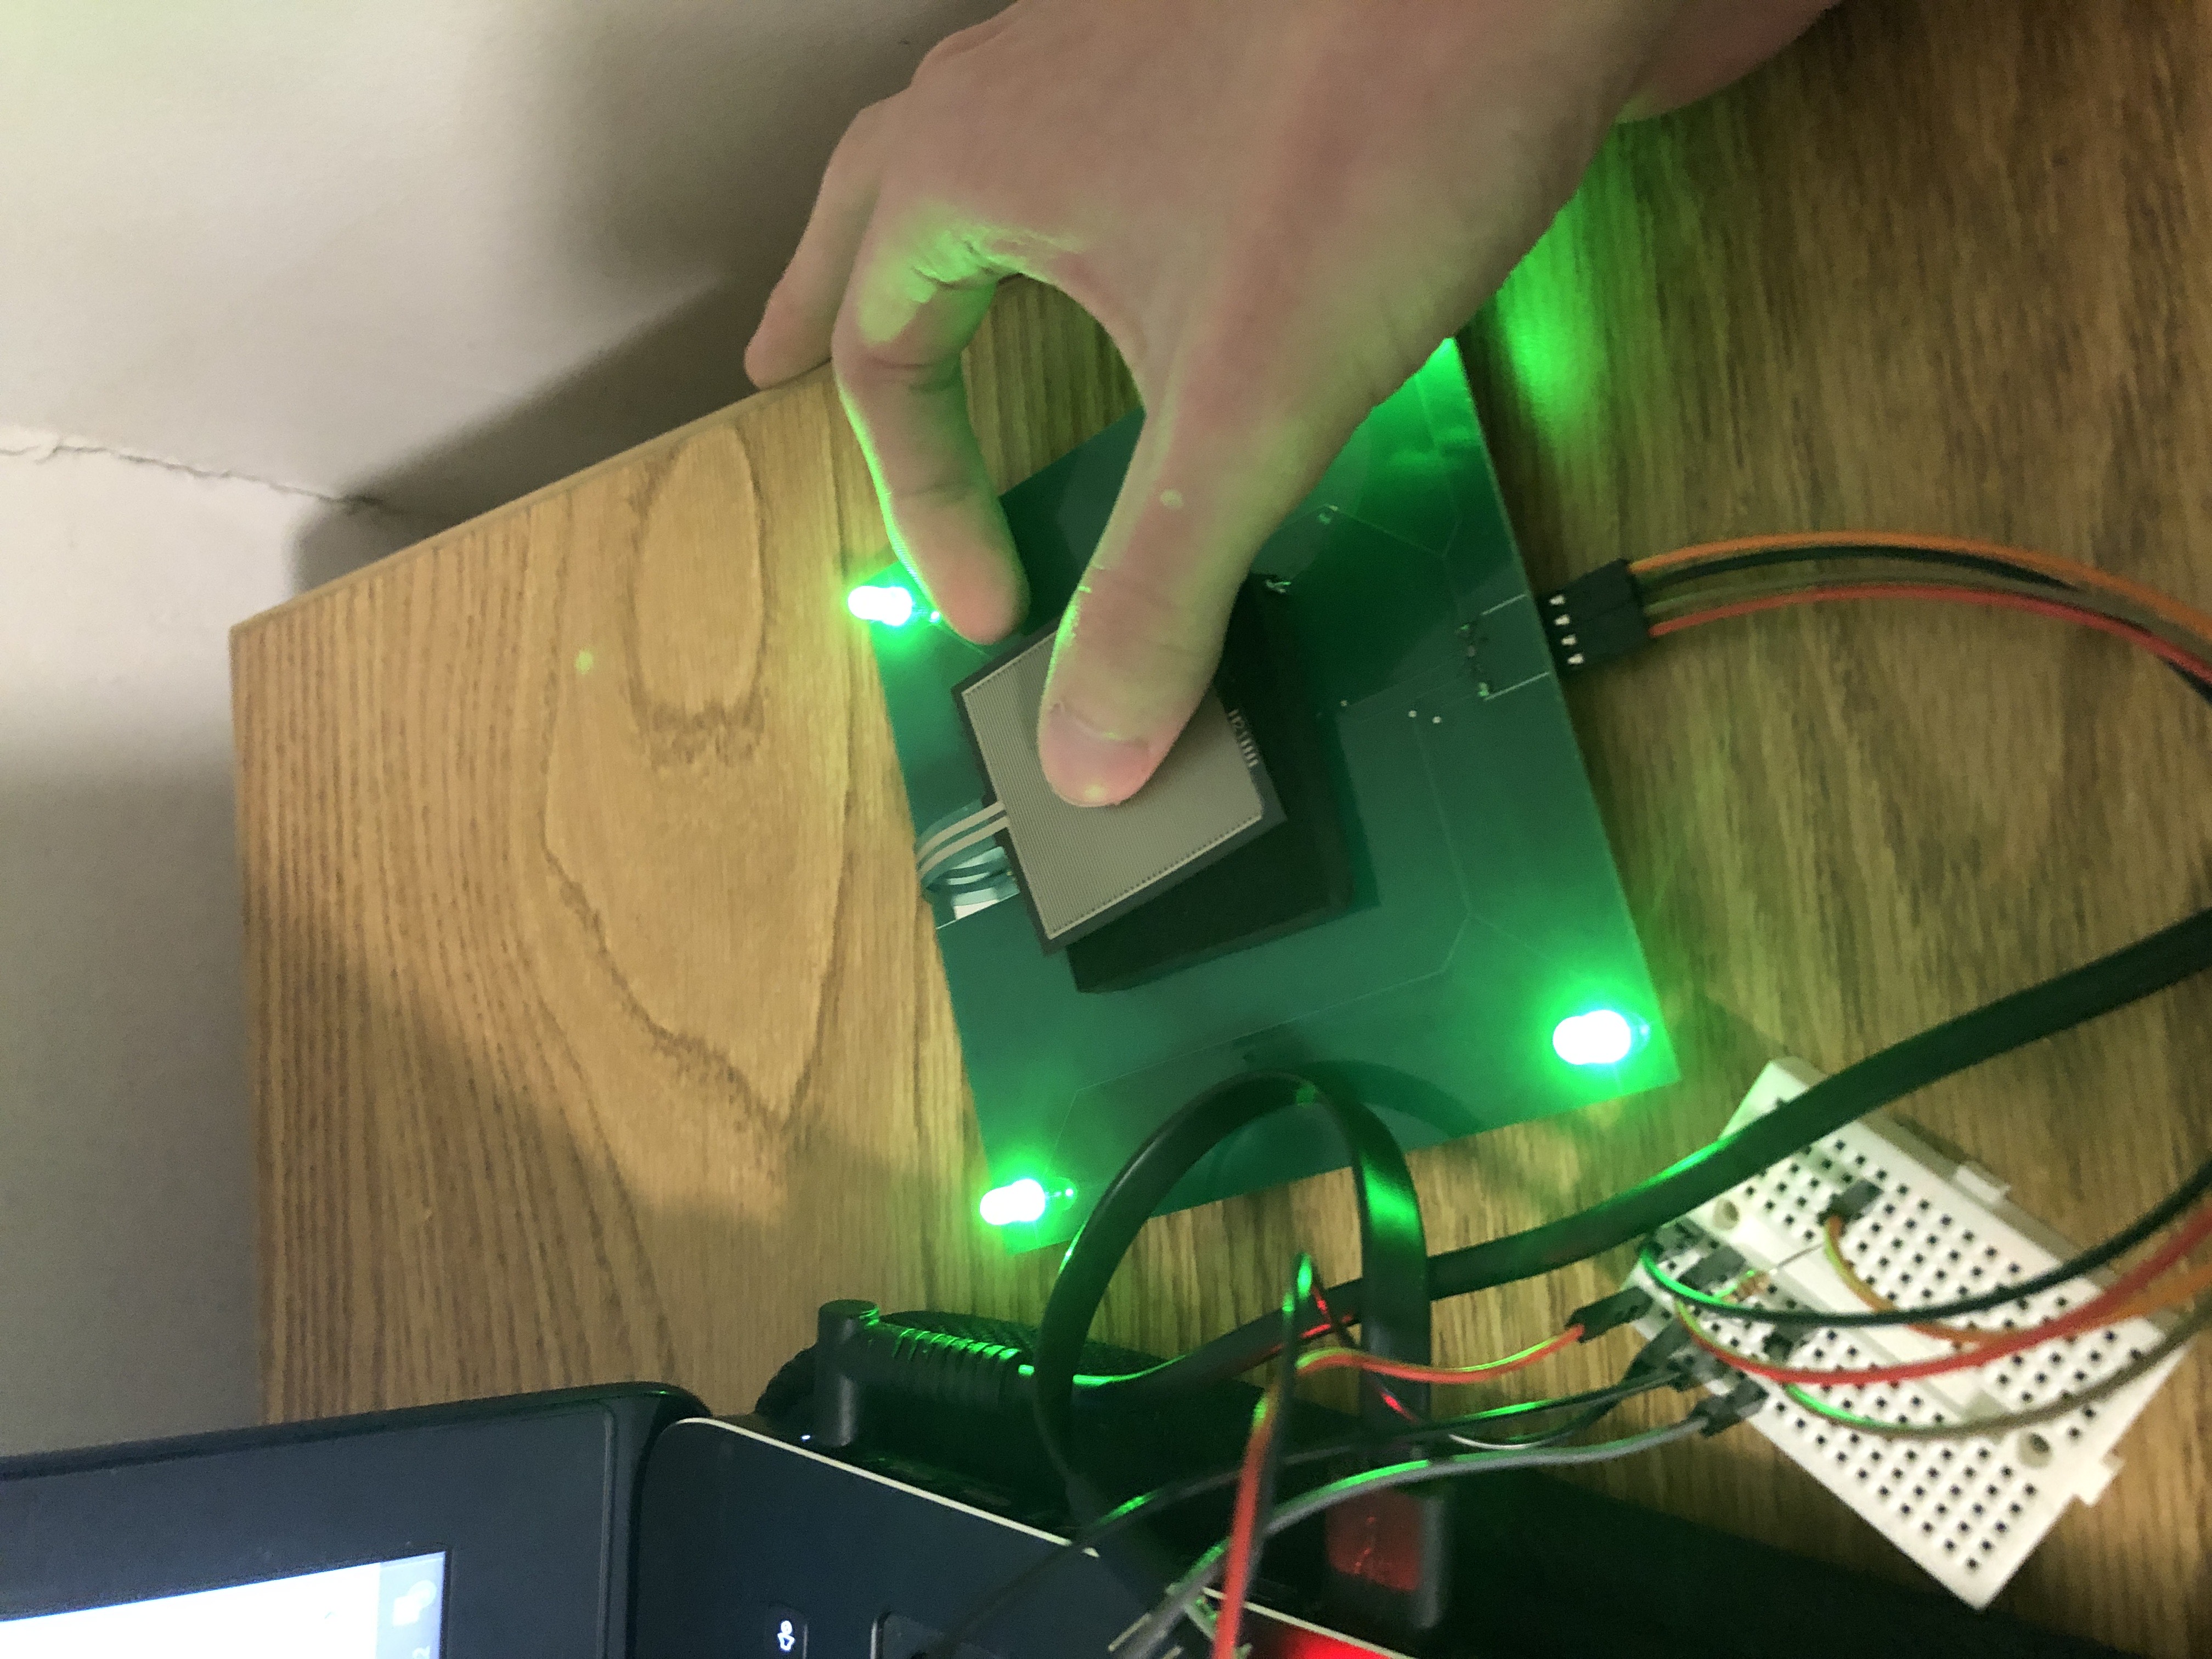
Currently, 2 of the 4 PCBs I’ve soldered are operating perfectly, with all 4 LEDs receiving feedback from the ESP32.

https://drive.google.com/file/d/1JVWyY8zhrED-C6ImZAhHwnd7PPoJRTvZ/view?usp=sharing

https://drive.google.com/file/d/1JCIqvQrxr8q2foaXEXLrCToc0U5jX7bv/view?usp=sharing


However, the two other PCBs have minor soldering issues with some of their LEDs, so I haven’t trimmed their leads and placed them into drums yet, as I want to resolder their connections properly.

https://drive.google.com/file/d/1CVYEODAB1FGnWKjktggWexWcM0r705bB/view?usp=sharing

https://drive.google.com/file/d/1Js0cr5h1dcjLEnHlIN9yyXimBuaWOt4X/view?usp=sharing

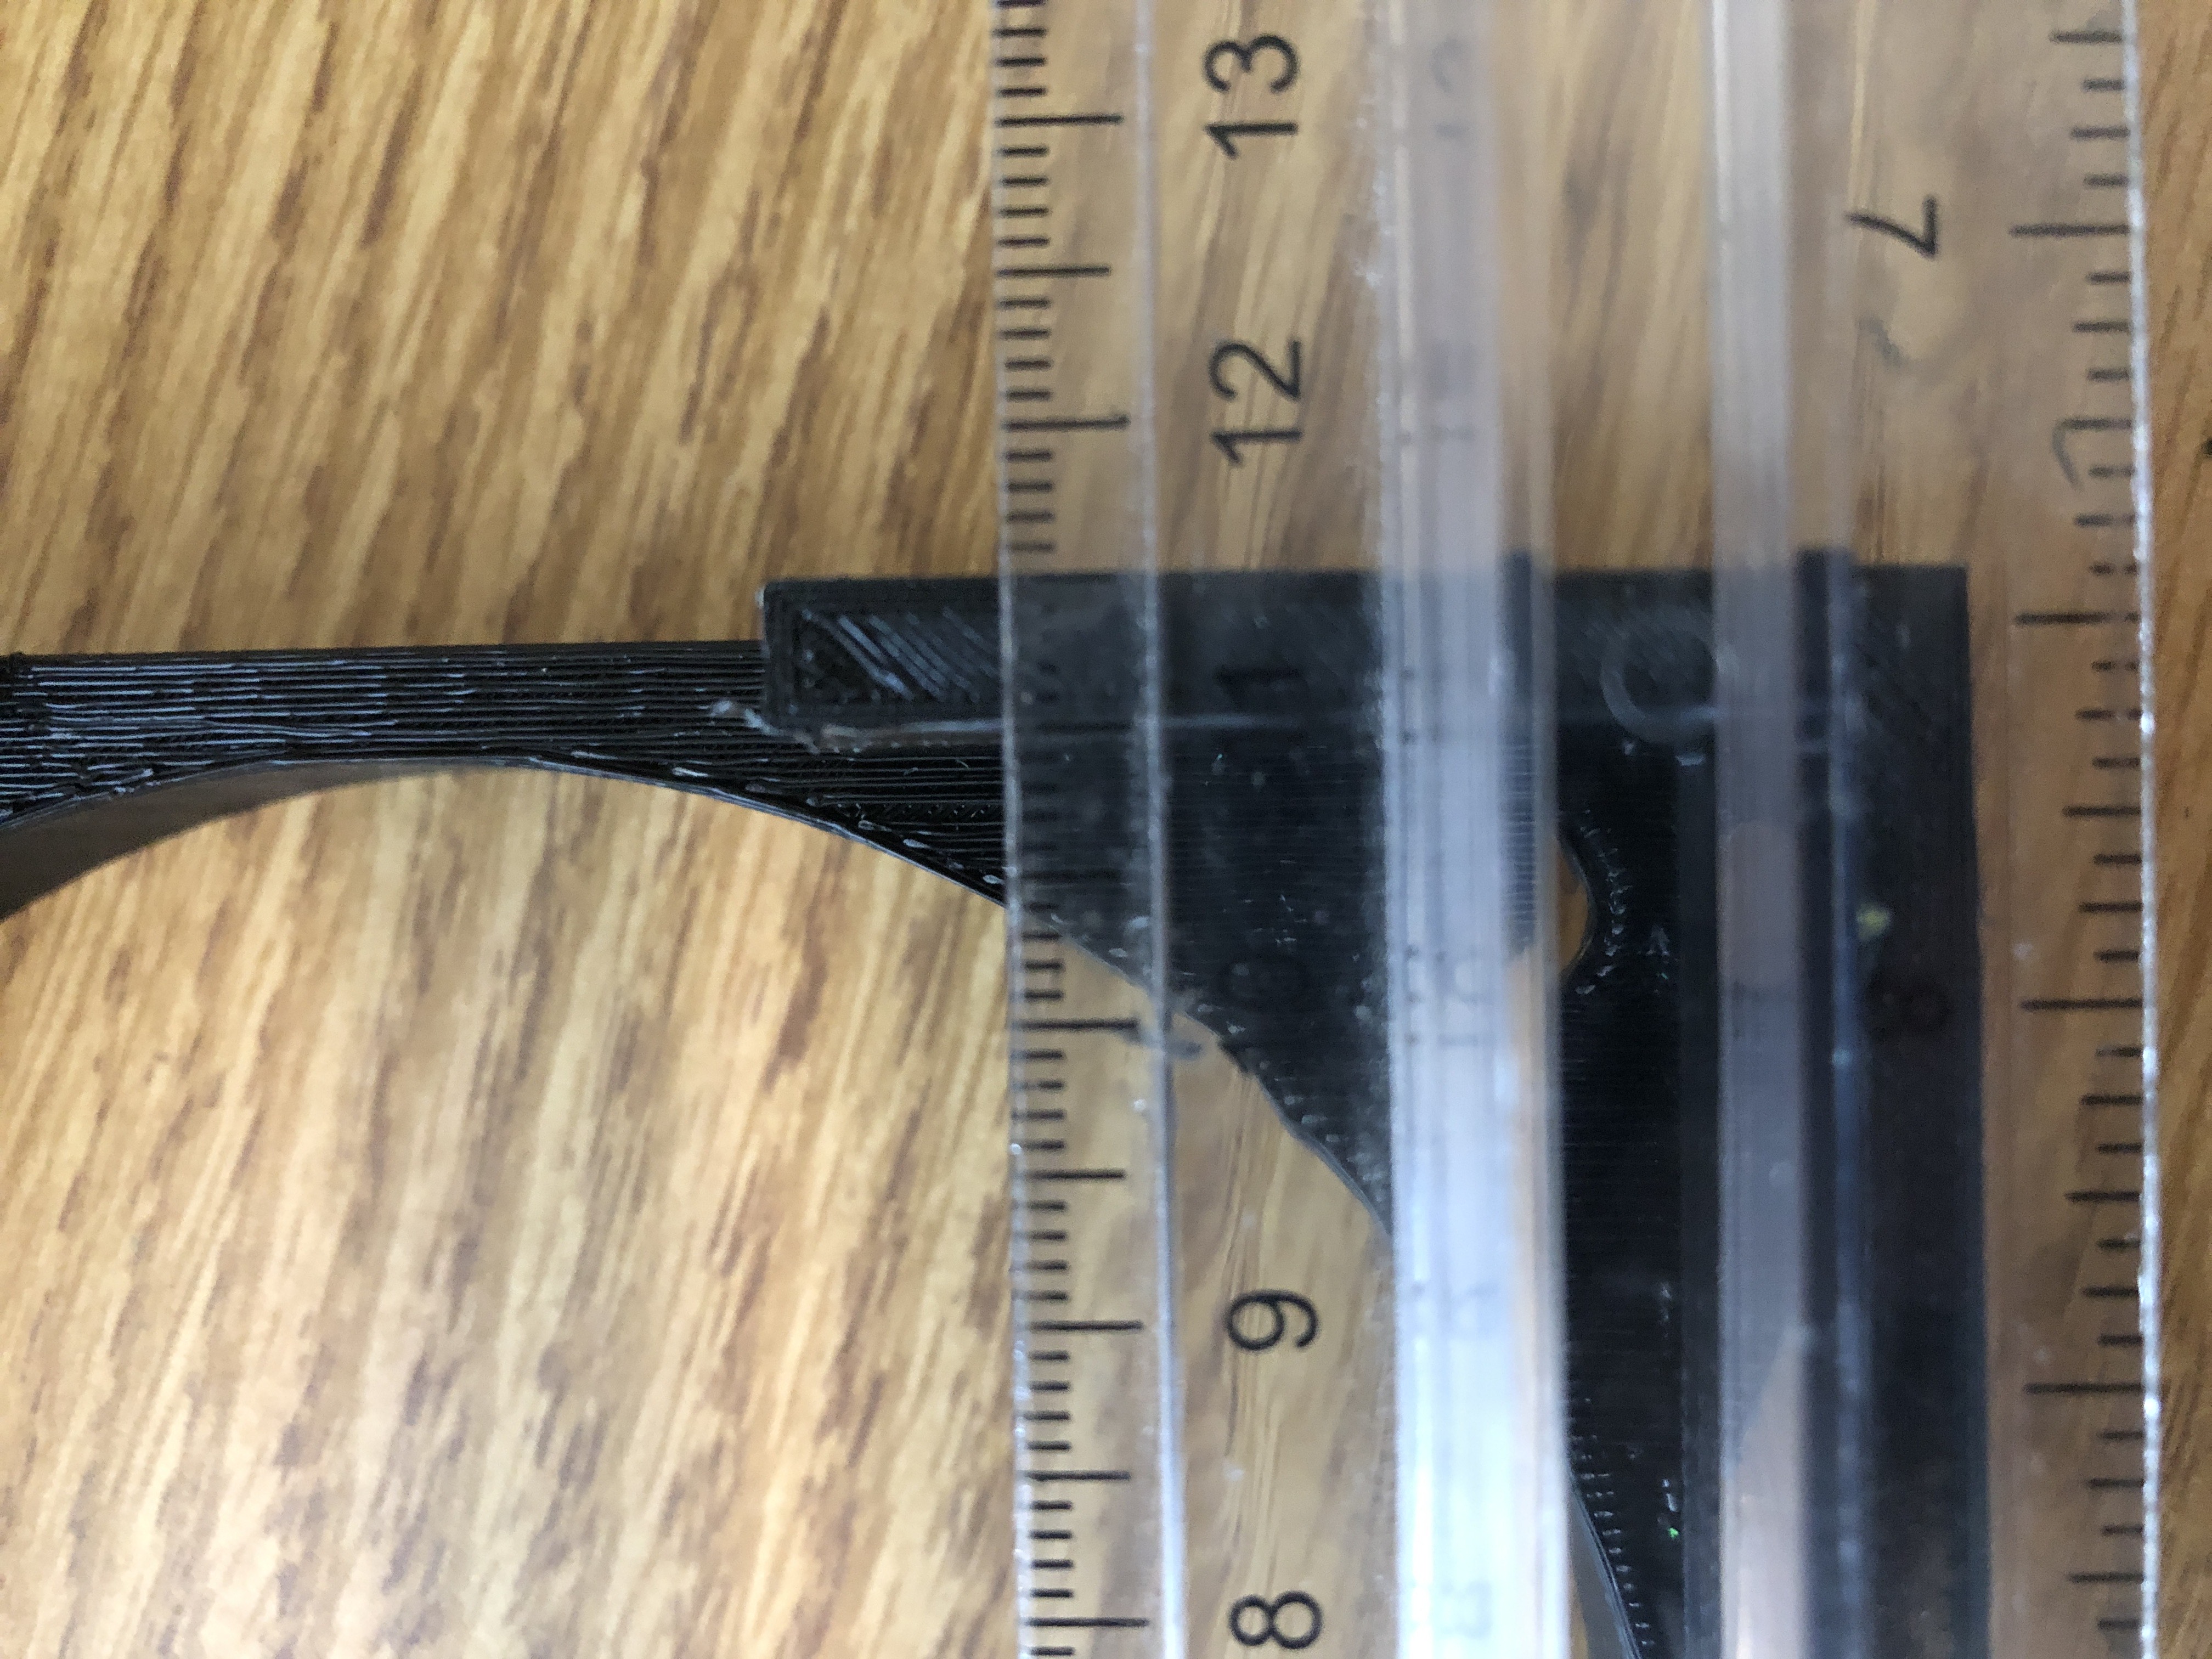
The issue which caused this is regarding the small solder beads depicted below, as all 4 LEDs on the PCBs worked immediately after soldering, but upon bringing them back to my dorm I realized that the LED leads were jostled in my backpack, which caused the hardened solder to break itself off from the PCB, ultimately disconnecting it from the circuit. To fix this, all I need to do is reheat the solder and form a better (more shock resistant) connection.

https://drive.google.com/file/d/1UG_pr4wPE5gjd6lG7UZG1uREZa2nyTdW/view?usp=sharing

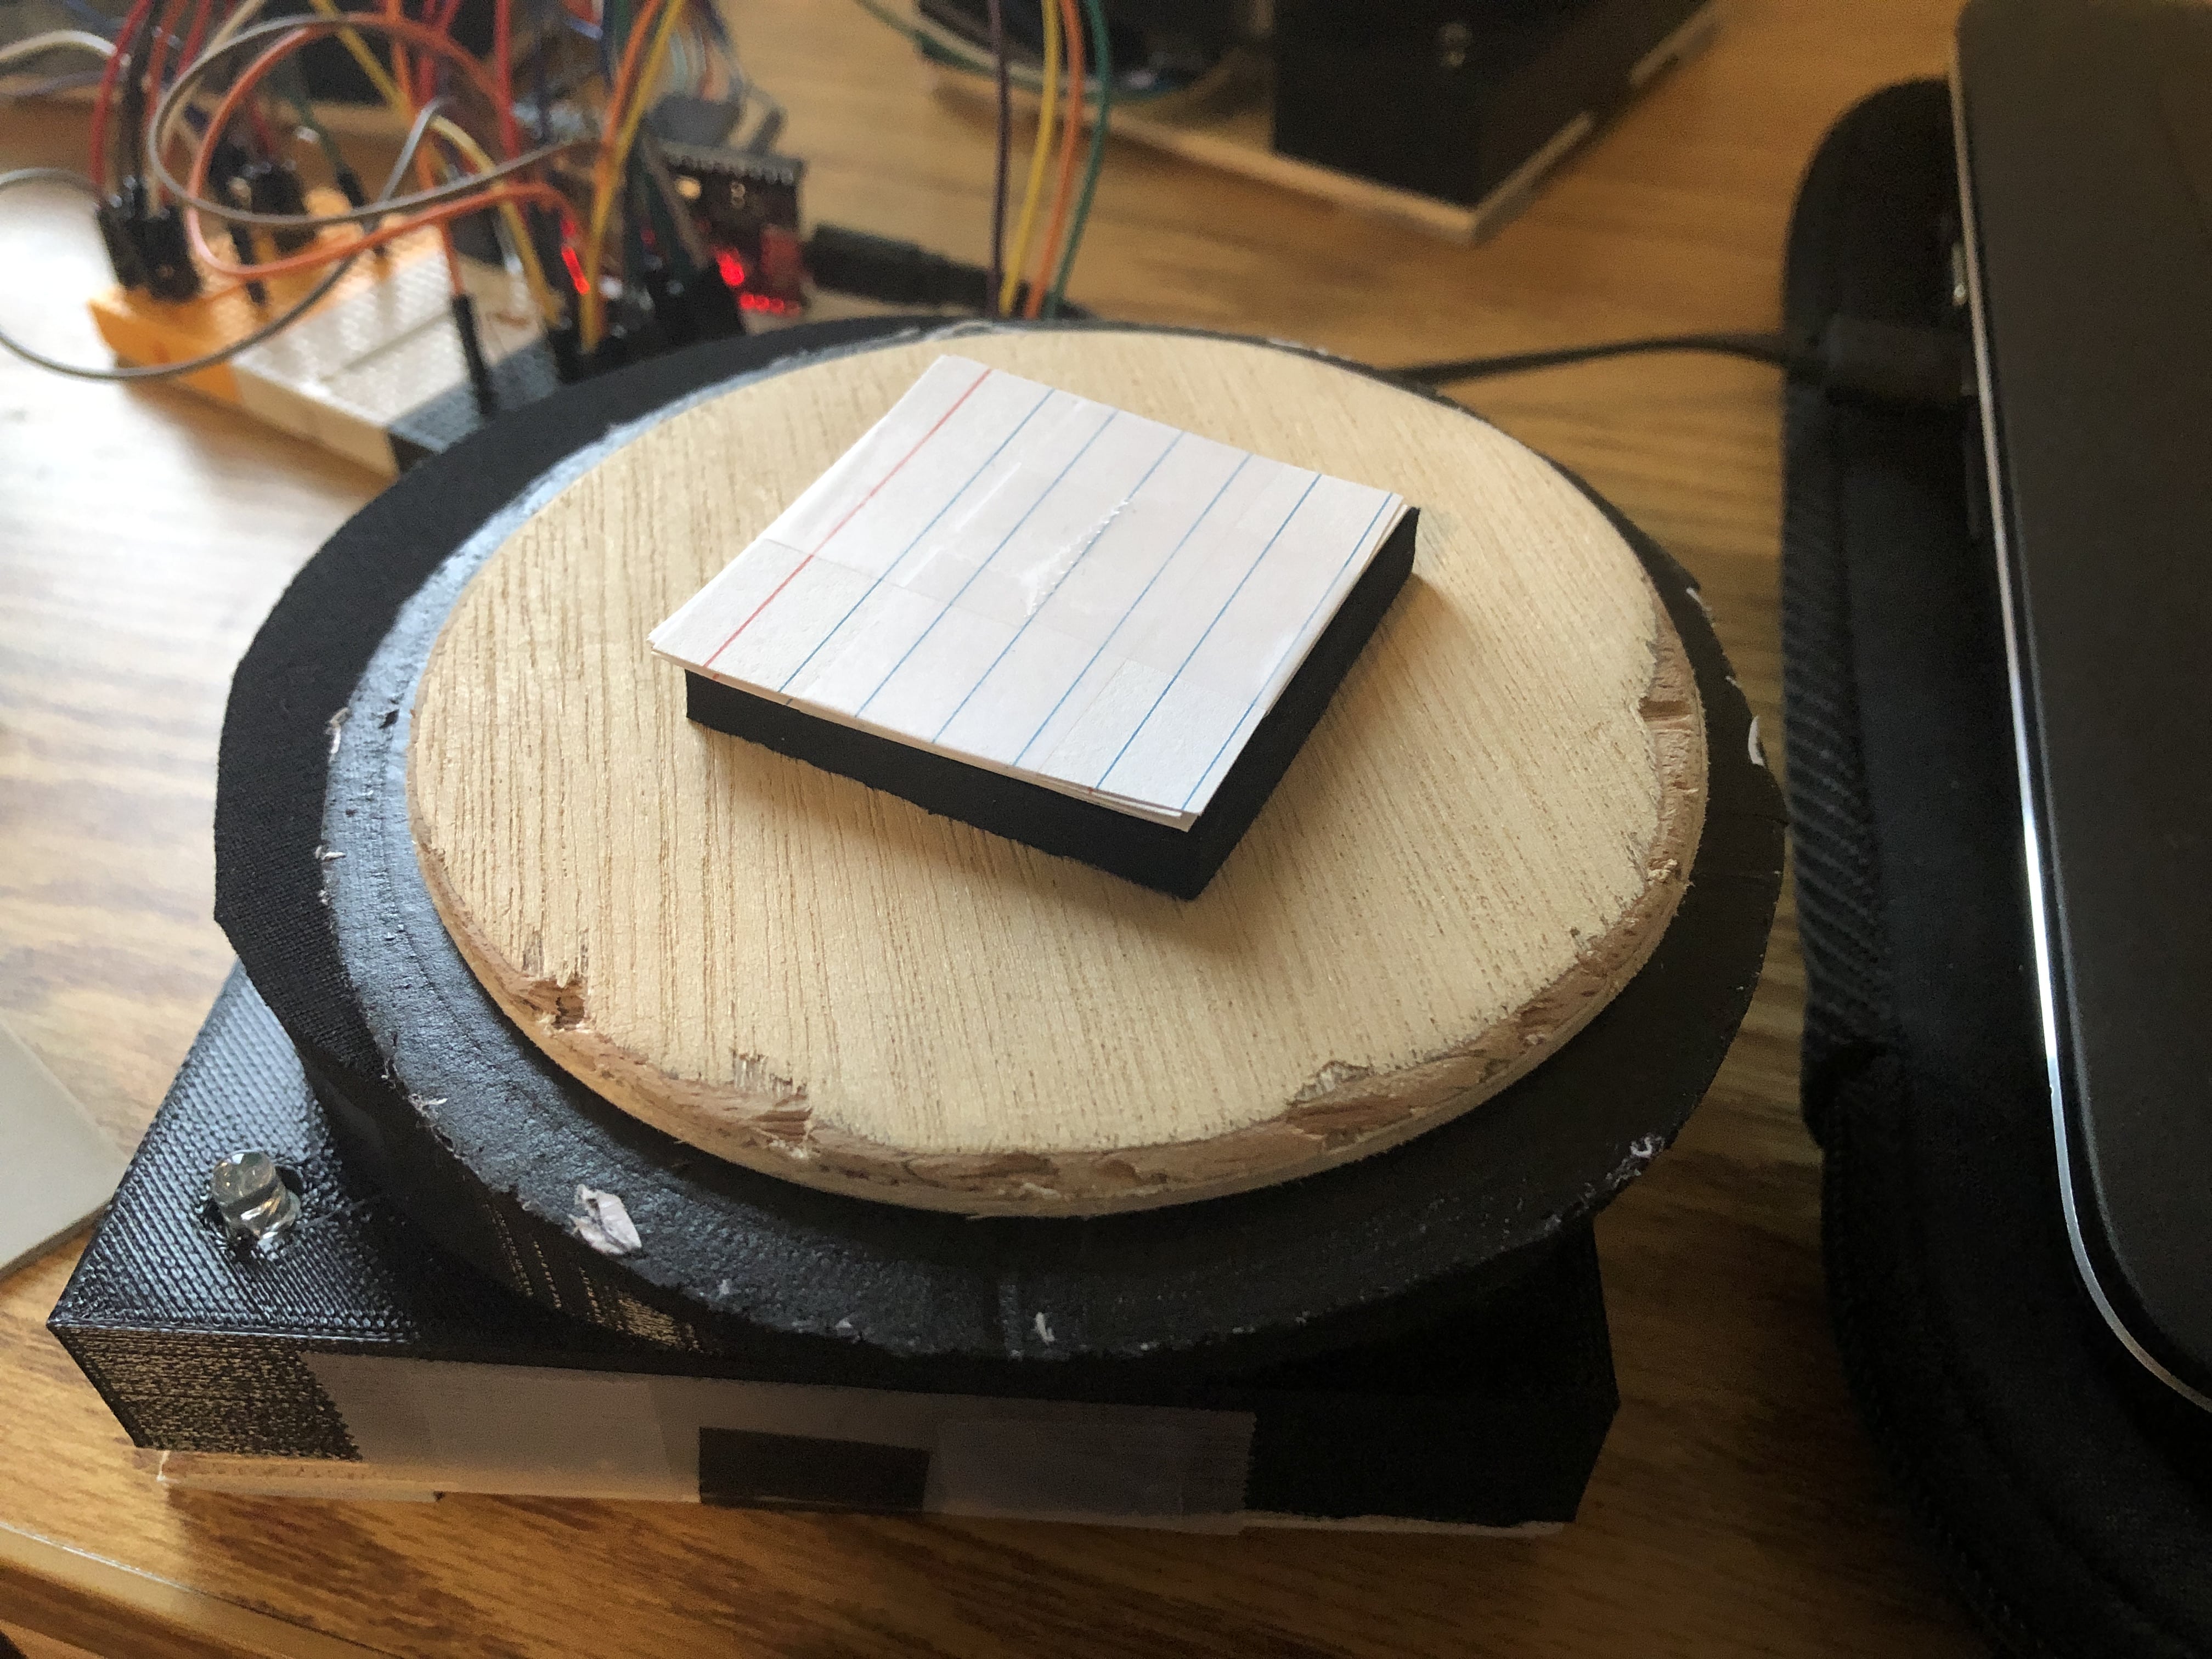
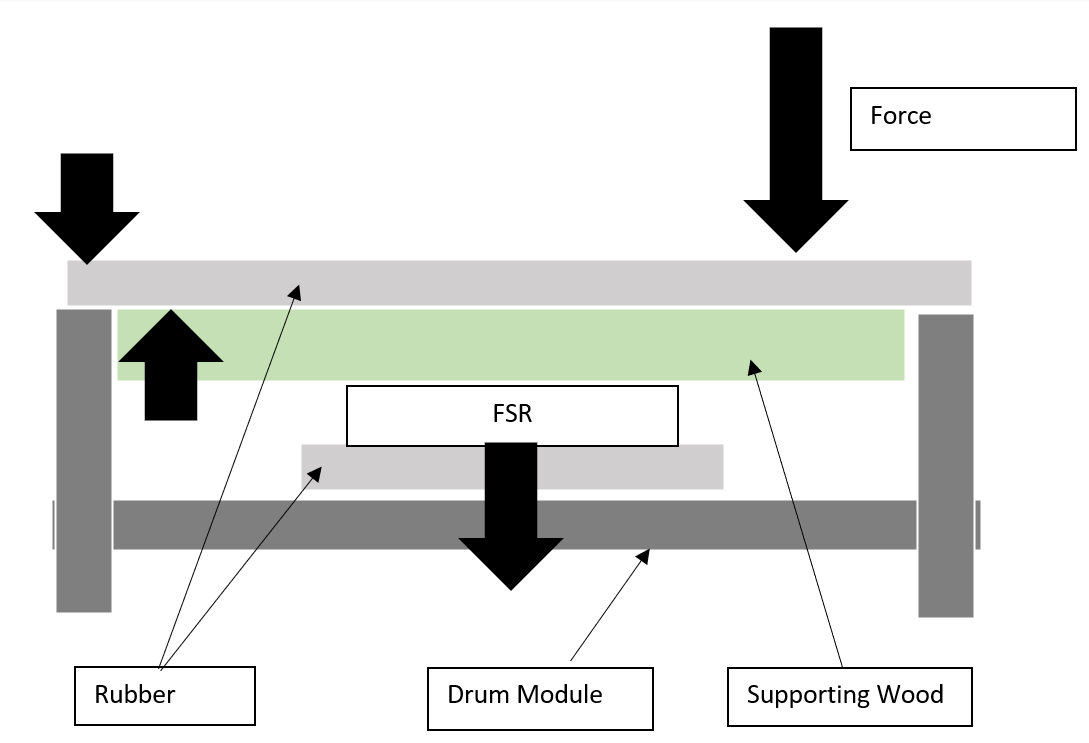
Lastly, I also acquired some wooden bases and supports for the drum modules this week. These bases will be fixed to the bottom of the PCB and to the drum’s base, which will provide support and isolate users from the drum internals. Additionally, I opted to use wood for this purpose as it was cheaper than 3D printing these parts and by using wood the bases will have more friction with whatever surface they are placed on, which should help prevent them from sliding around as much.

https://drive.google.com/file/d/1WeOysxl3Cy4t8Gs_CMU4My-Iigs1XabT/view?usp=sharing

https://drive.google.com/file/d/16U3gzAclyG5kQM6xwUeATo90310gCExV/view?usp=sharing

Regarding where I am in regards to our schedule, I think I’ve caught back up on pace this week/weekend, as once I’ve finished printing the last drum and resoldering those PCBs, the drums themselves will be in their finished state (barring some aesthetic improvements possibly) which will allow me to perform some needed testing this week. I do also need make a housing for the ESP32, but that will be purely to isolate it from the user rather than having a major functional purpose, so all I really need to do there is fix the ESP32 in a small box with holes for it’s wires, which shouldn’t take much time.

Stephen’s Status Report for 4/10

The majority of this week was spent preparing to print the final drum modules, as earlier this week the PCBs arrived from PCBway, and after soldering the components to verify that they perform as expected, I was ready to 3D print the final drum design. The only change I made from my recently posted drafts was to reduce the thickness of the top wall of the housing from 5 mm to 2 mm. This is mainly to allow the LEDs more room to stick through the holes in this layer, as I hadn’t originally accounted for how the stubs of the other through-holes components may prevent them from getting as close to the roof of the housing as the PCB would naturally allow.

The print had reduced scaffolding and height compared to the demo design, which brought the cost down from $56.50 previously to just $36.00 for this final version.

However, after clearing the scaffolding, I encountered an issue with the design’s size, as although both the drum’s internal cavity and the PCB measured 11 cm, the PCB was slightly too large to fit within the drum.

Since this size difference was less than a millimeter, I’ve been trying to sand down the interior of the drum enough to allow the PCB to fit. However, although the difference in size has shrunk from my efforts, the PCB is still unable to fit smoothly even after several hours of sanding.

I still believe this drum module is salvageable, as I was able to shorten the difference greatly, however I’ll need to dedicate more time to sanding or use a tool within TechSpark to assist me in doing so. Going forward, I plan on reducing the side walls of the housing from 5 mm to 3 mm for the other three drums, with all of the gained space going to the inside of the module. This may give me too much room on the drum’s inside, however it will be much easier to remove the additional space rather than to create more through sanding.

Regarding where I am in regards to our schedule, I am now slightly behind where I had hoped to be after carnival, as I was hoping to have a fully functional final module ready going into this week. However, This is not a major delay, as if I am able to perform a successful 3D print tomorrow with the new design I’ll only be a day behind where I expected to be. Other than that, the rest of this week will be focused on finalizing the drums and the Arduino code which communicates with them, so that hopefully I’ll be able to assist with other tasks going into the last few weeks.

Team Status Report for 4/2

Over the course of the previous week, the two primarily tasks we’ve worked on as a team were the modification of the C++ codebase so that it could function (and therefore be useful in testing) on Windows machines and the integration of our individual project components into a functional device that replicates the end-goals of our project.

Regarding the C++ codebase transfer, we wanted to make sure the codebase was operational on Windows machines, as up until this week we had only ever tested it using a Mac, and being able to run the code on Windows would make certain integration testing steps (such as Shreya testing Json files in the program) much easier. Unfortunately we did run into some issues derived from specific libraries, and although we have yet to resolve those issues for every library currently in the Mac version, the only ones we have yet to fully integrate aren’t integral to the code’s operation, so it was possible for us to display the beatmaps as a series of notes in the C++ game. The problematic library that we had to remove was related to audio, which is an integral part of our game’s design even if the code can run without it, so in the following weeks we hope to resolve that issue as well.

Regarding the integration of our individual modules, we’ve connected the three individual subsections (Shreya’s beatmaps, George’s C++ code, and Stephen’s drum module) into a singular system so that we can verify the full information stream of our project. This is in preparation for the interim demo next week, during which we hope to show an unpolished version of how we intend for our final product to function. Going into next week, we hope to further polish our system with improved beatmaps, visuals, and hardware modules before the interim demo, but we also need to make sure we don’t include any new/developing features into our system that we haven’t had the time to verify the accurate functioning of yet, as they could fail unexpected during the demo, preventing us from demonstrating the parts of our project we have functioning/meeting our expectations.

Regarding how this progress fits into our overall timeline, we are on pace with our expectations, but there still exists a good amount of polishing we need to perform before we’d feel comfortable calling our project a “game” like our end of semester target requires.

Stephen’s Status Report for 4/2

Over the course of the last week I’ve been primarily working on getting the C++ code to work on my Windows computer, as well as prepping for the upcoming interim demo on Wednesday 4/6.

Although last week I mentioned that I was expecting the PCBs I had ordered to arrive, I had actually misread the manufacturing completion date as the shipping arrival date. The true shipping arrival date turned out to be 4/4, so I haven’t gotten my hands on the PCBs yet, which has prevented me from soldering the components and printing the final drum design like originally planned.

As such, I’ve mainly been working on other minor tasks in preparation for next week. For example, both I and Shreya spent some time working with Visual Studio 2022 in an effort to get the C++ code working on our Windows machines. We did manage to get it working eventually, but only after removing an audio library, which will be necessary in our final product and so we’ll need to find a way to incorporate it back into the Windows version of the codebase later.

Additionally, I’ve been prepping the demo drum module for use in the interim demo. A video of such can be seen here:

When pressing the drum, the ESP32 simultaneously sends a serial signal to the computer (to be read by the C++ code) while also powering the feedback LEDs that give users a physical means of knowing their hit was detected. Other than improvements to the design/layout, this is exactly how the final drum module is planned to function.

Other than those two tasks, I’ve also been working on some modifications to the ESP32 code to handle multiple drum inputs as well as designing some drafts of what the ESP32 housing will look like. Due to the cost and time required to get custom PCBs, that likely won’t be feasible for the ESP32 module. As such, I’m planning on using a combination of breadboards and internal wiring to achieve the needed stability and connection quality with the ESP32.

Regarding where I feel this progress is at, I think I’m on schedule as what I have currently is sufficient for presentation during the interim demo next week. Although I would’ve liked to have the final drum module/PCB printed, soldered, and assembled together by then, I may still be able to do so depending on when the PCBs arrive next week. Once I do get that final module printed and assembled, most of the remaining objectives I’ll have going forward will be related to integration and helping out on other tasks where I can.

Stephen’s Status Report for 3/26

As mentioned in my previous status report, this week’s tasks were primarily focused on designing the finalized version of the drum module which incorporated what I learned through the prototype, designing a PCB to house the circuitry within that final module, and drafting the BOM for the components I’d need.

Here are the results of that progress:

The New Drum Module Design:

The EAGLE PCB board:

And the BOM for the EAGLE board and for the FSRs I’ll need:

The main change between these designs and the old prototype module is that I’ve removed the center platform in the drum module. This platform led to some undesired force dissipation along the crossbars, and as such I’m going to instead have the FSR supported through a platform that comes directly through the center of the PCB from the module’s base. Additionally, I’ve trimmed some of the wasted material from the prototype design, which when combined with the removed crossbar should hopefully reduce the printing costs.

The PCB also has LEDs in its 4 corners, which was a post-MVP target we had and which I feel should be readily achievable. I’ve already performed tests of the drum module using some spare LEDs I ad on hand, so I’m confident the ESP32 should be capable of adding this light feedback to the system. The needed holes for these LEDs to stick through have also been added to the drum module design.

Regarding the BOM, all of the components have been ordered. The PCBs are currently expected to arrive this Monday and I picked up the other components (excluding the FSRs) yesterday. I currently plan to test these components on a breadboard this weekend, and then solder them to the PCBs once they arrive this week. Assuming everything goes well, I’ll likely also print the new drum module by the end of this week to test the entire system together.

Regarding how this progress fits into our timeline, I think I’m on good pace with our initial estimations. As I mentioned last week, I feel the place I’m currently at aligns well with where I’d like to be for MVP even though I technically didn’t have the drum count we targeted for MVP (due to the additional 3D printing costs). If everything goes exactly as planned, I’ll likely have some flexible time in the coming weeks, so I’ll hopefully be able to help with improving the C++ code in areas like the game’s main menu.

Stephen’s Status Report for 3/19

Much progress towards reaching MVP has been made since my last status update on 2/26. For starters, I was able to 3D print the prototype drum pad module before spring break began so that I could create the working prototype while away from campus. The process of removing the internal scaffolding was slightly more involved than I originally anticipated, as without having used a 3D printer before I wasn’t aware of just how much scaffolding would be needed for my design. However, I still managed to remove the scaffolding without damaging any features of the module, so it still works as I intended.

After this, I arranged the FSR and other circuitry inside the module and began testing the responsiveness, with somewhat mixed results.

Although the ESP32 was recognizing strong hits to the direct center of the drum pad, hits off the center and to the sides were inconsistent in their recognition, and hits along the crossbars that supported the center platform had basically no recognition. The below diagram details my estimates for the relative accuracies.

The main issue that seemed to be causing this unreliability was the fact that the center platform (where the FSR is located) was at the same height level as the crossbars supporting the platform. This lead to any forces that are on top of the crossbars or close to the crossbars being dissipated through the crossbars rather than through the center platform, which meant the FSR never got a chance to recognize them. To remedy this temporarily, I placed a spare piece of rubber between the FSR and the center platform, which raises the FSR compared to the crossbars. Additionally, I used the adhesive edges of the rubber to fix the drum pad to the module’s rim, holding it in place as it is hit. This creates a pivot directly on the FSR, which redirects much more force through the center platform and greatly increased my recognition accuracy during my trial testing. A diagram illustrating this and the setup for the drum currently can be seen below.

After getting reaffirming results with this new makeshift setup, I began work on the final drum pad module design. This prototype module will be sufficient for MVP, but a new and slightly modified design would better accommodate for this new setup. Additionally, one issue I encountered with this prototype is that the small breadboards I had planned on using were somewhat hard to fit underneath the FSR’s platform, so I would like to design a PCB to go along with that new drum module design.

Designing the PCB and new drum module, as well as creating the BOM/order for them will be my primary tasks this following week.

Regarding how my progress fits into our timeline, I think the progress I’ve made so far has aligned well with our goals. We originally aimed for an MVP target of 3/20, and this progress meets most of our goals. Regarding the functionality, this drum setup has everything we need, as its capable of providing a signal quickly and reliably to the game’s program. The one area my progress doesn’t meet our MVP goals is that I only have one drum as opposed to our MVP target of 2. Creating a second drum wouldn’t be difficult, but I chose not to do so because the current drum design is only a prototype, and I know for certain that I will be changing it later. As such, printing a second prototype module would unnecessarily eat into our budget, as it would likely just get discarded once I began printing the final modules. However, other than that one consideration, I feel like this demo module satisfies our MVP targets and sets me up well to move into the post-MVP stage of the design.

Team Status Report for 2/26

Last weekend, all three of our members were working on the finishing touches for our design presentation, which we presented this week. Following that, each of us picked back up the individual tasks we had been working on the week prior.

The details of our individual progress can be found in our individual reports, however we did have some brief meetings over the week to discussĀ  concerns that would effect the group as a whole.

One of these concerns is the impact of Spring Break on our timeline. Although we accounted for the loss of time Spring Break would inevitably have, we didn’t fully account for non-time related factors such as location. For example, Stephen’s work is physically based, and as such certain tools such as a 3D printer won’t be available to him over the break period. The other major location concern we had was that we wouldn’t be able to meet in person during this break period (as we won’t be on campus). Although this wouldn’t effect our ability to share code segments, this would effect tasks like plugging Stephen’s Drum module into George’s computer for testing the communication between the two.

Luckily, our planned MVP date is approximately a week after spring break, so we can perform our integration during that period. However we needed to plan around the other issues. As such, our current plan is that Stephen should print at least one drum module prior to the break so he can have it for testing over the break and that George will help Stephen install the software needed to run George’s code so that the code can be sent wirelessly during the break if needed.

Other than those concerns and plans, everything is proceeding as planned as each group member is beginning to form the basic framework of their project portion. In Shreya’s case, she has almost completed the instrumental portion of her code, in George’s case, he has developed a basic game GUI and has basic sound functionality, and in Stephen’s case, he almost has his information pipeline from the hardware to software fully functional. As long as we keep on pace and these basic frameworks are completed in the following weeks, we should be able to make our MVP by 3/20.