Zeynep’s Weekly Status Report for 10/28

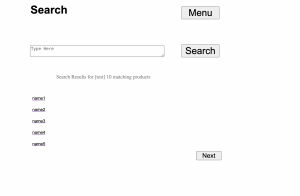
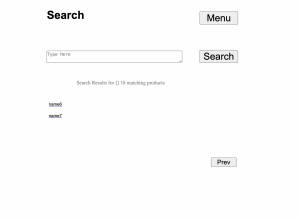
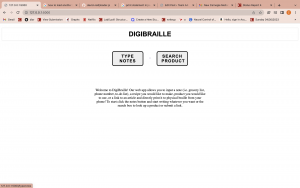
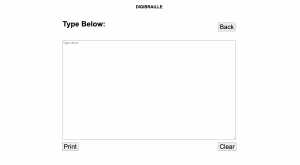
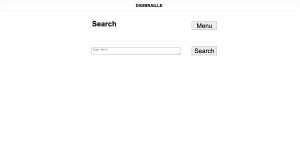
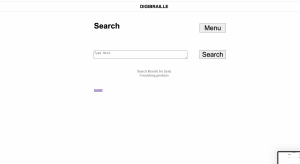
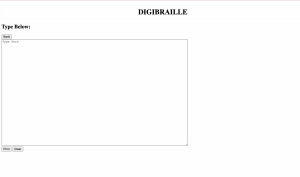
This week, I worked on the ethics assignment and discussion, implementation of the web-app, and preparing the solenoid circuit for testing/integration. For the ethics assignment, I read the two given papers and completed my written assignment. I also engaged in a group discussion about the ethical considerations of our project. Some points that were raised in our discussion include electrical safety and ensuring that proper instructions are printed. I also continued to work on the implementation of the web-app. I am working on setting up the product search functionality on our user interface. I have added the ability to pull results from the back-end and display them, included buttons to scroll between pages, and wrote code to fill the web-app with content from the back-end. My goal for next week is to tweak small bugs in the UI, such as the product name not being displayed on the second page and incorporate code for parsing and properly formatting the product text file to display the information. My stretch goals will be to have the basic framework of the website complete by the end of next week to be able to begin debugging it with Apple’s accessibility debugger tool.

(page two after clicking next button)

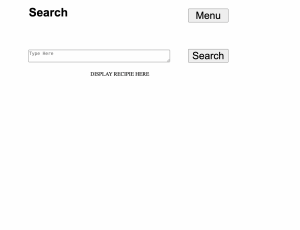
(after clicking product place holder for displaying product info/recipe)

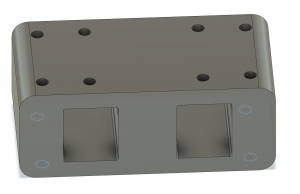
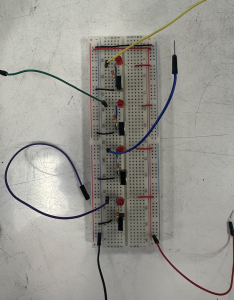
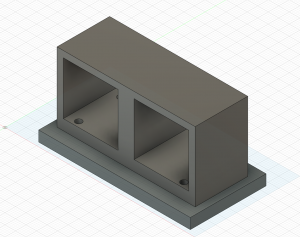
I received the solenoids and the grub screws I plan to use as the embossing stylus. I tweaked the design for the solenoid encasing in CAD now that I have the solenoids I am going to use. I also built the control circuit for RPI testing using LEDslater this week as we wait for the PCB to arrive.


Team Status Report for 10/28

This week, as a group, we primarily focused on planning our goals for the interim demo and engaging in discussions about the ethical concerns of our project. For our interim demo, our current stretch goals are to allow a user to input text into the notes feature of a finished web-app. We aim to display the braille translation and output these signals to our mechanical x/y system and our solenoid system. We will have these two systems decoupled for our demo and will work on integrating for our final product. For ethics we discussed, safety concerns of giving a blind user an electrical device and how it contributes to the welfare of our blind users.

As for the components of our project, this week we focused on our individual components. Zeynep worked on the front-end of the webapp, Becky finished the pcb and sent it out, and Joshna worked on setting up the rpi and the braille translation algorithm.

Overall, our design has had no major changes. We are currently working on integrating our back-end and front-end components building up the interm demo and are on track.

Team Status Report for 10/21

This week, our team primarily focused on submitting the design review document and refining our design following feedback from the design presentations. This included updating our number of solenoids from 2 to 4, accounting for tension needs of our braille embosser, and updating our back-end to ensure that it meets our user and design requirements. We also created many figures for our design document and spent most of the week writing our report. Due to fall-break, we did not accomplish too many team goals this week, but coming into next week, we are looking to finish PCB design, conduct user interviews of the web-app, and begin fabrication

Zeynep’s Weekly Status Report for 10/21

ABET #7 says: An ability to acquire and apply new knowledge as needed, using appropriate learning strategies

As you’ve now established a set of sub-systems necessary to implement your project, what new tools are you looking into learning so you are able to accomplish your planned tasks?

I have been learning a lot about how to use CSS, Javascript, and HTML to develop the web-app. I have minimal front-end experience, so I have been spending a lot of time reading documentation and learning how to use these to best implement or web-app to fit our user needs. I have also been learning how to use CAD software to iterate on our design to ensure our building/integration process goes as smoothly as possible. I am also familiarizing myself more with using a RPi with the solenoids.

What did you personally accomplish this week on the project? Give files orphotos that demonstrate your progress. Prove to the reader that you put sufficient effort into the project over the course of the week (12+ hours).

These last two weeks, I focused on the design review document, and working on the web-app.

For the design review document, I helped write the introduction, use-case requirements, architecture, design requirements, trade studies, implementation, and tests. I also created some of the figures included in the document, such as the system block diagram or the solenoid mechanism figure.

I also incorporated some feedback and changes into our overall design for the electromechanical embossing system with the addition of two more solenoids into our design. This involved recalculating our timing, and re-adjusting our solenoid system design. Once these changes were in place, I also began working on the PCB design. I added the components for the solenoid system. Becky will be in charge of other parts of the PCB.

After submitting the design review, I continued working on our web-app. We are aiming to start user studies on the front-end next week, so my goal is to have the basic framework done by then. I have attached screenshots of the pages I have implemented, which will all communicate with and display results from our back-end once the database is complete.

Progress and Deliverables

This week did have a lot of slack for me because of fall break, but I am planning on putting in extra hours to finish up the front-end before user-studies. I have also placed my orders for components and will finish up PCB design for the solenoid system, and begin building with my team members leading up to the interim demo.

Zeynep’s Weekly Status Report for 10/7

Accomplishments

This week, I primarily focused on completing the design presentation, working on the design review document, ordering parts/refining our bill of materials, and I began work on the web app. I spent time at the beginning of the week refining our design presentation by creating informative block diagrams and figures and cleaning up the slides.

I also began work on the design review document and transferring information from our design presentation into the document. I also refined the BOM and decided on some of the specific parts I would need for the solenoid system. I ordered the solenoids and I will begin ordering more components (such as screws, diodes, mosfets) later in the week.

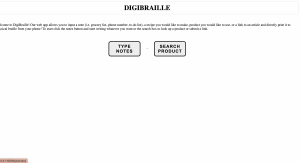
I also began working on our web-app. This is my first time using Flask and html, so I spent time reading through documentation and learning about how to use Flask. After I read through documentation and felt more acquainted with the framework, I began implementing our wireframe web-app design into the actual web-app. I am currently focusing on having the basic layout of the web-app complete. After that I will focus on specific design choices for its implementation based on accessibility documentation to make it most accessible to our users. My progress is a bit slow at the moment as I get more used to Flask and html, but currently I have created home page and two separate pages for each feature of our website. I have attached to example screenshots of my progress so far. The user input on this page will be sent to the back-end of our code.

Is your progress on schedule or behind? If you are behind, what actions will be taken to catch up to the project schedule?

My progress is a bit behind schedule at the moment. I have been out of town since Thursday, so I have not been able to devote as much time as I would like to working on the front-end. In addition, because I am out of town, I haven’t been able to work on my hardware component. In the next week, I will spend extra time to finish up the basic layout of the web-app so we can begin user testing, and work with Becky to design PCBs to send out during fall break. I also note that I emphasized finishing the solenoid circuit and encasing design, and testing prior to my weekend out of town so I would be ready to work on PCBs the following week.

What deliverables do you hope to complete in the next week?

In the next week, I hope to finish up and refine the basic layout of the web-app for user testing and finish up testing the solenoid system for PCB design by the end of the week. I will also complete the design review report, which I predict will take a good amount of my time this week.

Team Status Report for 10/7

This week we focused on finishing up the design presentation and began working on our design review report. We have been working on consolidating our documents, refining our requirements and testing plans, and will continue to work on it throughout the week.

Design Changes/Risks/Mitigation Plans

We conducted more user interviews this week, which impacted some parts of our software implementation. One suggestion was to include a dictation option for users who may not have a braille display. We are currently looking into implementing this option. Another topic that came up through our user interviews was contracted vs un-contracted braille. Un-contracted braille is a near one-to-one translation and is a very simple form of braille. Contracted braille is for more advanced readers. Braille readers read both contracted and uncontracted braille. We were initially only going to incorporate contracted braille. We are now looking into having both options available to users. We also learned that there are two braille codes: one that uses 8 pins and one that uses 6. 6 is the more common form of braille. However, we do not want to risk losing information if we don’t use 8 pins. We are currently doing more research into whether we will need to add the two extra pins. If we do make a switch from 6 to 8 pins, we will need to update our timing analysis. The design of the system itself, however, will remain unchanged.

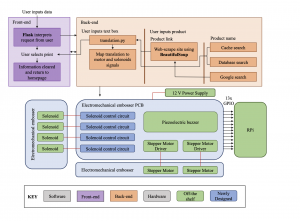
Another change we made to our design was making the web-scraping off-line. We wanted our site to take about .5 s to display results. Doing the web-scraping online was taking far too long and no one on our team has the ML capabilities to speed up this process. As a result, we switched to having the web-scraping offline and incorporating the results into a database to preserve our required speed. The database will work through keyword look up and will run much faster than our initial web-scraping algorithm.


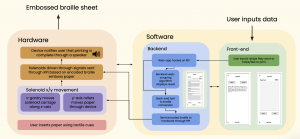
[BLOCK DIAGRAM FOR SOFTWARE UPDATE]

Some risks associated with this design change may be that the database could still be too slow. In this case, we will use a google search. In addition, instead of storing the text file of the web-scraping results directly on our site, we will be creating the database each time we run the code, which may make testing tedious. Another risk we have at the moment is whether our current 6 pin system will properly represent all the braille characters we need.   

Please enumerate one or more principles of engineering, science and mathematics that your team used to develop the the design solution for your project.

Two engineering principles we used to develop our design were testability and maintainability.

  • Testability
    • To ensure an easily testable design we focused on creating a very modular design from the electromechanical hardware component all the way to our software implementation. The electromechanical embossing system is made up of many individual components that can be tested on their own before we integrate the system together as a whole. For example, the solenoids act as their own system that are attached to the x/y gantry. The x-axis and y-axis components of the electromechanical printing system are also separate components that can be tested by themselves. The software has each component of our algorithm in separate components as well: the translation, web-scraping results, UI, output encoding can all be individually tested. Overall, we designed our system to be tested easily to ensure success of our project.
  • Maintainability
    • Our product is made for visually impaired users. It is often difficult for visually impaired users to be able to quickly fix something if one of their devices breaks. From one of our user interviews, we learned that every time a part breaks or there is a malfunction in a device, the user needs to go through the complicated process of sending the product out and waiting at least a couple of weeks to get it repaired. We wanted to design a device that would either be easy to repair or very strong against wear-and-tear. As a result, we chose cheaper and more maintainable parts–for example opting to laser-cut our enclosure rather than 3D printer. We also chose our parts specifically such that they were reliable against wear-and-tear.
    • On the software side, we are including both a database with recipes/product information in addition to a search option. The database with product options provides more ease of use to the user however does involve frequent updating from our end as there are endless products that could be put out on the market. The  database allows us to maintain updated information on products rather than having to constantly add more websites to an online web-scraping alogorthim.

Zeynep’s Weekly Status Report for 9/30


This week, I primarily focused on designing the solenoid embossing system and working with Becky to see how it would fit within the larger x/y gantry printing system. I also incorporated the user’s feedback into my current wireframe. (digibraille_wireframe_updated).

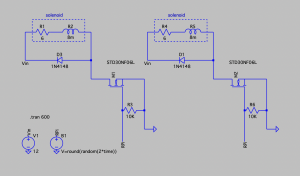
Before beginning the design of the solenoid system, I spent a lot of time consolidating my research from the previous week to select the best solenoid for our use. I decided on using a DC 12 V solenoid with a screw insert on the iron core. This solenoid will be the best for our use case because it provides enough force to emboss the paper (20 N) and will allow for us to screw in the braille pin-head for embossing. After I decided on the solenoid type I was going to use, I was able to begin thinking about designing the circuit and how to control the solenoid. This process involved employing my knowledge from my device sciences concentration, primarily 18-220 and 18-300 . The primary issues with using solenoids are the power consumption and controlling the switching of power on and off through the solenoid. The switching problem was an easy fix through the incorporation of a flyback diode in parallel with the solenoid. I am currently using an NMOS to control the circuit.

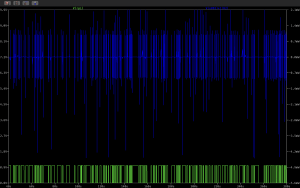
I tested this circuit in the LT SPICE simulator to make sure it was acting as desired, and would not exceed power requirements. Based on the available datasheet for the solenoid,  I calculated its internal resistance and inductance and modeled it as a resistor and inductor in series for my simulation. I then ran simulations of this circuit on LT SPICE over a time window of 10 minutes (our predicted embossing time) to test the power consumption of the circuit. I fed in a randomized square wave to represent inputs from the RPi. Based on stimulations, this circuit appears to be stable and fits our needs. However, I may still make modifications as I continue to test.

I also began to prototype this circuit. I was able to test it using a waveform generator as displayed in the simulation and a DC power source. I hope to test it using the RPi in the coming week.

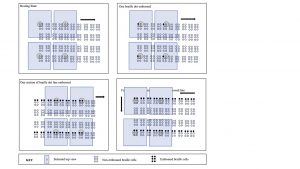
I also worked through the math for deciding how many solenoids to use and investigated the question of how the system will move (i.e. one cell at a time, one line at a time, one cell per solenoid). I calculated exact spacings between the solenoid and braille cells based on the American Society of Braille requirements and the size of the solenoid. Based on this, we decided the solenoids should move only in the x direction, embossing the braille line by line. I also calculated the time it would take for each number of solenoids to emboss based on the specific distances they need to be embossing within. Based on my results, I decided that two solenoids would be optimal, as the speed begins to plateau after two solenoids.

I also worked Becky this week on some of the design of the braille embossing system and x/y gantry. I designed an enclosure for the two solenoids in Fusion 360 that will fit into her x/y gantry design.

I also spent time working on the design proposal presentation — creating block diagrams, writing tests and requirements.

Is your progress on schedule or behind? If you are behind, what actions will be taken to catch up to the project schedule?

My progress is currently on schedule with the Gantt chart for the hardware components I have been assigned to. I am a bit behind schedule for the UI component of my role so I will devote the upcoming week to catch up on that. I aim to have the mock-up complete and some initial features implemented on the front end by the end of next week

What deliverables do you hope to complete in the next week?

In the next week, I will continue to test the solenoid circuit with the RPi. I will complete the mock-up for the front-end of the web-app and begin implementing features. I will also work on the design proposal document.

Team Status Report for 9/30

What are the most significant risks that could jeopardize the success of the project? How are these risks being managed? What contingency plans are ready?

This week, we worked on finalizing the design of the solenoid embosser, designing the x/y arm system to move the paper, setting up the web-app, and began working on the web-scraping algorithm.

These are the primary risks we identified for this week:

  • The linear bearings of the x/y gantry must be manufactured to high spec. If they are not, this could impact the mechanical functioning of the braille embosser to not work as well.
    • Mitigation: Source parts carefully and make proper cost benefit analysis of cheaper parts.
  • Proper functioning of tensioning system for y-axis printing motion
    • Mitigation: modularizing design such that size of enclosure can be remanufactured/re-designed as needed
  • Lack of control over solenoids may cause complications with embossing because only have control over voltage variable
    • Mitigation: Designing effective control circuit. If solenoids fail, use motors (however cost of time)
  • For backend, considering the kinds of keywords people would use since we’re finding the website and not searching is a risk
    • Mitigation: In worst case scenario allow users to do a google search
    • keep researching websites to source from
  • Frontend accessibility and usability
    • Mitigation: planning user tests and debugging with apple accessibility debugger

Were any changes made to the existing design of the system (requirements, block diagram, system spec, etc)? Why was this change necessary, what costs does the change incur, and how will these costs be mitigated going forward?Provide an updated schedule if changes have occurred.

This week we made a few small components to the design. This however does not set us off track according the schedule.

  • Downsized number of solenoids to a total of two solenoids. This change was made because after the number of solenoids passed 2 solenoids, the amount of time it took to emboss a single character begins to plateau. We chose 2 solenoids because it is most manageable without slowing down the overall system
  • A large component of our design decisions was whether to couple or decouple the x/y gantry. We decided to decouple the gantry because it will be a simpler design overall, and will give us a bit more control and create a more stable system. Decoupling will reduce mechanical failure points and increases accuracy. It also appears to be cheaper than a non-decoupled system.
  • We have also modified the webscraping methods. We will now only be webscraping from a select number of websites that already have products listed. This decision was made because of lack of supporting libraries in python.

Team Status Report for 9/23

What are the most significant risks that could jeopardize the success of the project? How are these risks being managed? What contingency plans are ready?

The most significant risks to the success of our project will be integrating all of the components and ensuring that they can communicate over wifi. The most integral component of our project is the user being able to connect to the braille printer with their phone, so it is important that we ensure the communication between each component runs smoothly. We are thinking about managing the risks of communication between components and communication on wifi by possibly  using a WIFI sd card and sending the g-code instructions wireless through this way. We are also considering using a wifi adapter for ramps boards. If this doesn’t work we may consider having the user plug their phone into the braille embosser. 

Another risk is the power management of the solenoids and ensuring that they don’t generate too current. We are managing this risk by including flyback diodes for each solenoid and separating the control of the solenoids (arduino) from the power source of the solenoids.

Were any changes made to the existing design of the system (requirements, block diagram, system spec, etc)? Why was this change necessary, what costs does the change incur, and how will these costs be mitigated going forward?Provide an updated schedule if changes have occurred.

During the design proposal, we presented a 6 solenoid system. After doing more research on the solenoid mechanism and the mechanism of our braille printer, we decided that a 3 solenoid system would work better under the constraints without compromising timing requirements. This however, does not alter the design and will lower the cost. It also will not impact the schedule.


Becky’s Weekly Status Report for 9/23

What did you personally accomplish this week on the project?

This week I met up with Alycia to get feedback on the design direction we should be going in for the Braille embosser. I asked her about how she can distinguish between different sides on a box, because we will need to be able to load paper in a specific direction on the printer. She mentioned different way of adding tactile information like adding an arrow to where the embosser needs paper inserted.

She also gave us the opportunity to use her different accessibility tools on her iPhone, and I have to say I’m pretty impressed with how easy it is for her to navigate around on her iPhone with her braille input device. She was able to navigate around Wikipedia and search up information about Beyonce no problem. She also showed how certain menu displays are not accessible to her, and aired some grievances about the Dunkin Donuts app and their inaccessible app.

I learned so much from Alycia this week, and I think her involvement in the project will steer us towards making a project that is actually useful to blind users. She took the time to show us the different tools she uses in her day-to-day life and that gave us some ideas on things we can integrate into the software side of the project. Specifically, she showed us these glasses she uses to read text, and detect scenes, which integrate already into her phone and could be a cool tool to integrate into our project because she could take a box with instructions, look at it with her glasses, and then take the text output from the glasses, and convert it into braille. Here’s a pic of me trying these glasses on at Panera Bread this week.
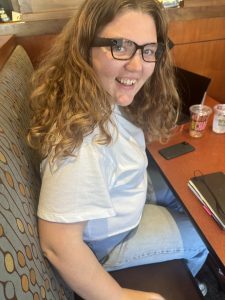
Me wearing the glasses that read text and detect scenes.

I started exploring how the gantry system was actually going to get constructed, and realized very quickly that designing our own system from scratch would be really expensive in terms of time, effort, and money to create, and that it would be a better use of time to buy a x/y system that was already built. I ended up finding a 3D printer for 135$ on Amazon that would have all of the mechanical parts we would need to print braille, and most of the electronics already included. When I looked into 2D plotters they were more expensive, and also may not be the best choice because we want to be able to control the amount of tension we have between the paper and the embosser.

I think using the 3D printer kit would come with many advantages including:

  • X/Y mechanical movement already figured out (saves time & $$$ on prototyping)
  • Electronics have JST connectors we can plug into our control board for easy wiring
  • We can control the Z-height of the embosser, which will be good for finding optimal tension between the paper and the embosser. It also gives us a lot of flexibility when designing the embosser
  • Parts already integrate into the RAMPS based control system we plan on using.

Like any other decision, using this kit will have its’ drawbacks.

  • The z-height is much taller than we need it to be. We can cut this piece, but that will require us to disassemble and reassemble the x/z gantry
  • We will need to figure out a way to make it easy to register the paper (consistently place the paper in the exact same location)  in a way that is accessible to our user. I think we can accomplish this by creating a easy to use slot based system.
  • We will need to modify the slot where the extruder goes to fit the solenoid.

If we were to source our own parts, it would be so much more expensive to build, to the point where it wasn’t worth finishing the spreadsheet.

DIY assembly Cost Quan Total Link
Nema 17 motors 8.99 3 26.97
Linear slide + mount 37.99 3 113.97
limit switches
tensioner
t slot
Nuts & screws
T-Slot Brackets
ETC
ALT TOTAL 140.94

Using the 3D printer kit will take some work to modify. We will need to do the following to create a system that meets our requirements:

  • Creating a mount for the embossing solenoid to go on the X/Z gantry
  • Making an accessible registration system
  • Creating an enclosure for the 3D printer so it is safer to use
  • Integrate the electronics to the ramps board
  • Figure out how to control the solenoids on the ramps board
  • Figure out how to communicate with the software portion of the project

I started exploring how we will control the system as a whole, and there is a way to control the 3D printer using G-Code on the RAMPS board. We will be able to modify the firmware to meet our hardware needs, as they have a way to add solenoids. I think we will be able to also add a setting to keep the embosser head at a specific height, depending on the tension that works best for printing.

I also started exploring how to communicate with the RAMPS board over Wi-Fi, and there is this software called Octo-Print that runs on a raspberry pi can control a 3D printer. I will need to do more research to see how we can integrate it into our software system, but it is a good sign that this exists.

Is your progress on schedule or behind? 

I feel like I’m making good progress on the project, and I think this week we can actually make some tangible progress if we can get the 3D printer ordered this week.

What deliverables do you hope to complete in the next week?

  • Order the 3D printer kit, and RAMPS Controller
  • Put in a request for a raspberry pi
  • Come up with a specific plan to communicate with the 3D printer over wifi
  • Design PCB’s that make connecting the limit switches, solenoids, and any other auxiliary hardware easy to plug into the ramps board.