Rashmi’s Status Report 11/14/2020

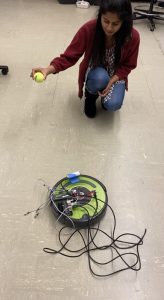
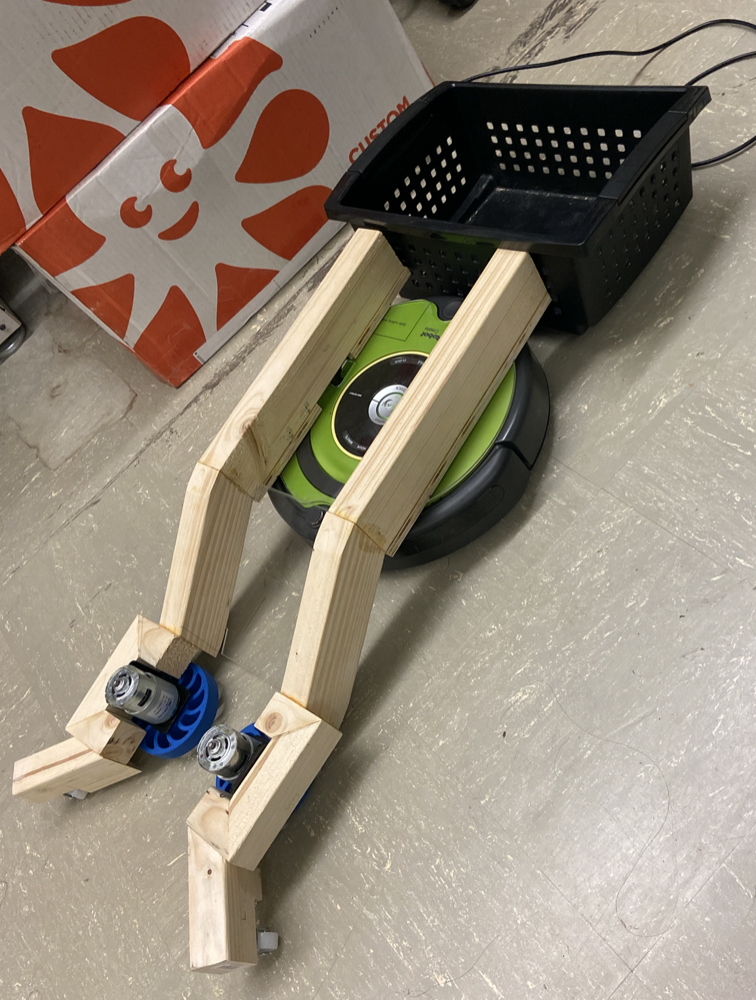
This week, we performed the integration of the hardware and software components of the robot. We wired together all of the electrical components and attached it onto the robot. To attach it to the robot, we designed a roof for the robot and attached the roof to on top of the ramp. After attaching all the components onto the robot and fixing a position for the camera, we were finally ready to do our integration test. After much difficulty we were able to integrate the hardware with the software. Some of the issues that we ran into include the wifi taking up too much power from the robot. When we ran the program, the robot kept getting disconnected from the program because of wifi issues. To mitigate this, we found that running the program in the background ensured that even if the wifi gets disconnected, the BallBot will continue executing the program. We also ensured that the jetson would no longer need to be connected to a display in order for it to be booted and start running. After resolving these issues, we were able to successfully test our robot. See video below!

Some things I noticed when doing this integration test is that we need a way to detect or set boundaries for the robot. For example, the robot needs to know where the fence of the tennis courts is located so that it can turn accordingly. Ideally, we should have used the iRobot sensors for this. However, the ramp unfortunately covers any sensor that we could have used so we have to come up with another way to do this. I will be working on making these improvements to the software this week.

Additionally, in order to brand our robot and give it a makeover, I designed and drew a logo as well as painted the robot. The paint not only makes the robot look good, but due to the wood finish that we added on top, it will also protect the wood from water damage.


Ryan’s Status Report for 11/14/2020

This week I focused on finishing up the mechanical work and integration testing. For the mechanical side, I designed a top layer platform to house the battery, Jetson Nano, buck converter, camera, and additional circuitry. The updated BallBot CAD model is shown below:

After verifying the designs, I quickly constructed the top layer from acrylic, and attached all the electronic components using M3 Dual Lock adhesive. We chose this adhesive because it, like velcro, allows us to quickly remove and service parts, but it has better durability than velcro. Below is the arrangement of our electronics on top of BallBot as well as a front view of BallBot.

With all the sensors and compute attached to BallBot, we could switch our focus to integration testing. We loaded our most recent code onto the onboard Jetson Nano, set up a chain of balls in the lab, and let BallBot run. Here is a video of the result:

As demonstrated above, BallBot is able to autonomously drive towards and pick up tennis balls.

To end the week, we decided to give BallBot a makeover. We painted the bot black with our logo in green. Below is a picture of the new BallBot:

For next week, I plan on finishing the mechanical construction by building the basket attachment. Additionally, we plan on doing our final integration tests on the CMU tennis courts.

Team’s Status Update for 11/7/2020

This week our team made significant progress on the robot on the hardware side as well as the software side and we are back on schedule. On the hardware side, we mounted the acrylic ramp, wooden arms, and motors onto the iRobot Create 2 base. Now the tennis ball launching system is securely fixed to the robot and we were able to test that the robot moves around successfully. Also, we were able to manually control the robot and successfully use the motors to launch the balls to the back of the robot. It was exciting to see the hardware work in action.

On the software side, we were able to test that our code works when we transition the Jetson Nano and Intel camera to being powered with the battery instead of from the wall. We placed the Jetson Nano, camera, and battery on the iRobot Create 2. When our code was running, if someone held a tennis ball anywhere in front of the robot, the robot successfully turned towards the tennis ball and moved towards it. This gives us confidence that the computer vision and path planning is working as intended.

Schedule Updates:
Our team is completely back on schedule on both hardware and software. Next week, we plan on working to integrate both the hardware and software systems. Currently, we have tested both systems independently and are confident they work, but putting them together will be a challenge. One of the things we need to do is create a platform on top of the robot so we can place all the hardware needed to run the software on the robot. There don’t seem to be any challenges that are of immediate concern.

Ishaan’s Status Report for 11/7/2020

This past week, I made progress on making the Jetson Nano and all the other connected hardware portable with the iRobot Create 2. To do this, I first figured out how to power the Jetson Nano and the Intel depth camera with the rechargeable battery we had. After testing that all our software worked as normal on the Nano when it was powered by the battery, I moved to testing the software with the Create 2 robot free to move after the tennis balls. This was not possible earlier since the camera and Jetson Nano were being powered from the wall outlet. We temporarily taped the camera to the front of the robot and also placed the Jetson Nano on top. When Rashmi held a tennis ball in front of the robot, the robot accurately followed the tennis ball, which shows that our software is working.

On the hardware side, I helped Ryan attach the arms and motors to the Create 2 robot so that the tennis ball collection system was mostly complete. We screwed the acrylic ramp to the arms and tested the hardware system. We manually controlled the robot and were able to launch the tennis balls that were funneled into the robot.

Next week, I plan on working on integrating the software and hardware into 1 system and also building the platform on which we will place the Jetson Nano, Intel camera, and battery. The 2 systems seem to be working well independently, but merging them together will be challenging.

Ryan’s Status Update for 11/7/2020

This week was a very productive week the mechanical side of Ballbot. I began this week by attaching a ramp between the two railings assembled last week. Below is a picture of the assembled ramp and runway ontop of the iRobot Create 2.

Before I continued with the assembly, I wanted to verify that the ramp was capable of raising tennis balls from the ground to the top of the iRobot Create 2. I rolled some tennis balls towards the ramp and observed the following:

As one can see, the ramp deflects tennis balls straight upwards instead of the up and towards the back of the robot as desired. This suggests that the ramp is too steep, so I went back to the designs and decreased the ramp’s angle from 45 degrees to 30 degrees.

With this new design, I recut and reassembled the ramp. After some additional testing, I was confident that the new ramp could deflect tennis balls towards the back of the robot, so I continued with the assembly. I attached the motor mounts to the railings and added our motor assembly. Now I was ready to test our tennis ball launching mechanism. Below are two videos of the mechanism in action:

After testing our launching mechanism, I added the arms and caster wheels to the motor mounts to complete the robot frame assembly.

For the rest of the week, I focused on developing a method for attaching the assembled frame to the iRobot Create 2. After some initial difficulties, I decided to screw together the Create 2 top plate, our acrylic top plate, and the wooden runway railings with six screws. The screws used to fasten the frame to the Create 2 are shown in the following video:

Using this method, we joined the frame to the iRobot Create 2 to complete the front side of Ballbot pictured below:

To end the week, I ran a mechanical integration test to see if the robot was able to pickup tennis balls when being controlled manually. Although we do not have a basket yet, Ballbot was to pick up all the balls and “shoot” them out its back. Take a look:

With the front side of Ballbot finished, we’re in a pretty good position for our demo next week. For next week, I plan on adding a roof (to help guide the tennis balls) and second layer to Ballbot (to house our battery, Jetson Nano, and camera). If I have time, I’ll begin prototyping our tennis ball basket.


Rashmi’s Status Update for 11/07/2020

This week I spent a lot of time working with the team constructing the robot. Together, we spent a lot of time assembling the pieces that we cut last week onto the Roomba. We mounted the arms and the ramp to the mounting plate and placed it on the Roomba. Now the exterior of the robot is pretty much complete.

On the software side, I worked with Ishaan and we were able to move the robot using the Jetson Nano and the battery fully untethered. We simply taped the camera onto the front robot and tried to get it to follow a tennis ball. This worked pretty well. Additionally, I also helped set up the motors to be controlled by the power supply.

This week, I plan on creating a platform to place the camera on the robot as well as test the algorithm with static balls. This test will be performed both indoors as well as outdoors. Currently, we have not tested the robot with multiple static balls on the scene. We have only had one ball that we moved around to make sure that the robot is detecting it well. Depending on the performance from the testing, I will decide what the next steps for improvement are.

Team’s Status Update for 10/31/2020

This past week, our team made good progress on both the software and hardware part of the project. On the hardware side, we purchased and cut wood for some of the components of the tennis ball launching system. When we tried this last week, we were using scrap wood which wasn’t good quality and were not using a machine that allowed us to be precise with our cuts. Learning from this, we were able to cut the wood exactly as we wanted and created the railings for the ramp and well as the components for mounting the motors. We also decided to use wood glue to connect the pieces instead of screws since this allowed us to cut at whichever angle we needed since screws were expensive as well as difficult to use at angles other than 90 degrees. After testing the strength of the wood glue, we found it to be more than strong enough.

On the software, we were able to get all our software so far to run together on the Nvidia Jetson Nano. This includes the code to communicate with the Inteal Realsense camera, the iRobot Create 2, and the computer vision code that uses OpenCV. We fixed the issues regarding building the python library for the Realsense camera and some other issues caused by moving from Windows to Linux. Now the Create 2 turns towards the closest tennis ball it sees with the Realsense Camera and moves towards it. We couldn’t perfectly test the system since the Jetson Nano is powered from the wall currently instead of the battery and is not portable.

Schedule Update:

Currently, we are on schedule on the software side of things and slightly behind for hardware. Next week, we will try to power the Jetson Nano with a battery so that we can better test how well the computer vision is working. Also, we will spend a lot of time on the hardware which involves cutting acrylic and finishing building the ramp. We will also try and mount the parts we have on the Create 2 Robot, or at least try to cut the parts needed to mount the tennis ball launching system. There don’t seem to be any immediate challenges that are of concern.

Ryan’s Status Update for 10/31/2020

With the simplified designs from last week, I was able to make significant progress this week on the construction of robot frame.  During the week, I was able to use the wood working tools in the makerspace to cut 2×3 wood planks into the necessary shapes for construction. After making all the cuts, I began the assembly of the frame. In the past, we made the mistake of using screws to join two pieces of wood. This proved to be very challenging, so this time we decided to switch to using glue. We thought glue would be a better choice since its easy to apply has a relatively strong bond. Below are pictures of the assembled motor mounts and railings.

Below are some pictures of the mostly assembled robot frame. We still have to attach the robot’s arms to the left of the motor mounts.

For next week, I plan on completing the robot frame and starting work on the acrylic pieces needed to attach the frame to the robot. To cut the acrylic, I’ll use the makerspace laser cutters, and I’ll use 4mm screws to attach the acrylic pieces to the wooden frame and iRobot create 2.

Ishaan’s Status Report for 10/31/2020

This past week, I continued to work on the software to get it to build on the Nvidia Jetson  Nano and also helped on the building side of things.  For the software, I was finally able to get the iRobot Create 2, the Intel Realsense Camera, and the OpenCV computer vision code all running together on the Nvidia Jeston Nano. This involved finding a workaround to building the Intel Realsense Python library from source as well as fixing some other issues related to transferring the code from a Windows implementation that was running on my laptop to a Linux now for the Jetson Nano.  Now, when running the code, the Create 2 robot turns towards the closest tennis ball in view of the camera until the tennis ball is centered. To better test this, we need to power the Jetson Nano from a battery instead of the wall port. This will allow the entire system to be portable instead of tethered to the wall.

On the hardware side, I helped Ryan construct some of the wood parts of the Tennis ball launching system. More specifically, we worked on building the sides of the ramp that the tennis ball will go over, as well as the pieces that the motors are connected to. To connect the pieces of wood, we decided to use wood glue instead of screws so that we were free to cut however we needed.

Next week, I plan on trying to power the Jetson Nano with a battery and seeing if there are any issues with that. Also, I will try to get most of the code written to control the motors. I will help Ryan continue working on the building side of things so that hopefully the motors are ready to be tested along with the rest of the hardware.

Rashmi’s Status Report for 10/31/2020

Much of this week was spent cutting wood again with my team because we weren’t able to assemble the pieces properly last week. Last week, we found it hard to assemble some of the wood pieces that surround the motor because we were screwing together wood pieces at 45-degree angles. This week, we recut them and decided to glue the pieces together instead. This process was much smoother and much easier than last week because we used glue. All of the pieces involving wood are now assembled. They just need to be placed onto the iRobot. We were not able to do that this week as we were waiting for the glue to dry. This week, we all plan on getting together and start to assemble the individual pieces onto the iRobot create2.

In terms of software, Ishaan and I were able to get the pyrealsense2 library to install onto the Jetson after great difficulty. We were able to run the code we wrote last week on the iRobot using the Jetson alone. The robot can now detect and move towards a tennis ball using the output from the real sense camera and the base path planning algorithm I wrote.

This week, since all of the software parts are now integrated onto the robot, I plan on focusing on improving the planning algorithm. Specifically, I will try to start using the depth information so that the robot can track and create a path for multiple balls at once.