Talay’s Status Report for 4/26

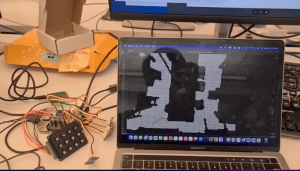
This week, I worked with the team to do some final fine-tuning of the different components of our project. We first tried to fine-tune the magnetometer (compass) since that was the least robust part of our hardware system. The compass was able to give orientation direction pretty well when the chip is always parallel to the floor. We wrote a mathematical equation to calculate the offset of the compass reading from true north and combined this with A*’s given direction to find the final direction to buzz the haptics at. We fine-tuned the compass as best we could but our final design would require the compass to be parallel to the floor always. If the compass tilted forwards or backwards, some readings may be slightly off. Other parts of our system were quite robust at this point when we tested it in Hammerschlag Hall. We received our final haptic sensors and added them to our system. Our system is complete with the setup in Hammerschlag Hall but moving to a new location would require some calibration and a bit of fine-tuning. We are also in the progress of integrating our entire system to a belt form factor.

This week we fine-tuned our system by doing more tests on it. Our CV stack is already quite robust, so we mainly tested the navigation, magnetometer, and haptics in the captured frame. We placed different configurations of obstacles in the room and had the person hold the entire circuit and navigate around the room. We tweaked the vibration patterns so that it would always buzz so the blind person knows where to go. We handled special error cases such as if the person was detected to be inside an obstacle. In those cases we would just vibrate the last known direction and make sure the person exits the obstacle first. We tested our entire system until we were quite sure this would work well.

Our progress is on schedule but we would still need to work hard this next week to complete all the deliverables.

Next week, we hope to finish integrating our product into the belt form factor. We would also need to to calibrate and set up the demo environment before the actual demo day. We also have the project video and final report coming up, so we would start working on that soon. Our project poster is in progress and will be completed by Monday.
Talay’s Status Report for 4/19

This week, I first worked on setting up the magnetometer with Kevin. Even though we bought a HMC5883L, we actually received a QMC5883L, which is slightly different. We were able to find a GitHub repository that allowed us to set up the magnetometer and have it output the orientation of the person relatively well.

Next, we worked to integrate the entire system together. This mainly involved putting together two big parts, which was the pipeline to run the segmentation model -> generate 2D occupancy matrix -> path-planning -> haptic feedback with the pipeline that localizes the person using UWB sensors. The two pipelines are fully robust on their own, but we worked to update the person on the occupancy matrix using UWB sensors instead of mouse presses. This also involved communication between the Raspberry Pi which controls all the components on the belt with the processing node (in this case our laptop for now) which runs path planning on the occupancy matrix and sends the results back.

Alongside this, we also worked as a team to verify and validate our results. Some simple tests that we have done throughout the course of the semester was taking images with the camera and making sure it covers a 6×6 space, validated by markers on the ground. We chose a few rooms on campus to do this test. We tested our occupancy matrix generation by running the segmentation model on all these rooms and noting how well it segments the room into obstacles. Obstacles were definitely detected more than 90% of the time, and with our algorithm to create a conservative bound for obstacles it will definitely be unlikely for the user to collide into obstacles. False positives were also quite rare (when the model detects free space as obstacles), and only happens when there is a glare from the sun or something similar. We tested our entire pipeline by seeing if the person would walk into obstacles given the feedback from our haptic sensors on a variety of environments and configurations of obstacles set up.

Lastly, we also worked on the presentation slides concurrently as we have slides due next week.

Our progress might be slightly behind schedule as we are still waiting on a few components to arrive. We have 4 haptic vibrators, but we need 2 more to complete our system. We are also hanging our UWB sensors on the ceiling, but we would use stands in the real demo.

Next week, we hope to put our entire system together so that we can get ready for demo. We have most of the parts working together but not completely yet. We also hope to get started on final deliverables next week.

As I’ve designed, implemented, and debugged my project, I’ve learned that it is extremely crucial to do thorough research on the internet on what you are trying to implement rather than implementing it from scratch. I think the saying “don’t rebuild the wheel” really applies, because there are so many resources out there where people have already built the same things you are building. Even if it is not exactly the same, the knowledge I gain from that additional research is invaluable and could save me so much time. Using hardware components with clear documentation and a user forum will save me a lot of headache as these systems do not work out the box most times, and would require some debugging.

I also found it extremely useful to unit-test. Since our systems are huge, there could be so many moving parts and it would be difficult to isolate the error. Testing each part incrementally is extremely crucial to the entire implementation working.

Talay’s Status Report for 4/12

This week, I worked on setting up the Arducam wide-lens camera on the Jetson, setting up the keypad to work on the Raspberry Pi, setting up the haptics sensors to work on the Raspberry Pi, and setting up socket communication under the same wifi subnet between the Raspberry Pi and my laptop. The first task I did was setting up the Arducam wide-lens camera by installing the camera drivers on the Jetson. The process was quite smooth compared to the OV2311 Stereo Camera since this wide-lens camera relied on the USB protocol which is a lot more robust.

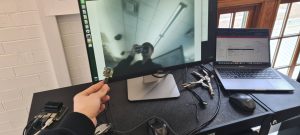
From the image you can see the quality is decent and the camera has a 102 FOV.

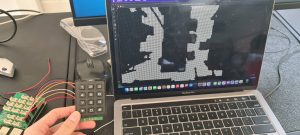
Next I worked on communication between the Raspberry Pi and the laptop using sockets. I set up a virtual environment on the Raspberry Pi and installed all the necessary dependencies to set this up. After this I set up the keypad on the Raspberry Pi using GPIO pins. Once the Raspberry Pi detects that a key is pressed, it sends data to the laptop which runs the A* path planning module and has the occupancy matrix visualized. The keypad is able to select different destinations on the occupancy matrix via network connection.

Once the laptop runs path-planning and determines the next move for the user, it sends the directions back to the user (Raspberry Pi) through the same socket connection. I then set up the haptic vibration motors which is also on the Raspberry Pi. I had to use different GPIO pins to power the vibration motors since some pins were already used for the keypad.

The Python code on the Raspberry Pi was able to detect which direction the user had to move in next and vibrate the corresponding haptic vibration motors. Our haptic vibration motors had slightly short wires, so we might need an extension for the final belt design.

I believe my progress is on schedule. Currently, the next main milestone for the team is to integrate the UWB sensor localization with the existing occupancy matrix. This is our last moving part in terms of project functionality. The last milestone for this project would be to integrate the Arducam wide-lens camera instead of the phone camera.

Next week, I hope to work with Kevin on integrating the UWB sensor localization with the occupancy matrix generated from the segmentation model and down-sampling. Currently, the user location is simulated through mouse presses, but we want it to be updated on our program through data received from the UWB tags. We would have to think about the scale factor of the camera frame and how much it has been downsampled, and apply the same scale to the UWB reference frame.

To verify my components of the subsystem, I would first test the downsampling algorithm and the A* path-planning module on different environments. I would feed the pipeline around 10-15 bird’s eye view images of indoor spaces. After the segmentation model, I would note if the downsampling does a good job of retaining the required resolution and identifying obstacles and free space. I would empirically measure the occupancy matrix on whether 95% of obstacles are actually still labeled as obstacles. To meet our use case requirement of not bumping into obstacles, I would come up with a metric that shoots for over-detection of obstacles rather than under-detection. Our current downsampling algorithm creates a halo effect around the obstacles, which would meet this requirement. For the communication requirements between the Raspberry Pi (the user’s belt) and the laptop, there is already minimal processing time. The A* path planning algorithm also has minimal processing time, so the user will have real-time updates on which direction to go through haptic sensors that meets our timing requirements. For percentage of navigation to the right location, I would check whether the haptic sensors always vibrate in the right direction out of 10 tries. If there is some calibration required by a compass, that would be taken into account as well.

Talay’s Status Report for 3/29

This week, I continued working on the path-finding algorithm and fine-tuning it so that it would be best for our use-case. I decided to switch from a D* path finding algorithm to an A* path finding algorithm so that it does not store any state from iteration to iteration. When integrated with the UWB sensors, we foresee that there might be some warping action with respect to the user’s position. D* path planning algorithm uses heuristics to only calculate certain parts of the path, which relies on the user moving in adjacent cells. Because the user might warp a few cells, A* path finding algorithm is more suitable because it calculates the path from scratch during each iteration. I simulated the user’s position on the grid with mouse clicks and there was minimal latency, so we are going to proceed with the A* path finding algorithm.

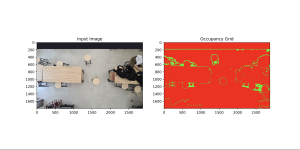
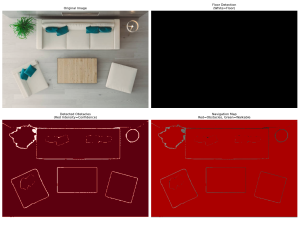
Next, I tested the segmentation model on multiple rooms in Hammerschlag Hall. The segmentation itself was quite robust, but our processing to further segment the image into obstacles and free space was not quite robust. I revisited this logic and tweaked a few points so it selected the largest segmented space as free space and everything else as obstacles. Now, we have a fine-grained occupancy matrix that needs to be downsampled.

I worked on the downsampling algorithm with Kevin. We decided to downsample by picking chunks of certain size (n x n) and labeling it as an obstacle or free space (1 x 1 block on the downsampled grid) depending on how many blocks in the chunk were labeled as obstacles. We wanted a conservative estimate on obstacles, so we wanted the obstacles to have a bigger boundary. This way, the blind person wouldn’t walk into the obstacle. We did this by choosing a low voting threshold within each chunk. For example, if 20% or more of the cells within a chunk were labeled as obstacles, the downsampled cell will be labeled as an obstacle. Once we downsampled the original occupancy matrix generated by the segmentation model, we saw that the resolution was still good enough and we got a conservative bound on obstacles.

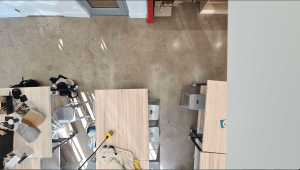
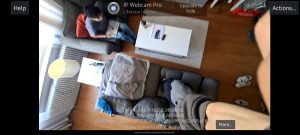
This is the livestream capture from the phone camera mounted up top.

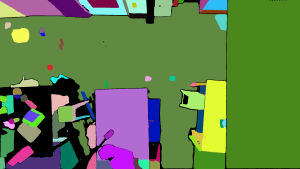
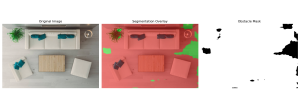
This is the segmented image.

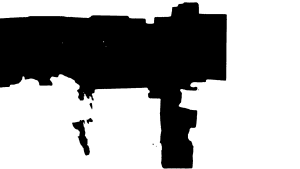
Here, we do processing on the segmented image to label the black parts (ground) as free space and the white parts as obstacles.

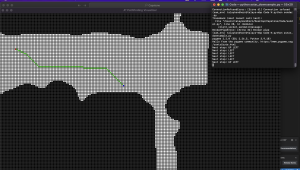
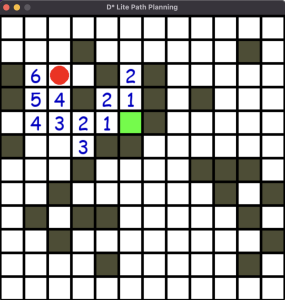
Here is the A* path finding algorithm running on the downsampled occupancy grid. Here, the red is the target and the blue is the user. The program outputs that the next step is top left.

I believe that our progress is on schedule. Next week, I hope to work with the team to create a user interface where they could select the destination. The user should be able to preconfigure which destinations they would like to save in our program so that they can request navigation to that location with a button press. I would also like to try to run the entire software stack on the Jetson to see if the Jetson can process everything with reasonable latency.

Talay’s Status Report for 3/22

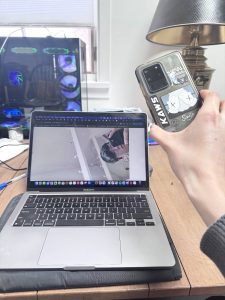
This week, I first tried to find an alternate to the OV2311 Stereo Camera that was not working with the Jetson. The camera had some issues and so we decided to use a phone camera that would be sent to the laptop for processing. We are going to move forward with this solution for the time being so that we can get to MVP and then decide to tweak some of the components later. I was able to capture images from my phone camera’s wide lens view and receive it on my laptop using Python’s OpenCV library. The frame of the indoor environment being stored as an OpenCV video capture is perfect for us to process later.

After this, I tried to experiment with some CV segmentation models that could classify the environment into either obstacles or free space. The models I tried were Segment Anything Model (SAM), Mask2Former Universal Segmentation, DeepLabV3 with COCO weights, and DeepLabV3 with Pascal weights. These models are pre-trained with mostly general data, and so they did not work as well on indoor environments from a top-down bird’s eye view as seen in the following images.

SAM Model With Hamerschlag Hall View:

SAM Model + Mask2Former Universal Segmentation:

DeepLabV3 Model with COCO Weights:

DeepLabV3 Model with Pascal Weights:

As seen from these images, the closest model that is able to at least outline the edges of the furniture is the SAM Model. Charles was able to tune the model such that it fills in the entire furniture and so we were able to get a working model from that. Thus, we are now going to base our segmentation model on the modified SAM Model.

Next, I started working on the D* Lite algorithm. I was able to create a UI that displays the person and the target in a 2D occupancy matrix (one that is similar to the one generated from the modified SAM model). The 2D occupancy matrix contains 0 for free space and -1 for occupied space. The D* algorithm recalculates the shortest path starting from the target to the person and uses heuristics to speed up the algorithm. Currently, I am controlling the person using arrow keys but these will be replaced with UWB sensors after we get that working. The person will also be navigated in the direction of the lowest cost.

My progress is slightly behind schedule as we were not able to get the OV2311 camera working. However, we have decided to use the phone camera as an alternative so we can move forward with our project. Once we have a working model for all the parts, we can consider switching back to the stereo camera instead of a phone camera. With the phone camera working, we are able to make significant progress on the software end of our project this week, so we expect similar progress going forward.

Next week, I hope to integrate the phone camera, SAM CV Model, and D* Lite Path Planning algorithm all into the same pipeline. Currently, these are all working as lone components, but we have to ensure that the output of one stack can feed into the input of the other. Once I am able to integrate all these components, our software stack will be mostly done and we could plug in hardware components as we move forward.

Talay’s Status Report for 3/15/2025

This week, I focused on setting up the OV2311 stereo camera on the Jetson Nano. First, I had to find a way to download the needed drivers for the camera onto the Jetson. Since the Jetson Nano 2GB Dev Kit does not come with a wifi adapter, I decided to use ethernet and plug it into the wall in HH. I had to register the ethernet MAC address on CMU’s network registration for that to work. Once my ethernet was working, I was able to download the driver for the WaveShare OV2311 stereo camera. After plugging in the camera, I was able to locate the camera on the Jetson with ls /dev/video*. The first stereo camera (video0) showed up on the console. To read data from it, I ran the following command:

DISPLAY=:0.0 nvgstcapture-1.0 –sensor-id=0

I was able to get some readings from the camera but since it was currently set up in headless mode, it was not able to create a window to display the image live. I decided to move my setup to a monitor, mouse, and keyboard and run the command again. However, the camera was no longer being detected on the Jetson. When I unplugged the camera’s ribbon cables and plugged it back on again, the camera’s lights refused to turn on. I tried multiple configurations as well as different commands to see if the camera was still being read from the I2C communications on the Jetson, but it was not showing up. I assumed that the camera may have broken while I was moving from headless mode to monitor mode, but I wasn’t able to exactly pinpoint the issue. I decided to order the same camera from the ECE inventory to test if this was a camera issue.

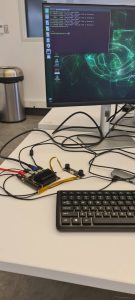
This was an image of the setup in headless mode, but the camera was no longer detected on the Jetson (as seen on the terminal).

My progress is slightly behind schedule since I wanted to complete the camera setup on the Jetson and send example images to Charles so he can test it on the CV stack. I will be testing out the camera in the next few days to see if it is truly a camera issue. If it is, I believe the new camera should arrive on Monday so I can use that model to make forward progress.

Next week, I hope to set up the camera as well as process data in a way that Charles would need for the CV pipeline. I would work with Charles to see what images he is currently testing on the pipeline for it to be compatible.

Talay’s Status Report for 3/8

This week I was able to successfully set up the NVIDIA Jetson Nano 2GB Dev Kit. From last week, we were having trouble setting up the Nano. We tried downloading many OS images from the website through various methods but were not able to get the Jetson booted up. We decided to reorder a new board (the same spec and version) and tested the new board with the OS image given on the Nvidia website. I was able to boot up the board and complete the first few steps to set up our account and sign the user agreements. I also looked into the Jetson connectivity with our computer to run different computer vision tasks. I consulted with my teammates and realized that the best option is to buy a separate wifi card to attach to the Jetson. We can download the CV frameworks and models (pre-trained) into the Jetson from our computer via ethernet or using the Nvidia SDK Manager, but our Jetson still needs to wirelessly connect to the Raspberry Pi 4 via bluetooth. I also tried to connect the stereo camera to the Jetson via CSI (Camera Serial Interface), but that isn’t working yet.

Our progress is slightly behind schedule as I should have the camera set up within this week. I will work to connect the stereo camera to the Jetson so that it can start reading in images from the processor. After the camera setup, we could start downloading pre-trained CV frameworks onto the Jetson. In parallel, we should also set up wifi connectivity from the Jetson to the Raspberry Pi 4.

In the next week, I will have the stereo camera connectivity complete. My teammates will be looking into the pre-trained model so that once the camera connectivity is done, we can start downloading models onto the board.

Talay’s Status Report for 2/22

This week, I tried to set up the Jetson Nano 2GB Dev Kit so we could start testing our camera and CV libraries on the board. We downloaded an OS image for this specific version onto an SD card and tried to boot up the Jetson. However, only the Nvidia logo showed up without the system booting up at all. We tried flashing other OS images onto the SD card with no luck, so we speculate that our Jetson board might either be broken or we have missed something while setting it up. We will have another team member try to look into this problem and troubleshoot it. If this doesn’t work, we would try to set up a different Jetson board. We also ordered some additional components this week, including the UWB sensors so that we could start testing them in parallel.

Our progress is slightly behind because setting up and booting the Jetson took longer than we expected, and we still don’t have it working. Despite using numerous OS installers (SDK Manager, balenaEtcher), we were still not able to get it to work. We would have to try to set up the Jetson as soon as possible in the next week and determine whether our camera is compatible with it. If not, we should try to find alternatives since the Jetson is the main processing unit of our entire project.

Next week we hope to boot up the Jetson and connect the camera to it. Hopefully we can start viewing images on the camera with the Jetson processing.

Talay’s Status Report for 2/15

This week I drew out the block diagram and implementation details for our project. First, we decided to localize the person on the same frame of reference as the camera by using Ultra Wideband (UWB) instead of IMU to avoid drifting. I did some research on UWB models and came across DWM1000 which seems suitable for our use case. We put 2 in the order list so we can start testing them next week. With 2 anchors in the room, we figured out a way to locate the coordinates of the person. I also did some research on the stereo camera mounted on the wall. We decided on the stereo camera dual OV2311, since it provides depth perception and is also compatible with the Jetson. We will also set up the Jetson and start running certain libraries on the input images next week. We decided to use the OpenCV library to convert from stereo images to a 3D point cloud, and Open3D to convert from the 3D point cloud to a 2D occupancy matrix. We looked into these libraries and it seems appropriate for our use case. We also decided to use the D* path finding algorithm. This algorithm tracks updates continuously and gives future directions. With these high level implementation details ironed out, we also spent some time making the design presentation slides for next week. I believe our progress is on schedule.

Next week, we first plan on setting up the Jetson Nano. This in itself will take up some time. After we set it up, we would like to run the stereo camera on the Jetson and take some input images. We could try setting up the camera on the ceiling and see how it could classify images from the bird’s eye view. However, the priority is definitely setting up the Jetson and connecting it to the camera module.

Talay’s Status Report for 2/08

This week, I did more research on the implementation details of our project. I proposed the idea to switch the camera from being mounted on the person to the ceiling instead. After digging into SLAM algorithms, we realized it may be difficult to mount a camera on a person and use that as a perception tool to map the person towards the target. Thus, we decided to potentially change the location of the camera to the ceiling instead, where both the user and the target is in view. From this single point of view, we can run a path planning algorithm to guide the person towards the target through haptic sensors. Our use case would be slightly shifted, where instead of having the blind person navigate unfamiliar indoor environments, they would be navigating inside an indoor setting that is blind-friendly. These environments could be their office or homes, where a one-time camera set-up including some pre-configurations would be necessary. After this, the blind person would wear a haptic vibrating belt that would guide them to their location with voice-assisted commands. We also tested an online image classification library with a top-down view image to see if there are existing libraries for our use case. The library we found was able to detect objects from a bird’s eye view quite well, so we believe this should be feasible.

Our progress is slightly behind schedule, since we have shifted the implementation details quite a bit. That was because we realized the original solution may not be feasible under the requirements given. To catch up to project schedule, we are planning to iron out specific implementation details of our project by next week. Once we know what toolchains, libraries, and technology stack we are using for each specific component, we can think about how they can all fit in together. This is our target for next week. We would also like to order all materials by early next week, so we can start working with each of them soon.