Team Status Report for 12.07

Here is what we did this week:

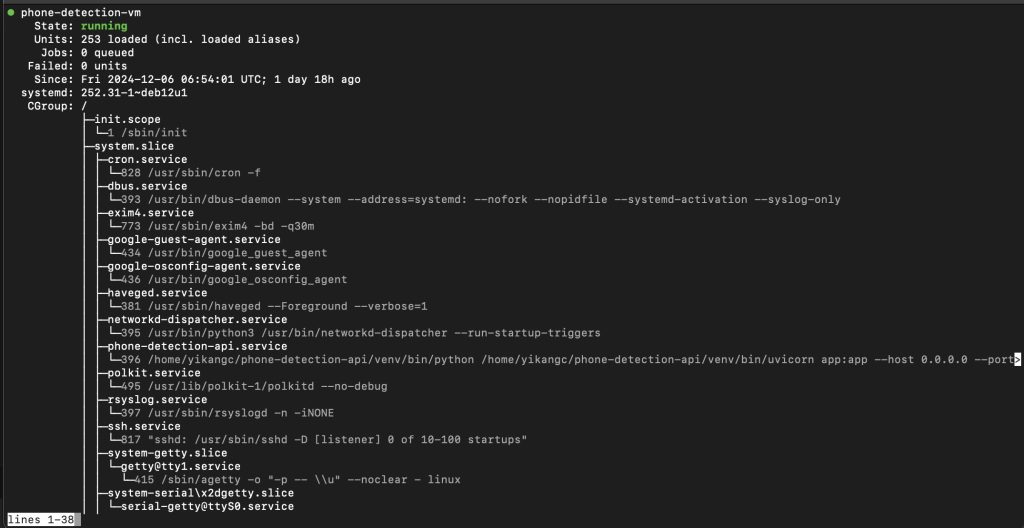
To optimize the YOLO-based object detection system, we migrated its operations to a cloud-based platform, creating an API endpoint. The Raspberry Pi now sends cropped images of the table area to the cloud for processing, reducing local computational delays. This change allows the Pi to allocate more resources to other critical tasks, such as feedback control for the charging pad and gantry system. After testing the cloud service 30 times, we observed an average detection time of 1.3 seconds and maintained an accuracy rate of 90%. These results met our requirements.

We improved the vision detection workflow by modifying the coordinate mapping system to align with the cropped images. Testing the gantry system under the updated configuration showed a consistent alignment precision within 1.5 cm across 20 trials. These adjustments reduces data size and improving accuracy.

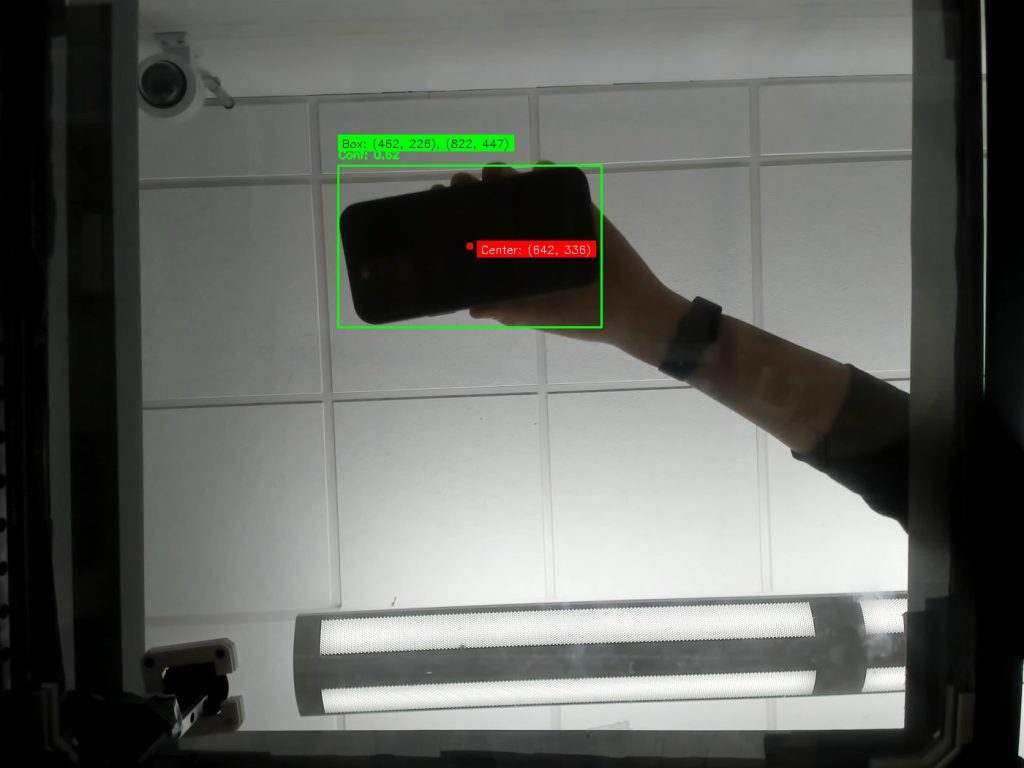
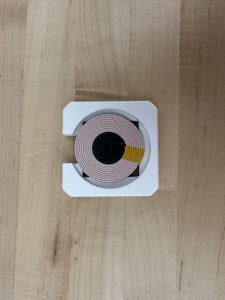
In terms of feedback control, we explored using computer vision to detect the charging pad’s light as an indicator of charging status. This approach provided faster and more reliable feedback compared to the app-based system, which suffers from delayed polling rates, especially in the background. Testing the light-based feedback on 10 images yielded a 90% success rate, with one failure due to improper HSV threshold settings. Adjustments to the threshold values are planned to improve reliability further.

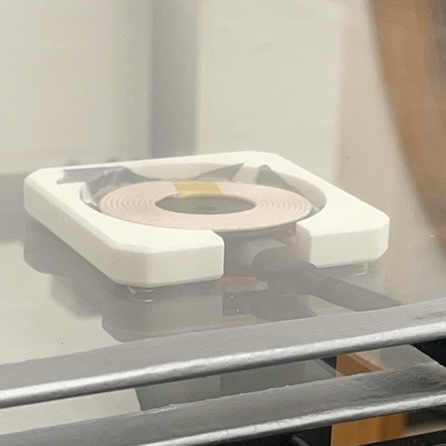
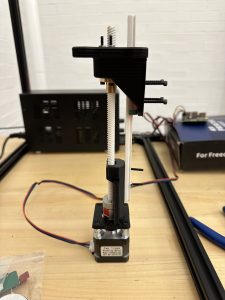
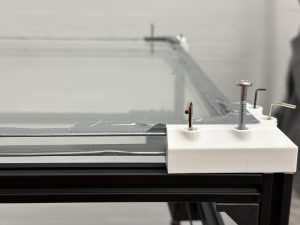
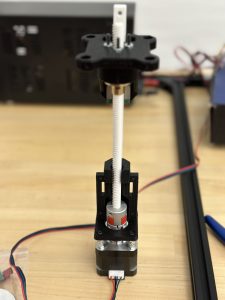
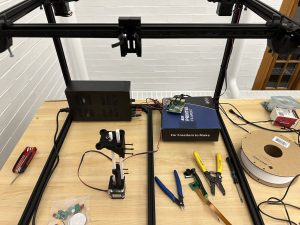
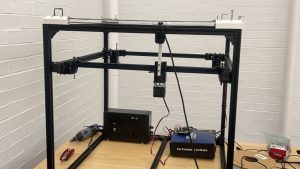
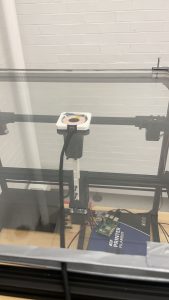
On the hardware side, we addressed stability issues with the gantry system by replacing PLA components with steel rails and shafts. These changes, along with revised screwing methods, enhanced the stability of the center manipulator. To resolve cable interference issues, we increased the height of the charging pad and adjusted the distance between the glass layers.

System integration tests were conducted to verify end-to-end functionality, including phone detection, gantry movement, and charging activation. While the system worked as expected, minor adjustments to ensure precise positioning are ongoing.

Looking ahead, we will focus on finalizing system integration and refining the interaction between software and hardware components. Specific tasks include tuning the gantry’s tracking and alignment feedback mechanisms and completing documentation, including a video, poster, and final report.

Bruce’s Status Report for 12.07

This week, I optimized the YOLO-based object detection system by migrating it to a cloud-based solution using the free tier. I constructed an API endpoint, which allow the Raspberry Pi to send images to the cloud for processing and receive responses. The reason for this change is because we run 20 tests on the pi, the yolo itself works pretty great, but when we incorporate other tasks like cv for feedback control, the computational power of pi seems insufficient to do it, and the yolo itself running on pi can cause some computational delay. Therefore, after I switch the yolo to cloud, the pi could distribute more computational power to other tasks, like feedback control for charging pad and gantry system. The cloud running app is registered as services to make sure it is always available, and I test for 30 times, the average detection time is 1.3s, which is below our requirement, and the accuracy is still around 90 percent as we are using the same model.

(yolo service on cloud || endpoint:  http://35.196.159.246:8000/detect_phone)

I also improved the vision detection workflow by modifying how images are processed. Instead of sending the entire picture for detection, the Raspberry Pi now sends cropped images representing only the table area to cloud. This change reduced data size and processing time and also improve the accuracy. Additionally, I updated the gantry system’s coordinate calculations to match the revised coordinate system, and we tested for about 20 times, each time the alignment will be within 1.5cm.

What’s more, in terms of the feedback control, I use computer vision to detect the light indicator on the charging pad as a real-time feedback mechanism. This approach provides immediate feedback on whether a device is charging, which is faster and more reliable than relying on the app. I initially try to read the cloud database from the app, but the app-based feedback system suffers from delayed polling rates, especially when running in the background. Therefore, Incorporating the light-based feedback is a better way to do this. I tested on about 10 images, and there is only 1 time it did not correctly identify the blue light on back of the charging pad(which indicate it is charging), so I may need to still update the HSV threshold value.

As mentioned before, I conducted several unit and system-level tests to evaluate performance and identify areas for improvement. Unit tests included verifying API response times for YOLO processing, ensuring coordinate adjustments matched the new cropped image detection system, and validating the detection of the charging pad’s light under different lighting conditions.

I am currently on schedule, and next week is basically just fixing small bugs and incorporate everything.

Steven’s Status Report 12.07

This week, our team successfully conducted the final presentation, effectively showcasing the significant advancements made in our hardware system. The presentation highlighted the structural improvements to the gantry system, particularly addressing the friction issues caused by the charging cable interacting with the charging pad connection. To resolve this, I enhanced our CAD model by increasing the distance between the glass interlayers on the tabletop by 2mm and redesigned the charging pad housing. These modifications ensure a better fit for the charging pad and prevent the cable from rubbing against the tabletop, thereby improving the system’s durability and performance.

In addition to the structural enhancements, I dedicated considerable effort to unit testing and recalibrating the gantry subsystem. This involved fine-tuning the subsystem to accurately move specified distances in the XY direction and ensuring reliable interaction with the computer vision system. Moving from one end of the gantry system to another end, with 57 cm of travel distance, the average error rate for the system is about 1.8mm. We have also run several tests on Z axis manipulator and hardcode its value. Each time the travel distance of the Z axis has a 2-3mm error while trying to improve the stability, this margin of error is acceptable for the design.T hrough rigorous testing, we confirmed that the vision system accurately detects the coordinates of a cell phone and effectively directs the gantry to position the charging pad at the target location.

Looking ahead to next week, our focus will shift to further system integration and enhancing inter-system interactions. I will be collaborating with Bruce on state feedback detection and vision calibration for the gantry’s end effector, ensuring precise positioning after the charging pad is moved to its designated location. These efforts aim to refine the overall system functionality and ensure seamless operation across all components.

Overall, this week has been highly productive, with key improvements made to both the structural design and the functional integration of our gantry system. These advancements position us well for continued progress in the upcoming phases of the project.

Harry’s Status Report for 12.07

Based on our final presentation, the remaining for us contains software (gantry system tracking, alignment feedback control) and hardware (workload test and cable management)

For the past week, after our presentation on Wednesday, we begin to test on charging pad alignment with the camera. The work I completed (primarily with Steven together for the hardware part) contains:

  1. Test original center manipulator. Use test code to let center manipulator drag the charging pad. However this configuration is not stable: sometimes can’t successfully drag; center manipulator very unstable with PLA shaft and rail. We tested for around 20 times, and around 8 times the center manipulator can’t successfully drag around the charging pad with wire. Therefore, we intend to modify the material of the center manipulator, the design of corner fasteners as well as the charging pads.
  2. Change to steel rail and shaft. Change screwing methods. Fix the shaft and rail right to the center manipulator. These changes are made to ensure the center manipulator is very stable and can successfully drag the charging pad.
  3. Help with corner fastener redesign and charging pad structure redesign.
  4. Help with software integration tests. Camera detect phone –> gantry move charging pad to the position of the phone –> start charging. Still tuning
  5. We increased the distance between the two glass boards. Increased the height of the charging pad. This makes sure the type C wire does not come out the charging pad at the bottom. 20 trails were implemented and 18 trails completed. One fail trail the charging module was not fixed well to the charging pad. The other fail trail the manipulator failed to drag the charging pad.
  6. Fine tuning of the CV system was also implemented. We placed the camera at several different positions to ensure it can view the whole top of the table. Based on the fixed position of the camera, we record the position and begin to fine tune the movement of center manipulator. We transform pixel distance to real world distance and change input values for fine tuning,

Next week: Video, poster, final report ongoing. Overall on time. Still a lot of paper work to do.

Steven’s Weekly Status Report 11.30


This week I continued to refine the hardware and control system for the gantry system. In order to ensure a close enough charging distance, I weighed the tradeoff between table thickness and charging effectiveness. Through testing, I found that a 3mm desktop ensures the best charging results i.e. charging with a case and without having to fully align the charging pad with the phone. However, the acrylic sheet we started with was not strong enough and its center section deformed very significantly and blocked the movement of the charging pad. On balance, I urgently purchased and cut glass panels and redesigned the CAD for the corner fixing parts, and tested to ensure that the charging pads would run silky smooth between the two layers of table tops, dragged by magnets.

I also debugged the motor driver and wiring for the up and down movement of the manipulator to ensure that it could perform the specified movement and drag the charging pad under the table. After experimentation, the gantry system now moves the charging pad well. At the same time, because the motor wiring is more confusing. I organized its wiring and centralized the motor driver into a cardboard box to avoid it receiving disconnection and other problems. Next week I’m going to focus mainly on improvements in the accuracy and workload testing of the system as well as the smoothness of the integration.

As you designed, implemented, and debugged projects, what new tools or knowledge did you find you needed to learn to accomplish these tasks? What learning strategies did you use to acquire this new knowledge?

As an ECE student, I started with no specialized knowledge of gantry systems. I referenced many belt designs for 3D printers and other three-dimensional gantry units from the internet. At the same time, the motor driver was more complex than we thought. Since I had not used a stepper motor professionally before, it took me a lot of time to debug the PWM signals. I browsed through Arduino user forums and YouTube tutorials to properly match our motor driver with the motor body.At the same time, since the design process requires a lot of rework, I have also brushed up on a lot of skills such as Solidworks and 3D Printing Slicing through online tutorials and learning from my mechanical engineering friends to help us efficiently complete our tests and improvements.

Team Status Report for 11.30

Our most crucial work for the past week is described in subsections as below.

  1. Gantry system debug based on problem exhibited in interim demo:
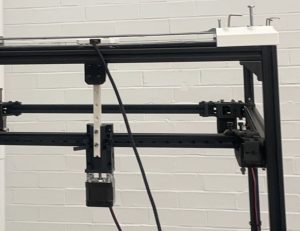
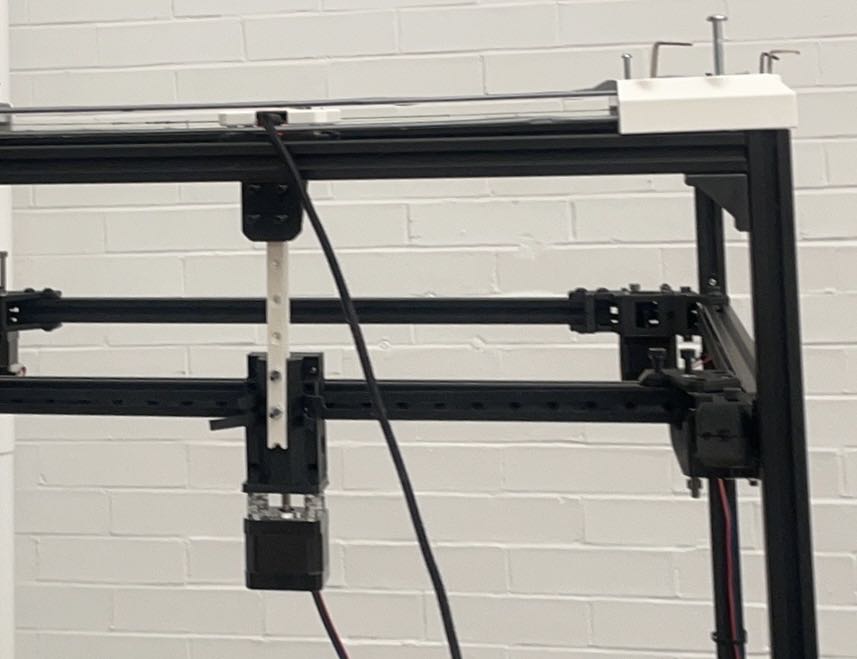
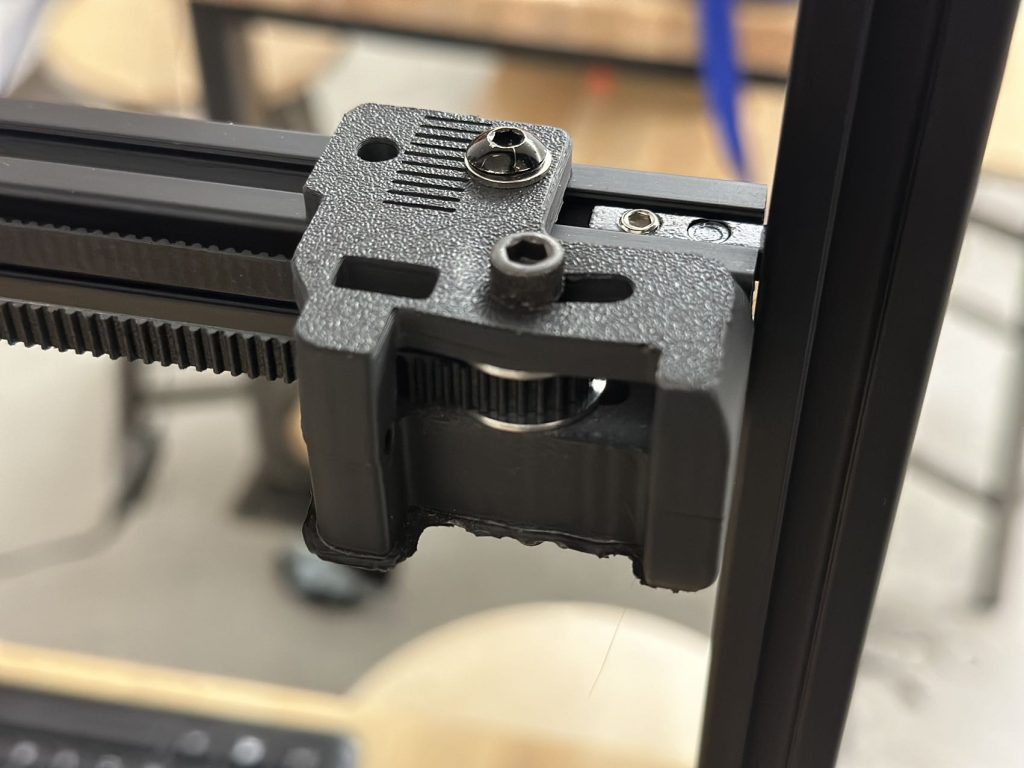
The problem that led to slow and uneven movement of the belt is the deformation of this 3d part. We reprinted this 3d part using ABS and it can then move on all x, y and z axis
  2. Center manipulator can operate as intended. Center manipulator is attached to the manipulator on the center rail. Also shaft and rail are assembled for center part to move up and down
  3. Glass boards are used to replace acrylic boards to ensure minimal structure changes
  4. Code is updated for testing the whole gantry system
  5. Charging module and charging pads are redesigned.
  6. Charging  success rate is ensured. Using around 2.6mm glass, the center manipulator can use magnets to attract the charging pad and move it around. Phone on top of the table can be successfully charged through testings. Video demos are taken and might be shown in presentation slides.

At present, the construction and testing of the overall hardware system has been completed, and more tests on intergation and workload are needed.

Harry’s Status Report for 11.30

The work I finished for the past week is described as below:

  1. Center part design/printing/purchasing/assemblyAssembled center part. Contains stepper motor, base, shaft, rail, upper part. The rail and the shaft are printed. Steel made rail and shaft are ready for cut (will be performed in machine shop). The upper part (primarily for charging pad attraction using magnets and movement) can move up and down on the shaft. Video was taken. This part is fixed onto the center manipulator as shown below: 
  2. Charging pad (charging pad was reprinted two times before it can work as intended) Steven will show in detail regarding charging results.
  3. Acrylic boards are replaced by glass boards and are fixed to the top of the table. Corners are reprinted to make sure they matches with the size of the glass board as well as the height of the charging pad
  4. Whole system overview with motor drivers fix into a box.Power supply under the table. All hardware parts completed. Assembled and tested for many times. Gantry runs good with odometry, can operate in all x, y and z axis. Center manipulator can drag charging pad around using magnets. 
  5. System integration already began. Camera control gantry movement. Bruce will update on this.

Tools and knowledge needed to accomplish these tasks:

  1. Mechanical design skills
  2. Understanding of Rpi programming logics (eg: gpio),
  3. Gantry system principles
  4. Testing and troubleshooting methods: hw, sw, meche, external force
  5. Quick 3d printing skills
  6. system integration skills, how to connect sw, hw and meche together. How to control the subsystems.

learning strategies

  1. Online documents blogs for Rpi use
  2. Online videos for specific motor driver use
  3. Rpi/Motor/Motor driver operational manual
  4. Consult other students, professors

We will continue system integration and work on slides.