Ji Status Report April 30th

This week, I did the final presentation.

I also drew the letters onto the keyboard with a pen. The only one I couldn’t do was Spacebar, because I drew the letters in a strange order and I couldn’t add the spacebar without smudging. I also started on the poster, but did not finish.

Ji Chang status report April 23rd

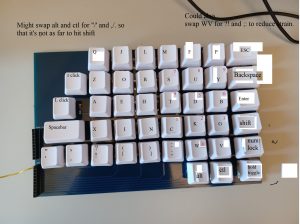
This week, I researched keyboard layouts for the one-handed keyboard. Since qwerty is rather arbitrary, I went with what looked like the closest thing to what we wanted: right-handed Dvorak.

Here is my keyboard layout. I included notes.

Over the weekend, we finalized the keyboard design. I helped mount the base and added rubber tape, allowing the keyguard to rest on top and prevent it from slipping. We also worked on the mouse mount, and I found a strap to attach to the base.

Since we have the presentation, I’m doing that and writing the powerpoint. We’re trying to finish the keyboard so we can do some proper testing before we can report the tests.

Ji status report April 16th

This week was rough, since we were all sick with something different. But we did get stuff done.

This week, I looked at potential keyboard layouts. At first, I figured we could sort the most common letters, but then I realized that it would be better if we could find a setup that was already known: Dvorak. QWERTY is designed rather arbitrarily, so I figured that the ergonomically designed Dvorak would work better.

There is already a setup for right-handed Dvorak, so I figured that I could adapt it to our current keyboard.

I am a bit worried that there might be more keys than characters; while we can get some to double up, I’m worried that the hold shift toggle key never showed up in the design.

Ji Status Report April 9th

We worked on the mouse on Monday.

My teammates are working on getting the pi to approve a mouse click, and mouse motions.

We’re looking into taking apart a mouse and then making a new chassis. I’m looking into other ways to operate a mouse with your foot. Actually, we’re now looking into joysticks.

I tried using my computer touchpad with my foot. I could move it, but it didn’t respond well to upward motions and I had trouble with fine movements. Lifting my leg for a long period of time also tired me. So we’re not going to use a touchpad.

In general, mouse sensitivity would have to be reduced, since our feet aren’t as precise as our fingers. We should also include the option to have a normal, hand-operated mouse as a backup. I guess that’s more of a number of USB ports than anything else.

I now think that a joystick is the best way to operate a mouse with your foot. The circle pad on the 3DS looks like the best, since it slides and is concave, but we can’t get a larger version.

Since we already know how to make buttons, we could do a d-pad, with four buttons.

Dance Dance Revolution pad, if smaller.

Since reducing mouse sensitivity would make mouse movement slower, I had thought that holding the stick/key/pad/whatever would gradually speed things up. Then I remembered that hold key presses were the most common error, so we shouldn’t do that.

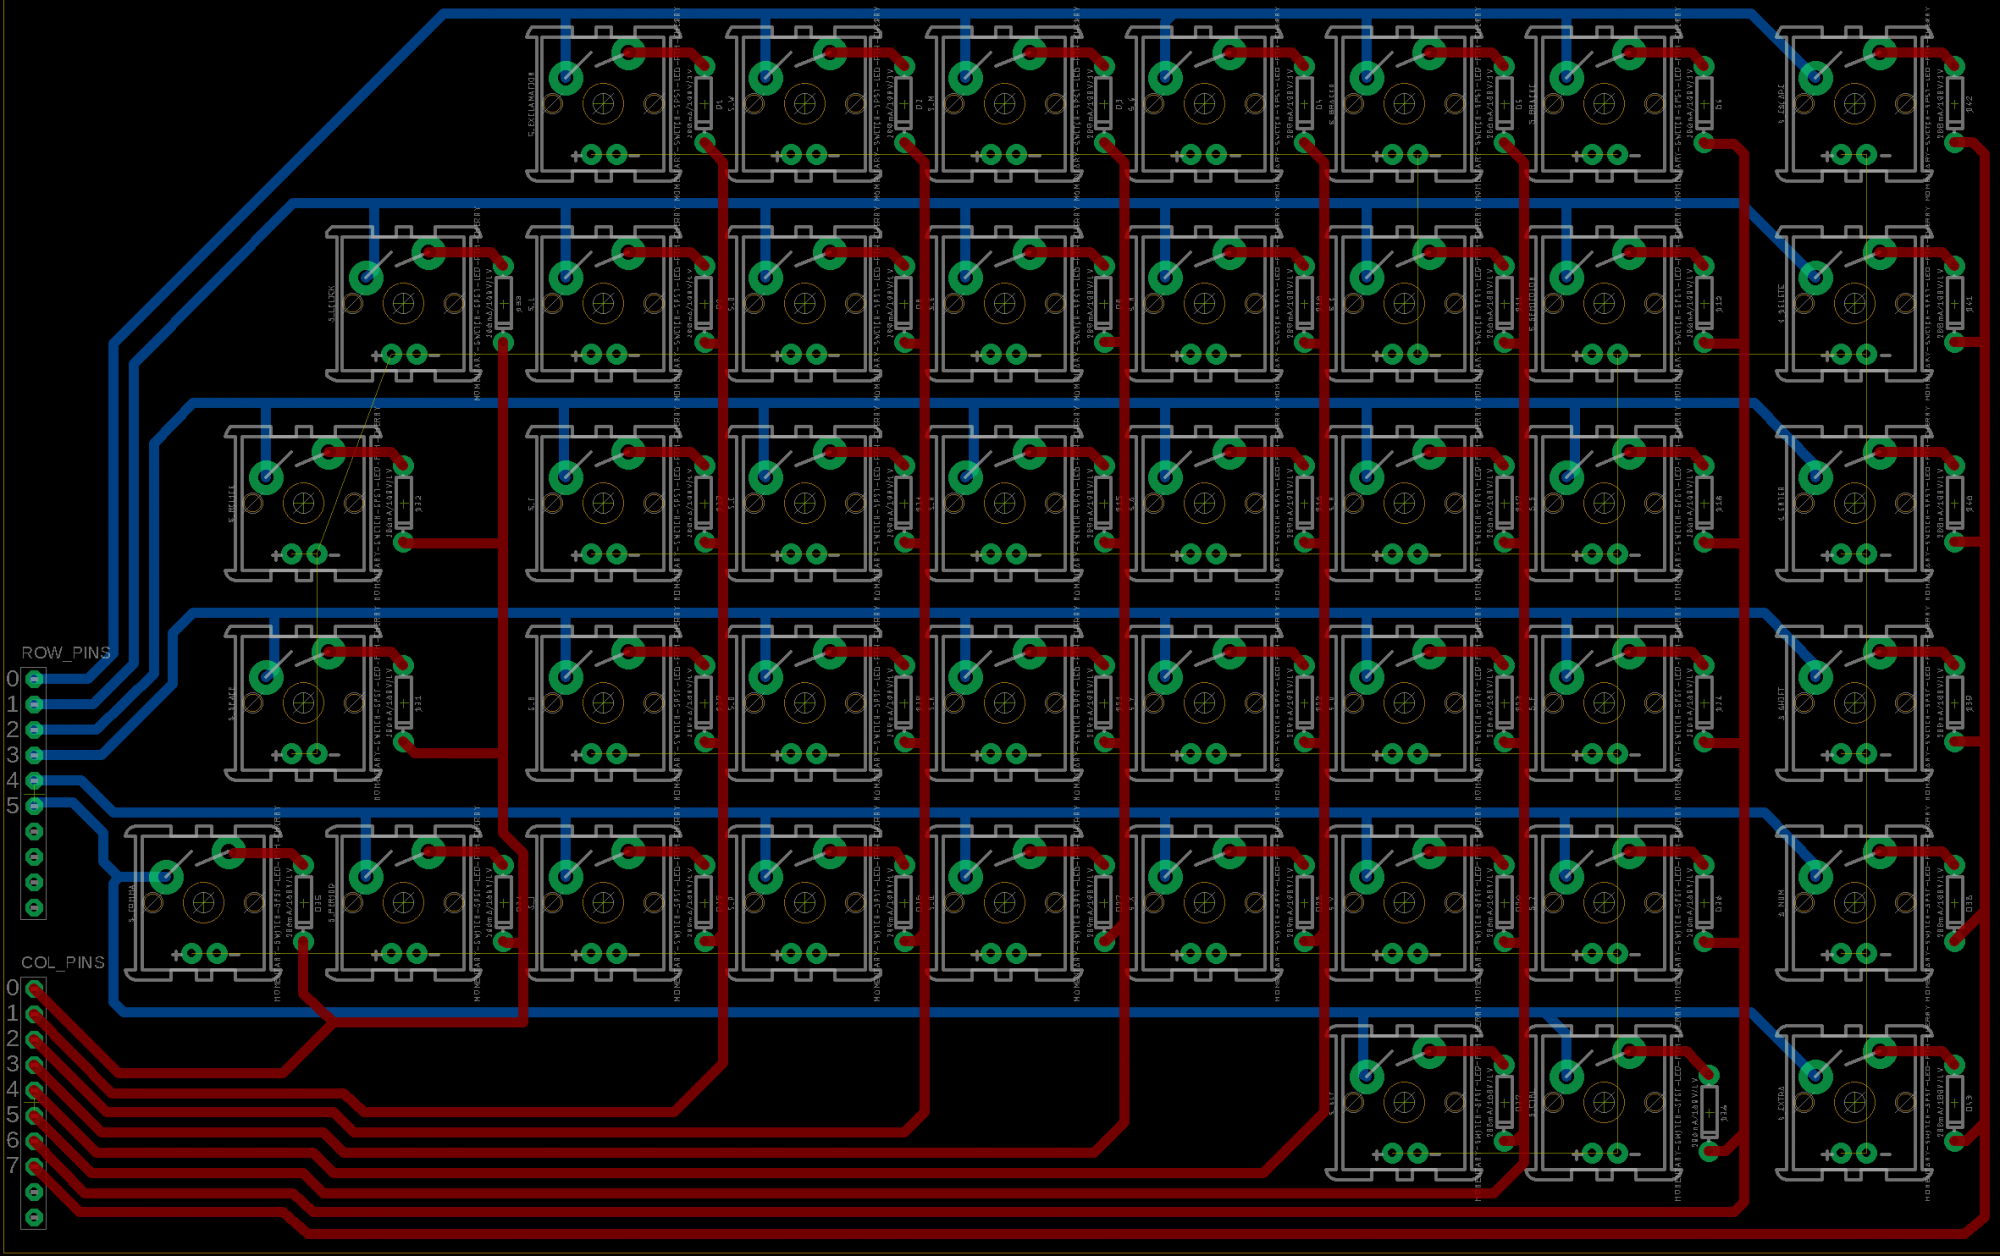
On Wednesday, Jorge and I soldered the diodes to the board.
Ji Status Report April 2nd

This week, we discussed the mouse setup. We were primarily focusing on the keyboard, so we had neglected the mouse design. The mouse will be foot-operated, and the clicks will be on the keyboard.

I proposed looking at larger touchpad peripherals, and placing them on the floor. To ensure that only the more dexterous foot can interact with the keyboard, we proposed that the more functional foot is wearing a sock treated with the cloth that can be used on touchpads, and the other foot is wearing a normal sock. This might cause some problems in hot weather, though. The team accepted that this is a possibility, but we did not finalize the design.

This is the link to the trackpad. This is the largest one we could find, at 6*4 inches.

Once we get the PCB, I want to solder them.

Ji status report March 26th

Due to the ethics seminar, we could not do much on Wednesday. We did discuss briefly how our project would potentially cause harm. On one hand, it is a ‘better’ keyboard and keyboards already exist. On the other, Social Media is just a better messaging board. We concluded that by giving some people easier access to services that already exist, we could not cause much harm. We also discussed how a cheaper accessibility keyboard may reduce the job opportunities for stenographers, but there are plenty of other jobs other than typing for the impaired.

We also discussed biases. As a team of able-bodied designers, we need to learn from people with cerebral palsy and what they want in a keyboard/mouse set, and not just what we think they want. We reached out to find people with cerebral palsy and are currently awaiting a response.

On Monday, we were still awaiting the shipment of diodes. I searched for key switches for keyboards (the things you press). We went with linear key switches, the simplest and most common type of key switch.

This is the link to the keys we plan on purchasing. We chose Gateron Ink Black switches because they are relatively inexpensive and have consistently been rated as having a ‘smooth’ feel. I was concerned about the mention of lubricating the keys, but apparently it does not particularly matter for people who do not already construct mechanical keyboards. I had considered the silent version of the keys, but they are more expensive and seem to require more force to operate.

https://divinikey.com/products/gateron-ink-v2-switches?variant=32067927048257

Ji’s Status Report, March 20th

As stated on the team report, we made the prototype board, only to run into a wall when we didn’t have the right diodes. We then moved on to the assigned ethics writeup, which we did during class.

I also proposed a way to make the board more durable: wrap the bottom and sides in adhesive rubber strips, and weigh down the bottom so that it would fall down on the rubber instead of the top. We plan to use an extra board to test durability.

Ji’s Status Report, Feb 27th

This week we were doing the design report, both writing the report and slides, so not a lot got done on the design front. We’re still on track.

I contributed by writing the introduction and editing the use case. I also started on the Architecture and Trade-off sections.

Ji’s Status Report, Feb 19th

We’re currently in the Design Review stage, and we currently don’t have many parts for prototyping. So we’re making do with components scavenged from the lab.

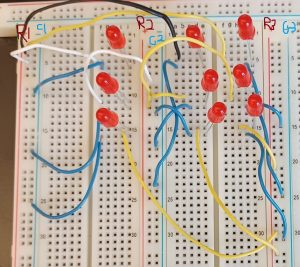
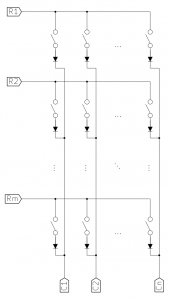
The circuit above is meant to simulate the circuit below; it is the matrix used for the keyboard. The purpose of the circuit is to test if the Raspberry Pi can detect if a switch is open (or closed), and if so, which row and column. That is, the circuit itself can’t do that; it’s a problem for the software to handle.

The blue wires are ‘real’ wires, while the other colors are pseudo-switches. The point of this circuit is to check if the Raspberry Pi could detect changes in switches, so you can pull (and replace) the non-blue wires to simulate a switch opening or closing.

This may violate some rule, but R1, R2, R3, etc. are the Vcc columns, and C1, C2, and C3 are the Gnd columns. Real Vcc and Gnd can connect elsewhere.

In other words, all LEDs on the top row connect to R1, or the leftmost Vcc. All LEDs in the middle row connect to R2, or the center Vcc. All LEDs on the left column connect to C1, or the leftmost Gnd. It may be hard to see, but they’re labelled.

We couldn’t test it this week because we need a part to connect the Raspberry Pi to the breadboard.

Next week, we can look at the mouse.

Ji Chang’s Status Report, Feb 12th, 2022

On Monday, we looked at keyboard circuits. Basically, how does the Raspberry Pi detect each key when you press it?

The one my teammates proposed was a matrix keyboard, and I proposed a series of cascading resistors.

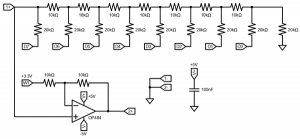
With a cascade resistor keyboard, each key in a row is mapped to a resistor switch, doubling each time. For example, the leftmost might have 100 ohms, the second on the left has 200, then 400, etc. so that the voltage difference across the row would change every time a key is pressed. The keys have different resistances so that the Pi can detect multiple key presses simultaneously and interpret the analog voltage drop as a binary bitvector.

Or at least, that’s what I remember. This is a digital to analog converter from Microelectronic Circuits, which does what I wanted. Every combination of digital inputs will change the voltage in a discretely unique way, which can then be interpreted on the Pi as a digital signal via an analog to digital converter.

This seems to work, but we haven’t seen this work in other keyboards, so we’re going with the matrix keyboard. I’ll leave this here as a backup.

To see how a matrix keyboard works, see the team status report.

I researched matrix layouts to see if I could build them, and I can say with several degrees of confidence that I can.