This week, I worked a lot more on monitoring. By the end of last week, I was able to send peer-to-peer text messages between two unique users. This week I extended that to allow for audio streams to be sent, and to work with an arbitrary number of users. These changes required a complete restructuring of all the monitoring code I wrote last week and the week before.
As a reminder, I’m using the WebRTC (real-time communication) API which comes built-in on your browser. WebRTC uses objects called RTCPeerConnection to communicate. I explained this in detail last week, so I won’t get into it here. The basic idea is that each connection requires both a local RTCPeerConnection object and a remote RTCPeerConnection object. If WebRTC interests you, there are many tutorials online, but this one has been by far the most helpful to me.
Connections with Multiple Users:
Last week, I created one local RTCPeerConnection object and an arbitrary amount of remote RTCPeerConnection objects. This made intuitive sense, since I want to broadcast only one audio stream, while receiving an arbitrary number of audio streams from other users. However, this week I learned that each local connection can only be associated with ONE remote user. To get around this, I created an object class called ConnectionPair. The constructor is simple and will help me explain its use:

Each peer-to-peer relationship is represented by one of these ConnectionPair objects. Whenever a user chooses to initiate a connection with another user, a ConnectionPair is created with 4 things:
- A new local connection object (RTCPeerConnection)
- A new remote connection object (RTCPeerConnection)
- A gain node object (GainNode from the web audio API) to control how loud you hear the other user)
- The other user’s username (string) which serves as a unique identifier for the ConnectionPair. You can then retrieve any ConnectionPair you’d like by using another function I wrote, getConnection(<username>), whose meaning is self-evident.
So why is this useful? Well, now there can be an arbitrary amount of ConnectionPair objects, and thus you can establish peer-to-peer connections with an arbitrary amount of users!
Sending Audio Over a WebRTC Connection:
Since the WebRTC API and the web media API are both browser built-ins, they actually work very nicely with each other.
To access data from a user’s microphone or camera, the web media API provides you with a function: navigator.MediaDevices.getUserMedia(). This function gives you a MediaStream object, which contains one or more MediaStreamTrack objects (audio and/or video tracks). Each of these tracks can be added to a local WebRTC connection by the function RTCPeerConnection.addTrack(<track>).
And finally, to receive audio on your remote RTCPeerConnection, you can just use the event handler RTCPeerConnection.ontrack, which is triggered every time the remote connection receives a track. This track can be routed to your browser’s audio output, any type of AudioNode (for example, a GainNode, which simply changes the volume of an incoming signal), and out.
User Interface Improvements:
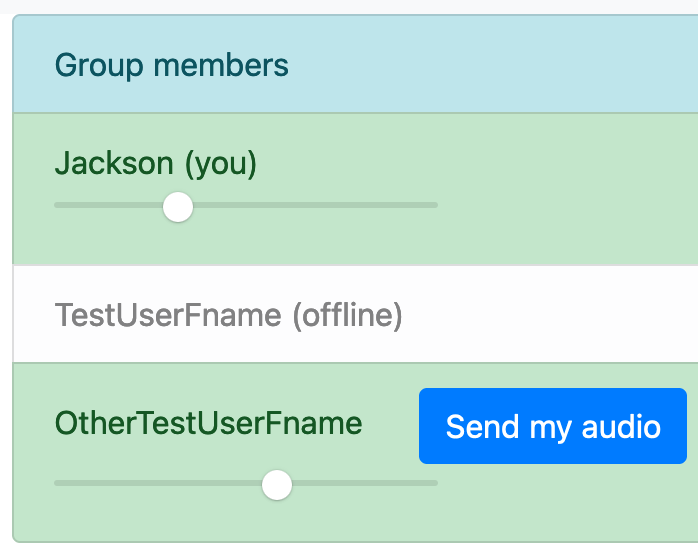
Finally, I added a little bit to the UI just to test the functionality mentioned above. On the group page, here is how the users are now displayed:

In this group, there are 3 members:
- Jackson (the user whose screen you’re looking at in this screenshot)
- TestUserFname (a test user, who is currently offline)
- OtherTestUserFname (another test user, who is currently online)
Next to every online user who isn’t you, I added a button which says “send my audio.” This button initiates a peer-to-peer connection with the user it appears next to. Once the connection is opened, the audio from your microphone is sent to that user.
Lastly, next to each online user, I added a slider for that person’s volume, allowing users to create their own monitor mixes.
We are still a bit behind schedule, since I thought I would have peer-to-peer audio monitoring working a few weeks ago, but I hope it’s clear that I’ve been working very hard, well over 12 hours/week to get it working! The biggest thing I can do to get us back on schedule is continue working overtime. As I said last week though, I think the hardest part is behind us.
With monitoring finally working, I can move onto testing and really driving the latency down. For next week, I will implement the latency and packet loss tests described in our design review and work on getting the numbers to meet our requirements (<100ms latency and <5% packet loss rate).
One Reply to “Jackson’s Status Report for 4/3”