The start of this past week went by pretty much like the last couple weeks – mired in malaise and inaction. The end of the week, however, couldn’t be more different…
After discussing our stalled project progress with Professor Yu, Greg and I wrote out a communication Action Plan (detailed in this week’s team status report). The core issue was that we were simply not communicating actively enough and thus allowing development goals to fall by the wayside. Having written out our plan for getting back on track we started a personal work record to track daily progress contributions made by each team member. This was exactly the kick in the pants I needed to get going in earnest.
First, I wrapped up several parts trade studies we had allowed to drag on and placed orders for mylar insulation, wire mesh, a pump, and tubing. The mylar will form the outer walls of the device and will serve to block outside light from disrupting the “blackout” phase of the grow cycle while also insulating the device’s internal temperature and maximizing internal light. The wire mesh will be used for the plug portion of the seed distributor – to be further developed in the following week. The pump and tubing will be used in the automatic watering system. I also researched power relay options and finally settled on a simple 8-channel 5V module from SainSmart. I’ll be placing that order at the start of the upcoming week.
Next, I got to work putting together the CAD assembly of the MiGroBox frame with the goal of getting the vertical CNC portion complete enough to send the “squish sheet” design files to get manufactured by Greg on campus. One of the biggest unexpected challenges up through this point was the decision paralysis regarding choosing specific 80/20 hardware to use from the enormous catalog of available parts. Having gone through the company’s educational material, perused their online shop, and written out relevant project requirements in a more systematic way, I was able to whittle down towards a solid selection.
I chose 40 series 80/20 both for the fact that is was one of the more popular options, having a larger number of compatible hardware available, and also because it featured smooth outer walls unlike the fractional series (smooth walls are key to getting let dirt and debris stuck on the device). After settling on a series, I selected linear bearings primarily based on cost, and fasteners based on a combination of ease of assembly as well as cost.
I imported the 80/20 hardware CAD library into my Solidworks environment and got to work on a proper assembly.
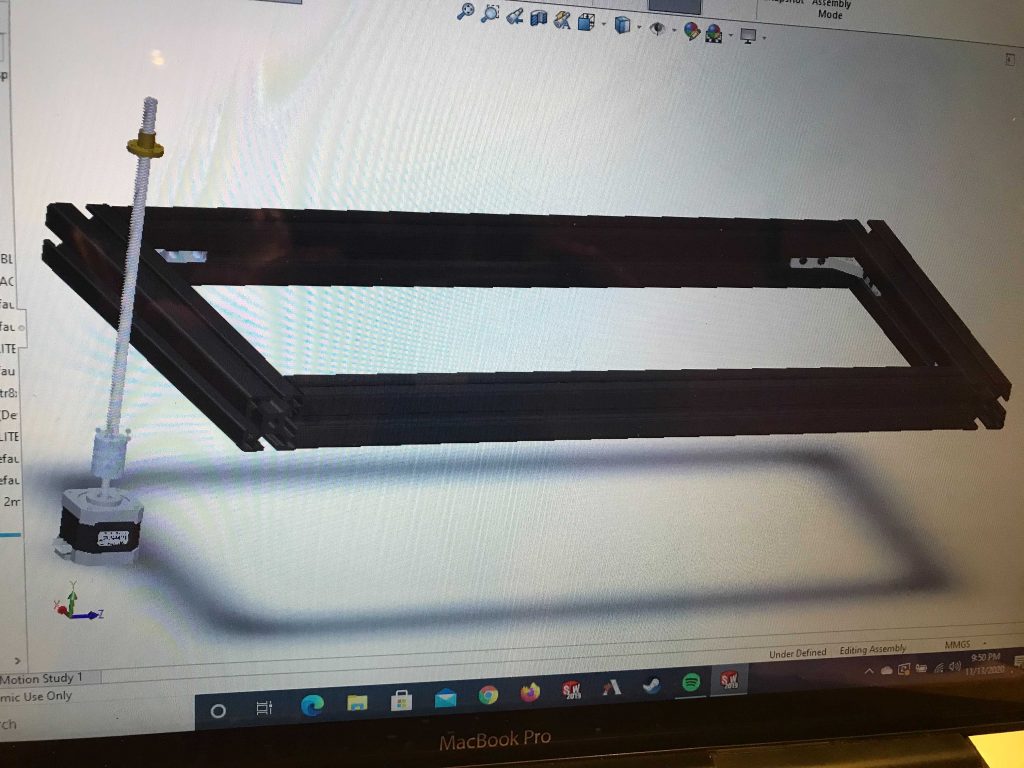
The first parts I put together were the z axis stepper motor with its related components and the frame of the grow tray base. This frame will hold onto the edges of the grow tray and move along the z-axis. This vertical motion is necessary to “squish” the microgreens for the first few days after seeding to encourage stronger root development while they germinate. The “squish sheet” they will be pressed up against is the first part I’ll need Greg to manufacture on campus and send back to me. It’ll basically just be a 10×20 inch piece of clear acrylic with some mounting holes at its corners, but I want to get the CAD reasonably complete to be sure we’re not wasting time and money on cutting out and shipping a faulty design.
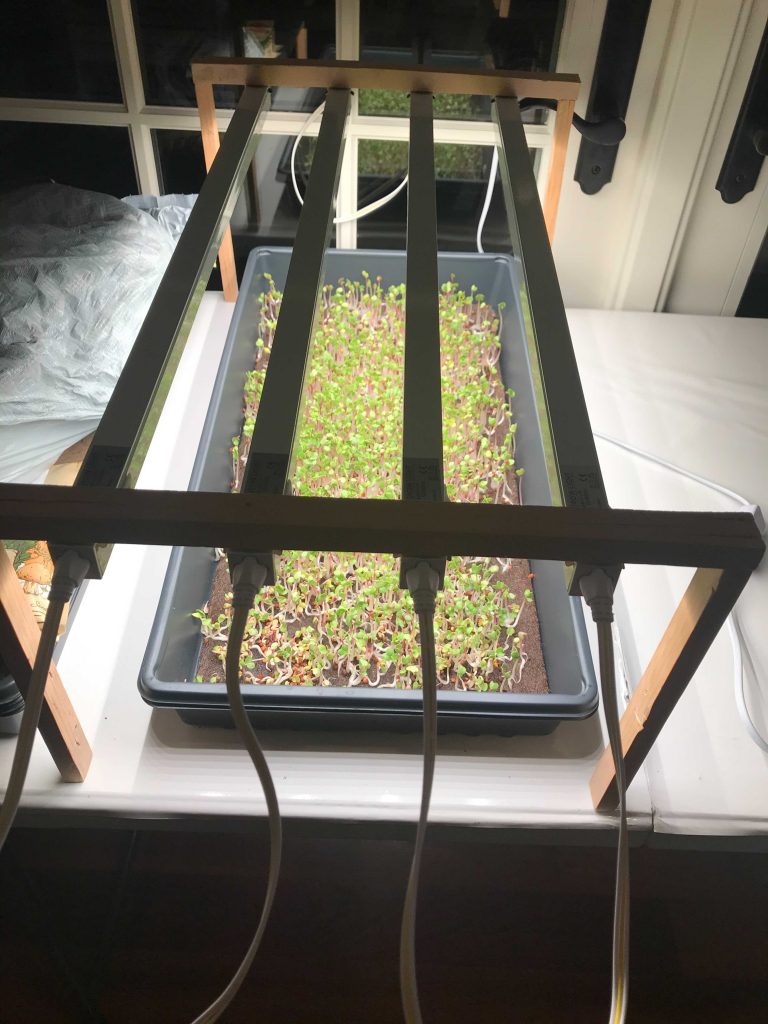
I took a slight break from staring at my screen to put together a simple frame out of some scrap wood I had lying around. This frame holds up our grow lights using the mounting hardware that came with the lights. It’ll be perfect for running an artificial light vs. natural light trial on the following week’s microgreens: I’ll plant one tray and grow it using only natural sunlight while using the light rack on a second tray. Keeping all factors such as seed weight, air flow, lighting hours, and general care routines as equal as possible should give good insight as to how grow lights will affect the yield ratio.
Switching back to the frame assembly, I ended the week having selected linear bearings but also having decided against using internal fasteners for the grow tray frame, as they would get in the way of the tray itself. I also modeled the grow lights and added them to the assembly. The final sight may look like a blown up mess, but it represents a huge leap in the right direction.
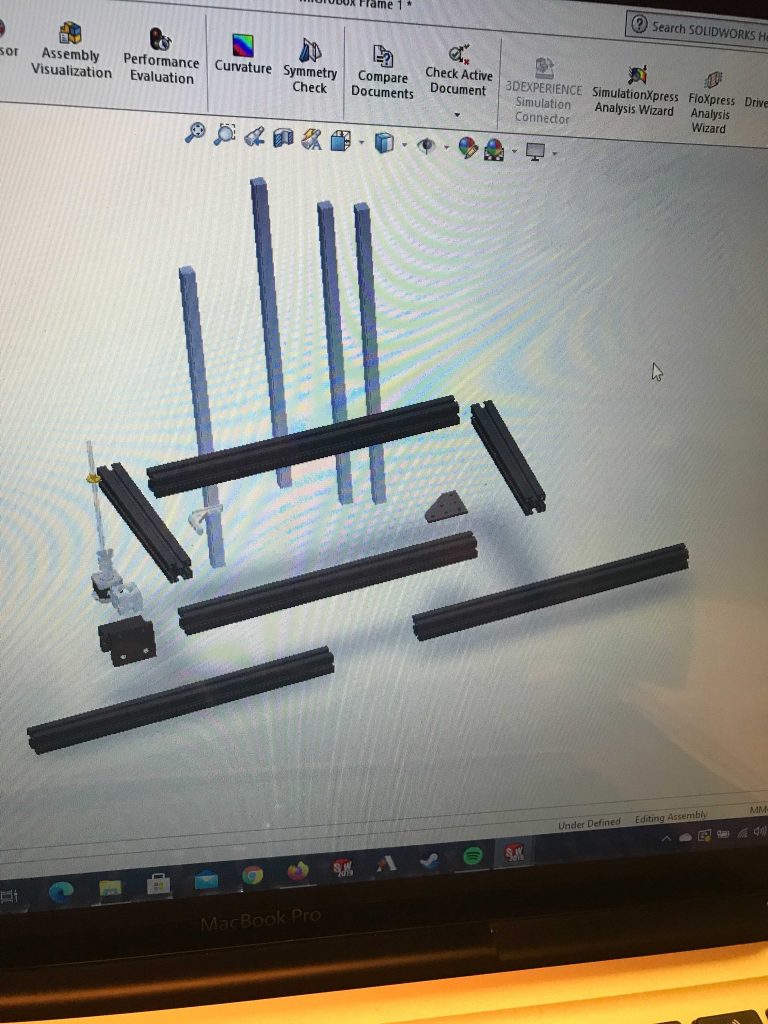
I essentially removed the mates holding the frame together and pulled in a selection of other fastener options. With Solidworks set up and the “hello world” of the frame assembly effectively finished, development should go much, much faster next week.
Next week, I expect to have the CAD assembly roughly complete. At the start of the week I will place the relay part order and complete the squish sheet CAD to get Greg to manufacture it. I will then focus on wrapping up the rest of the frame CAD to a point where we can place an initial order of mechanical parts. I will also be harvesting our third tray of microgreens and seeding two new trays of radish to run the natural vs. artificial light grow trial.
You can follow our grow trial data here