As the team status report explains, most of the past two weeks have been dedicated almost entirely towards solidifying our MVP design. Together, Greg and I ran through our desired features and decided on how to best achieve them using the most minimal number of sensors and actuators possible.
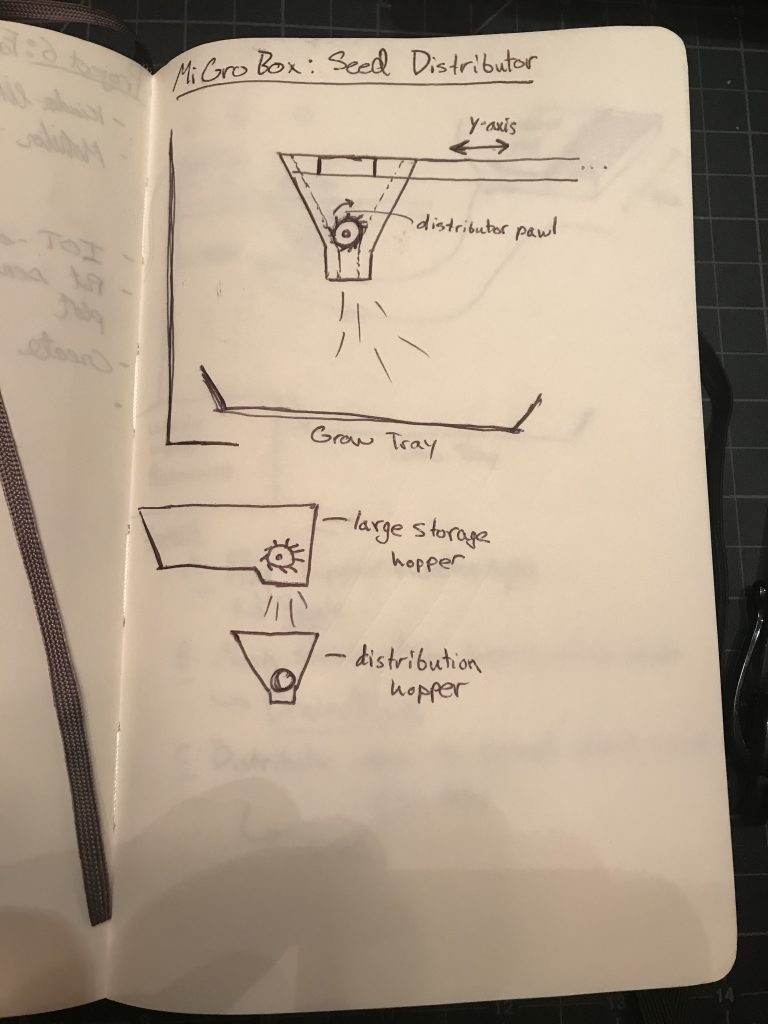
With key parameters and features roughly settled, Greg and I discussed the seeding mechanism at length. The idea behind this hopper is that it must hold roughly 2-3 oz. of seeds, retain them while they are rinsed from above, become water-tight to soak them overnight (a crucial step in the microgreens growing process) and finally drain them before distributing over the grow tray. A larger, long-term seed storage hopper would dispense the required amount of seeds into the distributor.
I got to work designing what is still so far just a mockup of the distributor mechanism. Here’s the progress so far:


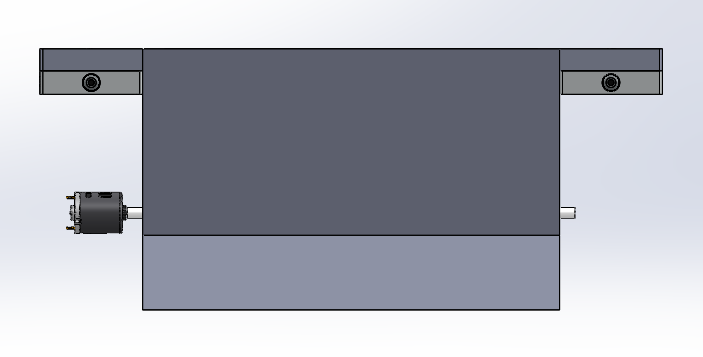

Again I want to stress that this is just a loose mockup, but hopefully it gives a good rough idea of what we’re aiming at. The assembly uses generic grabcad files for the motor and load cells. We have not yet settled on what motor or load cells to use in the final design, so these may change.
Also not pictured in this mockup is our idea for making the hopper water-tight using minimal hardware: having it back into a plug attached to the device frame. You can get a sense for the idea in the following sketch:

We already have the hopper moving along the y-axis. We already have a pump for the watering system. How can we get more use out of them? By extending the y-axis past the grow tray, we can have the hopper back itself into a plug. By adding a split water path and a manifold to select between the two, we can use the existing water pump and water reservoir to push water into the seed hopper for rinsing and soaking. The plug will certainly need more work, but the idea is that it is split into sections. Zone A, the soak zone, is closest to the MiGroBox frame and is essentially a solid rubber plug. This zone completely blocks off water flowing through the hopper. Next to that on the same plug is the Zone B section, the drain. The rubber plug section gives way to a mesh screen that retains any seeds that fall through the pawl while allowing water to rinse and drain through the hopper. Finally there’s Zone C, which is just the grow tray area over which the hopper is open and able to spread seeds.
Essentially the routine is as follows:
Distributor moves to Zone B -> Storage hopper dispenses the required weight of seeds into Distributor -> Water valve/manifold/solenoid switches watering system path to Zone A/B from Zone C -> Seeds are rinsed with water (to clean them) -> Distributor moves to Zone A -> Distributor is filled with water and soaks the seeds over a 10-12 hour period -> Distributor moves back to Zone B thus draining the seeds of the soak water -> Distributor moves evenly over Zone C, releasing seeds as it goes.
Waste water simply drains from Zone B into a waste water reservoir below.
This design maximizes the utility of our existing hardware while requiring minimal additions – the controller, y-axis mechanism, hopper, water pump, and water reservoir would have been there anyway. By slightly extending the length of the y-axis, adding a custom plug, adding a water manifold, and some extra plumbing we get a huge boost to product safety (rinsing is very important) and product yields (pre-soaking seeds is hugely beneficial).
Still, the devil is certainly in the details and any number of aspects to this design could prove a huge challenge: making sure the distributor is water tight, making it move effectively between zones, making sure seeds do not fall through the Zone B mesh grate or get stuck between the grate and the distributor pawl, etc.
What’s Next?
Having discussed, sketched, and roughly modeled the most concerning part of our project design, I am sufficiently satisfied that it can be implemented. This week I’ll have to switch gears towards wrapping up the trade studies and selections for what microcontroller to use, what RTOS to load onto it, and what sensors and actuators to use. Greg and I will also be finishing system block diagrams for the MVP.
Our goal is to wrap up the concept phase and much of the refinement phase of the project within the week. That means we need to settle our parts list with definitive parts needed, finish the system block diagrams, and pick out a selection of microgreens to start growing.
Let’s get ‘ta farming!