Updates

Check back here for updates on our project progression!

  • 4/4/2016

Two-Way Ranging, Android App, and a New Board Layout

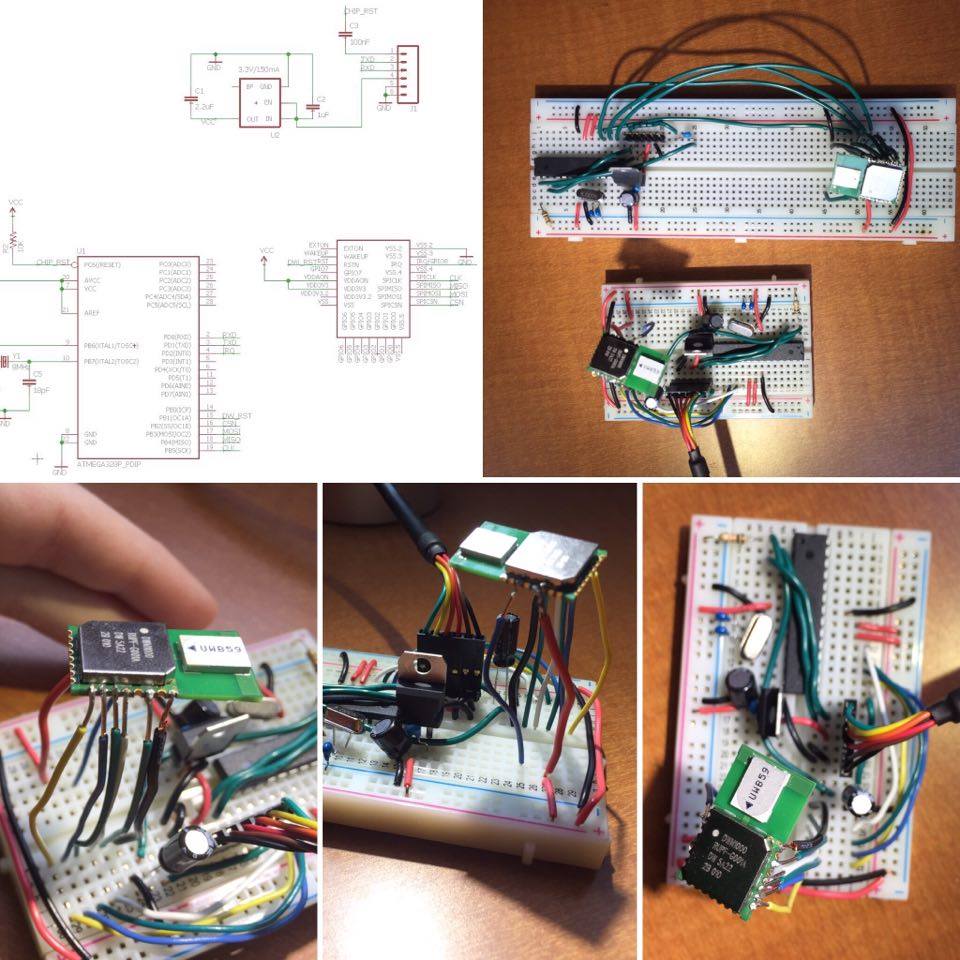
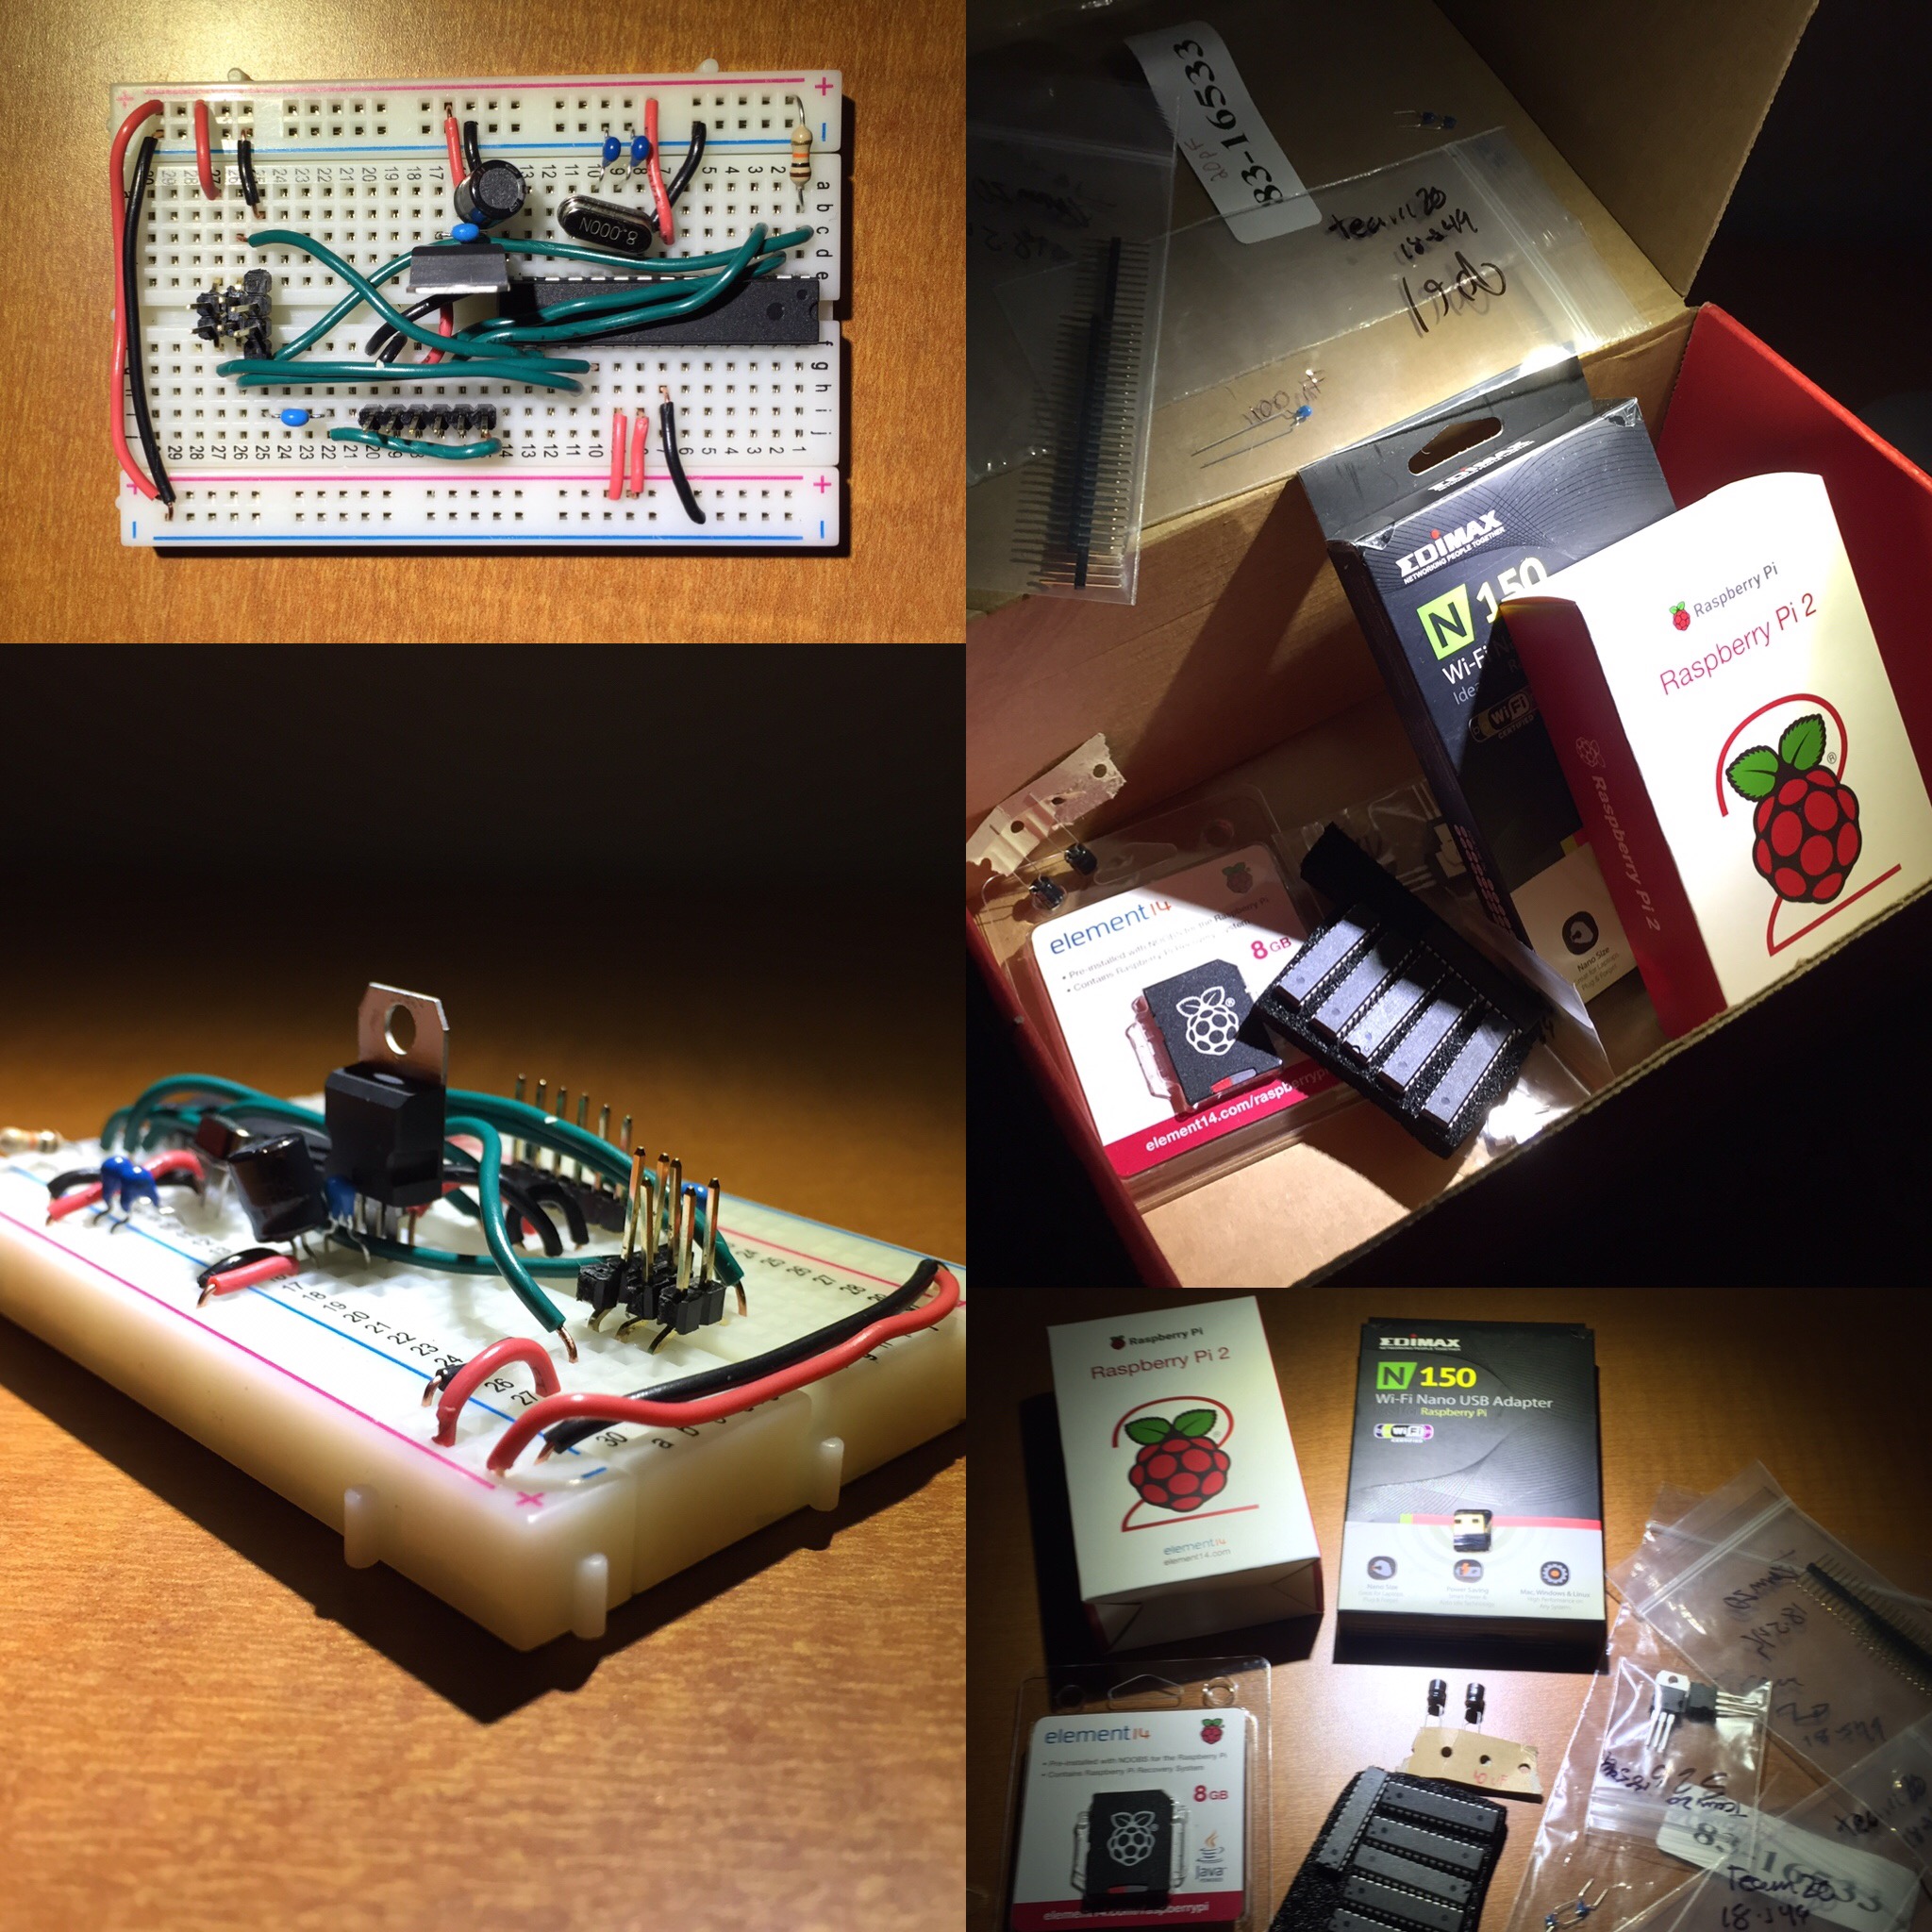
This week we revised our board layout, implemented a two-way ranging protocol using the DWM1000s, and created an example demo Android application.

We also updated the website for the second checkpoint and added the Use Cases, Interaction Diagrams, and Architecture sections to the Documentation part of our website (above).

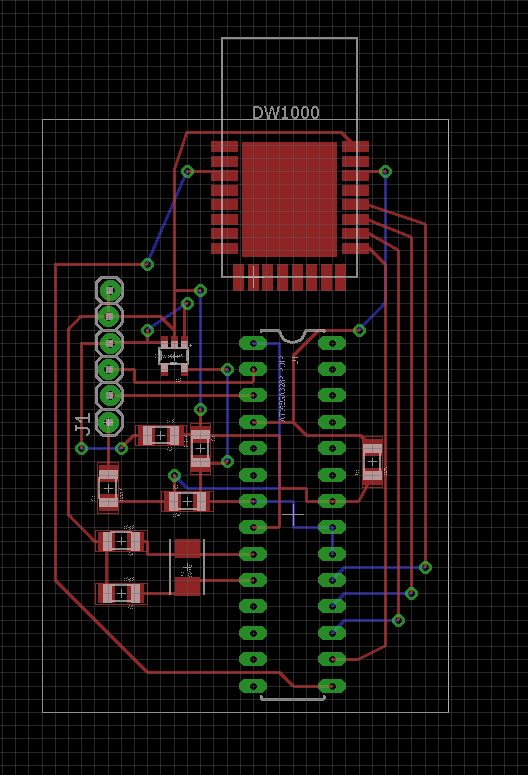
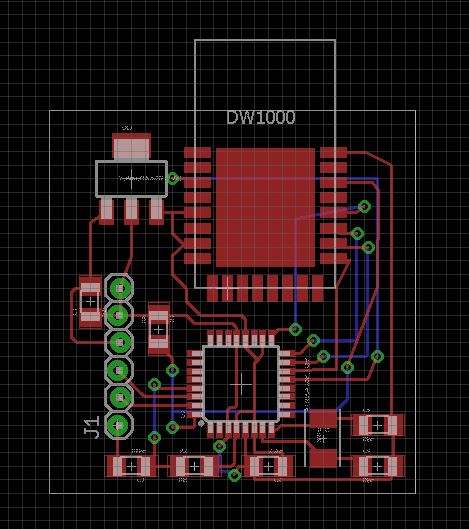
Second Iteration of Board Layout

We found a voltage regulator with a bigger footprint than our original choice. We should have no problem soldering this new one.

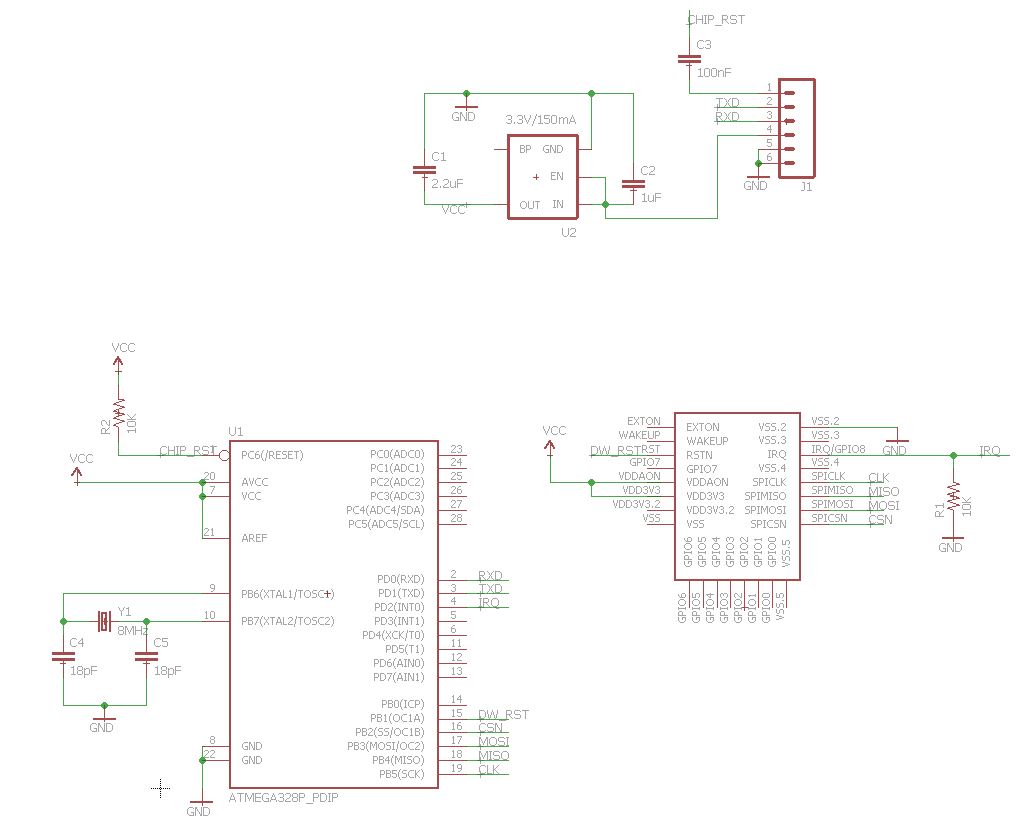
Instead of using a through-hole Atmega328, we decided we would use the surface mount TQFP version. This allowed our board to be smaller and more compact. However, our original plan was to program the chips off-board because of the 5V nature of our AVR programmer and the 3V nature of the DWM1000s (both would need to be connected via SPI and it would be hard to separate them). However, adding a surface mount chip meant we would need to program on-board, and therefore need to add the 6-pin AVR headers, and find a way to not fry the DWMs. We found out that there was a setting in the AVR programmer that allowed it to match the power level of the circuit it was programming when it is not the power source, so we were all set.

After all of that research we decided that because we technically don't need to be able to program the chip once it is on our PCB, we didn't want to expose the programming headers and have them take up more room on the board. Luckily, we found this TQFP Breakout Socket from Adafruit which should allow us to program our surface mount chips away from our PCBs.
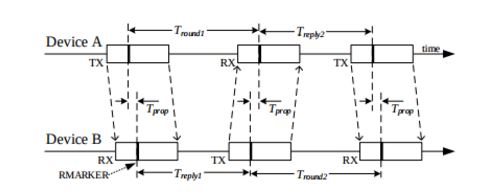
Two Way Ranging

After a lot of hard work we finally implemented a two-way ranging protocol using the DWM1000s. Here we have the specific roles of Tag and Anchor defined and they are able to determine the range between the two through the passage of three messages. This was an exercise in starting the protocol off, getting us closer to the final ranging protocol we decided on, descriped in the Interaction Diagrams section above.

Here is a diagram describing the initial protocol we implemented:

Android App

This week we created an Android App implementing the app idea we described last week. We chose to create an Android app mostly because our team member in charge of this portion is in an Android development class and is interested in getting as much experience as possible.

Deliverables for the week:

  • 3/28/2016

App Ideas, DWM 1000 Timestamps, and Eagle Board/Layout

This week we spent time finishing up our DWM1000 driver library, working primarily on the retrieving timestamps from the DWM1000 as this will be a crucial part of the ranging protocol. Additionally, we spent some time coming up with possible App ideas to run on top of our API. On the hardware side, we created the first iteration of our Eagle schematic and board layout.

The app idea is to make an Android mobile application which can use data it receives from the server to show the most recent position of the tag being tagged. To do this the Android app will connect to the website and pull information and update the locations of the tags on screen.

The dot representing the tag will move around as required. The position of the tag is fixed at the top of the screen and the user will have to orient himself that way as there is no way of knowing which direction the user is relative to the anchors.

Deliverables for the week:

  • 3/22/2016

Message Rx/Tx and Connecting the Arduino to the RasPi

This week we worked on sending and receiving messages using the DWM1000s (code). This proved to be a very arduous process. Additionally, rather than using the default config, we configured our DWM1000s using values we had picked out ourselves. We chose to do this in the hopes that we could get as much of the configuration done as possible, all at once.

Here are some of the configuration choices we made:

  • Data rate: 6.8 Mbps
  • Preamble length: 128
  • PRF: 64 MHz
  • Channel: 2

We also worked on getting the raspberry pi connected to the Arduino over serial using an FTDI cable (code).

  • 3/14/2016

Making Contact with the DWM1000, Schematics, Deployment, RasPis and More!

This week we focused on:

  • Soldering the new DWM1000s and adding them to our breadboarded prototypes.
  • Reading and Writing to DWM1000 Registers over SPI. (code)
  • Making DWM1000 Device Address Configurable via Makefile. (code)
  • Deploying our django server. (example API call)
  • Creating an Eagle schematic to Match our prototypes. (sch file)
  • Setting up Raspberry Pi.

Thanks to Spring Break, this is more like two weeks worth of work(ish).

The DWM1000s are here!

Much to our relief, the DWM1000s finally arrived. This allowed us to start a lot of the work we had been putting off while waiting for them. First, we soldered them and connected them to our breadboarded prototypes (this was a painful process, we are actually looking forward to being able to surface mount solder them to our PCB), then we decided to make initial contact with them by simply reading the device ID from the chip (some read operations are more complex than others due to offsets, etc. and this one seemed like a simple one to start out with). We then moved on to accommodating reads/writes with various address offsets.

RasPi and Server Deployment

This week we also decided to focus on deploying our web server and attempting to query it from the Raspberry Pi. This activity was good because it forced us to setup the Raspberry Pi and configure the Wifi adapter we bought. Additionally, it forced us to go through the web server deployment process which, even with experience, tends to be a bit tricky. We chose to deploy on Heroku because it is easy and we do not need to store data persistantly in our DB. Below is an example output from our API.


$ curl https://test-server-549.herokuapp.com/testServer/set/2/1/1/1
  % Total    % Received % Xferd  Average Speed   Time    Time     Time  Current
                                 Dload  Upload   Total   Spent    Left  Speed
100    60    0    60    0     0    192      0 --:--:-- --:--:-- --:--:--   213

It has been set to R=0.866025 and theta=0.000000

													
Eagle Schematic

After having a working prototype, we decided it was time to create an Eagle schematic of our prototype so we can be ready to print the PCBs as soon as possible. We are still waiting to confirm a few of the connections (mostly waiting for interrupt related connections coming from the DWM1000s). Creating the schematic brought up some problems related to the initial parts we ordered (and their possible lack of surface mount equivalents). For this reason, we had to do some more research into finding the correct surface mount substitutes for the through hole parts being used in the current prototypes. Additionally, we were able to find a DWM1000 library file for Eagle, which meant we didn't need to create/define this part ourselves.

  • 2/29/2016

Waiting for parts... plus adventures in 3V microcontrollers/django/Makefiles.

Much of this week was spent blocked as we waited for our parts to come in (they aren't even all in yet due to a plethora of errors from wrong part being delivered to credit cards being declined). This has set us back a bit -- especially because the bulk of the parts came in on Thursday but we are still waiting for our most crucuial part: the DWM1000 tranceivers.

In the face of this setback, we have been reorganizing and focusing on the things we can do without our tranceivers:

  • Project structure and build setup for microcontrollers. Including Makefiles that let us link to the Arduino library. (code)
  • Our django server. (code)
  • Breadboarding and programming our new 3V Atmega328s.
  • 2/17/2016

First parts ordered!

We put in our first parts order in order to get started on the building phase!

  • 2/12/2016

Project Proposal Completed

We completed our project proposal document containing a more detailed version of the documentation covered on this website.

Our proposal doc can be found here.

  • 2/10/2016

Elevator Pitch Presentation

We completed a short presentation in class describing the basics of our project.

  • 2/3/2016

Team Formed!

We decided to be a team of three because we don't like other people. #NoNewFriends #ExceptAaron