
A major issue has been with the IMU, which has been giving faulty results. This causes the linear actuator (LA) to rapidly adjust or over-adjust. Initially, we thought the errors were caused by vibrations. So we tested by tilting the robot forward and backward to see how the IMU responded. While this helped somewhat, there were occasional faulty data points when tilting. The IMU responded inconsistently, leading to unstable platform behavior. To address this, we have been testing the IMU in different scenarios and have added foam around it to reduce vibrations. Additionally, we moved the IMU to the center of the platform to get more stable readings and changed the start time of data collection to help with initialization issues. Another problem is that the wheels sometimes came off during testing. To solve this, we plan to superglue the wheels onto the axles.
Regarding design changes, so far we have made only small adjustments. The most notable changes are relocating the IMU to the center of the robot for better stability and deciding to use only one battery instead of two.
Because of some IMU challenges, we are slightly behind schedule on FPGA integration.
For unit testing, we first tested the IMU on flat surfaces and tilted the robot to verify that the data was recorded correctly. We also created a program that allowed us to input text commands to control PWM and direction, and verified the outputs using an oscilloscope.
For overall system testing, we drove the robot up a measured ramp. Then the imu’s data (angle, speed, etc) was recorded. A video was also taken. If we were testing with water, we used a water bottle to prevent spilling and watched the video to see if the water was over a certain threshold. We tested the robot both with and without water to study how the load affected performance. Through experimentation, we found that we could only fill the container to about 70% full without significant water spillage, unless we very carefully placed the robot so that the front wheels made contact with the ramp first. This minimized water sloshing at the start. Other testing discovered that our robot tended to curve to the left, which led us to realize that some of our wheels were not aligned properly. After repositioning and securing, the robot drove much straighter.
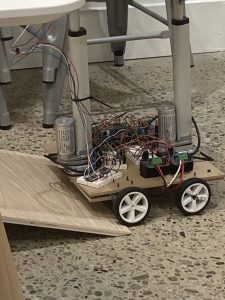
IMG 1: The New Robot Positioning
Below are several videos showing our testing process. Some early tests show issues like poor traction, unstable IMU readings that caused the LAs to “shake”, and minor bugs in the code.
Poor Traction: https://drive.google.com/file/d/1WCRZMwPiRRYIEO_k6S9NhSe–4uCuD7E/view?usp=drive_link
IMU: https://drive.google.com/file/d/1WiQ-6zIasJhYvzdJRrbxLwdb7-xIRUrI/view?usp=drive_link
The results from our successful runs: Water & Without Water.
