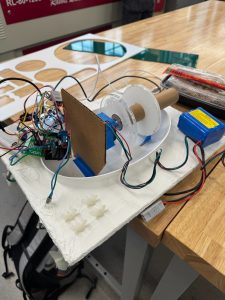
This week we completed our final presentation (shout out Emma for presenting!) and we were able to get our boat in the pool (see images below). We put together walls on the boat, added pool noodles so that it would float, waterproofed the bottom of the boat with liquid silicone, and made a smaller submersible acrylic casing for the camera to reduce the weight.
We waterproofed the boat and we were able to get it in the water on Friday, however the boat and the submersible took on water. Luckily our major electronics were preserved, but we noticed many things that needed improvement.
- The back of the boat was sinking more than the front because there was no noodle on the back side of the boat.
- Solution: We added a noodle on the back in between the motors, and then two noodles underneath the boat to keep it higher in the water to reduce the risk of leakage.
- The cable hole was cut through the bottom of the boat, which would have taken on water. When we tested the boat in the water on Friday, we sealed this so water wouldn’t get in and gave us time to come up with a new approach.
- Solution: We now have a hole that goes through the side wall of the boat above the noodle. This is out of the water so no leakage will occur. We also moved all of the electronics towards the back of the boat and secured the Raspberry Pi so that it rotates when the stepper motor moves.
- The submersible took on water, and the boat would not move in a straight line because of the weight of the submersible.
- Solution: We laser cut a smaller acrylic box so that it would require less weight to sink. We also used waterproof tape and liquid silicone to enclose the box instead of the caulk.
- The Arduino and Pi were not being charged with a portable battery.
- Solution: We soldered a 9V battery to the Arduino VIN and we will try using a portable charger for the PI tomorrow.
Overall we spent Saturday 4/26 fixing the above issues, and we are testing again tomorrow in the pool. We are also working on our poster due Monday. Next steps include testing in the water with our improved waterproofing system, collecting data, and taking our video. We will practice what we intend to do for the final demonstration as well.