
Team Status Report 4/26
Not really any risks at the moment, I guess if our project decides to magically stop working. But we are going to do another end-to-end run to make sure everything looks functional.
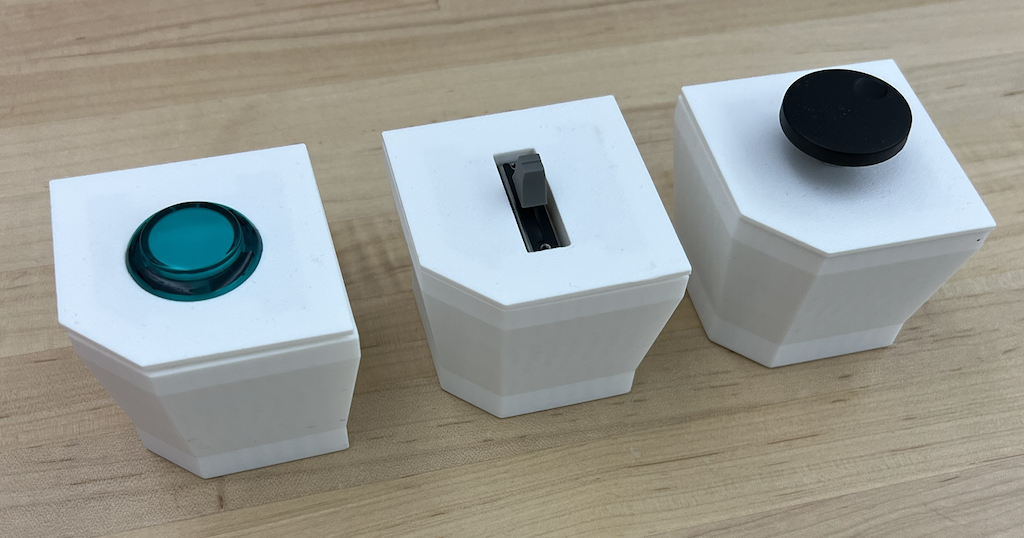
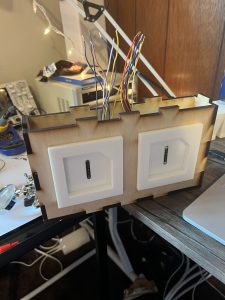
No changes to our design, but we did paint our controllers!
no updates to schedule.
Tests
.Aside from measurement, we added code in our arduino to measure timing related tests. The code reported latency times ranging from 1.9 – 5.6 ms depending on the load on the controller. We also added a functionality to keep track of how long the controller didn’t have both modules inserted to measure the average time taken to swap. We found that this was very fast compared to our requirement with an average of 1.5s. This solidifies our belief that the design changes we made to the CAD helped.
We’ve also had many players try out our game and fill out a feedback form. The more graphical results are in our final presentation we uploaded (it’s a bit of a pain to upload all the screenshots onto here). We used this feedback to iterate on various game design parameters to better balance the difficulty.
John’s Status Report for 4/26
This week I worked on and presented the final presentation. Our project is functional end-to-end so I haven’t done much additional development. I’ve also been studying for finals.
Progress and Next Week’s Deliverables
We are still on track for the final demo. At this point we are just continuing playtesting, painting, and working on the final deliverables (poster, video, report).
Team Status Report 4/19
Everything is now functional end-to-end, so the most significant risk to our project at this point would be players not finding it fun to play. To mitigate this risk, we are actively having users playtest the game and provide feedback by filling out a survey.
No major changes were made to the overall design of the system.
John’s Status Report for 4/19
Arduino Code Refinement
Since the final iterations of the modules and panels are all soldered and assembled, I spent this week refining the Arduino code to better integrate with Unity. The Arduinos are now able to simulate gamepads that have enough axes and buttons for each of the six modules. Unity is also able to see both panels separately and assign one of them to have harpoon gun and the other to have net gun.
I also fixed bugs caused by users removing the modules while pressing the buttons. Previously, if a user pressed a button or turned an encoder while removing the module, the button would stay pressed and the encoders would keep turning in software.
I added a smoothing function for encoder inputs to provide a more reliable user experience. Since some of the encoder state transitions would happen more quickly than others — even if the user was turning the encoder at a regular speed — I chose to take a moving average of the inputs. I used a simple, lightweight low-pass filter to achieve this:
// alpha is the smoothing factor
avgSteerSpeed = alpha * newSteerSpeedData + (1 - alpha) * avgSteerSpeed;
Playtesting
After finishing the software, I presented the game to a few people to playtest it. We got a lot of good feedback, mostly about the difficulty of the game and which modules were too powerful. Fortunately, many of the solutions to the feedback were straightforward. For example, most players felt that the submarine moved too quickly, and we can easily limit the maximum speed in the code.
Progress and Next Week’s Deliverables
Progress is on track for demo / final. I will spend the next week primarily working on the final deliverables.
As you’ve designed, implemented and debugged your project, what new tools or new knowledge did you find it necessary to learn to be able to accomplish these tasks? What learning strategies did you use to acquire this new knowledge?
Prior to this project, I had not worked extensively with Arduino. I knew the basics but not the intricacies. There were a few times when I didn’t understand why something was happening and couldn’t figure it out on my own. One of the learning strategies I used was looking for answers on the Arduino forums since many other people had the same issues before me. I also spent a lot of time reading documentation to understand details about the hardware, such as which pins can support interrupts and what pull-up/pull-down resistors are available.
John’s Status Report for 4/12
This week I completed the assembly for the game controllers and modules. It involved gluing things together and a lot of soldering.
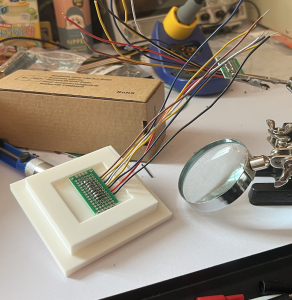
Module Assembly
There are 6 total modules that do different things in the game, but there are 3 different kinds of modules (2 buttons, 1 slide potentiometer, 3 encoders).
The bottom of each module is a row of 8 pogo pins that are magnetized and will stick to the pins in the module slots.
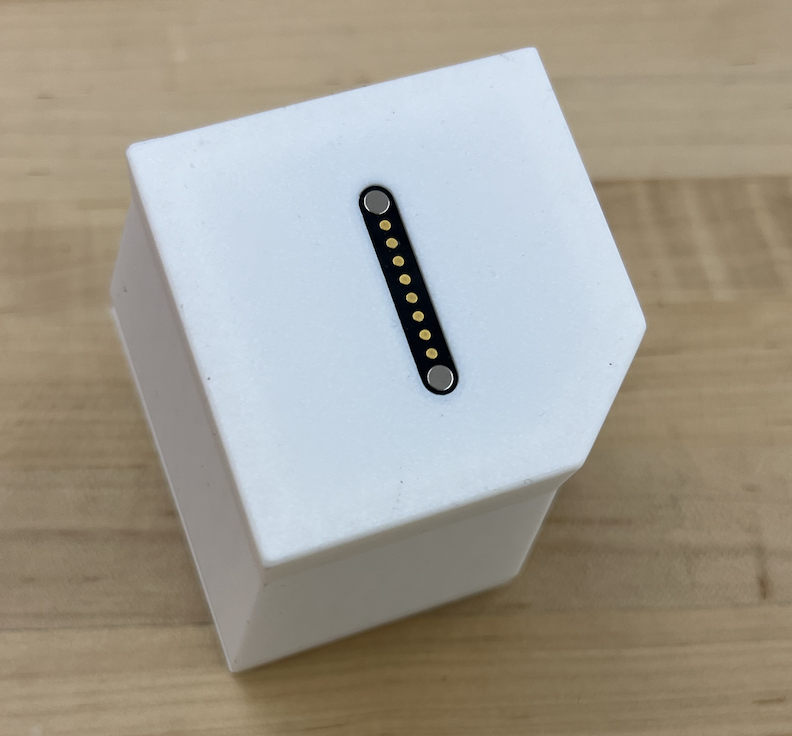
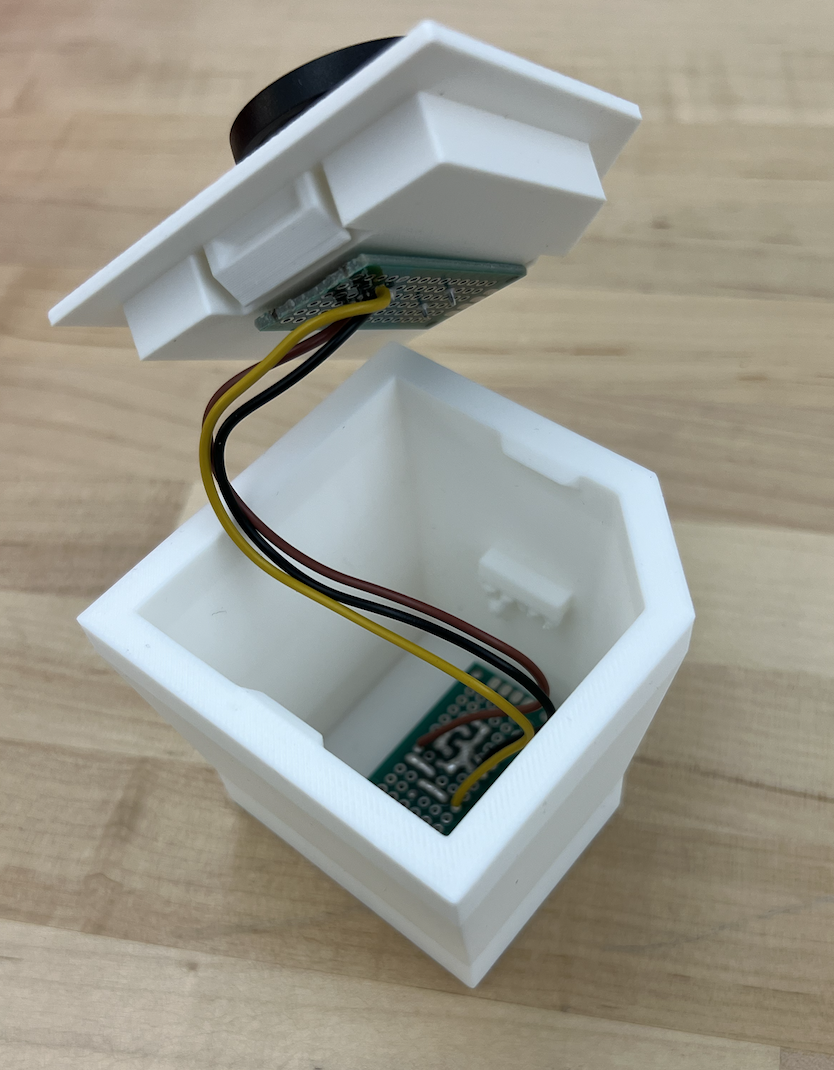
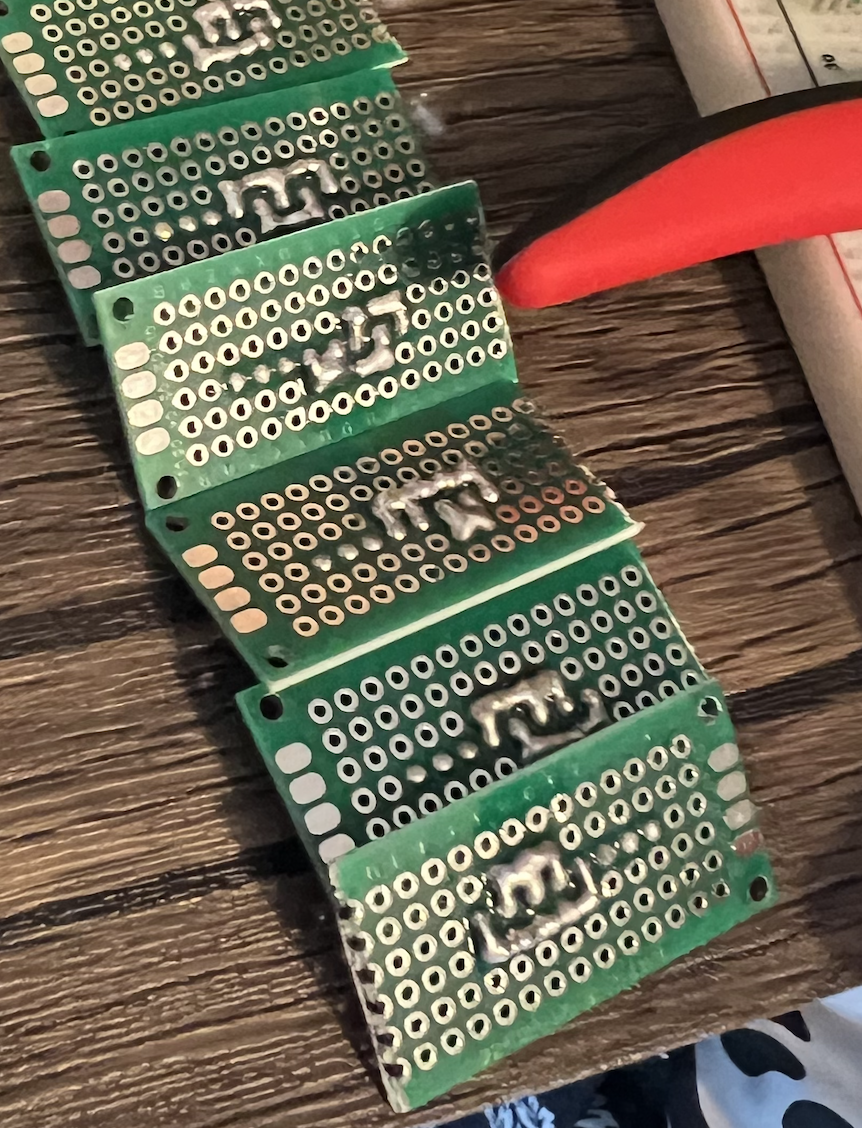
Inside of each module there are 1 or 2 pieces of perfboard, depending on the module type. For the encoder module, which is shown below, there is a piece of perfboard glued to the bottom which connects power/ground to the corresponding ID pins so the Arduino knows which of the 6 modules it is. The top perfboard holds the encoder in place and wires them to the lower perfboard. The second image shows different ID pin configurations for each of the 6 modules.
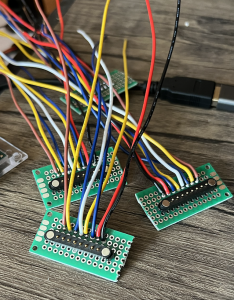
Controller Assembly
Each controller is a box with two module slots. For each module slot, a row of pogo pins (8 pins each) is soldered to a piece of perfboard. 8 Wires are then soldered to the perfboard and connect to the header pins of the arduino. The pogo pin perfboard is also glued to the 3D printed module slot which is glued to the controller.
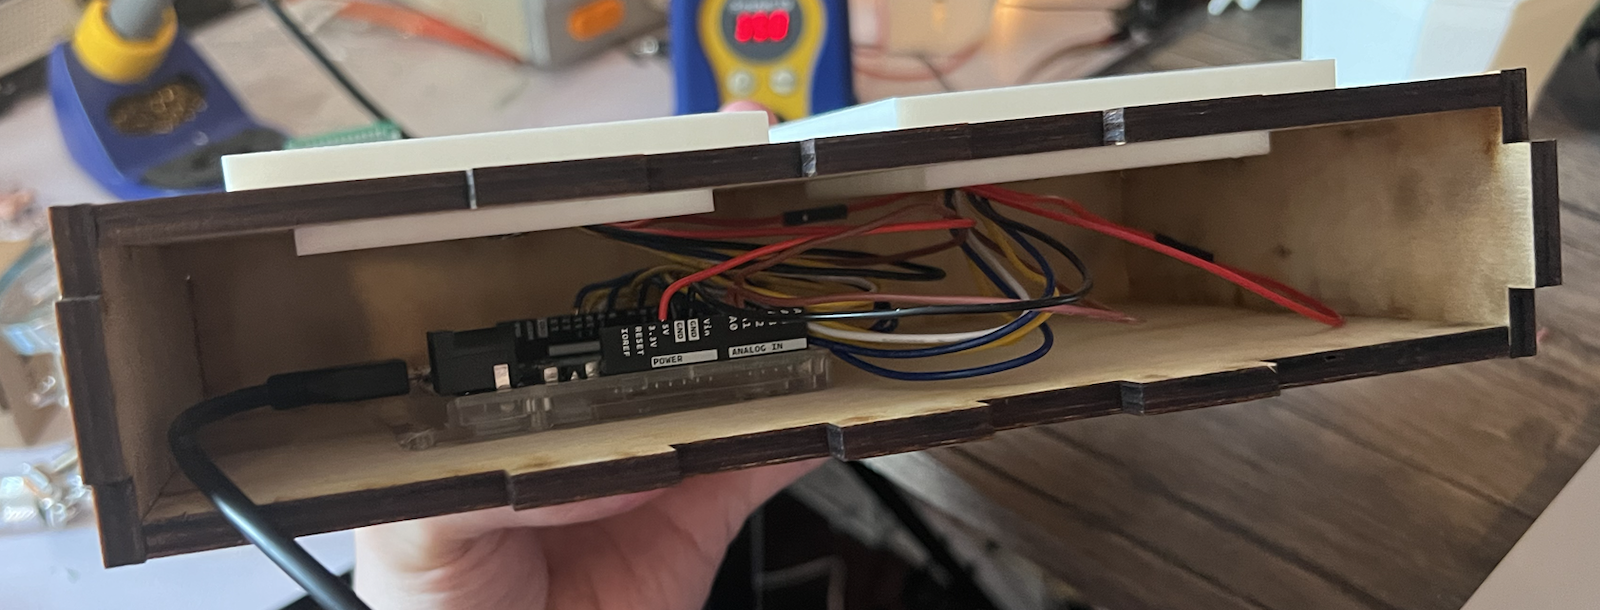
I glued 5 of 6 panel box sides together. The 6th side, which has the hole for the USB cable to the Arduino, is left un-glued for now so it’s accessible.
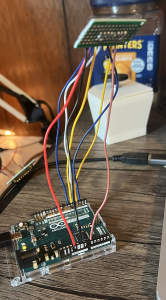
The Arduino and wiring inside of controller box:
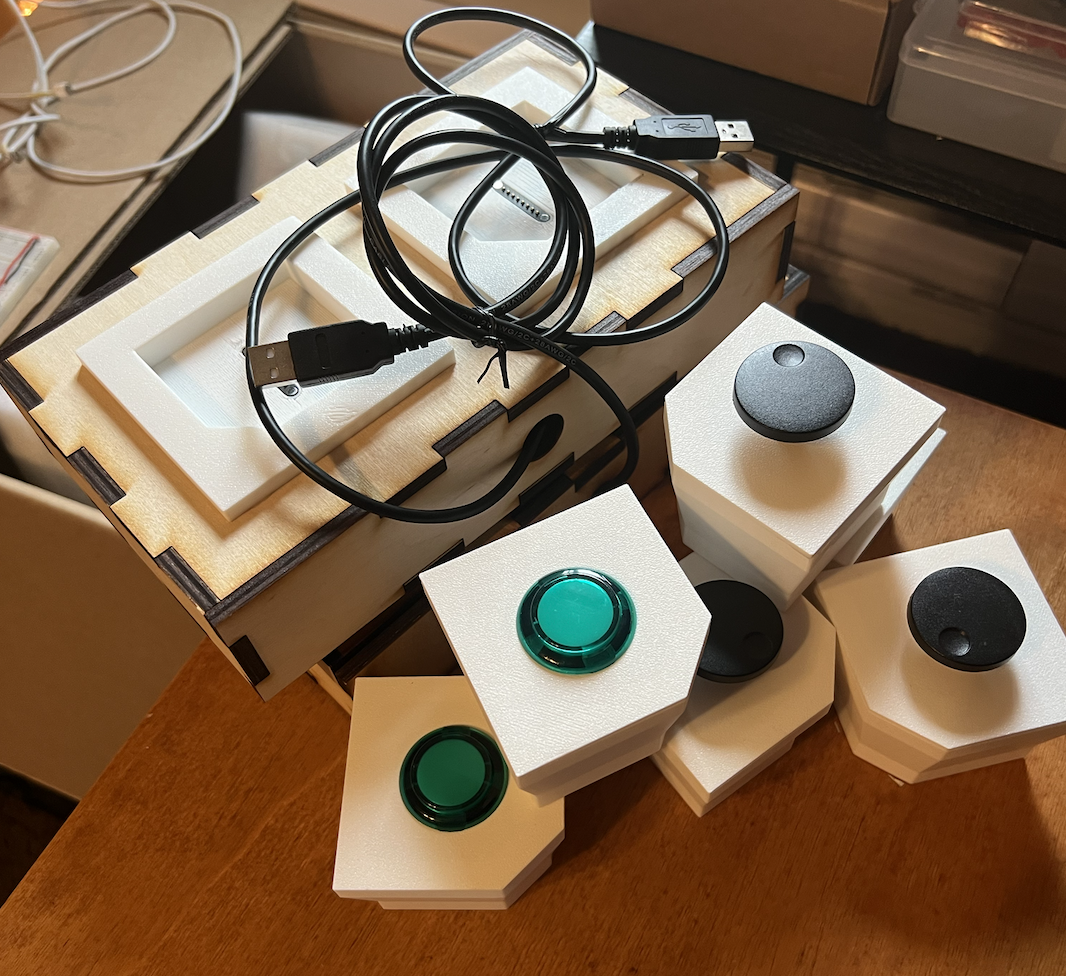
All of the assembled parts:
Progress and Next Week’s Deliverables
Progress is on track for the final demo/report/presentation. For next week, I will be preparing for the presentation and report since I am delivering the final presentation. I will also update the software if playtesting from users yields any valuable feedback.
John’s Status Report for 3/22
Testing Platform
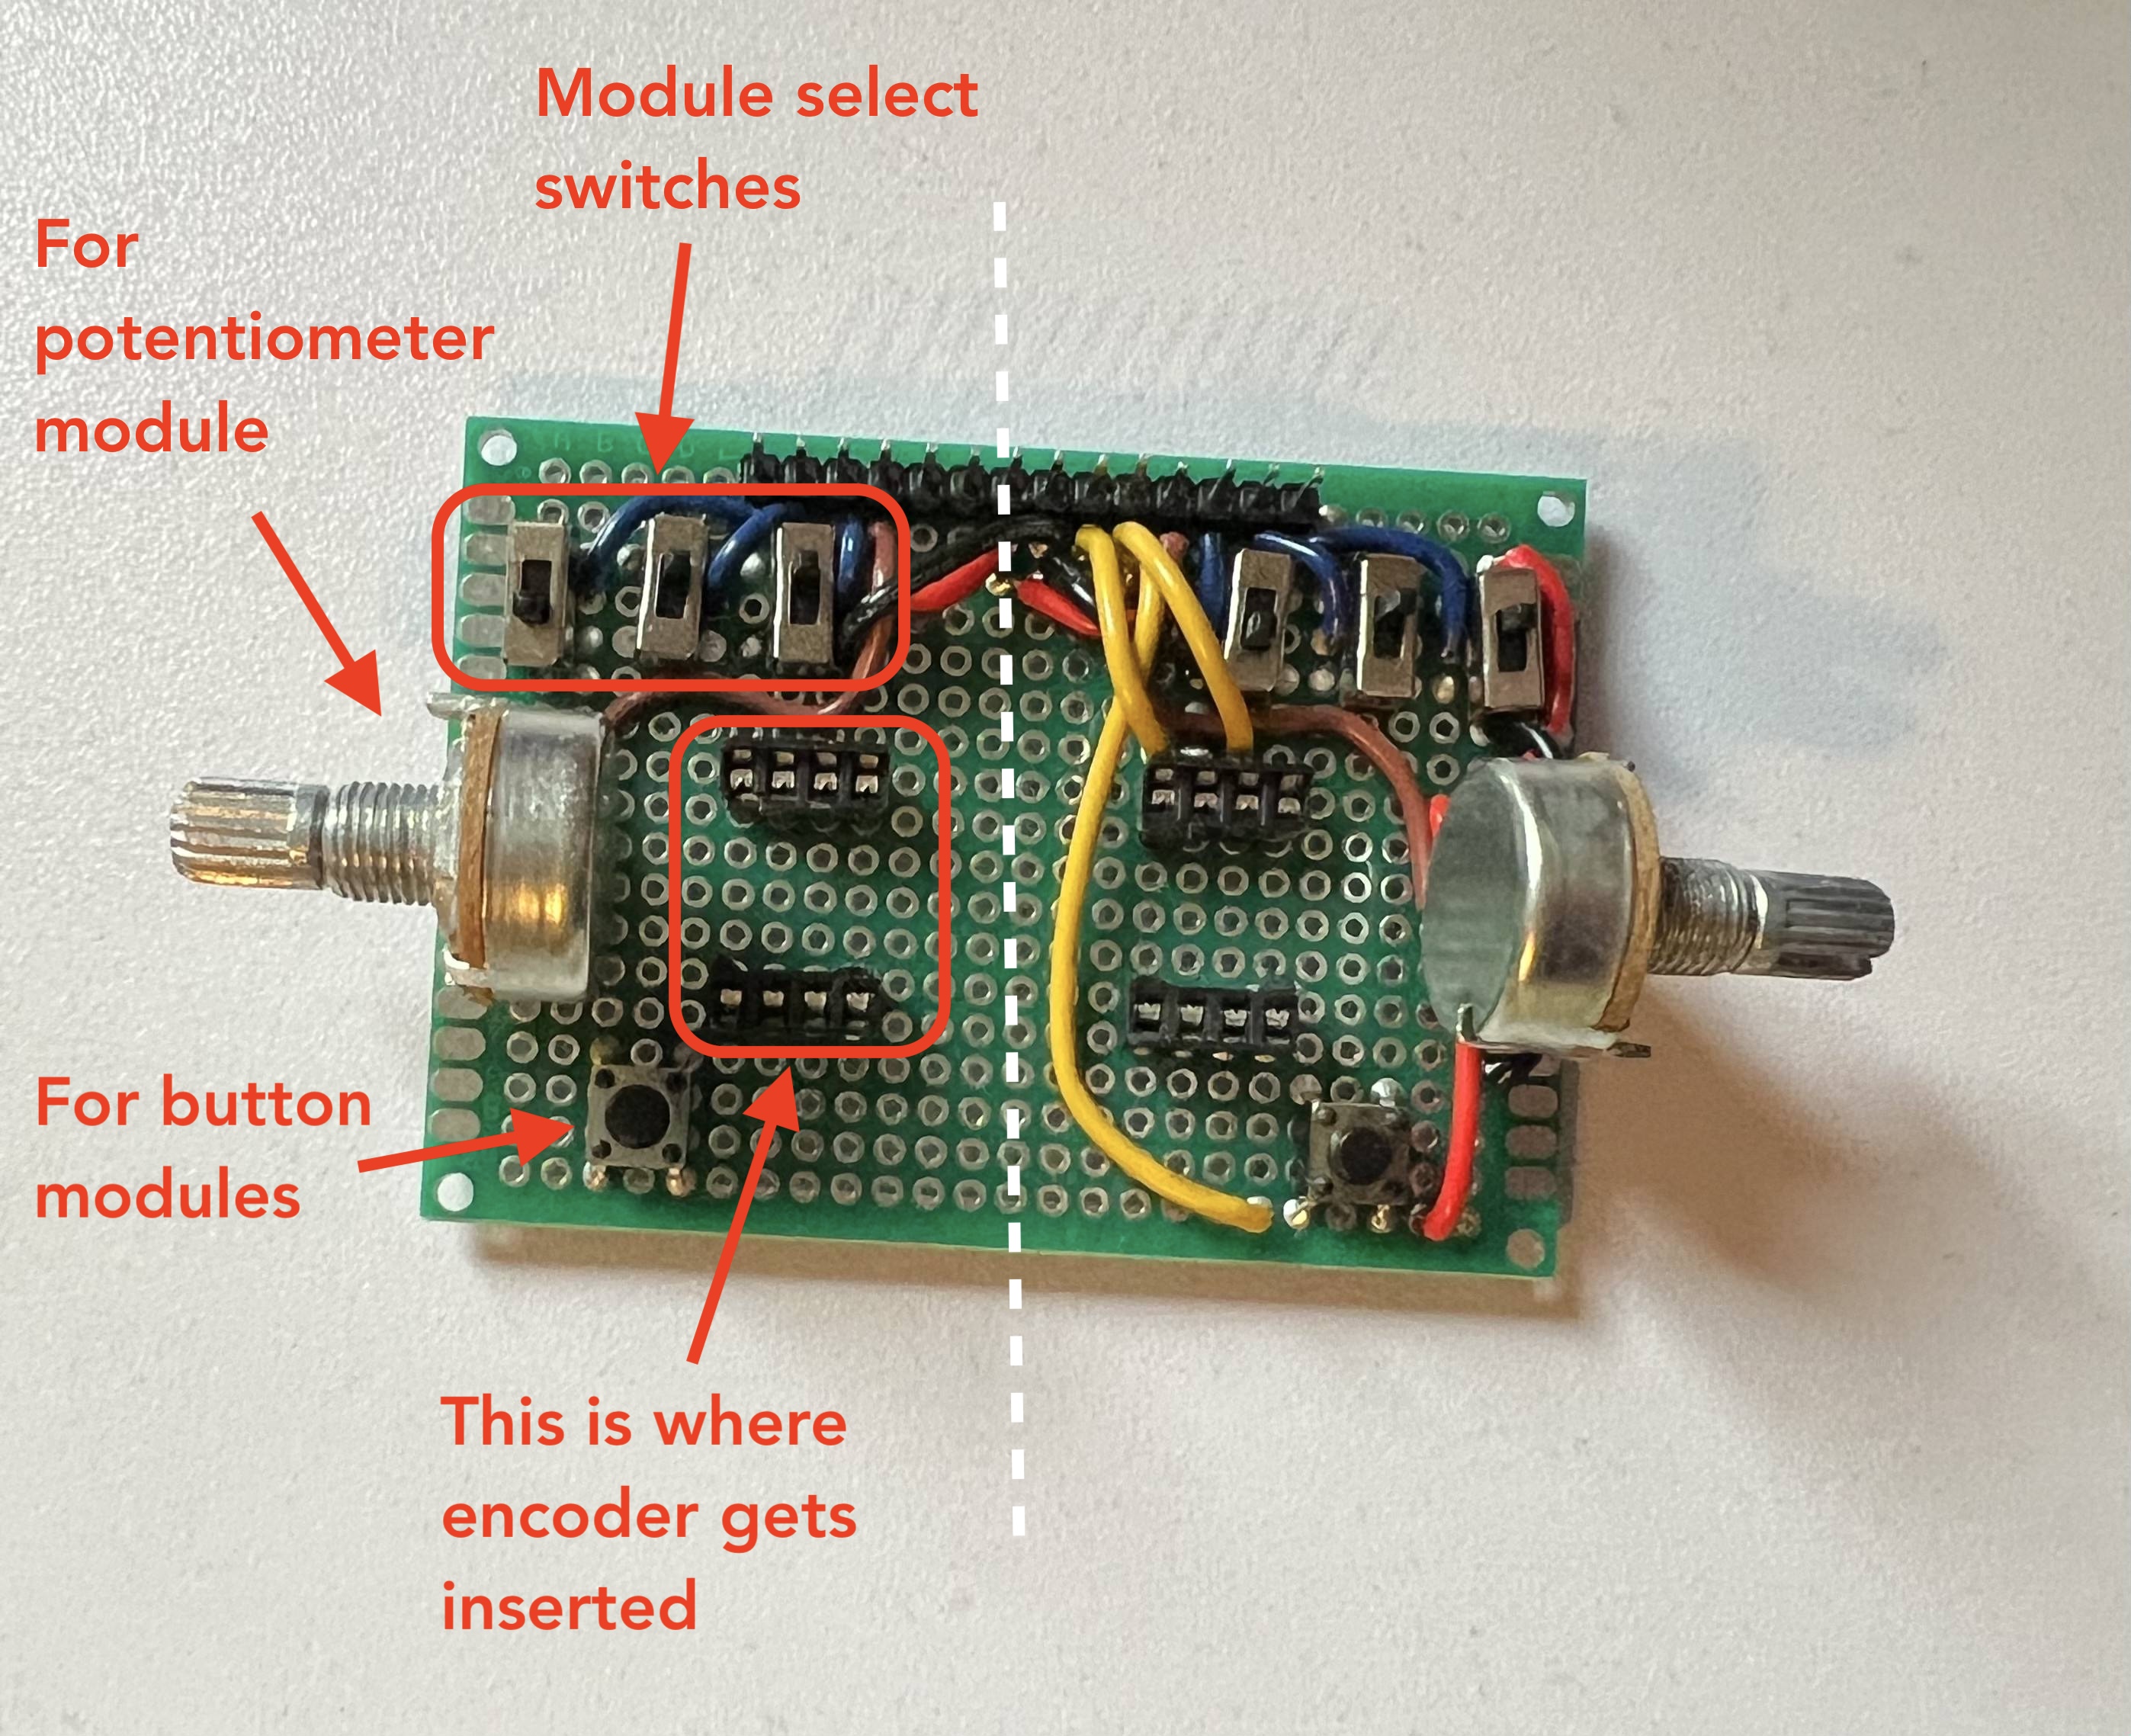
I continued working on a platform to test our modules with the Arduino. The board is symmetrical with two copies of each component to simulate the two module slots in each player’s panel.
Three switches are used on each side of the board to select which module the protoboard should simulate. This is because a 3-bit signal is used to determine which module is plugged into each slot of the panel.
Each side has a potentiometer, a button, and a space to insert an encoder. There is a row of header pins that connect to the Arduino pins via jumper wires.
Progress and next week’s deliverables
Progress is on track. For next week, I’d like to get some electronics integrated into the 3D printed modules. This should allow us to test gameplay / user interface.
Team Status Report 3/8
This week we wrote the design report.
We successfully simulated a game controller in Unity using the Arduino. We also received the rest of our electronic components and confirmed that they work as expected. We also made significant progress with game programming.
Design Changes
We have to make a slight design change with regard to pin assignments. Since only digital pins can be used for interrupts, we need an additional digital data pin. This is because we want to be able to use interrupts for reading encoder updates. We were originally planning on using one analog GPIO pin and one digital GPIO pin, and treating the analog pin as digital when we needed two digital pins for the encoder. We will now have two dedicated digital GPIO data pins and one analog data pin. This is not a significant change because we have the available pins that we need and our pogo pins have a spare pin available.
Significant Risks
The only risk we can think of at this time is the latency being higher than expected, but we will test this as soon as possible.
A was written by: Alan
B was written by: Angela
C was written by: John
Part A: Consideration of Global Factors
In general, the game we are designing is meant to be played at home with your friends physically next to you and hence lives in a very local space. But the general concepts that our project pushes toward have broader themes. In a more global context, our project contributes to the idea of more physical-oriented alternative controllers. Video games are a phenomenon that exist globally but many people are used to the same controller designs. Our project spreads more awareness of the possibility of controllers that can be uniquely created to enhance the experience of a specific game.
Part B: Consideration of cultural factors
Our product has a cultural aspect in encouraging players to play a cooperative game in person. The game is accessible to a wide age range considering that the modules have very simple controls such as buttons and sliders, so that young children and elderly people can both easily play the game.
Part C: Consideration of environmental factors
Our solution uses a microcontroller and the users’ personal computer, which use less energy than a large arcade machine. This efficiency is good for the environment since current power production often uses fossil fuels and other non-renewable resources.
Our design also uses easily repairable, open-sourced design, so users do not need to purchase a complete new set if something breaks. This reduces E-waste.
John’s Status Report for 3/8
Arduino-Unity Interface
I spent time integrating our Arduino code with Unity. I was able to successfully simulate the Arduino as a game controller. The game now reacts to us interacting with the buttons/potentiometers/encoders. I spent some time trying out the new electronic components that arrived. I made sure that the encoders are sending good signals and that the other components (buttons and potentiometer) work as well.
I also spent time working on the Arduino codebase and optimizing our design.
Design Report
I spent a significant amount of time this week working on the design report.
Progress and Next Week’s Deliverables
My progress slowed a bit due to midterms and time spent writing the design report, but I am still on track. By next week I hope to have some semi-permanent circuits (i.e. soldered protoboard instead of just breadboards) but that also depends on our panel/module design progress.
John’s Status Report for 2/22
Arduino-Electronics Interface
Since we received the Arduinos this week I spent time working on code to interface with the modules’ electronic components. We’ll be using the Arduino Joystick library, which works with the Arduino Leonardo.
The Arduino can be made visible as a game controller using the following initialization code: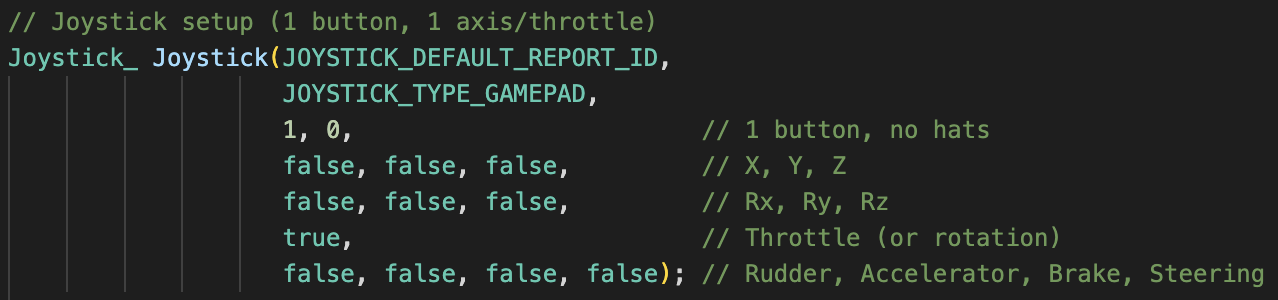
Our code will dynamically check the ID pins and process the modules’ data pins depending on which module is currently inserted: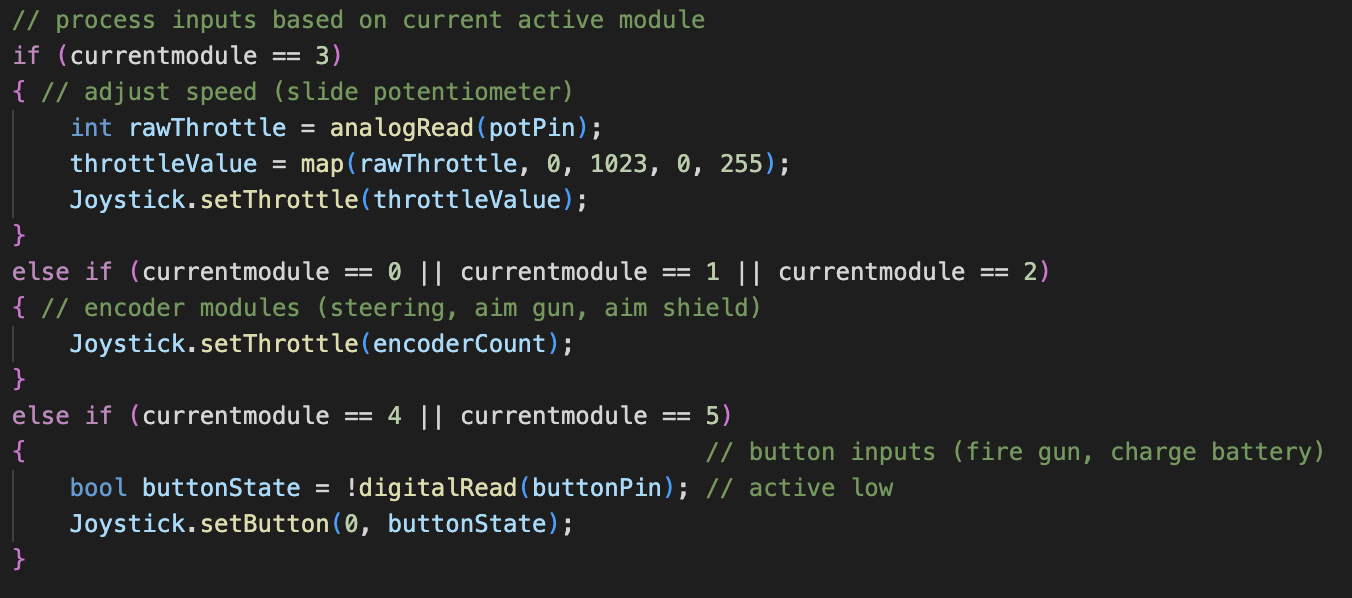
For reading from the encoder, we have two options: polling or interrupts. The polling option is less complex but risks skipping transitions if the encoder is turned very quickly. Here is an interrupt service routine that reacts to encoder state changes: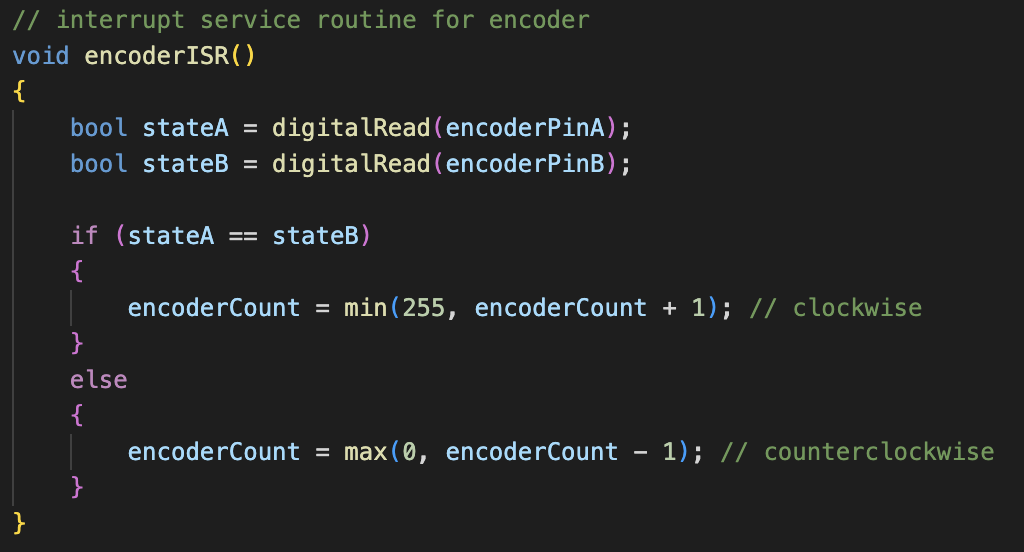 The ISR is attached using
 attachInterrupt(digitalPinToInterrupt(encoderPinA), encoderISR, CHANGE);
Progress and Next Week’s Deliverables
My progress is on track. Since we’ve now ordered all of our components, I’d like to get my code working with Unity by next week. If the Arduino-Unity integration goes well, I’d like to work on planning the spatial organization of the electronics within the modules.