
Everything is working so not many changes this week. I’ve been painting the controllers and working on documentation. I’m probably not going to make any significant changes to the game at this point.
Alan’s Status Report 4/26
We’re mostly done, so I don’t have too many updates. I helped paint the controllers. I have started working on the poster.
Team Status Report 4/26
Not really any risks at the moment, I guess if our project decides to magically stop working. But we are going to do another end-to-end run to make sure everything looks functional.
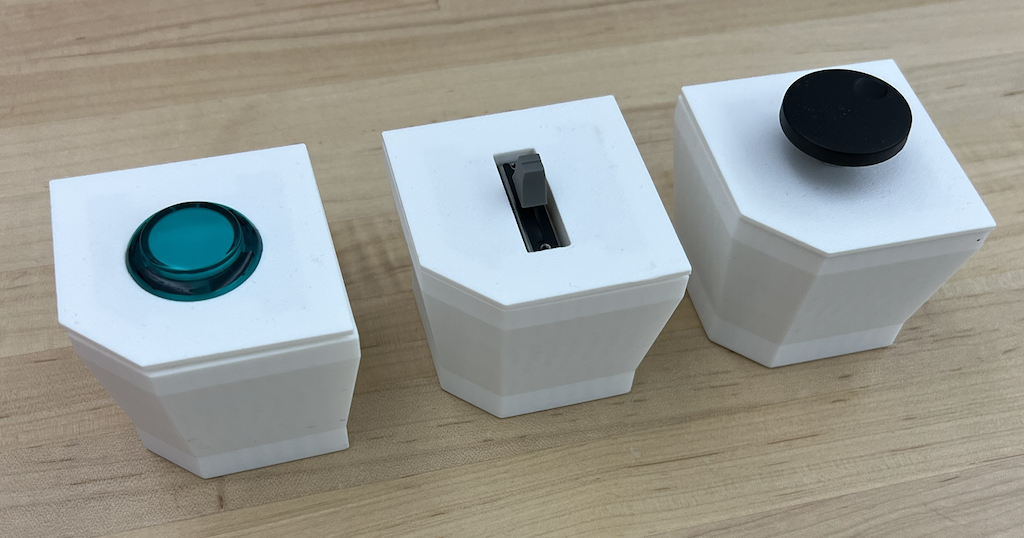
No changes to our design, but we did paint our controllers!
no updates to schedule.
Tests
.Aside from measurement, we added code in our arduino to measure timing related tests. The code reported latency times ranging from 1.9 – 5.6 ms depending on the load on the controller. We also added a functionality to keep track of how long the controller didn’t have both modules inserted to measure the average time taken to swap. We found that this was very fast compared to our requirement with an average of 1.5s. This solidifies our belief that the design changes we made to the CAD helped.
We’ve also had many players try out our game and fill out a feedback form. The more graphical results are in our final presentation we uploaded (it’s a bit of a pain to upload all the screenshots onto here). We used this feedback to iterate on various game design parameters to better balance the difficulty.
John’s Status Report for 4/26
This week I worked on and presented the final presentation. Our project is functional end-to-end so I haven’t done much additional development. I’ve also been studying for finals.
Progress and Next Week’s Deliverables
We are still on track for the final demo. At this point we are just continuing playtesting, painting, and working on the final deliverables (poster, video, report).
Angela’s Status Report 4/19
This week I added a main menu to the game and helped work on the final powerpoint. Next week I will be painting the controllers, fine tuning some values, and working on final documentation. The game is basically done, so I probably will not be making many more modifications to it considering that it is getting close to finals week.
I had a good amount of Unity experience before this, but I became familiar with many different systems I hadn’t used before through working on this project, especially with regards to the Input System and multiplayer, which I had to work with in order to get the custom controllers working. I spent a lot of time reading documentation, checking various forums, and experimenting in order to figure things out.
Alan’s Status Report 4/19
So, I was pretty busy this weekend working on the final presentation and I didn’t get around to writing this. But, as it would turn out one thing I worked on this week was the final presentation slides. Another thing I worked on was ordering the paint. I didn’t get time to do too much else, a tad bit of debugging on the integration.
Team Status Report 4/19
Everything is now functional end-to-end, so the most significant risk to our project at this point would be players not finding it fun to play. To mitigate this risk, we are actively having users playtest the game and provide feedback by filling out a survey.
No major changes were made to the overall design of the system.
John’s Status Report for 4/19
Arduino Code Refinement
Since the final iterations of the modules and panels are all soldered and assembled, I spent this week refining the Arduino code to better integrate with Unity. The Arduinos are now able to simulate gamepads that have enough axes and buttons for each of the six modules. Unity is also able to see both panels separately and assign one of them to have harpoon gun and the other to have net gun.
I also fixed bugs caused by users removing the modules while pressing the buttons. Previously, if a user pressed a button or turned an encoder while removing the module, the button would stay pressed and the encoders would keep turning in software.
I added a smoothing function for encoder inputs to provide a more reliable user experience. Since some of the encoder state transitions would happen more quickly than others — even if the user was turning the encoder at a regular speed — I chose to take a moving average of the inputs. I used a simple, lightweight low-pass filter to achieve this:
// alpha is the smoothing factor
avgSteerSpeed = alpha * newSteerSpeedData + (1 - alpha) * avgSteerSpeed;
Playtesting
After finishing the software, I presented the game to a few people to playtest it. We got a lot of good feedback, mostly about the difficulty of the game and which modules were too powerful. Fortunately, many of the solutions to the feedback were straightforward. For example, most players felt that the submarine moved too quickly, and we can easily limit the maximum speed in the code.
Progress and Next Week’s Deliverables
Progress is on track for demo / final. I will spend the next week primarily working on the final deliverables.
As you’ve designed, implemented and debugged your project, what new tools or new knowledge did you find it necessary to learn to be able to accomplish these tasks? What learning strategies did you use to acquire this new knowledge?
Prior to this project, I had not worked extensively with Arduino. I knew the basics but not the intricacies. There were a few times when I didn’t understand why something was happening and couldn’t figure it out on my own. One of the learning strategies I used was looking for answers on the Arduino forums since many other people had the same issues before me. I also spent a lot of time reading documentation to understand details about the hardware, such as which pins can support interrupts and what pull-up/pull-down resistors are available.
John’s Status Report for 4/12
This week I completed the assembly for the game controllers and modules. It involved gluing things together and a lot of soldering.
Module Assembly
There are 6 total modules that do different things in the game, but there are 3 different kinds of modules (2 buttons, 1 slide potentiometer, 3 encoders).
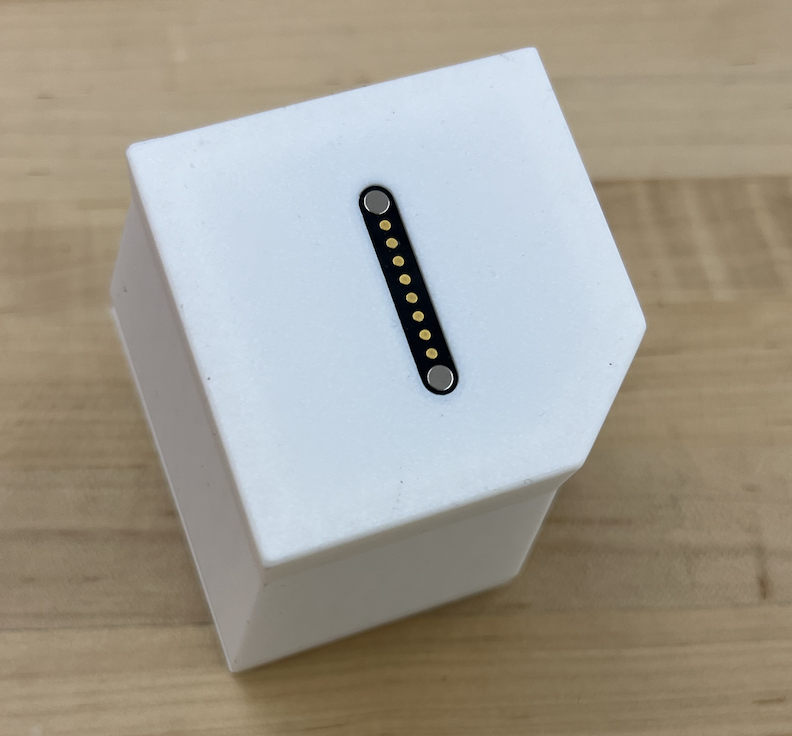
The bottom of each module is a row of 8 pogo pins that are magnetized and will stick to the pins in the module slots.
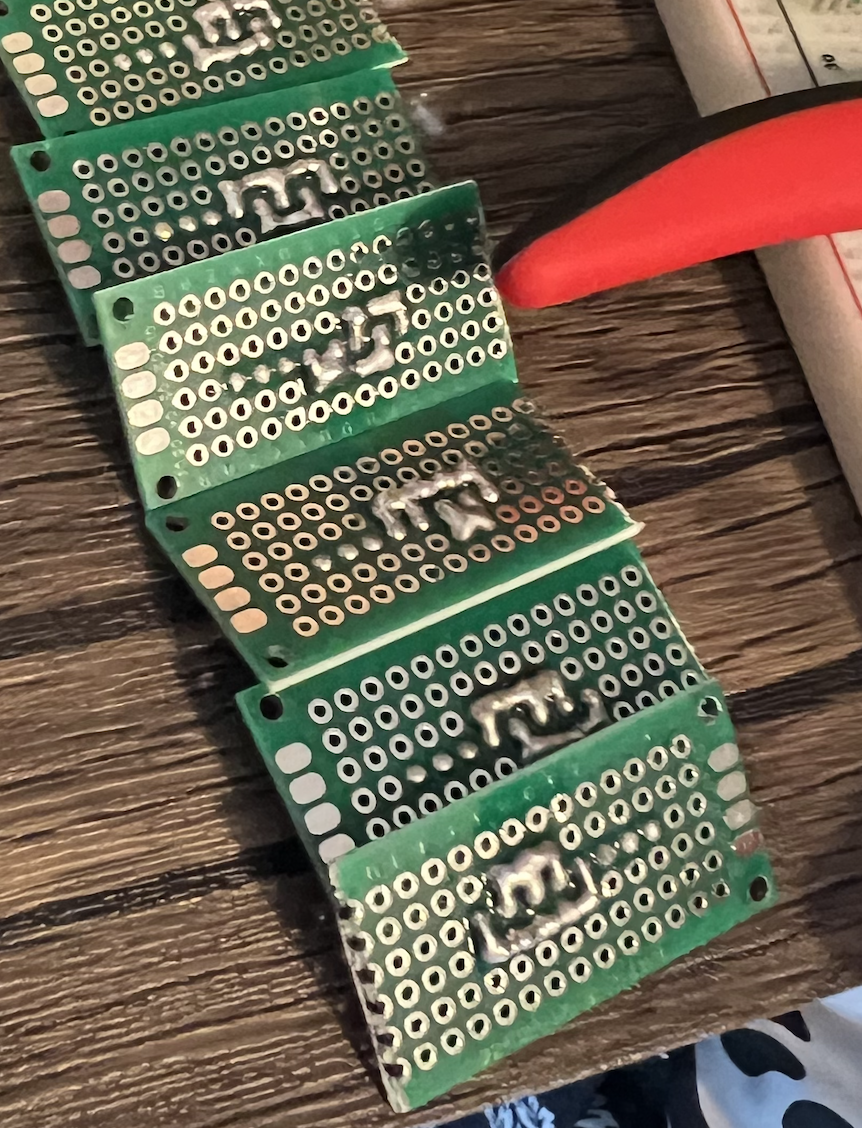
Inside of each module there are 1 or 2 pieces of perfboard, depending on the module type. For the encoder module, which is shown below, there is a piece of perfboard glued to the bottom which connects power/ground to the corresponding ID pins so the Arduino knows which of the 6 modules it is. The top perfboard holds the encoder in place and wires them to the lower perfboard. The second image shows different ID pin configurations for each of the 6 modules.
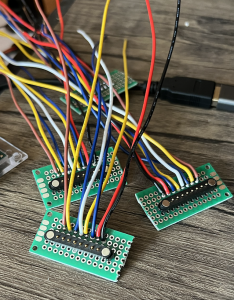
Controller Assembly
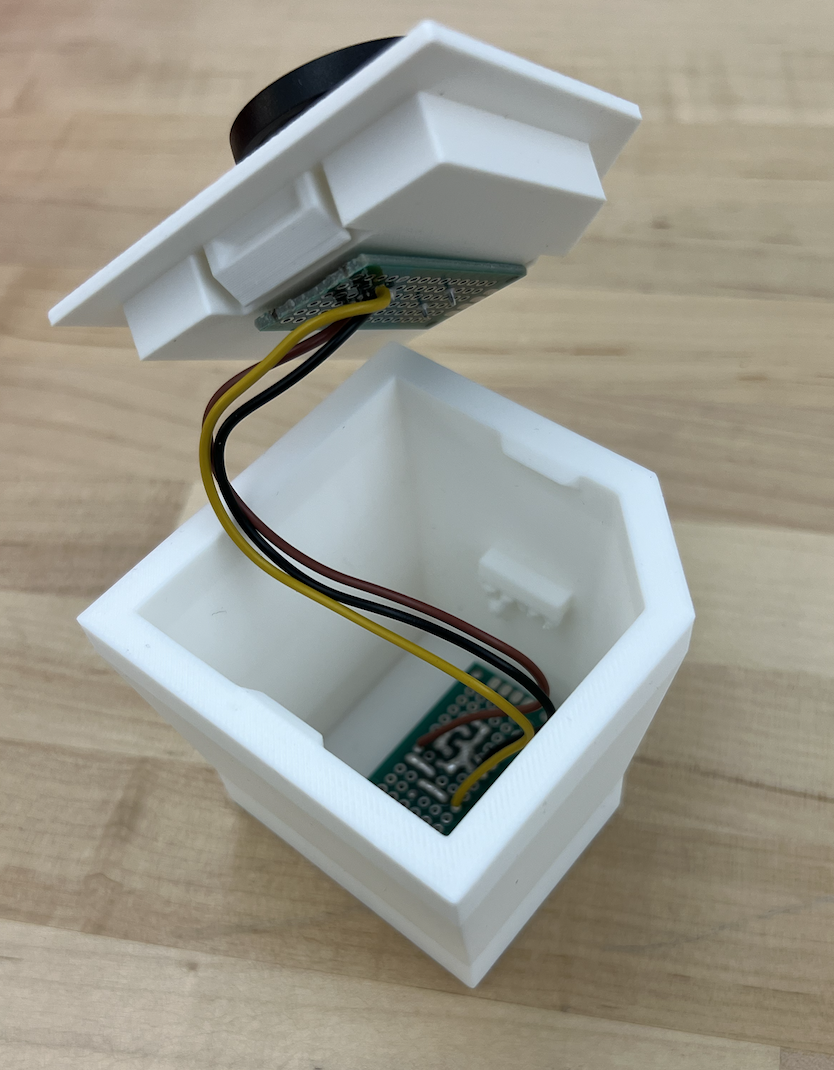
Each controller is a box with two module slots. For each module slot, a row of pogo pins (8 pins each) is soldered to a piece of perfboard. 8 Wires are then soldered to the perfboard and connect to the header pins of the arduino. The pogo pin perfboard is also glued to the 3D printed module slot which is glued to the controller.
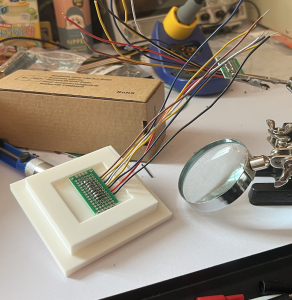
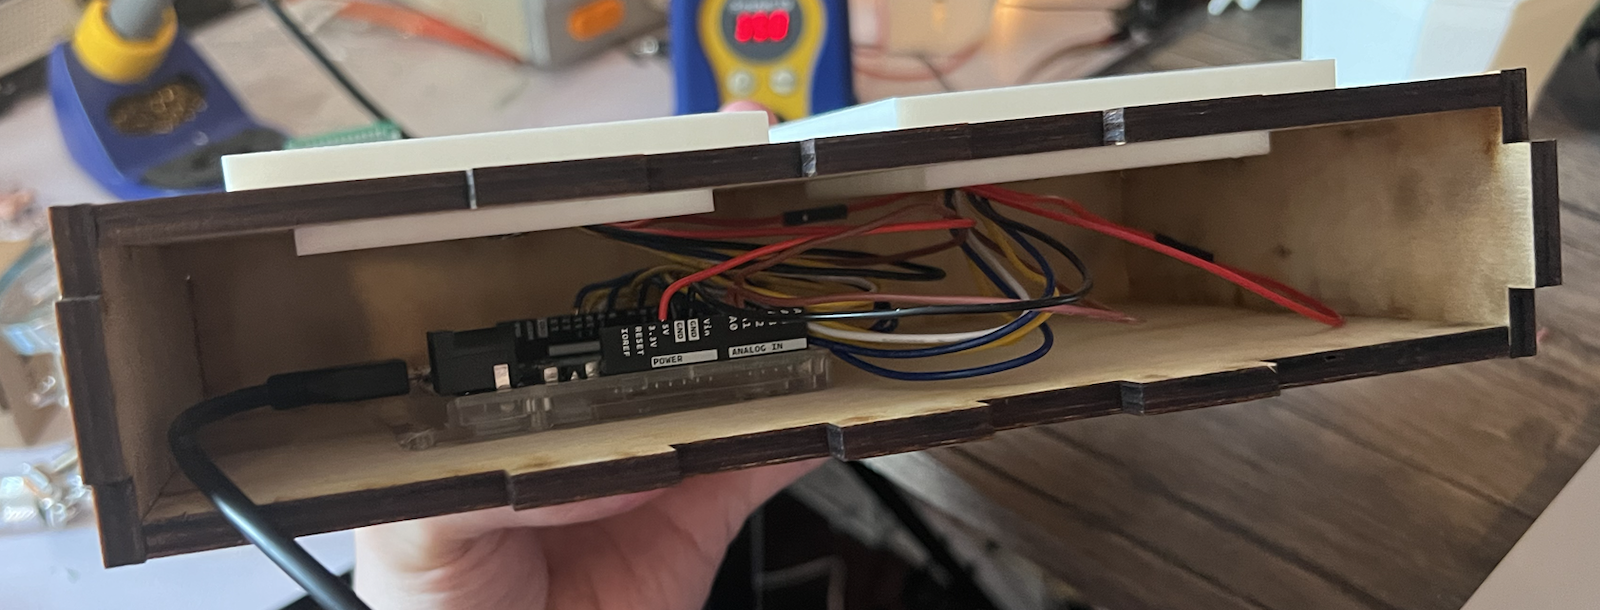
I glued 5 of 6 panel box sides together. The 6th side, which has the hole for the USB cable to the Arduino, is left un-glued for now so it’s accessible.
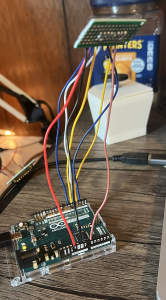
The Arduino and wiring inside of controller box:
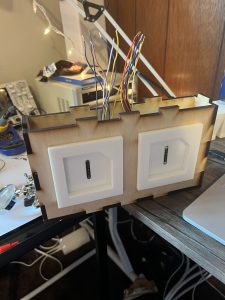
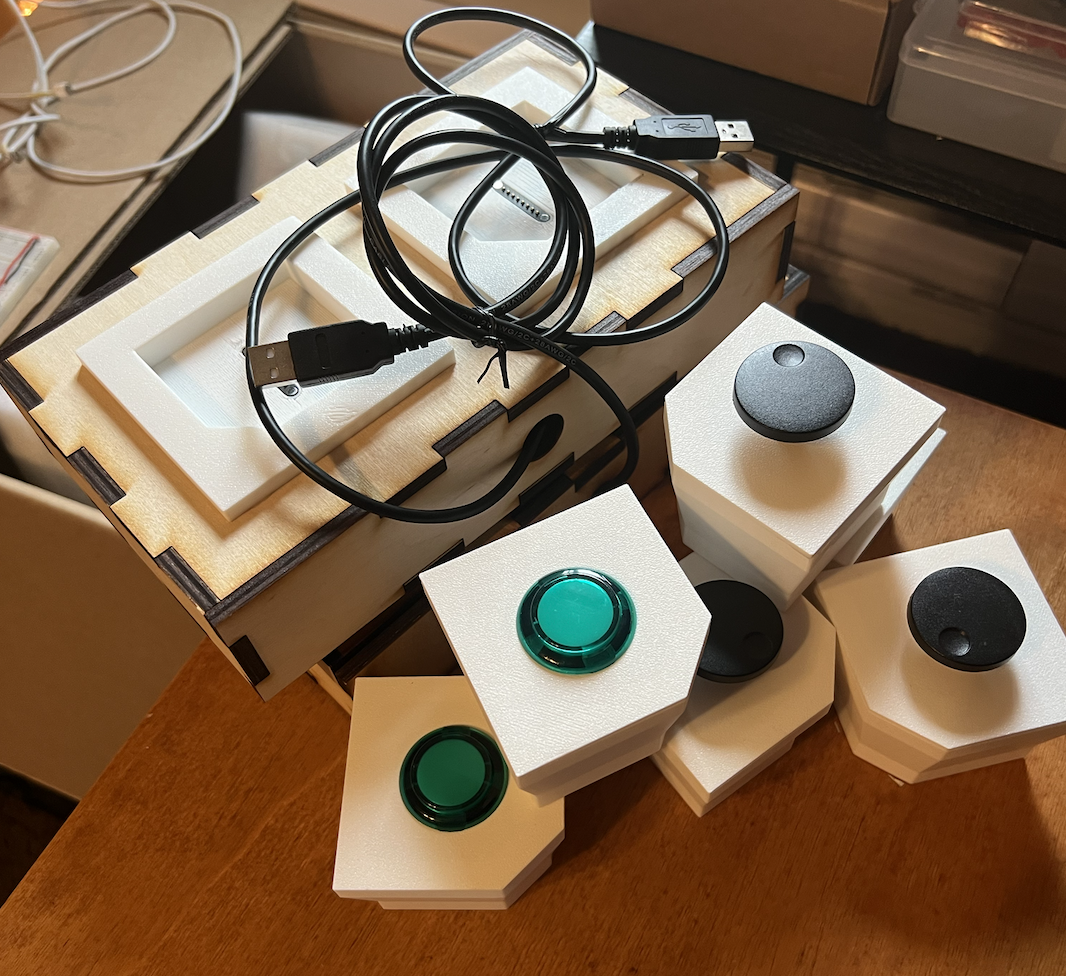
All of the assembled parts:
Progress and Next Week’s Deliverables
Progress is on track for the final demo/report/presentation. For next week, I will be preparing for the presentation and report since I am delivering the final presentation. I will also update the software if playtesting from users yields any valuable feedback.
Angela’s Status Report 4/12
Lots of progress this week, mostly focused on visual improvements for the game. Comprehensive list of improvements and gameplay screenshots under the cut.
Next week I will be gathering playtesting feedback in order to identify areas of improvement for the game and to see how well our game meets the enjoyability metric that we set in our design report. In addition to whatever improvements are suggested while playtesting, I also have a few more gameplay touchups in mind that I will be working on next week (adding a stun mechanic, a main menu, tutorial, pause menu, and scene transitions, and a counter for number of fish killed as well as a high score tracker for maximum depth reached and max number of fish killed).
For tests on the enjoyability of the game (unrelated to controller tests, which Alan / John will work on), we’ll be handing out a playtesting survey when we have people try our game. To measure enjoyability we will be using a simple, binary “would you recommend this game” question in the survey, similar to how Steam user reviews work. Tests haven’t been performed yet because we are still working on finishing construction of both controllers. Continue reading “Angela’s Status Report 4/12”