This week the team created the slides and the final Gantt chart of team accomplishments.
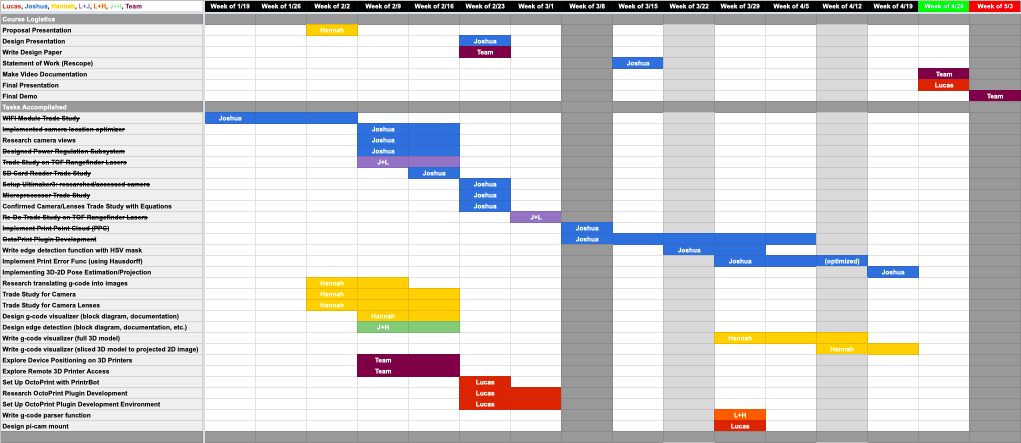
Yellow – Hannah
Red – Lucas
We’ve had some major setbacks (see Lucas’ post) and are working to find solutions to these challenges.
Team E1: 3D Printing Error Detection System
Created by Joshua Bas, Hannah Preston, and Lucas Moiseyev for Carnegie Mellon ECE Capstone, Spring 2020
This week the team created the slides and the final Gantt chart of team accomplishments.

We’ve had some major setbacks (see Lucas’ post) and are working to find solutions to these challenges.
This week, we mostly didn’t work together apart from our Monday meetings in preparation of the demo. We worked on our subsystems and will be presenting what we have.
We re-did our Gantt Chart, trimming out the unnecessary tasks due to our rescoping of the project and reassigning some tasks to better accommodate those who currently do not have access to on-campus resources. This week we will be focusing on the gcode visualizer and finishing the blob detection.
The biggest risk factor is our hardware limiting the soft- ware implementation we have chosen. We are manipulating very large data sets and performing multiple searches during each error check. Since our design can be checked just by streaming in a prerecorded video of a print job, we don’t necessarily need an RPi to prove our system works. So in the worst case, we can just run our plugin on a laptop.
Another risk factor is the system having a higher false positive rate than expected. Although a high false positive rate is preferable to a high false negative rate, we want to also have a low false positive rate. If we come across this issue, we can tune the various similarity metrics we used in order to mitigate this risk. This is unchanged from the design report.
A minor risk is that the fixture we construct to hold our sensors and devices is too heavy to meet specifications. Lucas has designed the armature already and is able to print it at home, so he’ll be in direct control of the weight of the fixture.
We only have access to a single functioning printer…that has already broken down once. If the printer were put out of commision again, we would lose not only our only test platform as well as our only avenue of printing mounts and other mechanical hardware.
Because of the COVID-19 predicament, as a team we didn’t do much in terms of work, but we did meet with each other and the course faculty and TAs over Zoom to discuss our project. The results of the discussion are outlines in our Statement of Work.
This upcoming week we will work on the error detection functions, the core system, and fixing up the broken Printrbot and the associated software components.
This week we spent time incorporating the written and verbal feedback we received from the design presentation into our design report. First, we reread the papers we found in order to get a better understanding of past designs. We refined our design further, and our report contains specific details on our system. In particular, we talk about the required math and gave more descriptive justifications for our design choices.
Towards the end of this week, we had a conversation with Prof. Rowe about our capstone design, and he brought up some good points on how to better reach our objective. We ultimately decided to switch our design so that the hardware’s purpose is to support the detection algorithm; previously, we were needlessly focusing on the exercise of creating a single board computer without considering other design avenues.
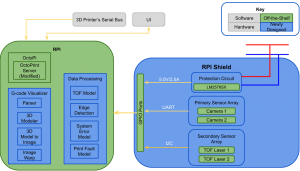
Our new design will include modifying OctoPrint and running our algorithm on a RaspberryPi. Our hardware component will be to construct an RPI shield. However, we will be gathering data from 2 cameras and 2 lasers in order to build a better model of the current print and to provide better cross-checking. Our system will also, over its lifetime, build up a model of the distribution of actual print-errors and inherent errors built into the system (i.e. due to laser and camera calibrations) and assign weights, contributing to the total error that is used to determine whether a particular print is erroneous. Then, the user will be notified and asked if the print should be stopped.
Here’s an updated block diagram:
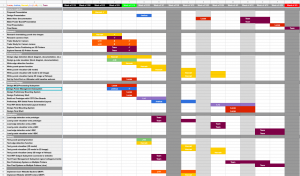
Because of the design change, we also needed to update our Gantt chart:
We visited TechSpark and talked with Ryan again. He gave us permission to use a Dremel printer for development within TechSpark, but said we would have to use the Ultimaker3 during demo day. He suggested we could create an armature that holds the camera to the calibration screws. He also made note that the Ultimaker3 is a dual extrusion printer, but they only use one extruder; we could put the camera in that second extruder chamber.
We’ve also started to go further into our different trade studies for the different pieces of equipment we will be buying (such as image sensor, camera lens, CPU/MPU/MCU). Also, we refined our testing plan and plan to demo the project. We also narrowed down the actions the user can perform and the types of notifications sent to the user.
After our project proposal, we got a lot of feedback on our project. One thing that we took to heart was that we needed to flesh out our schedule and really narrow down what exactly we need to do, and the steps that we will take to get there. So we completely revamped our Gantt Chart to give ourselves and the instructors a better idea as to what we will be doing each week.
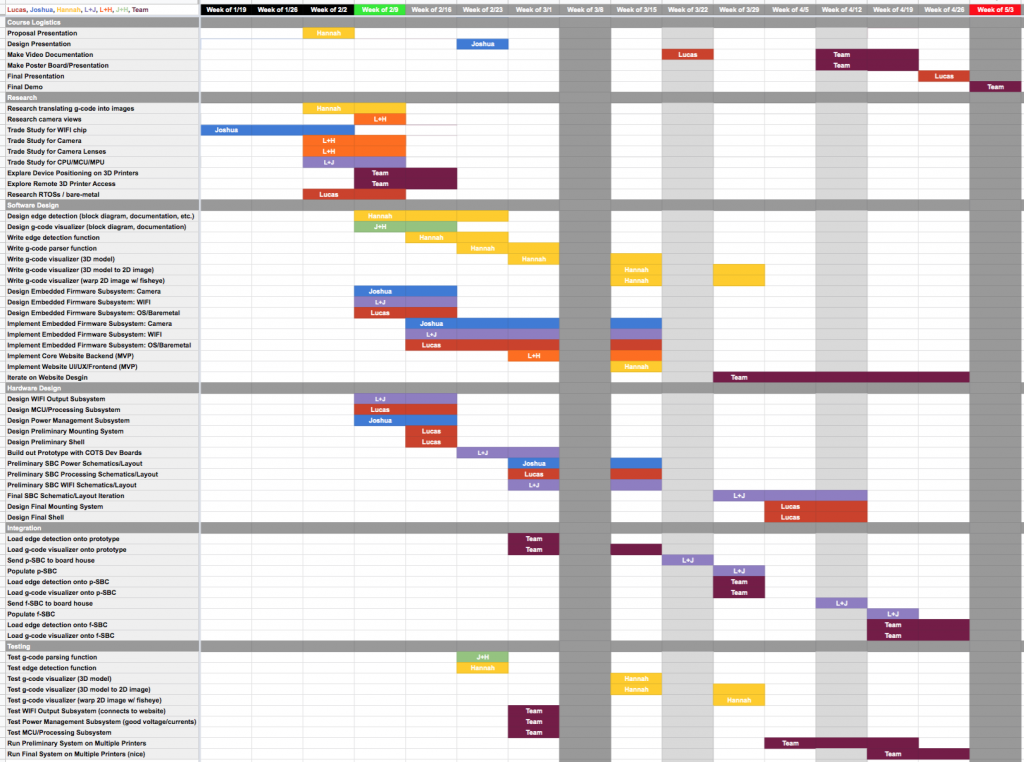
Gantt Chart v2 This week, we focused on doing research for different component trade studies.