Jessie’s Status Report for 10/05

This week’s tasks:

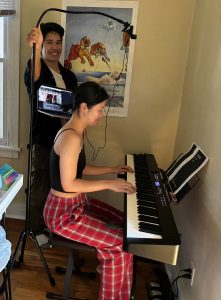
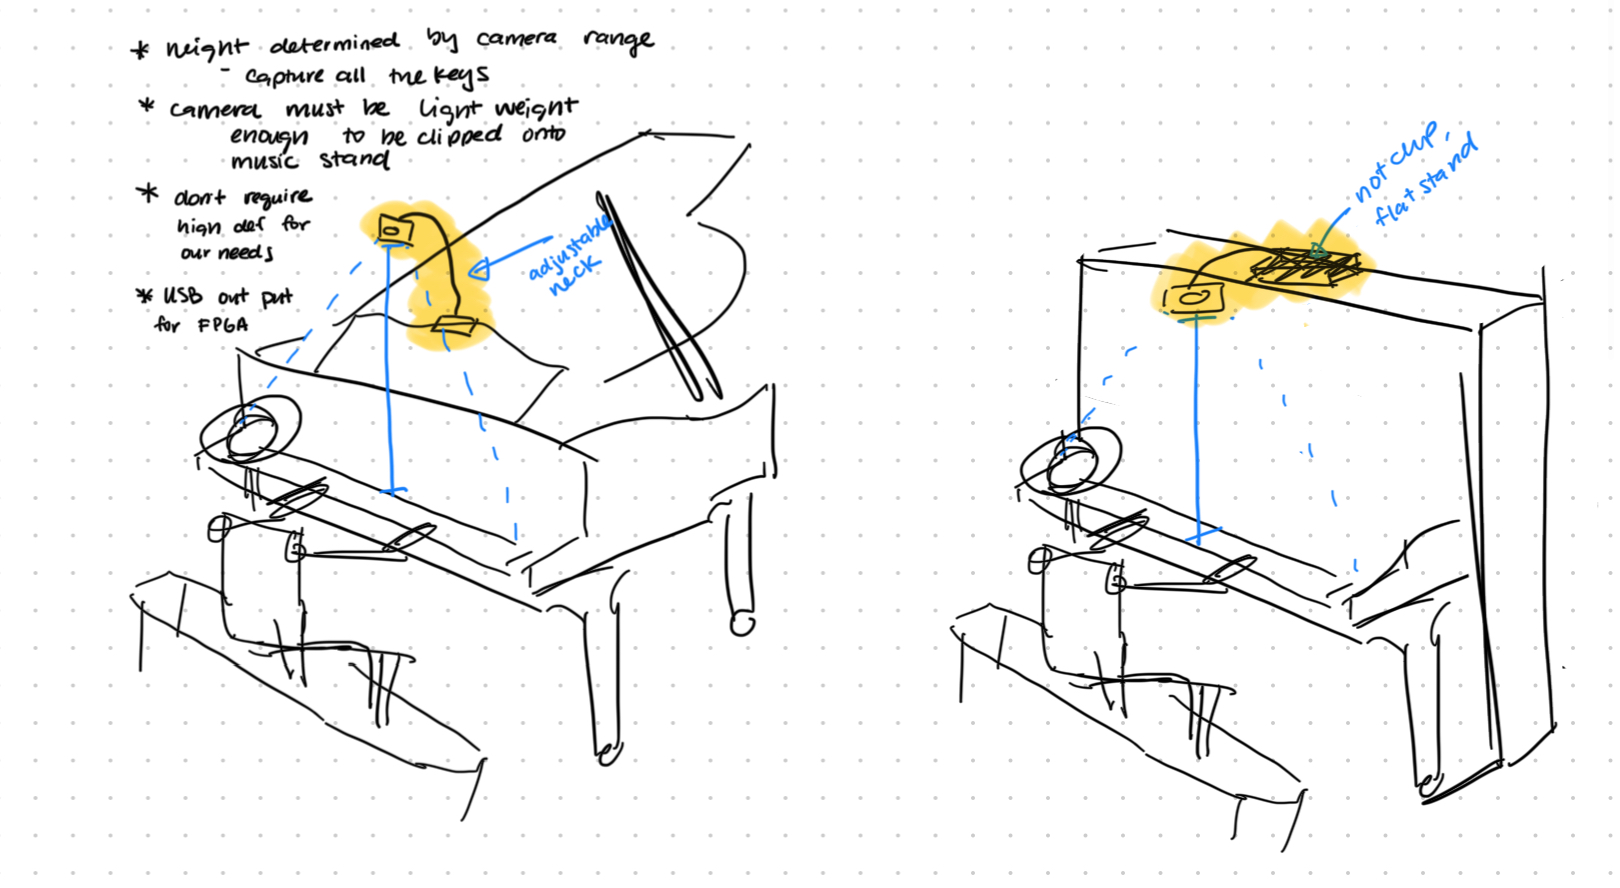
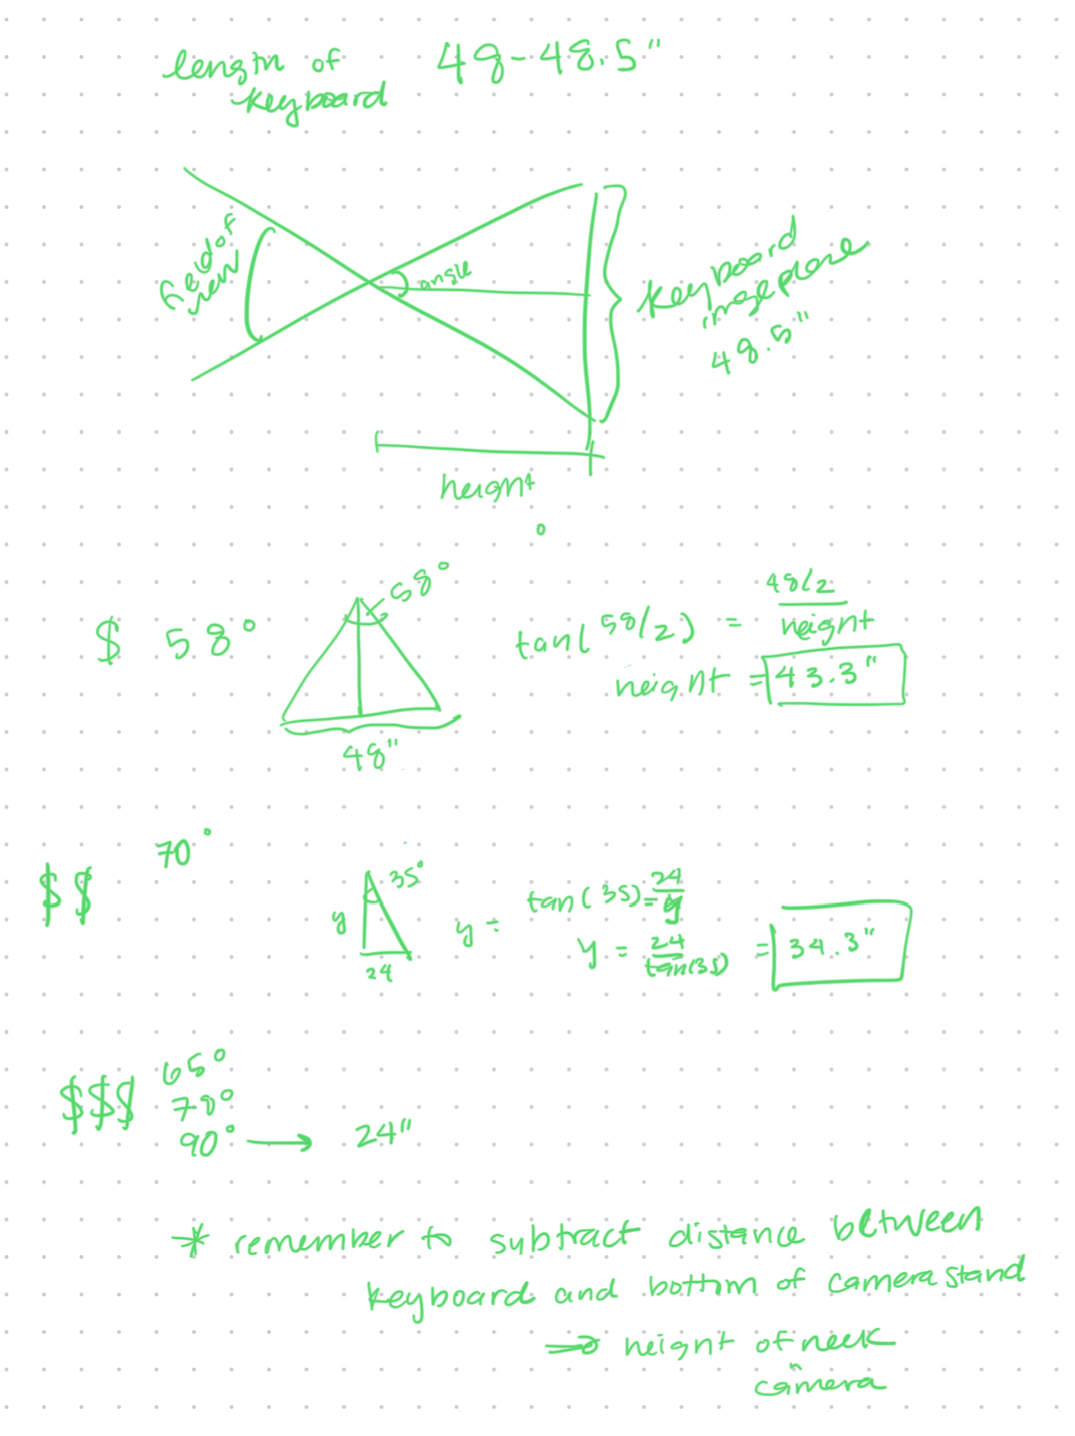
  1. I finalized shopping for parts for the camera stand given we now had a better idea of the measurements. These parts arrived and they seem to meet our requirements. We just need to find a way to connect the gooseneck and the tripod before our meeting with Prof Dueck’s students on 10/9.
  2. I looked into how to run the kinematic calculations on the FPGA. I again referenced Peter Quinn’s code: https://github.com/PeterQuinn396/KV260-Pose-Commands/blob/main/app_kv260.py and saw that he simply used python. I looked into some other options and saw that the easiest way would be to use the python Vitis AI API, but there also exists a C++ API that may allow us to have higher performance and the hardest option would be to work directly with the FPGA’s output bitstream. For now, we can plan to use python and later change to C++ if we are facing performance issues. A stretch goal could be to work directly with the bit stream. 
    1. A concern that came up while I was looking into these options is the rate that the FPGA would be able to run the pose detection model. Peter Quinn was able to achieve 3 FPS, I’m not sure how much better we can do and what is the requirement to fit out needs. We can investigate this at a later time and if it becomes an issue here are some ideas to try and improve performance: attempt to simplify the model (lower resolution, less landmarks, smaller image samples, etc.), go down the stack for the kinematic implementation (python to C++ and then to working with the bit stream). 
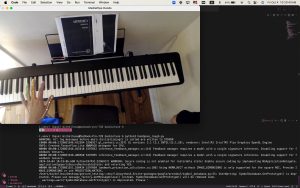
  3. We received the power supply and were able to finish the Zynq UltraScale+ tutorial: https://xilinx.github.io/Vitis-AI/3.0/html/docs/quickstart/mpsoc.html
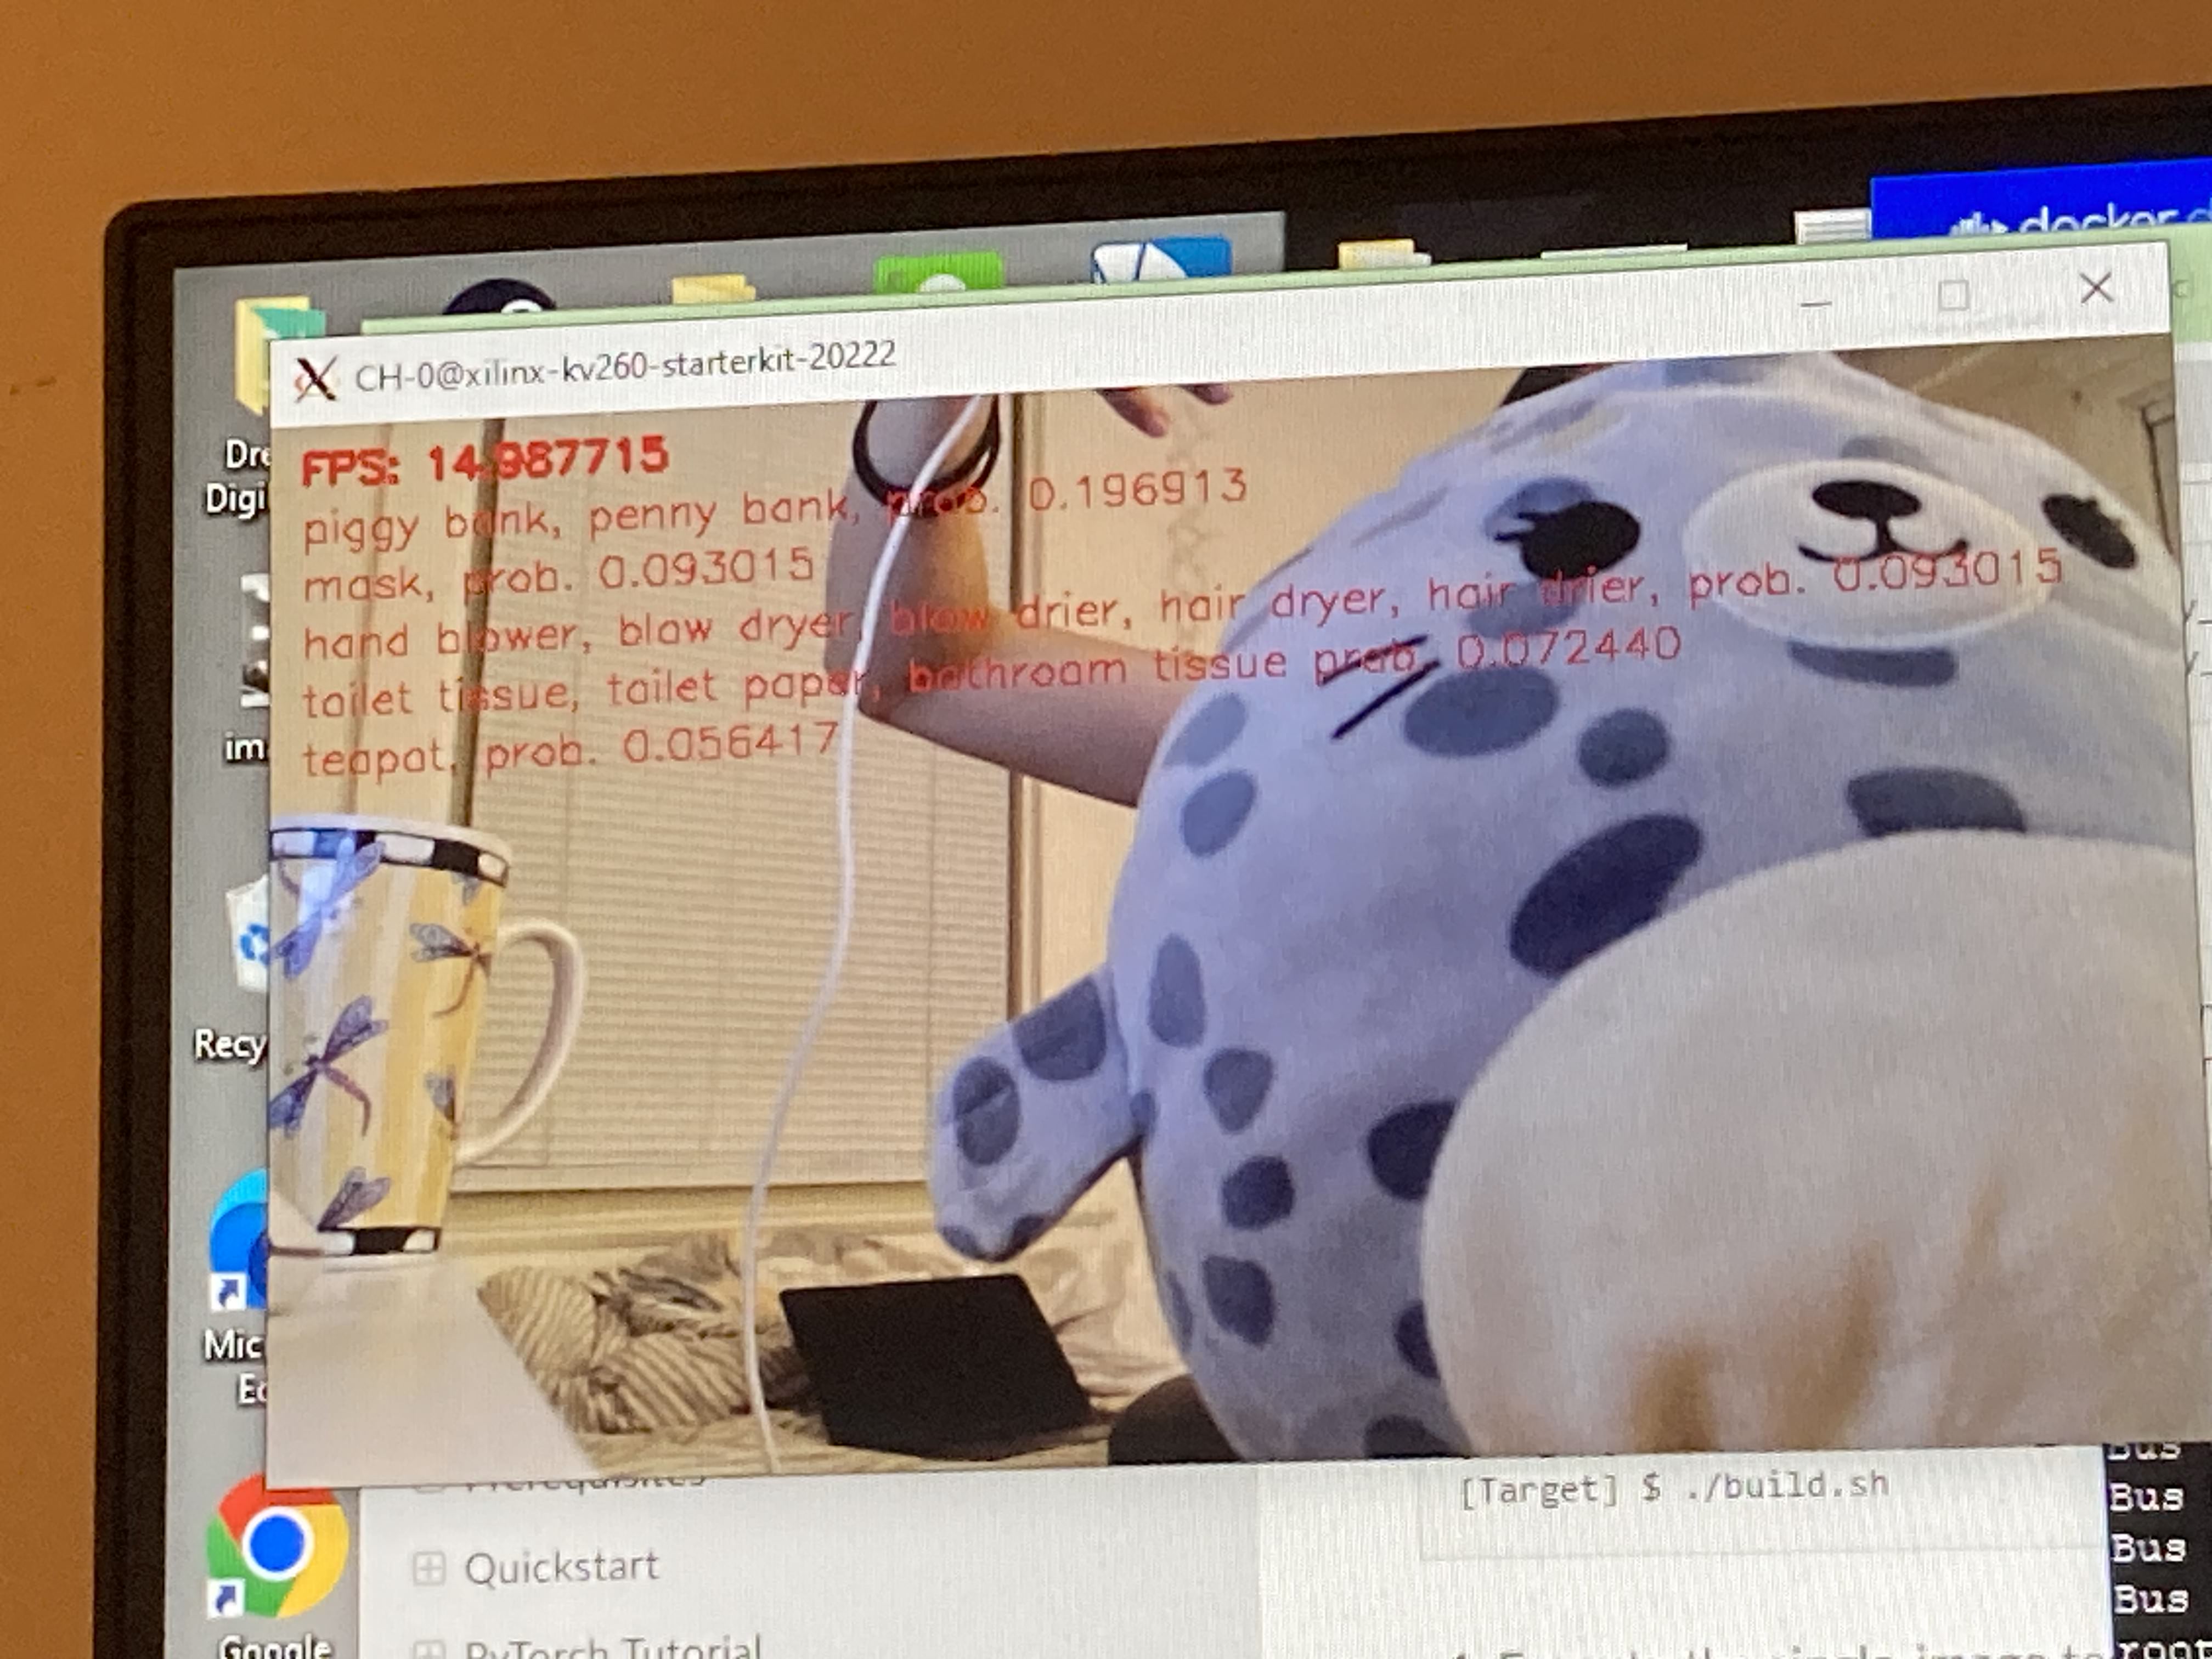
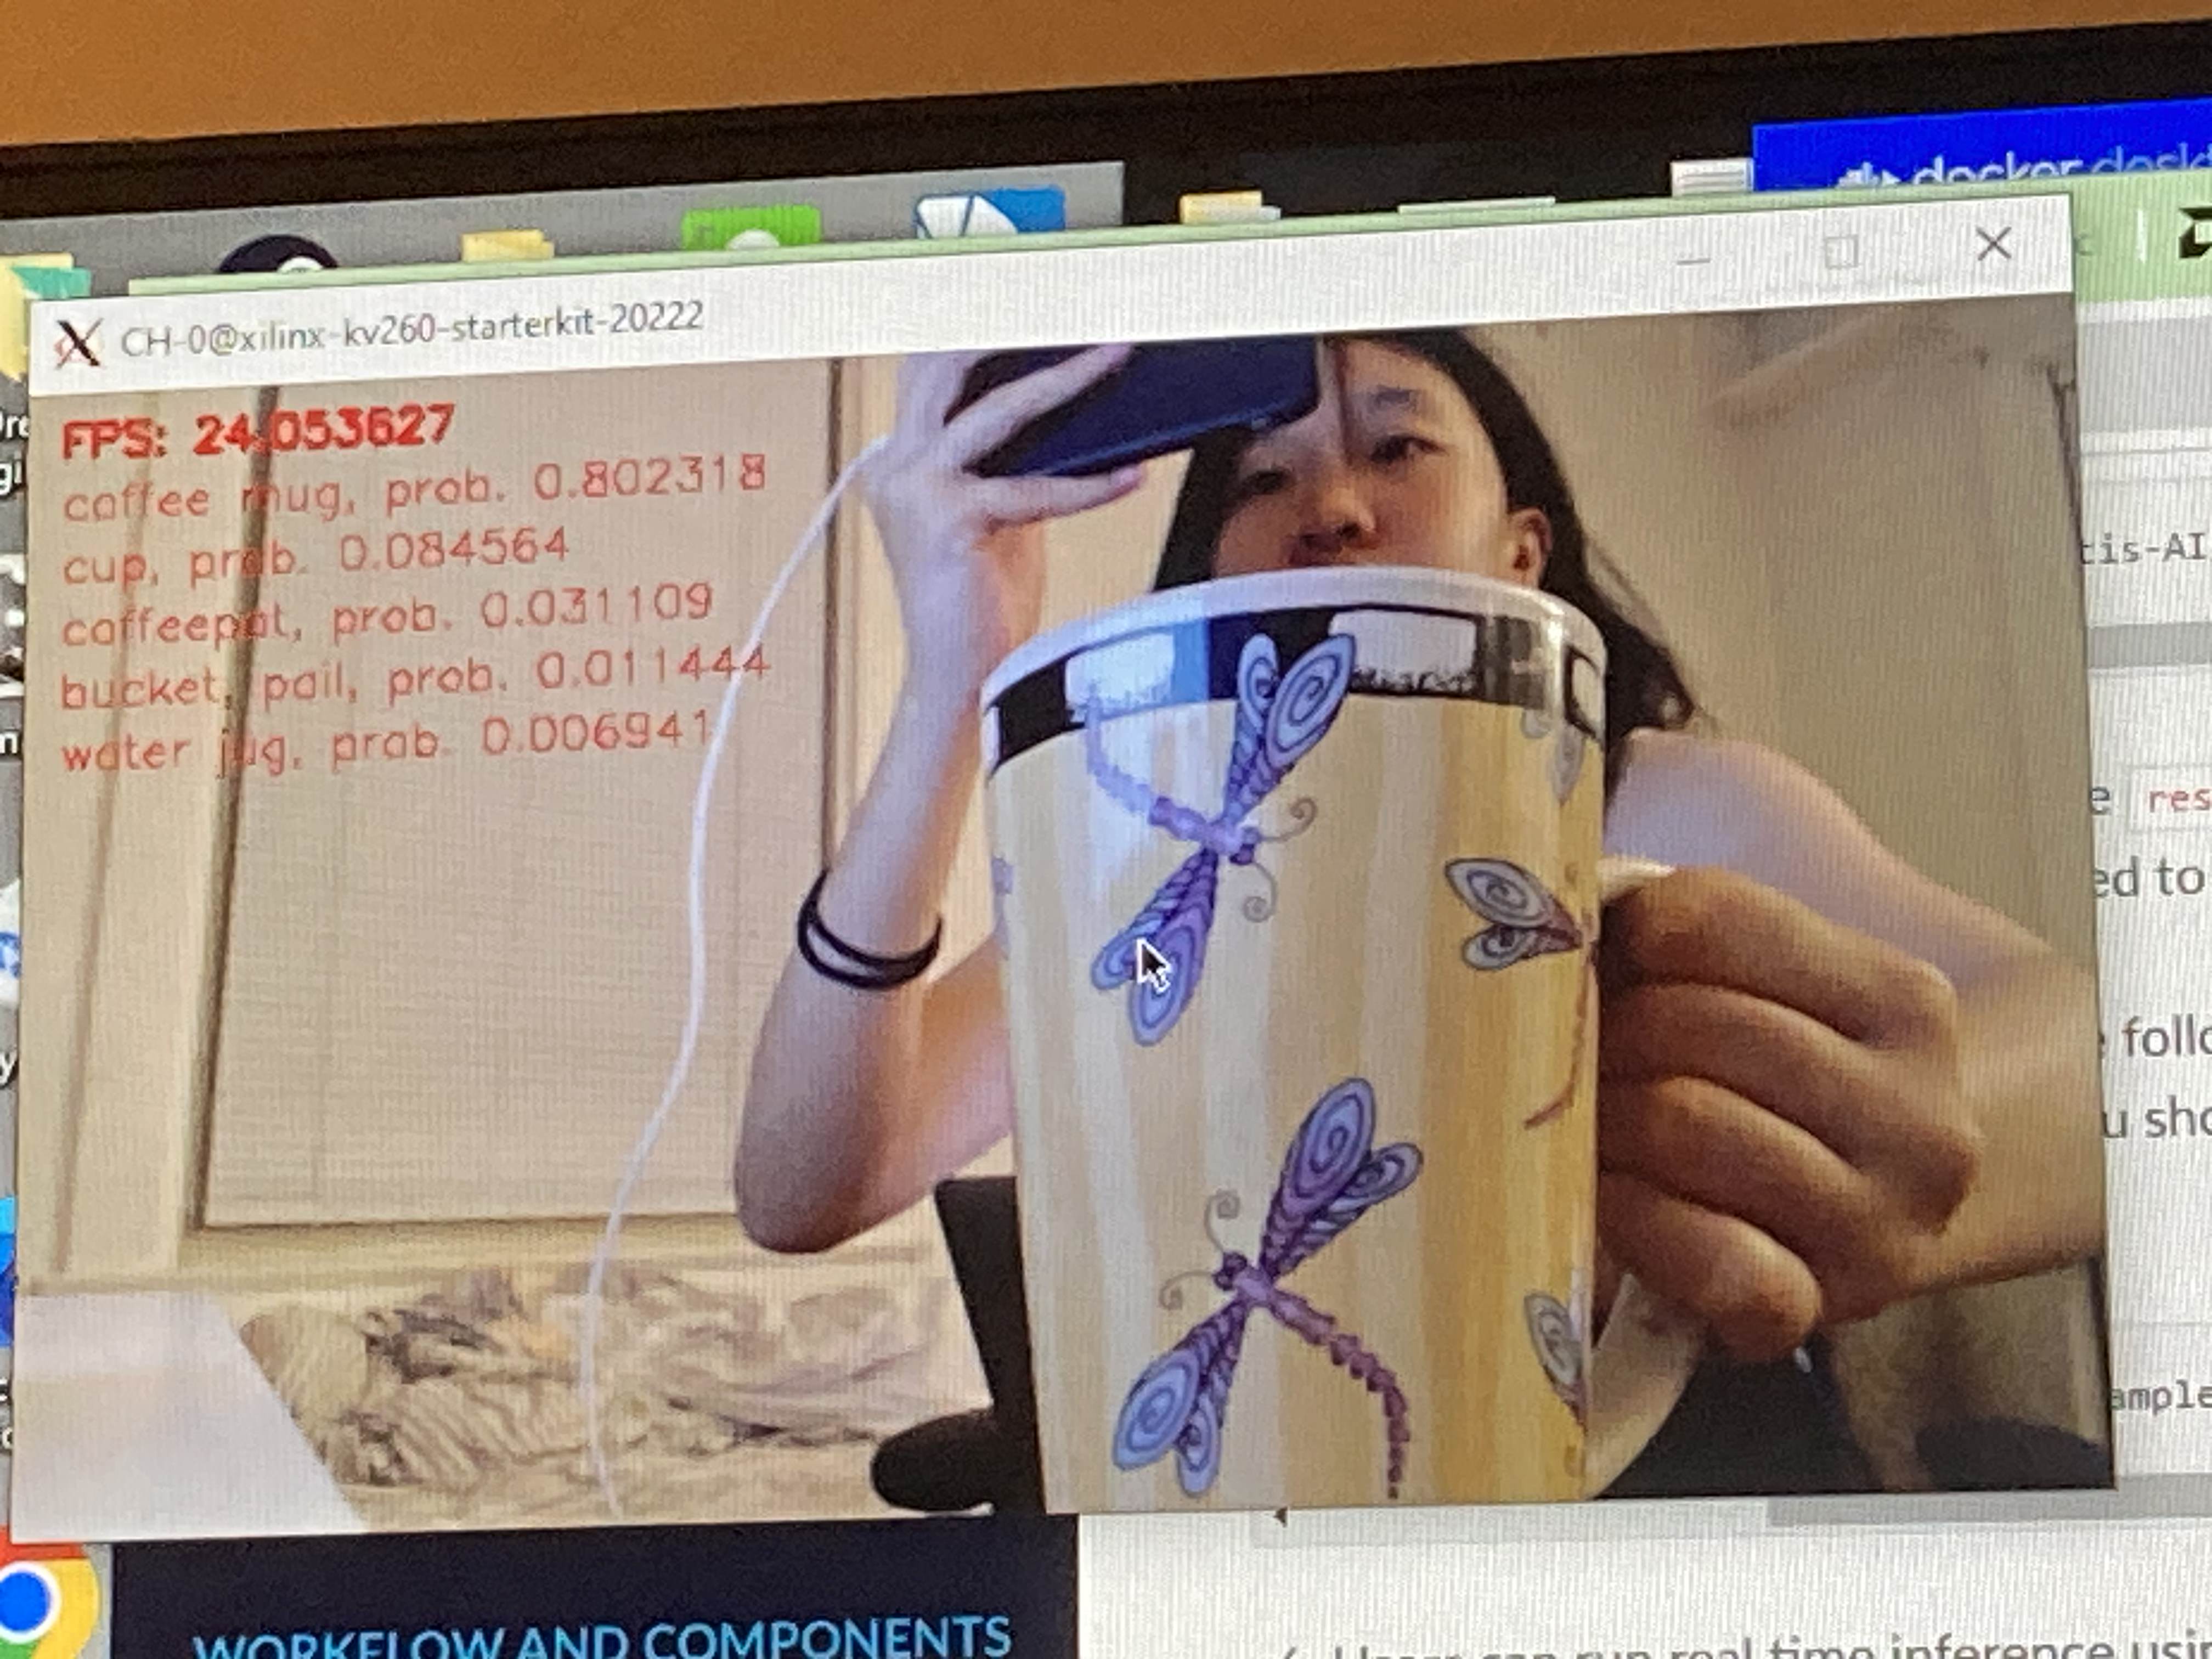
    1. Danny did the first half of the tutorial (set up the target and download the necessary software) and I did the second part of the tutorial (PyTorch Tutorial). I followed their walkthrough of the Vitis AI workflow with the example models and have a general idea what what configuration and scripts we need to write/modify from their examples. I was able to successfully follow the tutorial and compile a classification model on the FPGA. It was able to classify input from our webcam. 
    2. In reference to my previously mentioned concern regarding framerate, the example model is able to achieve a frame rate of around 14 or 15 fps when there is some movement in the video and around 24 or 25 fps when the video is still. I think the pose detection model will be more complex and be slower than this example model.
example model on FPGA categorizes my seal plushie as a piggy bank with low confidence at ~15fps
example model on FPGA categorizes my mug correctly with high confidence at 24fps

Schedule:

I’m still on schedule. Next week I plan to work with Shaye to start the early steps of the CV and FPGA integration. 

Next week’s deliverables:

  1. A rough draft version of the Python kinematics code using the Vitis AI API. 
  2. Work with Shaye to decide how we will obtain samples for the quantization step of the Vitis AI workflow. 


Team Status Report for 10/05

General update: 

  • We gave the design report presentation. This involved considering some use case requirements and making design decisions regarding our camera setup. We also fleshed out the testing for each of the different components.
  • We had a couple of practice sessions over the weekend to strengthen Danny’s presentation skills. 
  • We obtained the parts for our stand. We did a rough setup to see if the stand was able to capture the full keyboard. Our stand was tall enough that it was able to capture the entire keyboard. We plan to build a connector between the gooseneck and the stand before we meet with Professor Dueck’s students again on Wednesday. 
  • We ran through the basic setup tutorial for Vitis AI on the Kria KV260. We were able to set up a model and detect their example image. More details can be found in Danny’s status report. We also ran through the Vitis AI workflow tutorial for quantizing and compiling a model on the FPGA. More details can be found in Jessie’s Status report. 
  • We looked into how to implement kinematics on the FPGA. More details can be found in Jessie’s Status report. 
  • We worked on printing out tension vs not tension CV pipeline—see Shaye’s status report
  • We tested kinematics in CV pipeline—see Shaye’s status report
  • We further looked into the different webapp examples that are found in Django. 

Risks: 

  • Weight distribution of the camera stand being off-center leading to the stand tipping over. 
    • If this happens, we plan to add a counterweight. 
  • FPGA not working—many complications in general 
    • Order RPI to work with over break for contingency. 
    • May order RPI ai kit if we end up switching over 100%.

Changes to schedule/ design

  • No changes were made, we’re still on track of our schedule.

Stand setup:


Screenshot of “rough setup” we did

Danny’s Status Report for 09/28

For this week, I have finished the Django tutorial. I should have a very simple and basic understanding of how the Django framework functions. I have a more definitive idea of how the web app should be structured so I will do some research into how I can implement those features. I will probably also spend some time looking at existing frameworks if they already exist. Additionally, since I will be running the web server on the RPi I will look into how to do that effectively. I do not think the RPi section will take very long though. 

This past Wednesday we met with Professor Dueck and some of her students. I asked them about the features we currently had planned and any features that they might want. The consensus seemed to be that they wanted either limited live feedback or to be able to control the amount of live feedback they receive. For example, they were against the idea of having a live video as they were worried it would be too distracting. We are now considering having a live video on a display only for calibration purposes. Additionally, the audio buzzer used as live feedback was also questioned. They seemed to think it would also be distracting depending on the piece they are playing. Thus, they wanted to be able to toggle when they receive the audio feedback or not. For the web app, this would mean I would need to add some feature that is able to toggle the audio feedback as well. This should not be hard to do but it was good to know. Lastly, they supported the idea of storing their previous recordings on the web app so that they can go back and see their progress. Thus, we are considering buying a dedicated hard drive to store the videos for our users but we will stick to using the RPi for now.

Thirdly, I briefly helped Jessie with the quick guide at this link: https://xilinx.github.io/Vitis-AI/3.0/html/docs/quickstart/mpsoc.html.   However, we were not able to get far because we realized that the power supply we found for the FPGA was not compatible.

I would say my progress is still on track overall. For this upcoming week I am worried about slightly falling behind on the web app so that will be my main focus.

Next week, I hope to have examined a couple Django example frameworks to see how it is typically used. I would also want to research a couple ideas of how to implement the features that are required for our project. This includes having a start/stop record button, toggling the audio feedback, storing and serving the video files from the FPGA. I would like to get a decent idea of how all this could be implemented.

Shaye’s Status Report for 9/28

I started this week by continuing to work on the hand tracking pipeline—mostly adding in two-handed tracking abilities. My main focus of the week was working with pianists on Wednesday. The hand tracking ran smoothly with the pianists and we were able to record some footage (linked here). I made a key discovery during the session—hand tension isn’t determined by set deviation in either direction. Tension occurs when the wrist is held in one position for too long. So, I’ll be changing the pipeline to look for changes in wrist angle instead of specifically looking for ulnar/radial deviation. If the wrist remains at the same angle for too long, the pipeline will signal for a buzz. 

There are no new issues with the pipeline. I still need to integrate a way to tell which direction the wrist is deviated—however, since we’re now tracking wrist angle changes, this is more of a “nice to have” rather than a necessary component. 

Despite the change, I’m still on schedule. For next week, I’ll focus on continuing to beautify the code I have as well as looking into how to port Mediapipe to Pytorch. Jessie has started looking more into the KV260 and discovered that TFLite, the framework Mediapipe is based on, isn’t supported by the system. We’ll need to convert it to Pytorch or Tensorflow instead. I found more online resources outlining how to port to Pytorch so I’ll start looking there first. Finally, we’ll be putting in the order for our camera stand next week, so I’ll also begin assembly for that once it arrives.

Jessie’s Status Report for 09/28

This week’s tasks:

  1. After finding a webcam that we plan to use and talking to Jim Bain and Joshna more about the camera stand design, I finalized the necessary measurements. Since we have chosen a webcam, I used that webcam’s FOV to calculate the distance between the camera and the keyboard. Additionally, I worked with the group to measure the distance between the camera and the base of the stand (how much does the stand have to bend over the player). The measurements and calculations can be found in the team status report. From these calculations, the stand will have to be very long (about 7.5’ or 8’ if we want some wiggle room). I’m starting to look into attaching a gooseneck (various flexible plumbing materials) to a mic stand or tripod. 
  2. We were able to acquire the KV260, so I stopped working on Varun’s Vivado tutorial since I’m not sure if it’s still applicable. Instead, I started looking into Vitis AI. 
    1. The KV260 came without any accessories, so we had to scavenge to find them. We were able to find all the necessary components but discovered the 
  3. I learned more about the flow of Vitis AI and what would be required from us. My findings are largely based on the Xilinx documentation/tutorials but also from https://github.com/PeterQuinn396/KV260-Pose-Commands/tree/main and https://www.hackster.io/AlbertaBeef/accelerating-the-mediapipe-models-with-vitis-ai-3-5-9a5594#toc-model-inspection-7 who successfully put a MediaPipe model on the KV260.
    1. Vitis AI takes in models in either a TensorFlow or PyTorch format. However MediaPipe is in a TFLite format. The hackster post mentions conversion scripts from other people, but they had little success using these scripts. We might have to write a conversion script or look into finding another model that is in a compatible format.
    2. Vitis AI first takes the model and inspects it. From the hackster post, even if the model doesn’t pass the inspection, the Custom OP flow can be used as a workaround. Then Vitis AI will optimize the model (prune it). Then the model gets quantized. This step requires several 100s to 1000s of samples. 
      1. Since we don’t have access to the data set used to train the MediaPipe model, we will have to find a data set and convert it to samples. Both Peter Quinn and the author of the hackster post write scripts to convert data sets to samples that we can reference. 
      2. A concern I have right now is the quality of the samples and how that might influence the accuracy of the model. The author of the hackster post experienced degraded model accuracy as a result of using bad samples. We will likely have to experiment with different data sets or sample generation scripts to maintain a high model accuracy.
    3. Vitis AI then compiles the mode. I realized I’m not sure how to interact with the output of the model on the FPGA, so I will have to look into that in order to successfully calculate the kinematics on the FPGA.
  4. I worked with Danny to follow this quick guide from xilinx https://xilinx.github.io/Vitis-AI/3.0/html/docs/quickstart/mpsoc.html. We downloaded Vitis AI and ran the scripts, but had to stop at the setting up the target step since we discovered the power supply we found was not the right size for the board.

Schedule:

I’m still on schedule.

Next week’s deliverables:

  1. Once the power supply comes in, successfully run Vitis AI on the example models provided. 
  2. Either determine it’s not possible/feasible to run kinematic calculations on the FPGA, or have a plan for a way to execute it. 
  3. Finalize plans for a camera stand so that we have a rudimentary stand the next time we meet with Prof Dueck’s students on 10/9. 


Team Status Report for 09/28

General accomplishments:

  • We worked on the design report and slides.
  • Jessie looked into the AMD workflow for putting a model on the FPGA. We now have a more fleshed-out idea of the tasks that need to be done. More details can be found in Jessie’s status report. 
  • Danny finished the Django tutorial. 
  • We asked Dueck’s students on their preferences on different WebApp features. More details can be found in Danny’s status report.
  • We met with Dueck’s students to preliminarily test system 
    • Need to track angle variation rather than consistent angle position—more details in Shaye’s status report
  • We have better specified the setup measurements and requirements based on additional measurements of Shaye playing piano. (Shaye not pictured 🙁 )

Risks: 

  • We are slightly concerned about converting the currently used MediaPipe model (TFLite) to PyTorch or TensorFlow, the only 2 formats compatible with Vitis AI. We plan to look into 
    • existing scripts that convert between the 2 formats or 
    • find different models that are in the compatible format 
  • We are also worried about the MediaPipe model losing accuracy once compiled on the FPGA due to over-optimization and bad inputted samples during the quantization phase
    • We plan to try multiple data sets and ways to convert samples to tweak accuracy
  • We need to look into how to implement kinematics on FPGA. We are not sure how to interact with the output of the model
  • Contingency: switch to RPi—will request on 10/8 if needed so we have time to work on it before fall break

Updates on the system:

  • We figured out how to port model & communicate between FPGA & RPI
    • Using Vitis AI workflow for model conversion 
    • Using UART for board communication 

Schedule updates:

  • Still on schedule, no updates

Additional questions:

Part A is written by Jessie, Part B is written by Danny, and Part C is written by Shaye

Public health/ safety/ welfare factors:

Our product aims to reduce injury among piano players by identifying and correcting harmful playing positions. Injury among piano players is extremely common (50-70%), with many injuries being related to the hand and wrist. The effects of being injured can have mental health impacts additionally, as it may prevent players from being able to practice for extended periods. Our system will provide players with real-time and post-processed feedback on the player’s hand position. This will help them correct their position, even without the guidance of a piano teacher. We realize that providing bad feedback can lead to more injury; thus, we’re taking special care to focus on the testing and verification metrics we’ve mentioned throughout this process to ensure system accuracy. 

Social Factors:

Our product will change the dynamic between the piano teacher and the student. Instead of having the piano teacher focus on the health of the student and harmful techniques, they can focus on music-related content. This product could also help encourage beginners to get into piano playing without the potential worry of becoming injured, lowering the barrier to entry. This could potentially lead to an increase in piano players. 

Economic factors: 

Our project will be the first product pianists can use to monitor their technique while practicing. Thus, although the total cost of our current system is high (FPGA cost, camera, stand, etc), creating a proof of concept using more general hardware will allow for more projects down the line to decrease the cost and create more accessible & commercialized products. With more specific hardware/ boards dedicated to running our system, the cost will decrease, allowing the product to be available for all piano players. For now, even just parts of this tool (CV pipeline, video saving features) can help save pianists from injury and incurring more personal costs. 

Danny’s Status Report for 09/21

This week I started looking into web app development. My part for this project will be to work on the web app but I have no experience working with web apps. I dedicated some time researching the different parts and frameworks that go into creating a web app. There seemed to be a many ways to go about creating a web application and many tools to help. I settled on learning Django at first because it is popular and seems to provide a lot of features for both the backend and the frontend. It also seemed that if I needed to create a better/prettier frontend I can add that onto Django. Thus, I thought Django would be a good place to start picking up web apps. I am currently completing the tutorial on how to create your first web app and will be making progress throughout the rest of the week.

My progress is currently on track with my schedule and I have no concerns with falling behind.

My current plan for deliverables is to finish the Django tutorial to catch myself up to speed on how implementing the backend of a web app works. I will then continue to look into the documentation that I feel is relevant for our project. Currently, our main feature that we are considering adding into our web app is to create a page that will play the video feedback. I will try to look into what would be necessary for this to work.

On this upcoming Wednesday, we will meet with Professor Dueck’s students. I will attempt to get some preliminary feedback on what type of features they might expect from a web app. This will hopefully provide more guidance on what type of documentation from Django I would need to read so that I can begin thinking about implementing the features early.

Jessie’s Status Report for 09/21

  1. At the beginning of the week, I worked with my group to prepare for our proposal presentation. In addition to practicing with my group, I went through the slides a couple of times myself to better prepare for the presentation.

  2. We are trying to buy a camera soon so we can start collecting data from Professor Dueck’s students. Since the camera depends on the camera stand, I fleshed out the requirements for the camera and the camera stand. These diagrams/drawings and calculations are necessary to justify which camera we purchase.
    • The stand should be easy to use, and portable. 
    • The stand should capture the entirety of the keyboard length for different types of pianos.
      • For upright pianos, the camera stand can be placed on the flat top of the piano. 
      • However for grand pianos, if they are played open then there is no flat top; therefore we are looking into creating a clip to attach the camera to the music stand. We should be wary of the risk of the camera falling backward and into the piano, thus causing damage to the strings.

      • There is more variance when it comes to electric keyboards. At the time, I could not think of many ways to create a camera stand to position the camera. Currently, I envision keyboard players will be responsible for providing a flat surface (e.g. table) behind the keyboard to place the camera stand on. 
        • Many electric keyboards have very flimsy music stands, so it could be difficult to clip a camera onto it. They are also sometimes free-standing (no flat surface nearby to place it on). We don’t want to create a camera stand that would rest on the ground since it would have to be very tall to capture the full length of the keyboard from overhead. It would be difficult to create a stand that is very tall, adjustable, strong enough to hold the camera, and meet our use case requirements of being quick to set up and portable. 
    • Since the camera stand needs to be fairly tall and attached to a clip, it should be as light as possible. For this reason and to minimize costs, we decided to opt for a webcam. 
    • Another concern is camera compatibility with the KR260, which we are waiting for Varun to verify. We know that the camera must have a USB output to connect to the FPGA though. 

    I did some calculations using the field of view of variously priced cameras and the length of a piano keyboard to get a feel of how tall the stand would need to be and which camera we should opt for.

  3. I also started Varun’s KV260 setup tutorial. I estimate that I am ⅓ of the way through.

I am currently still on schedule. 

Next week I plan to finish the KV260 setup guide and install the packages necessary for media pipe. 

Team Status Report for 09/21

At the start of the week, we prepared slides for the proposal presentation and did a couple of practice runs during the weekend.  We also placed inventory orders for a (temporary) camera and KR260.  Discussed more concrete requirements for the camera tripod. Shaye got a basic CV pipeline up.  Danny looked into different backends for the web app and started the Django tutorial.  Jessie began Varun’s tutorial for Kria KR260 setup.

One risk that came up this week is camera compatibility with FPGA. We are waiting for Varun to test the compatibility with the 1080p webcam and are hoping to hear back by the end of this weekend. If the compatibility is confirmed, we’ll decide on and order a camera next week.  We are also concerned with the camera field of view in relation to capturing the whole keyboard.  We plan to either use a taller camera tripod or place the camera in a taller position, or get a more expensive camera with a larger field of view.  We will weigh the decision out by the end of next week.  A general worry we still have is porting to the FPGA. We’ll hold off on FPGA porting until the CV pipeline is fully finalized. We may start working in parallel on RPi in addition to the FPGA if we’re unable to see a path forward by October 12th. Shaye will focus on working with either an RPi4 or RPi5 while Jessie continues with the FPGA. If we’re unable to get the FPGA working on a basic level by mid October then we will give up on the FPGA.

No major changes happened—we have more concrete ideas on how to position the camera. This is included in Jessie’s status report for more detail; the diagram also included there.

We’re still on schedule. For next week we want to finish up CV pipeline and FPGA setup and hopefully start CV and FPGA integration. We will meet with Professor Dueck’s students on Wednesday, where we will test the CV pipeline to detect different angles on the keyboard. We will use a loaned camera from the inventory that will be handheld temporarily before we order one.

Link to video of current CV pipeline: link 

Shaye’s Status Report for 09/21

This week I worked on building out the initial pipeline for our hand posture tracking. Before starting the pipeline, I looked more into how wrist deviation is usually measured. I found that typically it relies on the middle joint as a reference position. First, a neutral position is recorded (solid vertical line in the photo). Then, as the wrist deviates, we can measure the angle between the middle solid line and the dotted lines to find the angle of deviation. 

Image from https://www.mdpi.com/2306-5354/10/2/219

I then ran the Mediapipe hand landmark detection demo available on Github and used the code as a starting point to build out the rest of the pipeline. After looking at the landmarks I had available to me, I decided to use points 0 and 9 to get the vectors to calculate wrist deviation angle with (see image below). I wrote a function to record a neutral position, then changed the code a bit to continuously find the vector formed between points 0-9 and calculate the current angle of deviation. This then allowed me to print out the live deviation of the wrist once a neutral position was recorded. A video demo of the running code is included here.

Landmark map for Mediapipe hand detection

A current issue with the pipeline is that it can’t tell which direction the deviation is in. Since I’m using a dot product to calculate the angle between my neutral vector and the live recorded vector, the angles I get as outputs are only positive. Thus, I’ll be adding another check in to identify, then label the direction of deviation using more vector operations. 

Another smaller issue is that the pipeline currently only works with one hand. I’ll add in the ability to track neutral positions & deviations for both hands while I’m finalizing and cleaning up the pipeline. 

For next week, my plan is to fully flesh out the pipeline by fixing the issues identified above restructuring the code to be more understandable and usable. We have a work session with Professor Dueck’s students on 9/25—two handed tracking will be added by then. During the session, I’ll be testing to make sure that the pipeline still works from an overhead angle with the piano keyboard backdrop. I’ll also record some video and photos to test with the following week. Finally, I’ll start looking at how to port the pipeline to work on the FPGA and assist Jessie as necessary on setup.

Link to Github w/ code. A new git will be made for the team; currently using this as a playground to mess with the hand detection before transitioning to a more formal pipeline.