Shaye’s Status Report for 11/16

This week my main objectives were to integrate my code onto the pi, gather more video from the pianists, and prepare for the interim demo next week. 

For integration, I ported my pre-existing pipeline to rely on an accelerated blaze-based version of Mediapipe. I used code from this repo as the base to add my pipeline to. Currently, I’ve included our old tension algorithm as a placeholder for the typical processing workload we’d be doing with each frame. This will allow us to get a realistic estimate for our anticipated framerate (20 fps woo!). The modularity of the code will allow me to update the tension algorithm independently of the system running on the RPi, making future independent work straightforward. A video of this fully integrated with buzzer is linked here

During our last session with Professor Dueck’s students, I gathered more clips of the tense/ non-tense technique playing. I also gathered some videos of students playing familiar & unfamiliar pieces and split them into 10 second clips—Jessie will send out a form this weekend for the students to label these clips as tense/ nonsense. This will become the data I’ll use to verify that the tension algorithm uses. 

Lastly, now that the system’s been integrated more, I’ll also start focusing on verifying my algorithm using the data gathered last week. My current plan is to run the system on the labeled clips, then comparing the output to label. I’ll record the number of times we match the label, and the number of times we give false positives & false negatives for tension. If some results are inaccurate, I’ll adjust some of the parameters for the algorithm and try the tests again. This would involve adding more span-based conditionals when looking for tension indicators, and adjusting the existing window size & convolution parameters from before. 

Additionally, I’ll use the technique clips to verify that output from the RPI matches the output from the Mediapipe-based pipeline running on my laptop. This means running the same test video on both systems, writing output information on tension to a text file, and comparing the textfiles to check that they are consistent. If they are, I’ll be able to safely assume that any work on the tension algorithm on my laptop will produce the same result on the RPi, making integrated testing much easier as we’ll only need to test the algorithm with my laptop. 

Jessie’s Status Report for 11/16

What I did this week:

    • RPI MODEL AND TENSION CODE INTEGRATION: Shaye mostly led the integration process.  I moved the code for the model onto GitHub so Shaye could work with it. I then copied the integrated version of the code from Shaye’s branch on GitHub. We then worked together to debug any errors.  The initial integrated code can be found on the jessie_branch at the blaze model commit
    • I built off the integrated model and tension algorithm code Shaye and I worked on to add the live feedback buzzer feature. I copied my previously written buzzer code into [], then using feedback from Shaye’s rudimentary tension algorithm, if tension was detected, I triggered the buzzer for 0.1 seconds. I noticed that the video feedback was laggy when the buzzer went off. I believe this is because to have the buzzer buzz for 0.1 seconds, it is turned on, then waits 0.1 seconds (time.sleep(0.1)), then is turned off; the time.sleep is a blocking process, which would cause the code to lag as I saw. To remedy this, I created a thread each time the buzzer buzzed; the video seemed much smoother after this change. The code can be found on the jessie_branch at the buzzing roughly works commit. Video of the working code can be found here: https://drive.google.com/file/d/1jA_3Sd2Z57bAgNAS1DLm2VFd9FsDfc_w/view?usp=sharing 
      • In the video, you can see that when I move my hands, the buzzing stops, and when my hands are still the buzzing occurs. This is because we correlate less movement with more tension. In the future, I’ll look into how to make the buzzer buzz less frequently when tension is detected. 
  • RPI WEB APP INTEGRATION: I worked with Danny to interface video recording and calibration with the web application. 
    • To interface the video recording, I had ChatGPT generate some basic functions to start and stop video recording. These functions were mapped to buttons on the web app. I mostly had to work to ensure the paths of where the video was being stored were correct and that the videos were uniquely named. This code can be found on the jessie_branch in accelerated_rpi/vid_record/record_video.py
    • I also wrote some code to interface the mirror_cam.py code with Danny’s web app buttons. The code consists of functions to start and stop the mirror_cam.py code. The code can be found on the jessie_branch at accelerated_rpi/LCD_Module_RPI_code/RaspberryPi/python/call_mirror_cam.py. In the future, the calibration process will be much more detailed than this, but we have yet to fully think it through. 

Schedule:

I am slightly behind schedule as I wanted to have the system fully integrated by this week. These are the elements I am missing: 1. recording while live feedback is being provided 2. triggering the start of a live feedback session with a button. However, I’m making good progress towards that and think it is very achievable for next week. 

This week I focused on writing code specifically for demonstration purposes with the upcoming demo in mind, rather than working on completing the full system integration— showing that the buzzer interfaces with the tension algorithm and model on the RPi, the calibration interfaces with the web application, and video generated on the RPi interfaces with the web application. 

Additionally, I was unable to write the Google form for the tension ground truth since we are waiting for Dr. Dueck to send us a tension detection rubric that we want to include in the form. Dr. Dueck has been away at a workshop in Vermont this week and thus has been delayed in providing the tension rubric. 

Next week’s deliverables:

  • Make a Google form and spreadsheet to collect and organize ground truth data from Prof Dueck and her students. 
  • Work with Danny to make the real recording with live feedback triggerable through a button on the web app.
  • Record video while the live feedback is occurring. 
    • Work with Danny to ensure this video is accessible on the web app.

Less time-sensitive tasks:

  • Investigate the buzzer buzzing frequency
  • Start brainstorming the calibration code
  • Experiment with optimizing the webcam mirroring onto the display 

Verification of System on RPi:

FRAMERATE:

We have already been able to verify the frame rate at which the model runs on the RPi, since a feature to output the frame rate is already included in the precompiled model we are using. The frame rate of the model is around 22 FPS with both hands included in the frame. 

To determine the frame rate at which our system is able to process data (it’s possible some of our additional processing for tension detection could slow it down) I have 2 ideas. The first is to continue to use the precompiled model’s feature to output the frame rate. Our code builds on top of the code used to run the precompiled model, so I believe any slowdown as a result of our processing will still be observed by the precompiled model’s frame rate output feature. My second idea was to find the average frame rate by dividing the total number of frames by the total length of the video. Both of these methods should result in a good idea of the frame rate at which our system processes video; additionally, I can use these 2 methods to cross-check each other.

I plan to find the framerate when there are:

  • 2 hands in the frame (2 hands in the frame slows down the framerate of the model compared to 1 hand in the frame) 
  • Various amounts of buzzing (does the buzzer code affect frame rate?)
  • Various piece types (does the amount of movement in the frame have an effect?)

LATENCY:

To find the latency of the system’s live feedback, I plan to subtract the time audio feedback (buzz) was given by the time tension was detected. To collect the time at which tension was detected, I plan to have the program print the times (sync-ed to the global clock) at which tension was detected. To collect the time at which live audio feedback was given, I plan to have another camera (with a microphone) that will also record the practice session; I will sync this second video with the global clock as well and mark down the (global) times at which audio feedback occurs. I will then match the times at which tension was detected with the times at which audio feedback was given to find the latency. 

If I find that the frame rate varies given the different situations previously mentioned, then I will also run this latency test for those situations to find the effect of various framerates on latency. 

POST-PROCESSING TIME:

My plan to verify the post-processing time is fairly simple. I plan to record the time it takes for videos of various lengths to post-process, specifically for 1-minute of video, 5-minutes of video, 10-minutes of video, and 30-minutes of video. I will start timing when the user is finished recording and stop timing once the video is finished processing.

Danny’s Status Report for 11/09

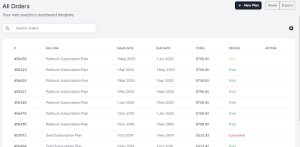
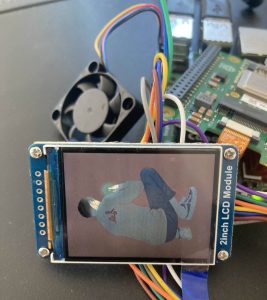
For this week, we received the RPI accelerator. Jessie spent most of the time working on it and making sure the model was working. We also received our display that will be used during calibration. I spent some time helping Jessie to work with the display. We were attempting to follow the instructions provided but certain libraries weren’t available to download on the RPi OS version we had and it was unclear if they were required. However, after spending some time we were able to figure out how to properly communicate with the display. Jessie then took over again and figured out how to display the camera feed onto the display for use during calibration. As for the web application, I realized that with my limited experience with web applications it would be difficult to create a web application that looks good or is friendly to our users. Thus, I have decided to modify a Django template to serve our users instead. I spent some time looking at the available options and choosing the template that we would like to use. I tried a couple templates at first and tried to stick to using React as well but those templates would not work for me. I was unsure if I was following the instructions for how to compile and run the server incorrectly or if their template was just broken. After spending some time trying to debug the issue I eventually decided to choose a different template to use. Finally, I have settled on a specific template and was able to get it to compile and work. I will and have been making some modifications to it as we only need a simplified version of the template. Currently, we are planning on having 2-3 pages to use so I have been cutting down on the number of pages that we need. I will then be modifying the pages so that one page is the control page (has a button that runs the model code) and a video page that will display the videos. The video page will still require the same video database idea I came up with so the work I did last week should still be applicable. 

I would say my progress is still on track. I have decided to speed up the way we are doing our front end design so that should not be an issue anymore. The rest of my time will be spent on the backend design so I am not too worried about the schedule.

For next week, I hope to continue working with the template and implementing some basic functionality that will work with the full-system integration by the end of the week. Right now that is looking like a button that will start recording and a page that stores the videos that we have recorded. As a stretch goal, I will be looking into how we will modify the videos to display the incorrect positions. Shaye has suggested creating a graph and putting that below the video to display the tense playing throughout the video.

Team Status Report for 11/09

General updates:

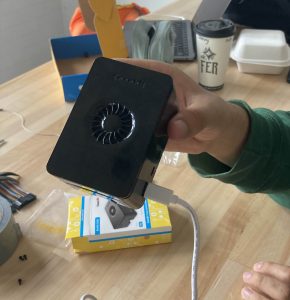
  • As a team, we set up the RPi case/fans. We have to take this apart and back it together in the future to attack the display and buzzer. 
  • This week the team largely worked independently. 
  • Jessie continued working on setting up the accelerated RPi. She started the week by registering the RPi with CMU-DEVICE and looking at how to have a program run automatically at boot. She continued to look into putting the model on the RPi, setting up the active buzzer, and interfacing the display. To find more information, refer to Jessie’s status report. 
  • Shaye worked on using footage from this week’s session with the pianists to help inform tension algorithm rewrites. Refer to Shaye’s status report for more info. 
  • Danny continued to work on the web application. Danny decided to refer to a template and modify that for our uses instead of starting from scratch. Refer to Danny’s status report for more information.

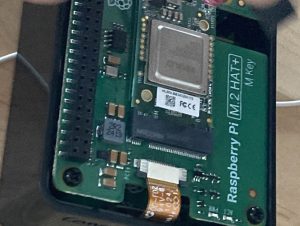
Pictures of the RPi Accelerator and the case:

Shaye’s Status Report for 11/09

This week I gathered more formal piano playing videos from Professor Dueck’s students and did some analysis on them. More specifically, I took tense/ non tense recordings with the pianists, then post processed the recordings to gather wrist angle data that will help inform future iterations of the tension algorithm. 

During the session, I recorded the same tense and non-tense technique playing as usual. I also recorded a side angle for extra data in addition to our current above angle  in case it provided a clearer difference between tense and non-tense playing. I then trimmed videos to be split by exercise and sorted them into tense/ non tense groups. 

After taking and processing the recordings, I wrote a script that would record wrist angle over the course of the entire clip and output the data as a text file to an output directory. I then automated it to run on all of the recordings. Finally, I graphed the wrist angle data for the tense/non tense playing for each exercise and compared them to one another. 


Tense vs. Non tense wrist angles for different exercises

From the graphs, I was able to confirm that tense playing correlates to less change in wrist deviation over time. I was also able to confirm what I suspected earlier—that playing with hand span is smaller means smaller differences in wrist deviation between tense and non tense playing. This explains why the previous algorithm worked for exercises involving larger hand spans (arpeggios & chords), but didn’t work for exercises involving smaller hand spans (scales & Hanon). 

I do have some concerns that these findings aren’t 100% sound. For some of the recordings, the built in Mediapipe hand labeling would sometimes mislabel the hands, causing angle data between hands to mix. While I don’t think this has a large impact on the metrics I’m looking for, I do think having a better way to label hands would improve the overall robustness of our system. Additionally, only two students were able to make our session last Wednesday, meaning that these findings may be specific to only these two students. I’ll gather more data with the remaining students this coming Wednesday to verify if this is true or not. 

I’ll look more into how to use these findings to write a new tension algorithm/ modify our old one to work for smaller hand span exercises tomorrow. I’ll also analyze the side view recordings more in depth. The remainder of my time will be spent preparing for the demo the following week and helping out with integration.

Jessie’s Status Report for 11/09

This week’s tasks:

  • CONNECTING RPI TO CAMPUS WIFI: At the beginning of the week, I successfully connected RPi to school wifi by registering it to CMU-DEVICE.
  • RUNNING PROGRAM AT BOOT: I also investigated having a program run automatically at boot (so we won’t need to ssh into the RPi each time we want to run a program). After tinkering around a bit, I was able to get a sample program that writes “hello world” to a file to run automatically at boot. I wonder if a program that continuously loops (likely like the program we will end up writing) will be able to work in the same way. I can experiment more with it next week or with the integrated code. 
  • The next time I came to work on the project I was unable to boot the RPi. It seems like the OS couldn’t be found on the RPi. When I tried to reflash the SD card, the SD card couldn’t be detected, indicating that something happened to it; we suspect we broke it when we were putting the RPi into the case. We had another SD card on hand; however, it was a 16 GB SD card instead of a 128 GB one. I redid my work on the RPi with the 16 GB SD card (installing necessary programs and starting a program automatically at boot). This would have been fine had we not planned to put video files for testing purposes on the Pi. Therefore we will likely have to transfer the data on the 16 GB SD card to a different 128 GB SD card in the future. 
  • ACCELERATED RPI TUTORIAL: I finished following the tutorial to put the hand landmark model onto the accelerated RPi
    • Overall it was pretty straightforward. It was difficult to attach the accelerator to the Pi at times (the Pi wasn’t picking up that it was connected). 
    • I was stuck for a bit because there was no video output as the tutorial said should pop up. Danny helped me out and we figured out it was because I didn’t have X-11 forwarding enabled when I ssh-ed into the Pi on my laptop. Once I had X-11 forwarding enabled, the video output was very laggy. As a sanity check, I re-ran the direct media pipe model on the Pi (no acceleration) like I did last week, and it had a much slower frame rate (~4 fps instead of the previously observed 10 fps). Danny also helped me figure out this because last week I used a monitor to output the video instead of X-11 forwarding. Once I connected the Pi to a monitor to output the video, I was able to achieve a frame rate of around 21-22 fps on the accelerated RPi. The video output causing a drop in frame rate should not be a concern for us as we don’t care much about the video output for live feedback and only need to use the outputted landmark information (in the form of a vector) for our tension calculations. 
    • Video of accelerated RPi model output: https://drive.google.com/file/d/1msm4iRN0igps-D62fNLJPaKeeLQqsShn/view?usp=sharing
  • ACTIVE BUZZER: I had ChatGPT quickly write some new code for the newly acquired active buzzer. There are 2 versions of code on the GitHub repo that I tried, which output at different frequencies. On my branch (jessie_branch) active_buzzer.py outputs at a higher frequency and active_buzzer_freq.py outputs at a lower frequency. We can tinker with this more at a later time– I think the high frequency can be very distracting and alarming. 
    • higher frequency video: https://drive.google.com/file/d/10R0AOH2a84ZJaFh7ogOY7JOEHq7ynsl4/view?usp=sharing
    • lower frequency video: https://drive.google.com/file/d/1epzOV_M6fjuQC4USLHoPRA3CS1ay1ExG/view?usp=sharing
  • CALIBRATION DISPLAY: The 2-inch display arrived this week! I tried to follow this spec page to get the display set up: 
    • I hooked the display up to the RPi as the page indicated; however, I was unable to get the examples to work successfully. Danny was able to get the examples to work and more information can be found in his status report. 
    • Once the examples were working I was able to work with ChatGPT to write some code to mirror the webcam output onto the display for the calibration step. The code can be found at backintune/accelerated_rpi/LCD_Module_RPI_code/RaspberryPi/python/mirror_cam.py on the jessie_branch. I had to edit their outputted code a bit to properly rotate the video output onto the display. The webcam output has a huge delay and low frame rate. We don’t think this is a huge issue as the webcam mirror will only be used during the setup/calibration step to help the user ensure their hands and the entirety of the piano are within the frame; therefore, a high frame rate is not necessary but could be frustrating to work with. If there is time in the future, I can look further into optimization possibilities.
    • video of laggy display: https://drive.google.com/file/d/1eLImQROqo-vjqi8m00PNjzmGhWVeltTi/view?usp=sharing
  • I also responded to AMD’s Andrew Schmidt’s email (and Prof Bain’s Slack message) asking for feedback. 

Schedule:

I am very much on schedule, even completing less time-sensitive tasks. At Joshna’s suggestion, we decided to combine the web app hosting RPi and the accelerated RPi onto one Pi, therefore the previous UART interface is not necessary. Next week I’m hoping to make a lot of progress with full system integration. 

Next week’s deliverables:

  • Make a Google form and spreadsheet to collect and organize ground truth data from Prof Dueck and her students. 
  • Interface the output of the hand landmark model on the RPi with Shaye’s code.
  • Work with Danny to interface the web app with the RPi. Specifically, try to get programs to run by clicking buttons on the web app. 
  • Start looking into how to post-process video and transfer it to the web application. 

Less time-sensitive tasks:

  • Experiment with optimizing the webcam mirroring onto the display 

Danny’s Status Report for 11/02

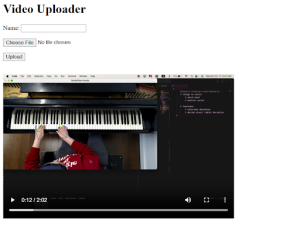
For this week, I was going to spend some time figuring out how to interface between the two RPis using UART. However, Jessie spent the vast majority of the time trying to figure it out for us. I spent some time initially setting up the additional RPi as there were some ssh issues but we all worked together to get the RPi connected to the wifi and were able to ssh. We were considering using a hotspot from our phone as the internet connection for our RPi but for some reason that was not working for us and we were unable to ssh. As I mentioned, after the RPi was functioning and we were able to properly ssh into it Jessie took over and spent time looking into how to connect the two RPis. I spent some time figuring out how to store videos within the database. I tried looking into it last week but was unsuccessful because of some misunderstandings I made. However, I figured out how to properly upload, reference and display the videos stored within the database. For my test, the videos were stored on my laptop’s filesystem but in the future they will be stored on the RPi. If we get an additional drive then the videos will be stored on that as well. Additionally, I do not believe we need to add functionality for our users to upload videos so it is unlikely that feature will make it to the final version but it is relatively easy to do if required. 

My progress is still slightly behind but I believe that I am catching up. Again, as I emphasized before, it would be ideal if I was able to implement some basic functionality before meeting with Professor Dueck and her students next week. I believe figuring out the video portion of the web application was a good step towards that goal.


For next week, I would like to work with Jessie to figure out how to interface with the other RPi through UART. I would then want to create a simple button on my web application that can use UART to talk to the other RPi. This would be good as it could be a way to show basic communication between the two RPis and how the web application is involved. Additionally, I have figured out how to store the videos in the database but I would like to change how the videos are displayed in a more list-like format. I would like to investigate how to do that by the end of next week as well.

Shaye’s Status Report for 11/02

This week I worked on reorganizing the code and writing a test script that utilizes pre-recorded clips of piano playing. I also created two more versions of the tension algorithm. 

For more code organization, I created a hand class that stores information about wrist angles and reference vectors, then refactored the code to use that class. This organization will be extremely helpful later on when I’m integrating with the web app. The test script I wrote enables me to try different versions of the algorithm on video recordings. I haven’t extensively tested any of the tension algorithms yet, but I will be in the next few days. 

The new versions of the algorithm use the same idea as the old algorithm with two main variations. In one verison, we take a new neutral vector after some time to give a new reference point to calculate wrist angle with. The second new version is very similar, but instead of using a neutral vector as a reference to calculate the wrist angle, we use the vector recorded from the frame before as a reference. These changes are intended to prevent the algorithm from getting stuck outputting “not tense” after recording for too long. Additionally, they’ll hopefully be able to give more conclusive tension results on scales/ Hanon. I’ll be doing testing in the next few days to help confirm this. 

For the coming week, I’m focusing on testing the algorithms more thoroughly to determine which one works best for which exercise. Additionally, I’ll be collecting feedback about how tension looks like from Professor Dueck’s students and use that to further develop the algorithm. Finally, I’ll start porting my script to use Blaze—an accelerated version of Mediapipe for edge devices—so that I’ll be ready to integrate onto the RPi when that’s setup. 

I’m currently not behind schedule, but will be a little busy next week and less available to work on the project. I’ll be spending more time this weekend/ next weekend to prevent this from being an issue. 

Jessie’s Status Report for 11/02

This week’s tasks:

  • I started the week by setting the RPi so I could ssh into it from my laptop. I had trouble doing this on my hotspot or the school wifi, but I could do it on my home wifi. Additionally, we needed to connect the RPi to some I/O (monitor, keyboard, and mouse) to connect the RPi to wifi. This is not feasible in the future when we need to use the RPi on campus. We plan to register the device to the CMU device wifi and get that set up next week. More long term, we plan to look into incorporating our code into the booting so that the program is automatically running when the RPi is booted up. We hope that if we do this, the user will not have to ssh into the RPi to run our code and therefore not even need to worry about connecting the RPi to wifi. 
  • I tried to go through the tutorial mentioned in last week’s status report for putting the MediaPipe model on the RPi that was mentioned; however, I was unable to get their script to work since the accelerator component hasn’t arrived yet. We believe the part will come early next week.
    • As a fallback plan in case the accelerator doesn’t work and out of curiosity about the speed of the model without an accelerator, I followed this tutorial to run the MediaPipe model on the RPi. It seems to consistently run at 10 fps, even when there is movement in the frame. For some reason, the model can only detect one hand at a time. The accelerated tutorial seemed able to detect 2 hands at a time, so we can reevaluate this issue once the accelerator comes in. 
  • I shopped around for displays for the calibration step. Most were fairly big (7 inches), advanced (unnecessary features like touch screen), and expensive (around $60). I ended up landing on this one because it is smaller and cheap. We were slightly worried about the 2-inch display being too small; however, we thought it was reasonable as it’s bigger than the screen of a smartwatch. Once the display has arrived, I will look into how to interface it with the RPi.
  • Shaye was able to find a buzzer. I tried to write some basic test code to interface with it. The code I wrote can be found in the accelerated_rpi folder of this Github repo. You can look at the commit history to see the different iterations of code I tried. The final version of the code is on the jessie_branch (I forgot to branch my code earlier). Shaye informed me that this is a passive buzzer, so it takes in a square wave and buzzes at the frequency of the square wave. I tried to use different libraries with the GPIO pins and struggled to get the buzzer to buzz at a loud volume (you can see my struggles in the multiple iterations of code). However, with the help of Shaye, we were able to max out the volume of the passive buzzer by tinkering with the frequency. The max volume of the passive buzzer is still somewhat quiet and we’re not sure if the user will be able to hear it well over piano playing, so Shaye plans to acquire an active buzzer. I will have to write different code to interface with this active buzzer in the coming weeks. 
  • I attempted to interface UART between the 2 RPis. You can find the sample code on jessie_branch in the same Github repo. The sender code is in the accelerated_rpi directory and the receiver code is in the host_rpi directory. I was unable to get this sample UART code to work– the code doesn’t print anything so the receiver isn’t receiving anything.  I suspect this is because the host_rpi is running on Linux OS (for Danny’s web app needs), so the UART setup is a little different. I’m not sure if I set up UART correctly on the receiver RPi because when I look for serial ports, none of the common ones show up; therefore I don’t think I’m using the right port in the receiver code. Next week I plan to look into other ways to do UART. 
    • Currently, I’m using the tx and rx pins, but Shaye has suggested I also try using the dedicated UART JST pins. For these pins, I won’t be able to use jumper cables, so I’ll need to acquire JST pins. 
    • Another possible option we can explore is using the USB port instead. I’ll need to acquire a USB-to-USB cable for this approach. 

Schedule:

I am still roughly on schedule as though I haven’t finished the accelerated MediaPipe on RPi tutorial (waiting to receive the accelerator), I did get the model on the RPi and I have made progress with interfacing I/O on the RPi (UART, buzzer, display). 

Next week’s deliverables:

  • Get the RPi working on the school wifi. 
  • Finish the tutorial and accelerate the model on the RPi. 
  • Write new code for the active buzzer. 
  • Get UART working between the 2 RPis.

Some future tasks that are less time-sensitive:

  • Look into adding code to the boot so we don’t have to connect to wifi
  • Connect fans to RPi
  • Connect the display to RPi

Team Status Report for 11/02

General updates:

  • This week the team largely worked independently. 
  • Jessie worked on setting up the accelerated RPi. She looked into putting the model on the RPi, interfacing UART between the 2 RPis, using the buzzer, and ordering a display. To find more information, refer to Jessie’s status report. 
  • Shaye worked on different iterations of the tension algorithm and set up unit testing with the videos from last week. They also organized the code for storing information about hand position information and helped debug buzzer RPi issues. Refer to Shaye’s status report for more info. 
  • Danny continued to work on the web application. He worked on figuring out how to store the video file paths within the database and how to display the videos through our web application. He implemented some functionality to allow users to upload videos but it will probably not be part of the final design. Refer to Danny’s status report for more information.