Jessie’s Status Report for 12/07

What I did this week:

  • UPDATE PROCESSING DATA SET VIDEOS: I continued working to test the dataset of videos for average fps and post-processing time. I was correct in my guess that the video was playing much slower on the display because the video clip had a high frame rate. Because the processing rate is lower than the inputted frame rate, the video looks like it’s moving slower. I changed my dataset video processing script to adjust the frame rate to 30 fps. 
  • UPDATE POST PROCESSING CODE: I found that my code now worked for the shorter videos (1 minute) but did not work for the 5-minute video. I thought this could be due to the large number of video frames, which I was storing in an array (in memory) before writing to a video at the end; running out of memory (resources) could’ve been what caused my program to be killed prematurely. I adjusted my code to store the files in an array to save memory. I believe this change did slow down our frame rate slightly, likely due to the extra time to execute I/O (writing to a file); however, the frame rate is still above target (close to 21-22 fps while previously it was around 22-23 fps). 
    • With this change, the 5-minute video was able to run successfully and I was able to collect data. I found that the post-processing time was around 1 minute (1/6th of the length of the video), which is still way below our target of ½ of the length of the video. This rate was lower than my previously observed rates for the shorter videos; this could be due to the videos being shorter or to the additional time to read from a file (instead of an array) while post-processing the video.
    • I tried running a longer video (11 minutes) but it seemed to crash. I’m not sure what happened and more investigation will need to be done. 
    • The updated live feedback code can be found here: https://github.com/mich-elle-xu/backintune/blob/jessie_branch/blaze/ported_live_blaze_handpose.py 
  • DEBUG LED: I noticed that the wireless LED stopped working this week. The problem seems to be the RPi cannot connect to the LED– I cannot even ping the LED. I made some adjustments to the LED code, to try and debug the issue; however, it seems to be related to poor wifi connection. I plan to create a wired alternative and debugging this wireless connection will be a low priority.

Schedule:

I am still roughly on schedule. The testing infrastructure is largely complete, and I just have to run it on the updated live feedback code once the tension algorithm is finalized; I’m still working with Shaye to finish finding the tension of 2 hands. I don’t anticipate this taking long though since the infrastructure is already established. Next week I plan to work mostly on the poster, video, and report as well as some integration finishing touches for the demo.

Next week’s deliverables:

  • Running the existing testing infrastructure on the updated code (finalized tension detection algorithm)
  • Investigate the wireless LED and create a wired backup. 

Jessie’s Status Report for 11/30

What I did last week:

  • GROUND-TRUTH FORM: I started the week by making a Google form and corresponding spreadsheet to collect/organize ground truth data from Prof Dueck and her students. 
    • https://docs.google.com/forms/d/e/1FAIpQLSdZ1LsQ5ckyfkgTnUzCFKm7-o78PcxrrPIhwr4NxlNbCd_XEQ/viewform?usp=sf_link
    • For each clip included, we asked Professor Dueck and her students to fill out a tension identification rubric (sent by Prof Dueck), whether they thought the clips were tense in general, and their level of confidence in their response.
    • I use the video clips Shaye created by dividing the recorded footage of Prof Dueck’s students into 10-second snippets. I had to upload each of these videos to YouTube in order to link them to the form.
    • There are a total of 23 clips included, though we have 50 clips in total. The form only uses half of the clips we have since the form was getting quite long. Additionally, some of the clips were unusable since the hands were covered by the pianist’s head.
  • CLEAN LIVE-FEEDBACK CODE: At the beginning of the week, I also cleaned up the code from the hackster article since it includes a lot of optional functionality that we don’t use. A more concise version will be easier to debug in the future too. This can be found in the “cleaned up code” commit on the jessie_branch
  • DETERMINE HANDEDNESS: I then tried to figure out how to edit the tension algorithm so it would work for 2 hands (instead of just one). However, I was unable to determine the handedness (identifying right versus left hand) metric from the model. There was a variable defined in the precompiled model; however, the output seemed the same for left and right hands. Shaye said they will write an algorithm to determine the handedness since we’re not sure the model provides it. 
  • VIDEO RECORDING: I also worked to integrate video recording into the live feedback code based on the code from the Hackster article. I wanted to include the visual of the model’s landmark placement in the video so that users were able to see if the landmarks were incorrect, which could cause inconsistencies in our tension detection algorithm. The code from the Hackster article creates an image for each frame processed where the landmarks are placed onto the inputted video feed and then outputted to the display. I created an array of frames (with the landmarks placed onto the video feed), which could then be written into a video. The changes can be found in the “can record video and buzzes every second instead of all the time” commit on the jessie_branch
    • A minor concern I have right now is that our captured frame rate is not consistent, it fluctuates. However, when I write the frames into a video, it must use a fixed frame rate. Therefore the video might not be synchronized with the timing in which the video was recorded. I don’t think this will have any implications on our functionality, though it could be disorienting for users.
  • ADJUST BUZZER FEATURE: Lastly, I adjusted the buzzer feature so that instead of constantly buzzing when tension is detected, it would buzz once when tension is detected and continue to buzz at a rate inputted by the user if tension is still detected. I attempted to achieve this by using a flag for tension and creating a recursive thread with a timer. Each time tension is newly detected, a thread to continually buzzing will be started. It uses a timer to wait a user-specified time before buzzing again. If tension is no longer detected (signaled by the flag), the thread will exit. These changes can also be found in the “can record video and buzzes every second instead of all the time” commit on the jessie_branch


What I did this week:

  • INTERFACE LED AND ESP32: At the beginning of this week, I learned how to work with the RGB LED and ESP32 board. I first had to determine whether the RGB LEDs we had were common cathode or common anode– I didn’t have a multimeter on hand so I tried different wirings of the LEDs to the RPi and noted when the LED lit up. Once we determined whether the LEDs were common cathode or common anode, I wired the LED to the ESP32 board. I used an Arduino IDE and with the help of ChatGPT, I was able to download the necessary libraries and achieve the basic functionality of the LED. We want the LED to be wireless so that the user can place it somewhere in their line of sight and not be restricted by the RPi wiring, so we opted to use HTTP requests to communicate requests from the RPi to the ESP32. Code for the basic functionality can be found here.  
  • INTEGRATE LED TO RPI: I then integrated the LED into the live-feedback code. The LED is turned off at the beginning of the program and at the end of the program. That way if the LED is on, it should signal that recording is occurring. Additionally, I was able to determine how many hands the model recognizes by evaluating the length of the landmarks array; I used this information to make the LED green when >= 2 hands were in frame and make the LED red otherwise (only 1 or 0 hands were recognized). 
    • I reverted this code to debug the integration of user-specified values with the web app, but the final code on the RPi can be found in this commit. I also made a copy of the code that is on the ESP32 and that can be found here.
    • When I implemented setting the LED color for each frame that was inputted, the frame rate dropped down significantly (around 7 fps). I think this is because it takes time for the ESP32 to respond to the GET request from the RPi and blocks the program. To combat this I limit the number of requests sent by creating a flag for the current color the LED is set to and only send a request when the color must be changed. I also implemented threading for each request that needs to be sent.
    • Another problem I ran into was that sometimes the connection between the RPi and ESP32 would fail, so the request to change the LED color would be dropped. To handle this, I handle the connection error exception to recursively call the change color function until it succeeds. 
    • A concern that I still have is that sometimes it seems like the ESP32 gets overwhelmed– it gets a bit warm and many requests will fail. Further testing will need to be done to determine how robust our system is and if this could be a problem. 
  • DEBUG BUZZER: I returned to editing the buzzer feature because after more iterations it became apparent there was a severe multi-threading problem.  The buzzing often started out fairly evenly spaced, but as the ‘practice’ session progressed the buzzing became more erratic. 
    • I think the unevenness of buzzes was due to multiple buzzing threads existing at the same time. Multiple buzzing threads can exist if in the span of the timer waiting in one thread, the current state went from tense to not tense and then back to tense. Then the buzzing thread would not detect that the user became not tense and would continue buzzing while another buzzing thread would be created. To remedy this issue I used an “event” in Python to block/unblock threads. This way I could detect if there was a change in state and interrupt the thread. 
    • At first, I used this event in conjunction with the flag I previously used; however, I think I was still having more subtle threading issues. Print statements when a thread was created and when a thread finished confirmed the existence of multiple threads at the same time, though less frequently than before. I believe this could’ve been due to some race conditions since setting the flag and setting the event was not atomic. To fix this, I removed the use of the flag and checked whether the event was set or not instead. Print statements confirmed the existence of only one buzzing thread at a time. 
    • There are still instances when buzzing is not evenly spaced (2 buzzes close together); however, my print statements show that this is due to the fast change in state from tense, to not tense, and back to tense as the system will immediately buzz each time tension is detected. If this proves to be a big issue in practice, we can increase the window size in the tension algorithm so that the algorithm is more robust to small changes in angle deviation. 
    • The finalized code can be found at this git commit.
  • TEST LATENCY: Once the buzzer feature was working as intended, I tested the system’s live feedback latency (the time between tension and live audio feedback). 
    • To do this, I deviated a bit from what I had previously planned. Originally, I was planning on finding the time between tension detection and audio feedback; however, when I tried doing this by putting a print statement when we detect tension, the print statement came after the audio feedback. This implies that the time between detection and outputting is extremely small. This measurement is likely inaccurate since there is a noticeable gap between when I am tense (no hand movement) and when I hear audio feedback. This implies that most of the latency is from the model processing/tension detection algorithm. 
    • To better test the system, I found the time between when I was tense and when I heard a buzz. It is difficult to determine exactly when a piano player becomes tense; however, our algorithm will detect tension when there is no horizontal hand movement (waving) and vice versa. So I decided to have iterations of me waving my hand, and then abruptly stopping so I could precisely document the start time of tension.
    • Danny helped me record a video on his phone (our system doesn’t have a microphone) of me interacting with the system by waving my hand. I then played this video at 0.1x speed to have a finer time granularity when documenting the time of the tension and audio feedback. 
    • I used the recorded times of the tension and audio feedback to find the latency. From there I found some metrics to present in our final presentation.
    • Here is a link to the video Danny recorded that I used to measure latency time: https://drive.google.com/drive/u/0/folders/1W-ZQKiA9caTTIdh_Ydgcm5rLkRDS_jbL
    • Here is a link to a Google sheet with my results: https://docs.google.com/spreadsheets/d/1GLNH3a0HwWe3TAwUPFOv4lbOCp4f87zj3cBo2VtS-zI/edit?gid=0#gid=0
    • It is worth noting that I was only able to test our system with one hand in the frame because the handedness feature has yet to be completed (so our system only works on one hand). This is important because our system has a much lower frame rate once two hands are in frame (22 fps versus 30 fps), so the latency will likely be higher than what I recorded once the tension detection algorithm is finalized. 
  • INTERFACE USER INPUTS: I then worked with Danny to interface the start/stop recording functionality, inputting the buzzer volume, whether the user wants to display the footage, inputting the time between consecutive buzzes, and outputting the video recorded by the live-feedback code between the RPi and the web app. 
    • I created functions that would call and quit the live-feedback program. This can be found in the file call_ported_live_blaze_handpose.py
    • I adjusted the live-feedback code to take the buzzer volume, the time between consecutive buzzes, and the toggling of the display as arguments that could be passed in. The finalized code can be found at this git commit
  • INTERFACE TENSION GRAPHS: I also started to work with Danny to interface the synced tension graphs with the video from the RPi to the web app. To do this, I created an array of tense/not tense values that are written to a csv file that corresponds to the recorded video of the same name.
  • FRAME RATE AND POST-PROCESSING VERIFICATION: Lastly, I started to work on the frame rate and post-processing time tests. 
    • The given code finds the frame rate by using a ticker to keep track of time. Each time 10 frames are processed, it will divide 10 by the amount of time that has passed to find the frame rate. I add these values to an array to be averaged at the end of the program.
    • To find the post-processing time I create a time-stamp before the frames are written to a video and after the frames have been written to the video. 
    • The script can be found here: 
    • Next week I plan to convert all the videos to a smaller size and investigate their frame rates. 
    • First I had to figure out how to input videos (instead of using video from a webcam) into our system. The code from the hackster article already had the functionality for this, but I discovered I was only able to input .mp4 videos (not .mov). 
    • I created a set of videos which were of various lengths. I used videos we recorded from Prof Dueck’s students, which varied in piece type but were all around 1 minute. To stress-test the post-processing time, I downloaded a couple of longer videos from YouTube. I ensured all these videos were .mp4.
    • I then edited my code to record the captured fps values and post-processing time. 
    • Then, with the help of ChatGPT, I wrote a script to run the downloaded videos and gather the video length, average framerate, and post-processing time into a csv file.
    • I tried testing this script on just one video and my code seemed to work for a while, but was killed prematurely. After looking at the video’s metadata, I believe this happened because the video was too big and took up too many resources. Once I made the video smaller (scaling the height/width) the code was able to successfully complete. However, the video seemed to be playing on the display much slower than the webcam input which caused my script to take a while. I still have to investigate and fix this, but I suspect it is because of a high input video frame rate. 


Schedule:

I am still roughly on schedule as the system integration is largely complete and I am almost done with testing. The only 2 big parts of system integration left are 1. tension graphs to sync with video on the web app and 2. integrating the finished tension algorithm. For 1. I have already outputted an array of tense/not-tense information for Danny to turn into a graph. For more sophisticated graphs I am waiting for Shaye to finalize the tension detection algorithm. I am also dependent on the finalized tension detection algorithm for 2.   

Next week’s deliverables:

  • Finish testing frame rate and post-processing times.
  • Redo latency testing on the finished tension detection algorithm (with 2 hands in frame). 


Learning Reflections:

I had to learn a lot for this project. 

  • I had little experience using Raspberry Pis, so even getting SSH and wifi setup was difficult. 
  • Learning to interface with all the hardware was also a learning curve: installing the necessary RPi accelerator materials, writing code to interface with the SPI display, learning how to use active/passive buzzers, learning how to program the ESP32 chip with the Arduino IDE. 
  • I also had to use many Python libraries I was unfamiliar with.


My learning involved many strategies. Our approach for how to accelerate the model was to look up similar applications online. For the accelerator materials, I followed the Hackster article. In other applications I followed the given documentation/materials; for example, for the SPI display setup I followed this article https://www.waveshare.com/wiki/2inch_LCD_Module#Python and for the ESP32 wiring I followed the provided pinout from the original Amazon listing. Shaye was also a big help as they were more familiar with many of the hardware components I was working with. I would often first go to them for guidance on what I should generally do. Lastly, ChatGPT was a big help when it came to adjusting to new Python libraries as they could help generate basic code for me to build onto and give me ideas to help debug problems related to the unfamiliar libraries (specifically cv2 and threading specifics). 

Team Status Report for 11/16

General updates:

  • We worked as a team to piece together the RPi into its case with the display wiring and new SD card. Danny transferred the data on the 16GB SD card to the larger 128GB SD card. Shaye pieced the accelerator to the RPi, ensuring that the GPIO pins were exposed. Jessie had to redo the display wiring many times in this process. 
  • In general, the team’s goal for this week was to have an integrated system for the demo on Monday/Wednesday. Individual parts of the system aren’t fully done, but the basic workflow and basic integration have been completed. We are confident we can complete integration the following week. 
  • Shaye and Jessie worked to interface the blaze model on the RPi with the tension-tracking algorithm Shaye had previously written. See Shaye’s status reports for more info on the integration. 
  • Danny and Jessie worked together to interface button clicking from the web application to start/stop video recording as well as start/stop calibration. Jessie wrote some code to start and stop recording to test the button-clicking mechanism (this code will not be used in the final product) that can be displayed for demo purposes. She also wrote some code for the start/stop calibration. For more information on this code see Jessie’s status report. For more information on the web application button clicking integration see Danny’s status report. 


  • Shaye collected more video data & analyzed the video for more tension algorithms. They also cut the gathered video data into snippets for the ground-truth Google form. See Shaye’s status report for more information. 
  • Jessie worked off of the integrated blaze model with tension-tracking to add the buzzer feature for when tension is detected. See Jessie’s status report for more information. 
  • Danny has moved the code for the web application onto the RPi. He has continued working on trimming the unnecessary content and creating the functionality desired for the project. See Danny’s status report for more information.

Verification of Subsystems:

Stand Set-up/Take-down:

To test whether the user can set up and take down the camera stand within the targeted time, we plan to simply write some instructions to direct the user on how to set up and take down the camera stand. We then plan to time how long it takes the user to follow these instructions and successfully set up/take down the stand. The stand is considered successfully set up when the entirety of the piano is within the camera’s view and is parallel to the frame of the camera. The stand is considered successfully taken down when all the components are placed in the tote bag. We plan to test both new users (1st time setting up and taking down) and experienced users. This way, we can get a feel for how easy the instructions are to follow as well as get a sense of how long it would take a user to set up our system if it were a part of their daily practice routine. 

If the set-up/take-down time is too long, we plan to modify the instructions so that they are easier to follow (i.e. adding more pictures) and fix more of the components of the system together so there is less for the user to put together. The specific modifications we’ll make will be dependent on our observation (i.e. if users often got stuck at a specific step) and their feedback (i.e. they thought step 2. In the instructions was poorly worded). 

Tension Detection Algorithm:

We have run some informal tests to determine the effectiveness of our tension detection algorithm. We roughly tested the effectiveness of our algorithm by collecting data from Professor Dueck’s students– we asked them to play a list of exercises with and without tension. We then check the output of our system to see if it aligns with how the pianist intended to play. For more information on the results of these informal tests, see Shaye’s status reports.

To more formally test the correctness of our tension detection algorithm, we have collected more data from Professor Dueck’s students; however, this time we asked them to prepare a 1-minute snippet of a piece they were comfortable with and a 1-minute snippet of a piece they were still learning. Shaye has divided these recordings into 10-second snippets, which we plan to ask Professor Dueck and her students to identify as tense or not; this will help establish a ground truth to compare our system’s output. The data we collected from Professor Dueck’s students is good because we can run our algorithm on a variety of pianists and a variety of pieces. Additionally, we can use the output of the gathered data to compare the output of the tension detection algorithm using the MediaPipe model and the Blaze model to see if there was any reduction in accuracy after converting models. We can then adjust the tension detection algorithm accordingly. See Shaye’s status report for more information on how the tension detection algorithm can be tweaked. 

System on RPi:

We want to ensure that our system can process data fast enough and provide feedback within a reasonable time. For information on how we plan to test our system’s live feedback latency/frame rate and the system’s post-processing time, see Jessie’s status report. 

Web Application:

We want to ensure that our web application is easy and intuitive for users to use. For information on how we plan to test the intuitiveness of our web application, see Danny’s status report. 

Validation:

Finally, we want to ensure that our system is meeting our user’s needs. The main way we will be ensuring that our user’s needs have been met is through polling them. Currently, we are planning on polling Professor Dueck and her students on different aspects of our system. These aspects include but are not limited to whether or not our system provides enough accurate feedback for our system to be useful, how easy was it to set up and use our system, was there any difficulties when using our system and how we could improve upon it, and whether or not the way they received the feedback was helpful for their uses. Through the use of this polling, we will validate whether or not our tension detection algorithm on the RPi provides accurate and helpful feedback for our users. Additionally, our users will be interfacing with our system through the use of the web application. Our polling will help ensure that our web application is intuitive and easy to use and if they have any suggestions for a better user experience. 

Jessie’s Status Report for 11/16

What I did this week:

    • RPI MODEL AND TENSION CODE INTEGRATION: Shaye mostly led the integration process.  I moved the code for the model onto GitHub so Shaye could work with it. I then copied the integrated version of the code from Shaye’s branch on GitHub. We then worked together to debug any errors.  The initial integrated code can be found on the jessie_branch at the blaze model commit
    • I built off the integrated model and tension algorithm code Shaye and I worked on to add the live feedback buzzer feature. I copied my previously written buzzer code into [], then using feedback from Shaye’s rudimentary tension algorithm, if tension was detected, I triggered the buzzer for 0.1 seconds. I noticed that the video feedback was laggy when the buzzer went off. I believe this is because to have the buzzer buzz for 0.1 seconds, it is turned on, then waits 0.1 seconds (time.sleep(0.1)), then is turned off; the time.sleep is a blocking process, which would cause the code to lag as I saw. To remedy this, I created a thread each time the buzzer buzzed; the video seemed much smoother after this change. The code can be found on the jessie_branch at the buzzing roughly works commit. Video of the working code can be found here: https://drive.google.com/file/d/1jA_3Sd2Z57bAgNAS1DLm2VFd9FsDfc_w/view?usp=sharing 
      • In the video, you can see that when I move my hands, the buzzing stops, and when my hands are still the buzzing occurs. This is because we correlate less movement with more tension. In the future, I’ll look into how to make the buzzer buzz less frequently when tension is detected. 
  • RPI WEB APP INTEGRATION: I worked with Danny to interface video recording and calibration with the web application. 
    • To interface the video recording, I had ChatGPT generate some basic functions to start and stop video recording. These functions were mapped to buttons on the web app. I mostly had to work to ensure the paths of where the video was being stored were correct and that the videos were uniquely named. This code can be found on the jessie_branch in accelerated_rpi/vid_record/record_video.py
    • I also wrote some code to interface the mirror_cam.py code with Danny’s web app buttons. The code consists of functions to start and stop the mirror_cam.py code. The code can be found on the jessie_branch at accelerated_rpi/LCD_Module_RPI_code/RaspberryPi/python/call_mirror_cam.py. In the future, the calibration process will be much more detailed than this, but we have yet to fully think it through. 

Schedule:

I am slightly behind schedule as I wanted to have the system fully integrated by this week. These are the elements I am missing: 1. recording while live feedback is being provided 2. triggering the start of a live feedback session with a button. However, I’m making good progress towards that and think it is very achievable for next week. 

This week I focused on writing code specifically for demonstration purposes with the upcoming demo in mind, rather than working on completing the full system integration— showing that the buzzer interfaces with the tension algorithm and model on the RPi, the calibration interfaces with the web application, and video generated on the RPi interfaces with the web application. 

Additionally, I was unable to write the Google form for the tension ground truth since we are waiting for Dr. Dueck to send us a tension detection rubric that we want to include in the form. Dr. Dueck has been away at a workshop in Vermont this week and thus has been delayed in providing the tension rubric. 

Next week’s deliverables:

  • Make a Google form and spreadsheet to collect and organize ground truth data from Prof Dueck and her students. 
  • Work with Danny to make the real recording with live feedback triggerable through a button on the web app.
  • Record video while the live feedback is occurring. 
    • Work with Danny to ensure this video is accessible on the web app.

Less time-sensitive tasks:

  • Investigate the buzzer buzzing frequency
  • Start brainstorming the calibration code
  • Experiment with optimizing the webcam mirroring onto the display 

Verification of System on RPi:

FRAMERATE:

We have already been able to verify the frame rate at which the model runs on the RPi, since a feature to output the frame rate is already included in the precompiled model we are using. The frame rate of the model is around 22 FPS with both hands included in the frame. 

To determine the frame rate at which our system is able to process data (it’s possible some of our additional processing for tension detection could slow it down) I have 2 ideas. The first is to continue to use the precompiled model’s feature to output the frame rate. Our code builds on top of the code used to run the precompiled model, so I believe any slowdown as a result of our processing will still be observed by the precompiled model’s frame rate output feature. My second idea was to find the average frame rate by dividing the total number of frames by the total length of the video. Both of these methods should result in a good idea of the frame rate at which our system processes video; additionally, I can use these 2 methods to cross-check each other.

I plan to find the framerate when there are:

  • 2 hands in the frame (2 hands in the frame slows down the framerate of the model compared to 1 hand in the frame) 
  • Various amounts of buzzing (does the buzzer code affect frame rate?)
  • Various piece types (does the amount of movement in the frame have an effect?)

LATENCY:

To find the latency of the system’s live feedback, I plan to subtract the time audio feedback (buzz) was given by the time tension was detected. To collect the time at which tension was detected, I plan to have the program print the times (sync-ed to the global clock) at which tension was detected. To collect the time at which live audio feedback was given, I plan to have another camera (with a microphone) that will also record the practice session; I will sync this second video with the global clock as well and mark down the (global) times at which audio feedback occurs. I will then match the times at which tension was detected with the times at which audio feedback was given to find the latency. 

If I find that the frame rate varies given the different situations previously mentioned, then I will also run this latency test for those situations to find the effect of various framerates on latency. 

POST-PROCESSING TIME:

My plan to verify the post-processing time is fairly simple. I plan to record the time it takes for videos of various lengths to post-process, specifically for 1-minute of video, 5-minutes of video, 10-minutes of video, and 30-minutes of video. I will start timing when the user is finished recording and stop timing once the video is finished processing.

Jessie’s Status Report for 11/09

This week’s tasks:

  • CONNECTING RPI TO CAMPUS WIFI: At the beginning of the week, I successfully connected RPi to school wifi by registering it to CMU-DEVICE.
  • RUNNING PROGRAM AT BOOT: I also investigated having a program run automatically at boot (so we won’t need to ssh into the RPi each time we want to run a program). After tinkering around a bit, I was able to get a sample program that writes “hello world” to a file to run automatically at boot. I wonder if a program that continuously loops (likely like the program we will end up writing) will be able to work in the same way. I can experiment more with it next week or with the integrated code. 
  • The next time I came to work on the project I was unable to boot the RPi. It seems like the OS couldn’t be found on the RPi. When I tried to reflash the SD card, the SD card couldn’t be detected, indicating that something happened to it; we suspect we broke it when we were putting the RPi into the case. We had another SD card on hand; however, it was a 16 GB SD card instead of a 128 GB one. I redid my work on the RPi with the 16 GB SD card (installing necessary programs and starting a program automatically at boot). This would have been fine had we not planned to put video files for testing purposes on the Pi. Therefore we will likely have to transfer the data on the 16 GB SD card to a different 128 GB SD card in the future. 
  • ACCELERATED RPI TUTORIAL: I finished following the tutorial to put the hand landmark model onto the accelerated RPi
    • Overall it was pretty straightforward. It was difficult to attach the accelerator to the Pi at times (the Pi wasn’t picking up that it was connected). 
    • I was stuck for a bit because there was no video output as the tutorial said should pop up. Danny helped me out and we figured out it was because I didn’t have X-11 forwarding enabled when I ssh-ed into the Pi on my laptop. Once I had X-11 forwarding enabled, the video output was very laggy. As a sanity check, I re-ran the direct media pipe model on the Pi (no acceleration) like I did last week, and it had a much slower frame rate (~4 fps instead of the previously observed 10 fps). Danny also helped me figure out this because last week I used a monitor to output the video instead of X-11 forwarding. Once I connected the Pi to a monitor to output the video, I was able to achieve a frame rate of around 21-22 fps on the accelerated RPi. The video output causing a drop in frame rate should not be a concern for us as we don’t care much about the video output for live feedback and only need to use the outputted landmark information (in the form of a vector) for our tension calculations. 
    • Video of accelerated RPi model output: https://drive.google.com/file/d/1msm4iRN0igps-D62fNLJPaKeeLQqsShn/view?usp=sharing
  • ACTIVE BUZZER: I had ChatGPT quickly write some new code for the newly acquired active buzzer. There are 2 versions of code on the GitHub repo that I tried, which output at different frequencies. On my branch (jessie_branch) active_buzzer.py outputs at a higher frequency and active_buzzer_freq.py outputs at a lower frequency. We can tinker with this more at a later time– I think the high frequency can be very distracting and alarming. 
    • higher frequency video: https://drive.google.com/file/d/10R0AOH2a84ZJaFh7ogOY7JOEHq7ynsl4/view?usp=sharing
    • lower frequency video: https://drive.google.com/file/d/1epzOV_M6fjuQC4USLHoPRA3CS1ay1ExG/view?usp=sharing
  • CALIBRATION DISPLAY: The 2-inch display arrived this week! I tried to follow this spec page to get the display set up: 
    • I hooked the display up to the RPi as the page indicated; however, I was unable to get the examples to work successfully. Danny was able to get the examples to work and more information can be found in his status report. 
    • Once the examples were working I was able to work with ChatGPT to write some code to mirror the webcam output onto the display for the calibration step. The code can be found at backintune/accelerated_rpi/LCD_Module_RPI_code/RaspberryPi/python/mirror_cam.py on the jessie_branch. I had to edit their outputted code a bit to properly rotate the video output onto the display. The webcam output has a huge delay and low frame rate. We don’t think this is a huge issue as the webcam mirror will only be used during the setup/calibration step to help the user ensure their hands and the entirety of the piano are within the frame; therefore, a high frame rate is not necessary but could be frustrating to work with. If there is time in the future, I can look further into optimization possibilities.
    • video of laggy display: https://drive.google.com/file/d/1eLImQROqo-vjqi8m00PNjzmGhWVeltTi/view?usp=sharing
  • I also responded to AMD’s Andrew Schmidt’s email (and Prof Bain’s Slack message) asking for feedback. 

Schedule:

I am very much on schedule, even completing less time-sensitive tasks. At Joshna’s suggestion, we decided to combine the web app hosting RPi and the accelerated RPi onto one Pi, therefore the previous UART interface is not necessary. Next week I’m hoping to make a lot of progress with full system integration. 

Next week’s deliverables:

  • Make a Google form and spreadsheet to collect and organize ground truth data from Prof Dueck and her students. 
  • Interface the output of the hand landmark model on the RPi with Shaye’s code.
  • Work with Danny to interface the web app with the RPi. Specifically, try to get programs to run by clicking buttons on the web app. 
  • Start looking into how to post-process video and transfer it to the web application. 

Less time-sensitive tasks:

  • Experiment with optimizing the webcam mirroring onto the display 

Jessie’s Status Report for 11/02

This week’s tasks:

  • I started the week by setting the RPi so I could ssh into it from my laptop. I had trouble doing this on my hotspot or the school wifi, but I could do it on my home wifi. Additionally, we needed to connect the RPi to some I/O (monitor, keyboard, and mouse) to connect the RPi to wifi. This is not feasible in the future when we need to use the RPi on campus. We plan to register the device to the CMU device wifi and get that set up next week. More long term, we plan to look into incorporating our code into the booting so that the program is automatically running when the RPi is booted up. We hope that if we do this, the user will not have to ssh into the RPi to run our code and therefore not even need to worry about connecting the RPi to wifi. 
  • I tried to go through the tutorial mentioned in last week’s status report for putting the MediaPipe model on the RPi that was mentioned; however, I was unable to get their script to work since the accelerator component hasn’t arrived yet. We believe the part will come early next week.
    • As a fallback plan in case the accelerator doesn’t work and out of curiosity about the speed of the model without an accelerator, I followed this tutorial to run the MediaPipe model on the RPi. It seems to consistently run at 10 fps, even when there is movement in the frame. For some reason, the model can only detect one hand at a time. The accelerated tutorial seemed able to detect 2 hands at a time, so we can reevaluate this issue once the accelerator comes in. 
  • I shopped around for displays for the calibration step. Most were fairly big (7 inches), advanced (unnecessary features like touch screen), and expensive (around $60). I ended up landing on this one because it is smaller and cheap. We were slightly worried about the 2-inch display being too small; however, we thought it was reasonable as it’s bigger than the screen of a smartwatch. Once the display has arrived, I will look into how to interface it with the RPi.
  • Shaye was able to find a buzzer. I tried to write some basic test code to interface with it. The code I wrote can be found in the accelerated_rpi folder of this Github repo. You can look at the commit history to see the different iterations of code I tried. The final version of the code is on the jessie_branch (I forgot to branch my code earlier). Shaye informed me that this is a passive buzzer, so it takes in a square wave and buzzes at the frequency of the square wave. I tried to use different libraries with the GPIO pins and struggled to get the buzzer to buzz at a loud volume (you can see my struggles in the multiple iterations of code). However, with the help of Shaye, we were able to max out the volume of the passive buzzer by tinkering with the frequency. The max volume of the passive buzzer is still somewhat quiet and we’re not sure if the user will be able to hear it well over piano playing, so Shaye plans to acquire an active buzzer. I will have to write different code to interface with this active buzzer in the coming weeks. 
  • I attempted to interface UART between the 2 RPis. You can find the sample code on jessie_branch in the same Github repo. The sender code is in the accelerated_rpi directory and the receiver code is in the host_rpi directory. I was unable to get this sample UART code to work– the code doesn’t print anything so the receiver isn’t receiving anything.  I suspect this is because the host_rpi is running on Linux OS (for Danny’s web app needs), so the UART setup is a little different. I’m not sure if I set up UART correctly on the receiver RPi because when I look for serial ports, none of the common ones show up; therefore I don’t think I’m using the right port in the receiver code. Next week I plan to look into other ways to do UART. 
    • Currently, I’m using the tx and rx pins, but Shaye has suggested I also try using the dedicated UART JST pins. For these pins, I won’t be able to use jumper cables, so I’ll need to acquire JST pins. 
    • Another possible option we can explore is using the USB port instead. I’ll need to acquire a USB-to-USB cable for this approach. 

Schedule:

I am still roughly on schedule as though I haven’t finished the accelerated MediaPipe on RPi tutorial (waiting to receive the accelerator), I did get the model on the RPi and I have made progress with interfacing I/O on the RPi (UART, buzzer, display). 

Next week’s deliverables:

  • Get the RPi working on the school wifi. 
  • Finish the tutorial and accelerate the model on the RPi. 
  • Write new code for the active buzzer. 
  • Get UART working between the 2 RPis.

Some future tasks that are less time-sensitive:

  • Look into adding code to the boot so we don’t have to connect to wifi
  • Connect fans to RPi
  • Connect the display to RPi

Jessie’s Status Report for 10/26

This week’s tasks:

  • I started the week with the intention of putting the model onto the KV260. I downloaded the model and dataset (for the quantization step) suggested by Shaye. I parsed through the dataset and selected a subset that I thought would be best for the quantization step. Note that the model we chose is not same the MediaPipe model Shaye has been using. This is because the Vitis AI workflow is only compatible with Pytorch and TensorFlow files while the MediaPipe model is a TFLite file. For now, we opted to use the Blaze model instead which is in the form of a PyTorch file, but planned to look into conversion scripts in the future if the accuracy of the Blaze model was too low. 
  • I met with Varun to discuss our concerns and difficulties while using the KV260. We learned that using the KV260 is unfavorable to the accelerated Raspberry Pi for our specific application.
    • The Raspberry Pi has a more powerful accelerator and processor. The  RPi can do 13 tera-operations per second (TOPS) while the FPGA can do around 1 TOP. 
    • The Raspberry Pi is easier to work with because there are more resources online. We found someone using the RPi with our exact model application who achieved a frame rate of 22-25 fps. The KV260 would take a lot of effort to reach our target frame rate (if it’s even possible). Varun said that the frame rate of processing the Restnet 18 model (from the quickstart tutorial), which I found to be 15-24 FPS from doing the tutorial a previous week, is likely the maximum capability of the KV260. 
    • Varun mentioned the following benefits of using the KV260; however, none of them apply to our project
      • The KV260 is more power efficient than the RPi. We plan to have users plug the device into wall power (no battery necessary), so this is not a concern for us. 
      • The KV260 has more I/O. It has more pins that can be used for anything while the RPi just has a small amount of GPIO pins and some USB ports. However our application has a limited number of I/O (display, buzzer, webcam, web app hosting RPi), so the additional I/O pins that the KV260 provides are not necessary for us. 
      • The KV260 can be useful if there are multiple things that need to be accelerated. However, our application only requires the model to be accelerated. Varun believes that software should be fast enough to run the tension detection algorithm. 
  • I read through the documented RPi workflow for putting MediaPipe’s hand landmark model onto the accelerated RPi to prepare to do it myself next week. 
  • I also worked on the ethics assignment that was due this week. 

Schedule:

I failed to complete last week’s assigned deliverable because we decided to shift from putting the model onto the KV260 to putting the model on an accelerated RPi. I’m currently behind schedule as Shaye and I originally planned to finish the FPGA/CV integration by the coming Wednesday; however, due to the pivot from KV260 to Raspberry Pi, our schedule has changed as noted in the team status report. 

Next week’s deliverables:

Next week I plan to integrate the MediaPipe model onto the RPi. I should also have a rough idea of how to implement the buzzer and display feature. I will also look into how to set up UART to communicate with the web app hosting RPi. 

Jessie’s Status Report for 10/20

This week’s tasks:

  • Worked on the design report, largely focusing on the FPGA-related and testing sections; however, writing and editing were collaborative and done synchronously.
  • Sent an email to AMD’s Andrew Schmidt as a follow-up to our meeting last Wednesday. I explained the main ideas of our project as they relate to what we plan to do on the KV260 and listed our concerns, some of which include whether meeting our target frame rate is feasible, fitting the model onto the FPGA, and advice on how to implement the kinematics portion on the FPGA.

Schedule:

I’m still on schedule, though next week I will have to make a lot of progress towards the CV and FPGA integration. I was unable to write a rough draft version of the Python kinematics code using the Vitis AI API as I planned last week as the design report took up the 12 hours I allotted towards capstone. 

Next week’s deliverables:

In order to stay on schedule, though ambitious, I plan to work closely with Shaye to finish putting the MediaPipe pose detection model onto the FPGA and write a rough draft of the kinematics code. These plans might change depending on the advice we receive from Andrew.


Jessie’s Status Report for 10/05

This week’s tasks:

  1. I finalized shopping for parts for the camera stand given we now had a better idea of the measurements. These parts arrived and they seem to meet our requirements. We just need to find a way to connect the gooseneck and the tripod before our meeting with Prof Dueck’s students on 10/9.
  2. I looked into how to run the kinematic calculations on the FPGA. I again referenced Peter Quinn’s code: https://github.com/PeterQuinn396/KV260-Pose-Commands/blob/main/app_kv260.py and saw that he simply used python. I looked into some other options and saw that the easiest way would be to use the python Vitis AI API, but there also exists a C++ API that may allow us to have higher performance and the hardest option would be to work directly with the FPGA’s output bitstream. For now, we can plan to use python and later change to C++ if we are facing performance issues. A stretch goal could be to work directly with the bit stream. 
    1. A concern that came up while I was looking into these options is the rate that the FPGA would be able to run the pose detection model. Peter Quinn was able to achieve 3 FPS, I’m not sure how much better we can do and what is the requirement to fit out needs. We can investigate this at a later time and if it becomes an issue here are some ideas to try and improve performance: attempt to simplify the model (lower resolution, less landmarks, smaller image samples, etc.), go down the stack for the kinematic implementation (python to C++ and then to working with the bit stream). 
  3. We received the power supply and were able to finish the Zynq UltraScale+ tutorial: https://xilinx.github.io/Vitis-AI/3.0/html/docs/quickstart/mpsoc.html
    1. Danny did the first half of the tutorial (set up the target and download the necessary software) and I did the second part of the tutorial (PyTorch Tutorial). I followed their walkthrough of the Vitis AI workflow with the example models and have a general idea what what configuration and scripts we need to write/modify from their examples. I was able to successfully follow the tutorial and compile a classification model on the FPGA. It was able to classify input from our webcam. 
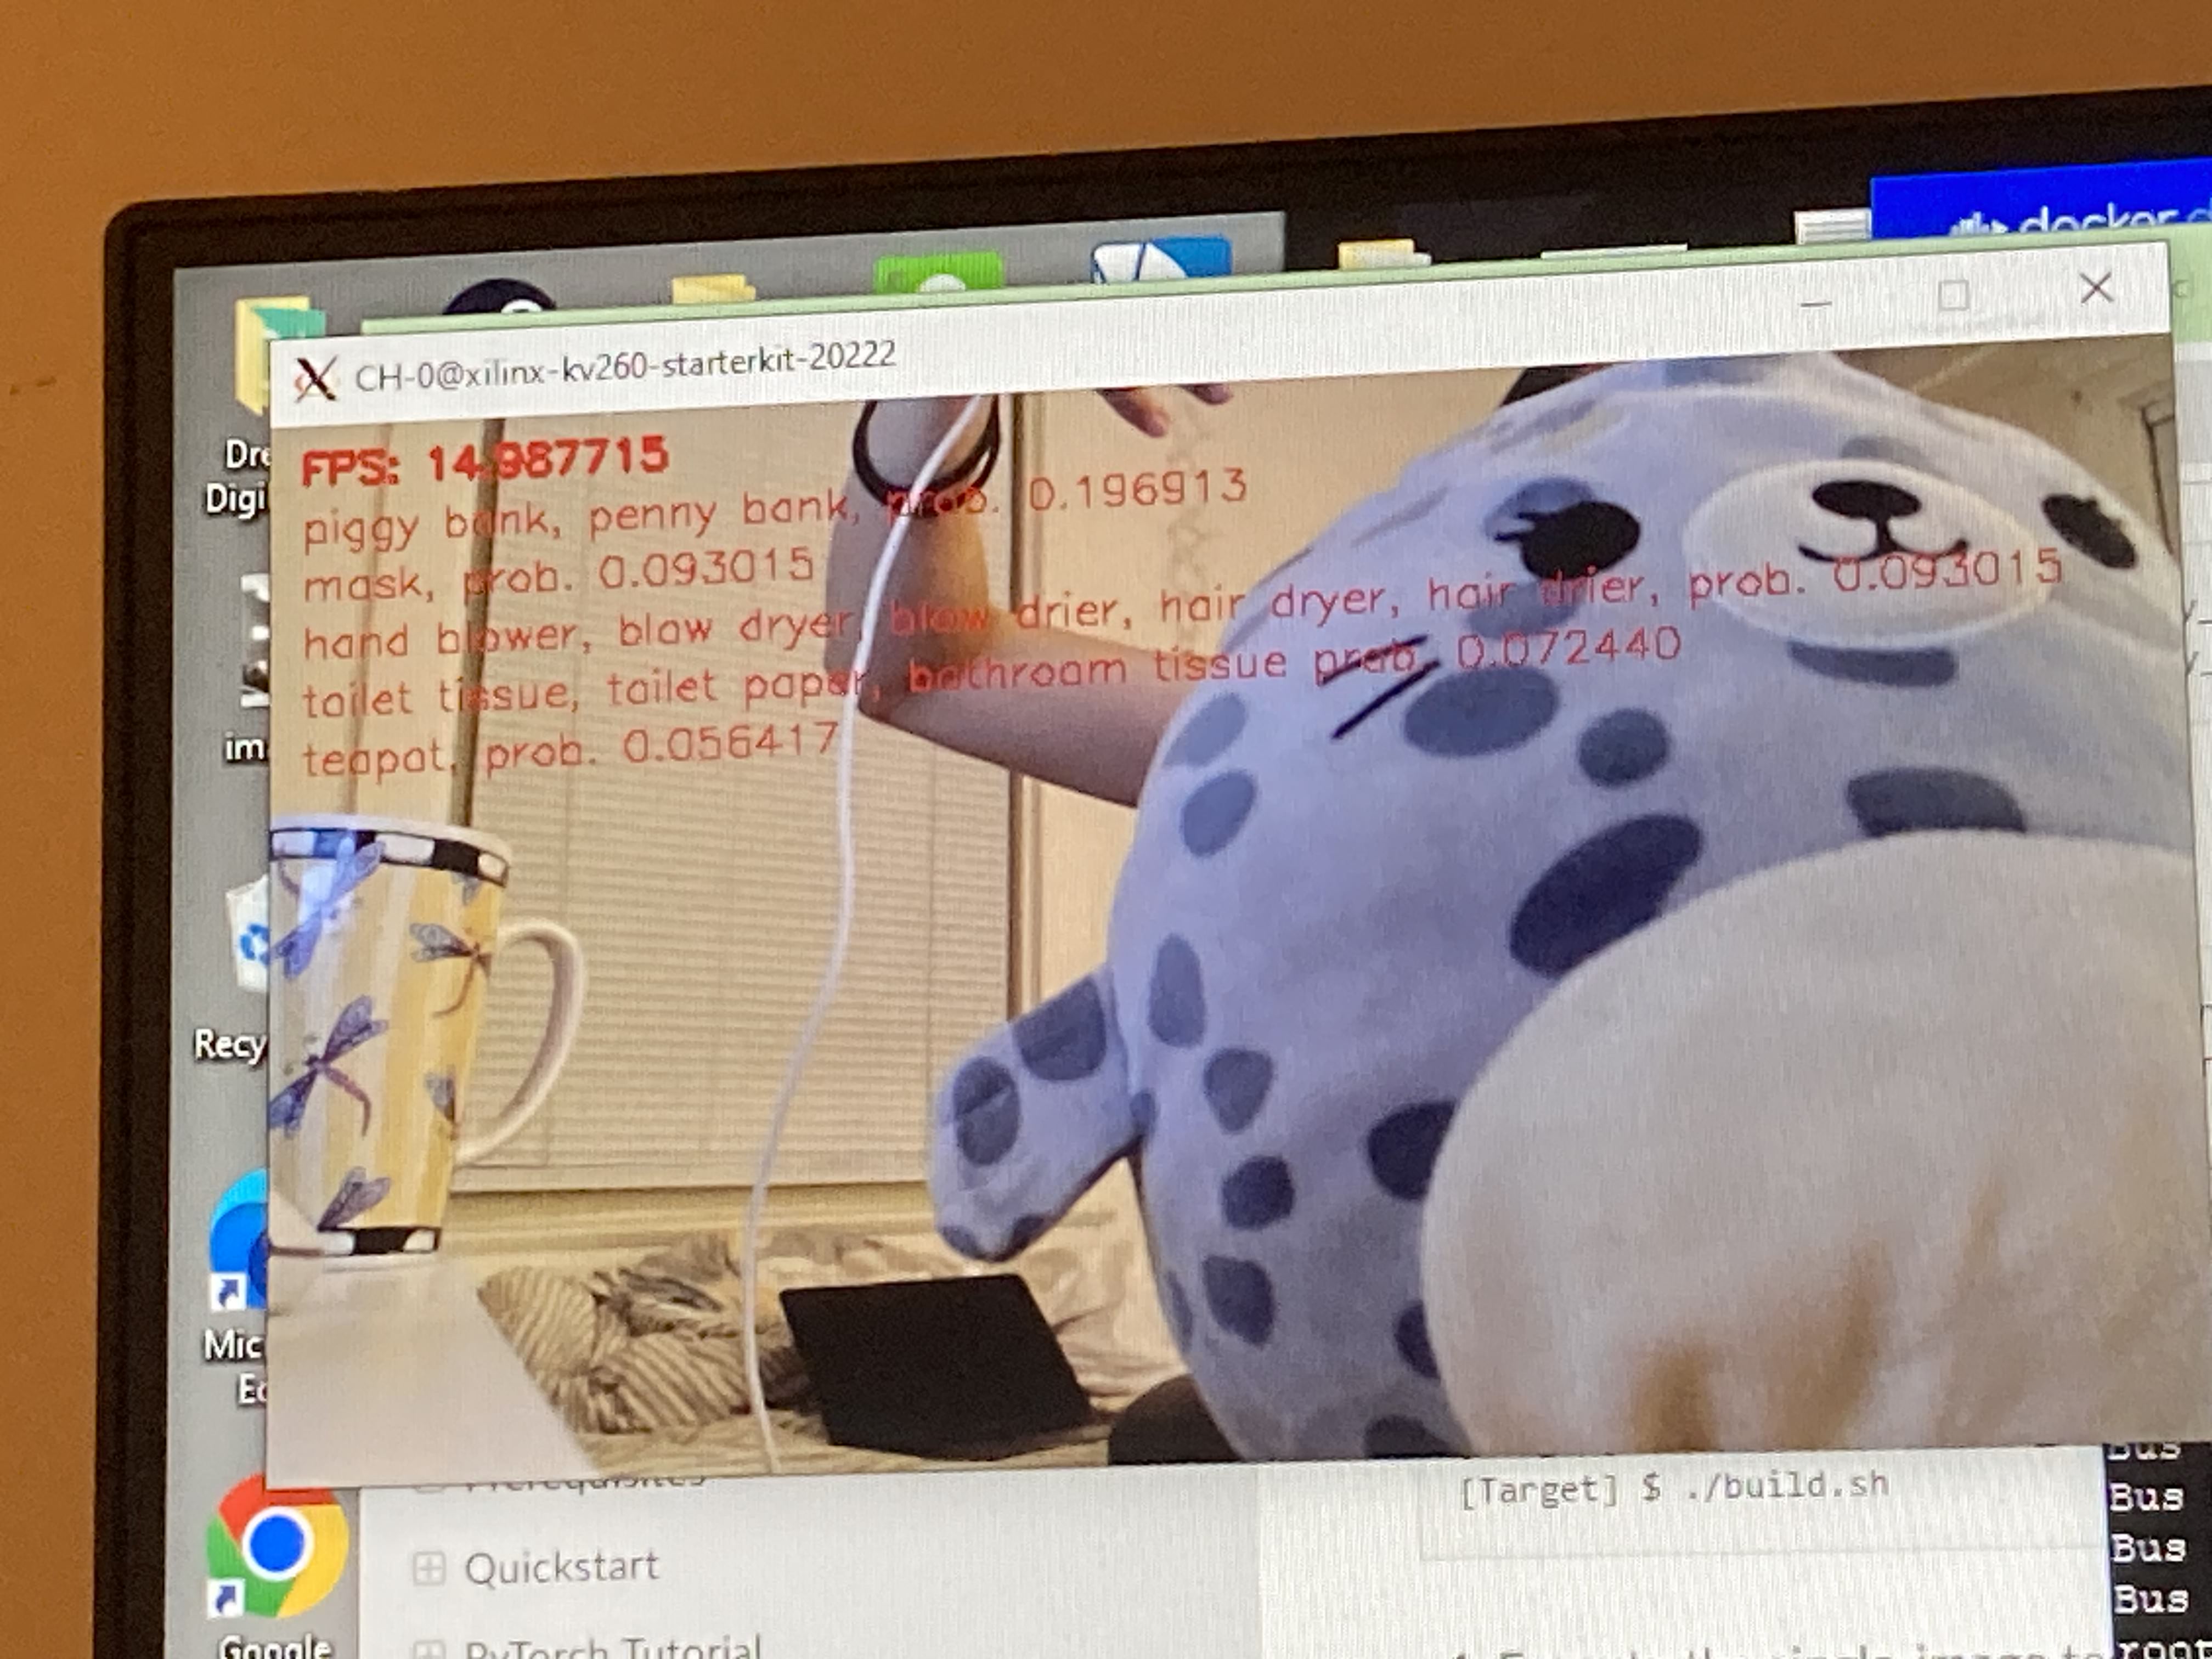
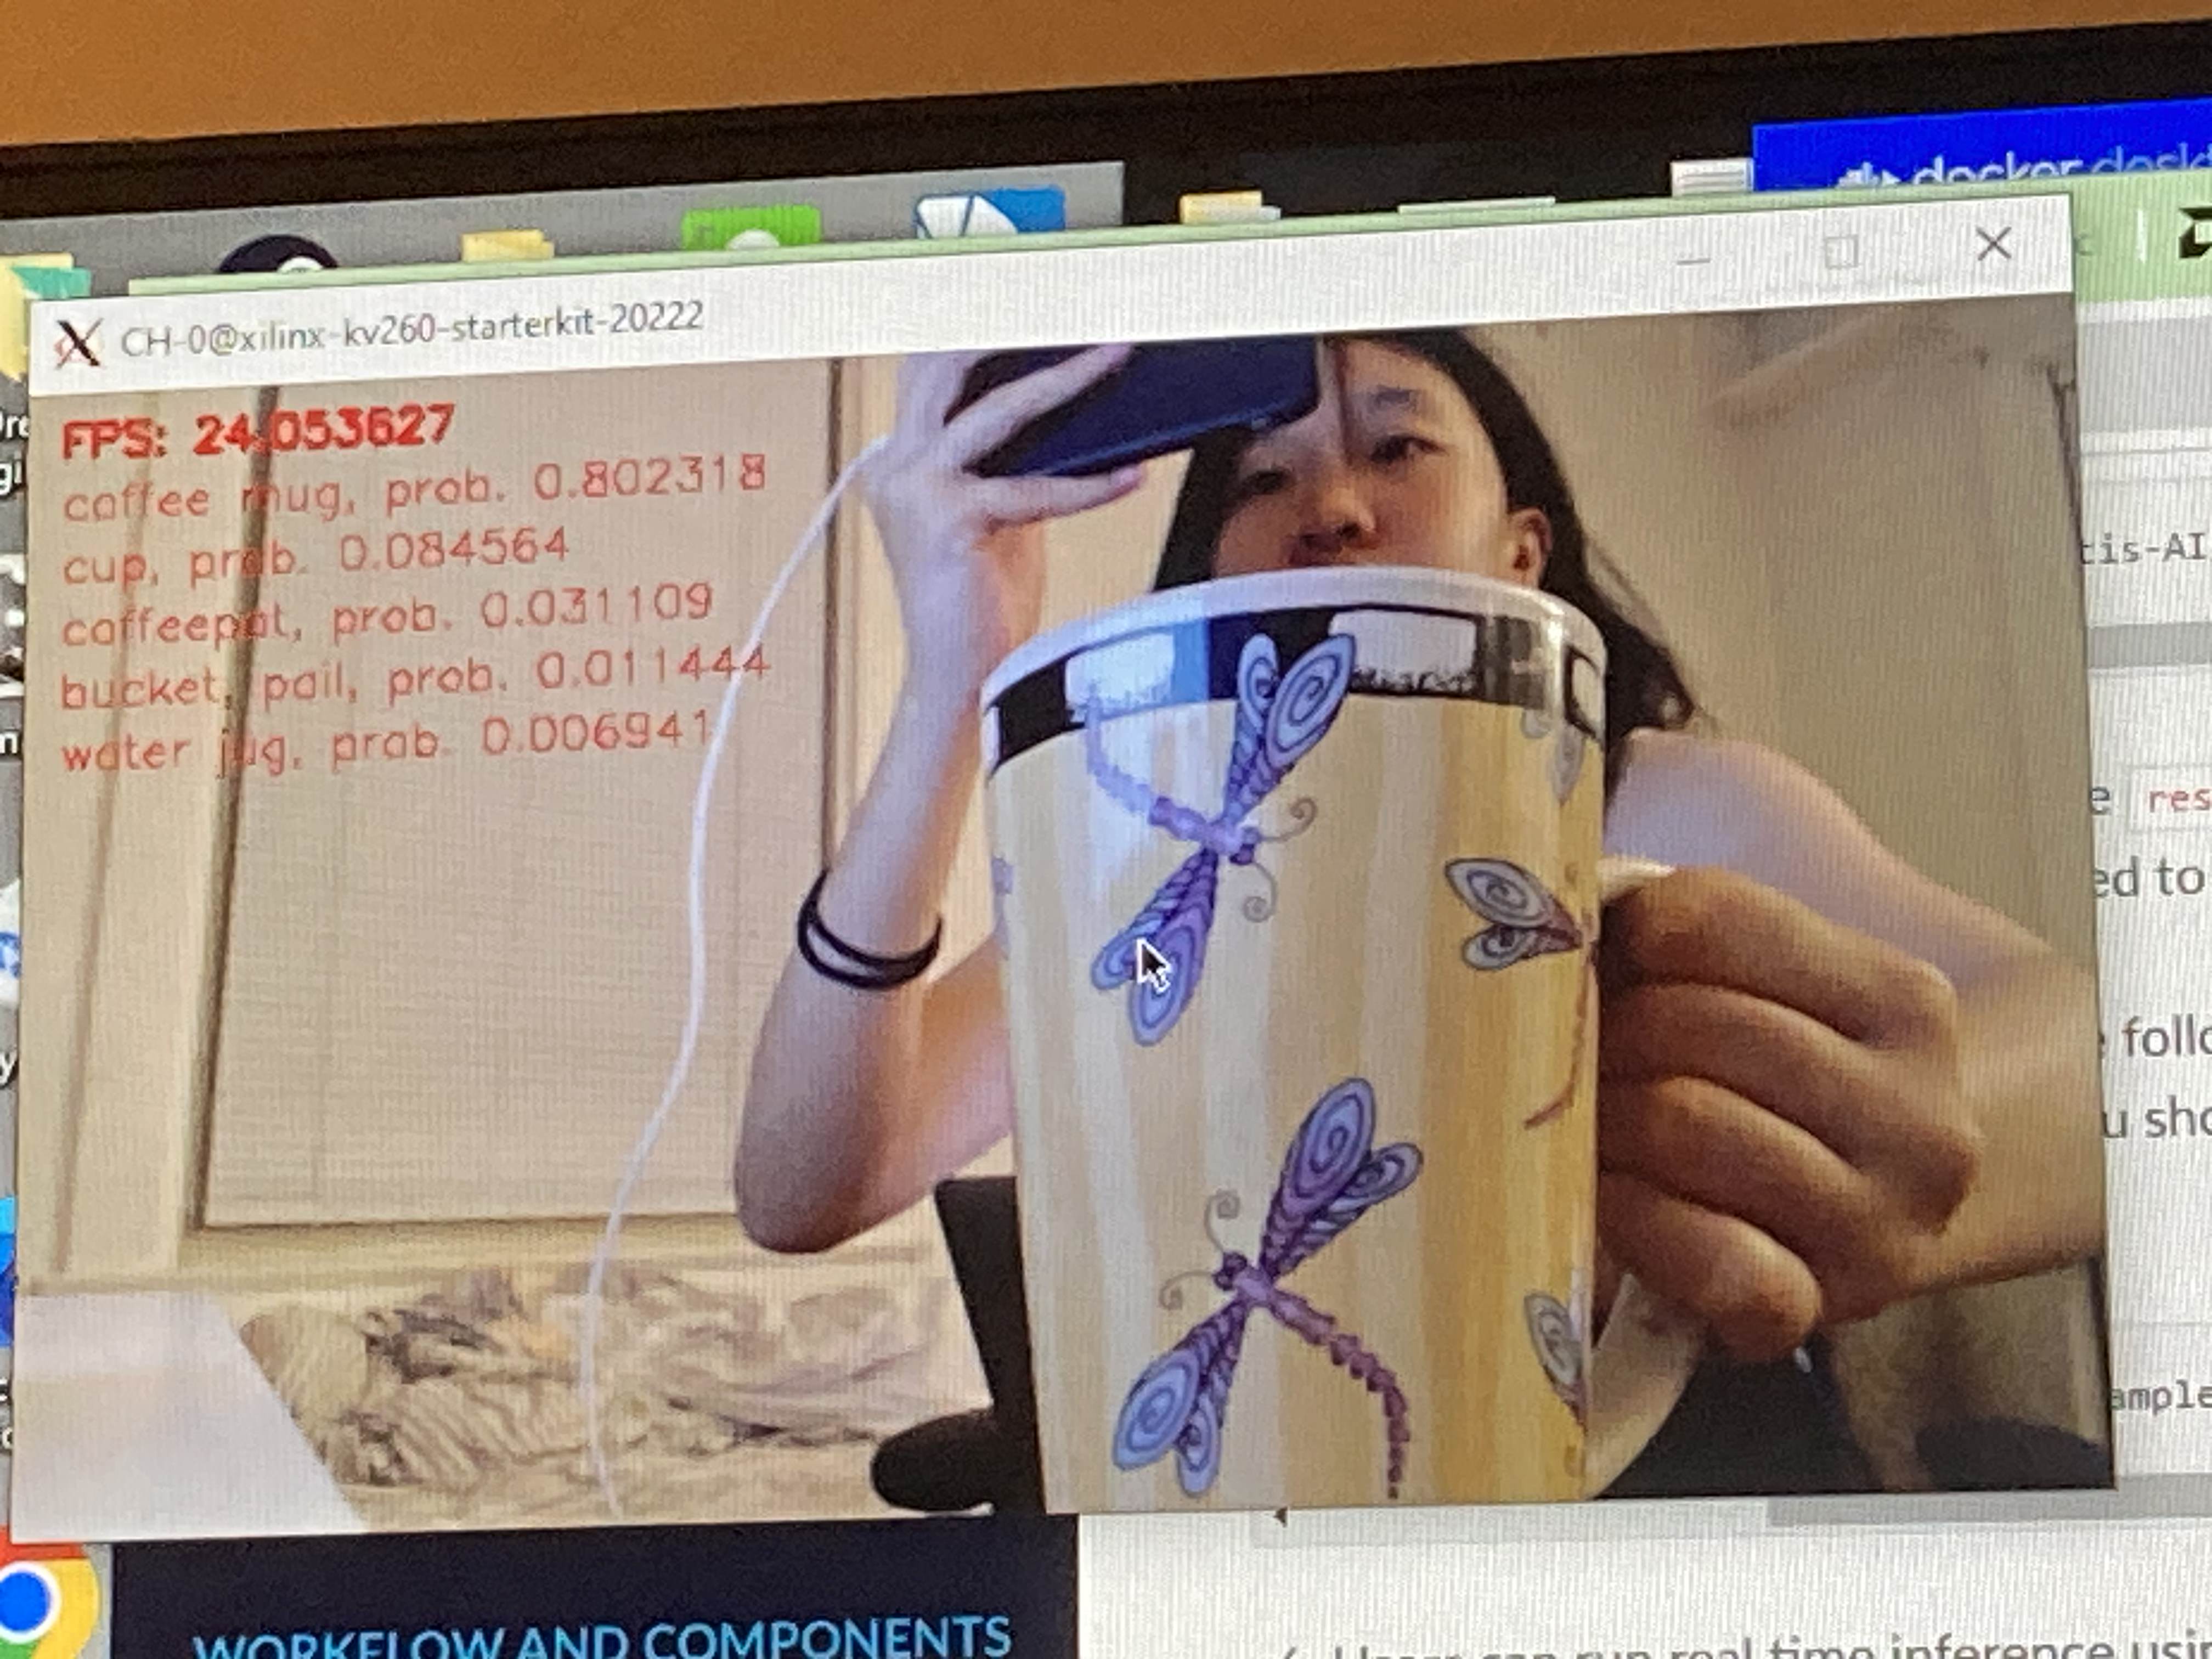
    2. In reference to my previously mentioned concern regarding framerate, the example model is able to achieve a frame rate of around 14 or 15 fps when there is some movement in the video and around 24 or 25 fps when the video is still. I think the pose detection model will be more complex and be slower than this example model.
example model on FPGA categorizes my seal plushie as a piggy bank with low confidence at ~15fps
example model on FPGA categorizes my mug correctly with high confidence at 24fps

Schedule:

I’m still on schedule. Next week I plan to work with Shaye to start the early steps of the CV and FPGA integration. 

Next week’s deliverables:

  1. A rough draft version of the Python kinematics code using the Vitis AI API. 
  2. Work with Shaye to decide how we will obtain samples for the quantization step of the Vitis AI workflow. 


Jessie’s Status Report for 09/28

This week’s tasks:

  1. After finding a webcam that we plan to use and talking to Jim Bain and Joshna more about the camera stand design, I finalized the necessary measurements. Since we have chosen a webcam, I used that webcam’s FOV to calculate the distance between the camera and the keyboard. Additionally, I worked with the group to measure the distance between the camera and the base of the stand (how much does the stand have to bend over the player). The measurements and calculations can be found in the team status report. From these calculations, the stand will have to be very long (about 7.5’ or 8’ if we want some wiggle room). I’m starting to look into attaching a gooseneck (various flexible plumbing materials) to a mic stand or tripod. 
  2. We were able to acquire the KV260, so I stopped working on Varun’s Vivado tutorial since I’m not sure if it’s still applicable. Instead, I started looking into Vitis AI. 
    1. The KV260 came without any accessories, so we had to scavenge to find them. We were able to find all the necessary components but discovered the 
  3. I learned more about the flow of Vitis AI and what would be required from us. My findings are largely based on the Xilinx documentation/tutorials but also from https://github.com/PeterQuinn396/KV260-Pose-Commands/tree/main and https://www.hackster.io/AlbertaBeef/accelerating-the-mediapipe-models-with-vitis-ai-3-5-9a5594#toc-model-inspection-7 who successfully put a MediaPipe model on the KV260.
    1. Vitis AI takes in models in either a TensorFlow or PyTorch format. However MediaPipe is in a TFLite format. The hackster post mentions conversion scripts from other people, but they had little success using these scripts. We might have to write a conversion script or look into finding another model that is in a compatible format.
    2. Vitis AI first takes the model and inspects it. From the hackster post, even if the model doesn’t pass the inspection, the Custom OP flow can be used as a workaround. Then Vitis AI will optimize the model (prune it). Then the model gets quantized. This step requires several 100s to 1000s of samples. 
      1. Since we don’t have access to the data set used to train the MediaPipe model, we will have to find a data set and convert it to samples. Both Peter Quinn and the author of the hackster post write scripts to convert data sets to samples that we can reference. 
      2. A concern I have right now is the quality of the samples and how that might influence the accuracy of the model. The author of the hackster post experienced degraded model accuracy as a result of using bad samples. We will likely have to experiment with different data sets or sample generation scripts to maintain a high model accuracy.
    3. Vitis AI then compiles the mode. I realized I’m not sure how to interact with the output of the model on the FPGA, so I will have to look into that in order to successfully calculate the kinematics on the FPGA.
  4. I worked with Danny to follow this quick guide from xilinx https://xilinx.github.io/Vitis-AI/3.0/html/docs/quickstart/mpsoc.html. We downloaded Vitis AI and ran the scripts, but had to stop at the setting up the target step since we discovered the power supply we found was not the right size for the board.

Schedule:

I’m still on schedule.

Next week’s deliverables:

  1. Once the power supply comes in, successfully run Vitis AI on the example models provided. 
  2. Either determine it’s not possible/feasible to run kinematic calculations on the FPGA, or have a plan for a way to execute it. 
  3. Finalize plans for a camera stand so that we have a rudimentary stand the next time we meet with Prof Dueck’s students on 10/9.