In the past week our team made significant progress towards completing DrumLite. As was previously the case the one issue we are still encountering, which at this point is the only real threat to the success of our project, is related to laggy performance when using two drumsticks simultaneously. Currently, Elliot has written and flashed new firmware to the ESP32’s which we very much hope to resolve the issue. We plan on testing and adjusting our implementation this weekend in preparation for the TechSpark Engineering Expo on Wednesday. Our progress is on schedule and in the coming days we aim to complete our entre integrated system, construct our poster, and start the demo video as to allow for sufficient time around demo day to prepare and write the final report. Additionally, we will conduct further tests highlighting tradeoffs we made for our system which will be included in our poster and final report.
The unit and system tests we’ve conducted so far are as follows:
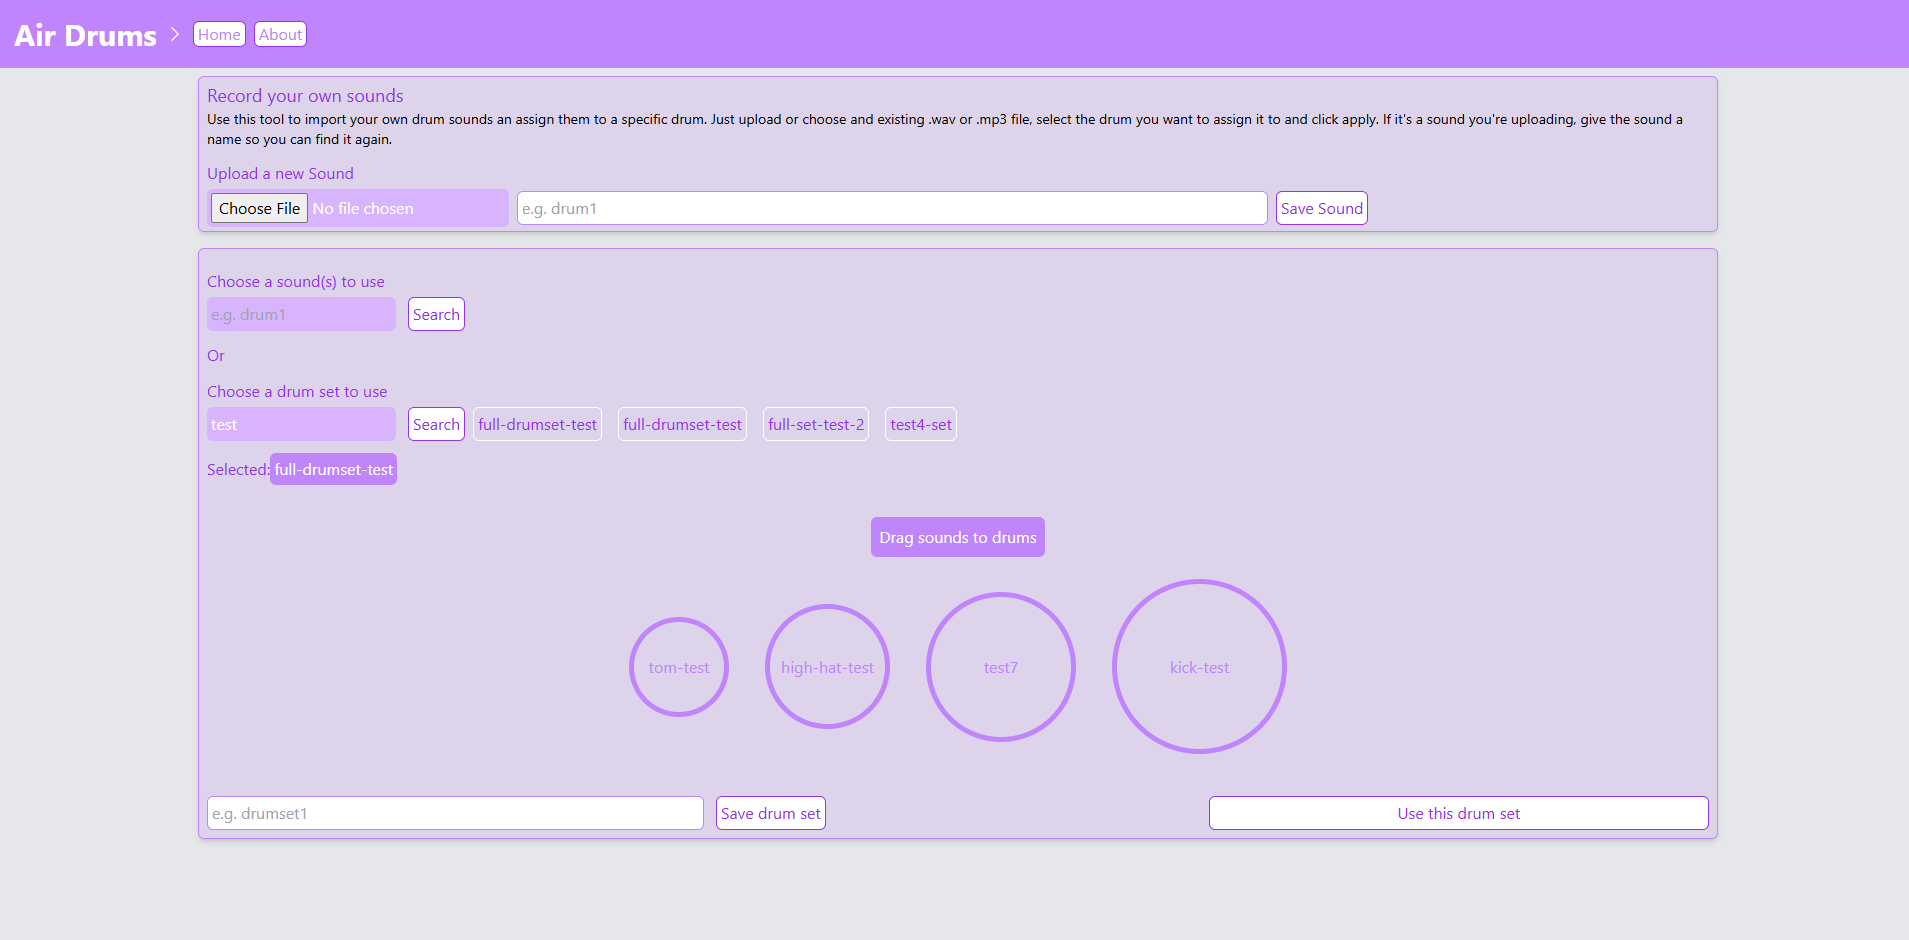
1.) Ensure that the correct sound is triggered 90% of the time. This test was conducted by running our full system (CV, pad location, BLE, and audio playback) and performing hits on the 4 drum pads sequentially in the order 1, 2, 3, 4. For each impact, the expected audio and actual audio was recorded. Of the 100 samples taken, 89 impacts triggered the correct sound. While this is fairly close to the goal 90%, this led us to realize that we needed a tool allowing the user to select a specific HSV color range to accommodate for varying ambient lighting. Our new design prompts the user to tune the HSV range using HSV sliders and a live video feed of the color mask being applied at the start of each session.
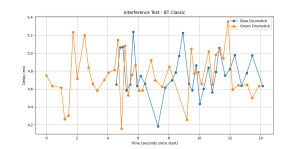
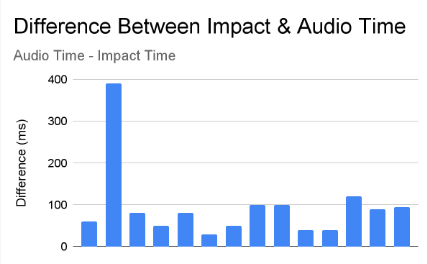
2.) Verify that the overall system latency is below 100ms. This test was conducted by recording a video of performing a series of hits, then analyzing the video and audio recordings to determine when an impact occurred and when the sound was played. The difference between these two time stamps was recorded for each impact and the average was found to be 94ms. This average is however high due to one outlier in the data which had a latency of 360ms. Through further testing we realized that this was a result of our BLE module queueing data when the system was overloaded, and thus triggering an audio event whenever the impact was read from the queue. Elliot thus began implementing new firmware for the microcontrollers that reduces the connection interval and prevents the queuing of events in most cases.
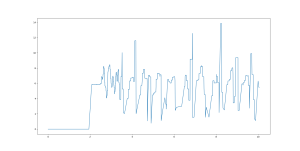
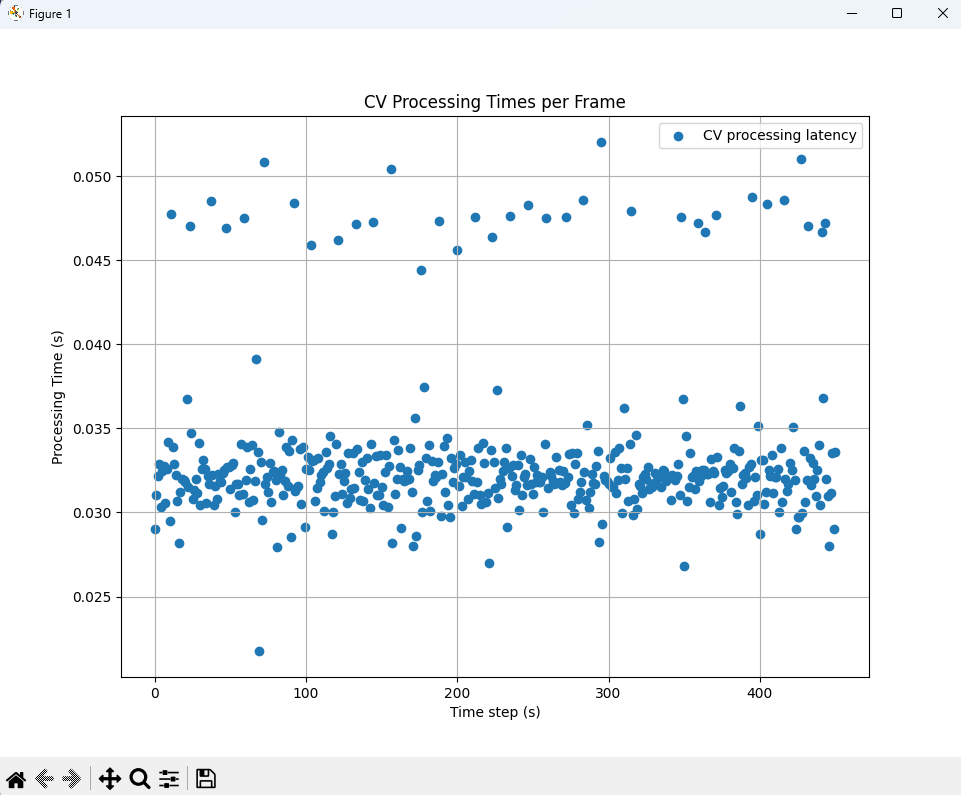
3.) Verify that the latency of the CV module is less than 60ms per frame. This test was conducted by timing each iteration of our CV loop, each of which processes a single input frame. The data plots were plotted and the values average, resulting in a mean latency of 33.2ms per frame.
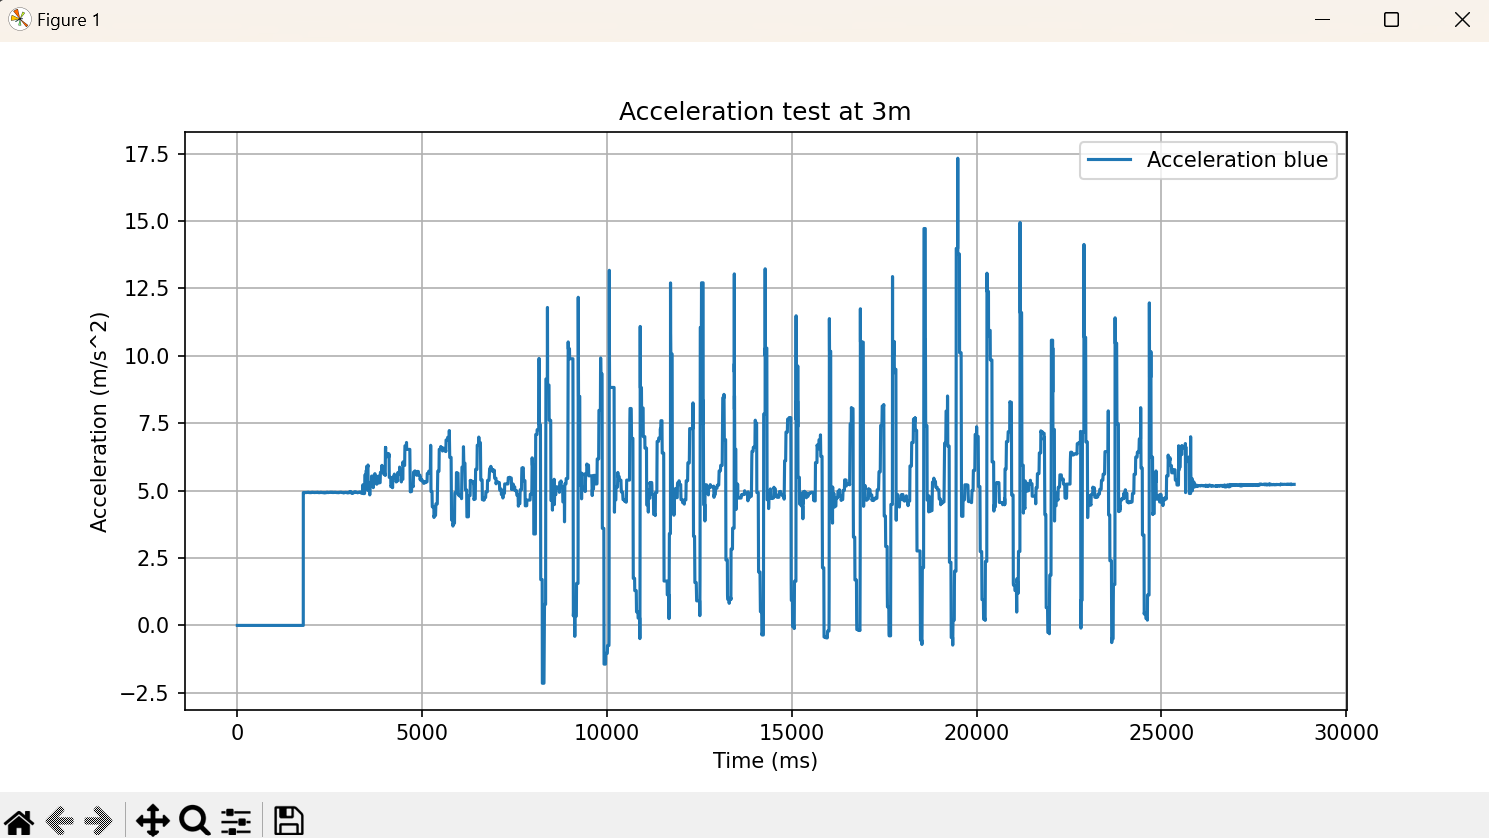
4.) verify BLE reliability within a 3m range of the user’s laptop. This test was conducted by recording accelerometer data for 20 impacts per drumstick at a distance of 3m from the laptop. By visually inspecting the graph of the accelerometer data, we were able to see that each of the 2o impacts was clearly identifiable and no data was lost.
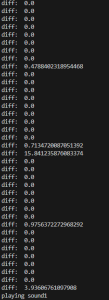
5.) Verify that accelerometer read + data processing delay is sub 5ms. To conduct this test, we placed two timers in our code. One was placed just before the accelerometer data was read, and the other just before an audio event was triggered. About 100 readings were recorded, plotted, and average, resulting in an average delay of 5ms per impact

6.) Ensure less than 2% BLE packet loss. This test was conducted by creating counters which track packets sent ad packets received for each of the two drumsticks. By verifying that after execution, both counters match (or are within 2% of each other), we were able to ascertain a packet loss rate of ~2%.
7.) Verify BLE round trip latency below 30ms. TO conduct this test we started a timer on the host laptop, sent a notification to the ESP32’s, and measured the time at which the response was received at the host laptop. By averaging these recordings, we determined an average RTT of 17.4ms, meaning the one way latency is about 8.7ms.
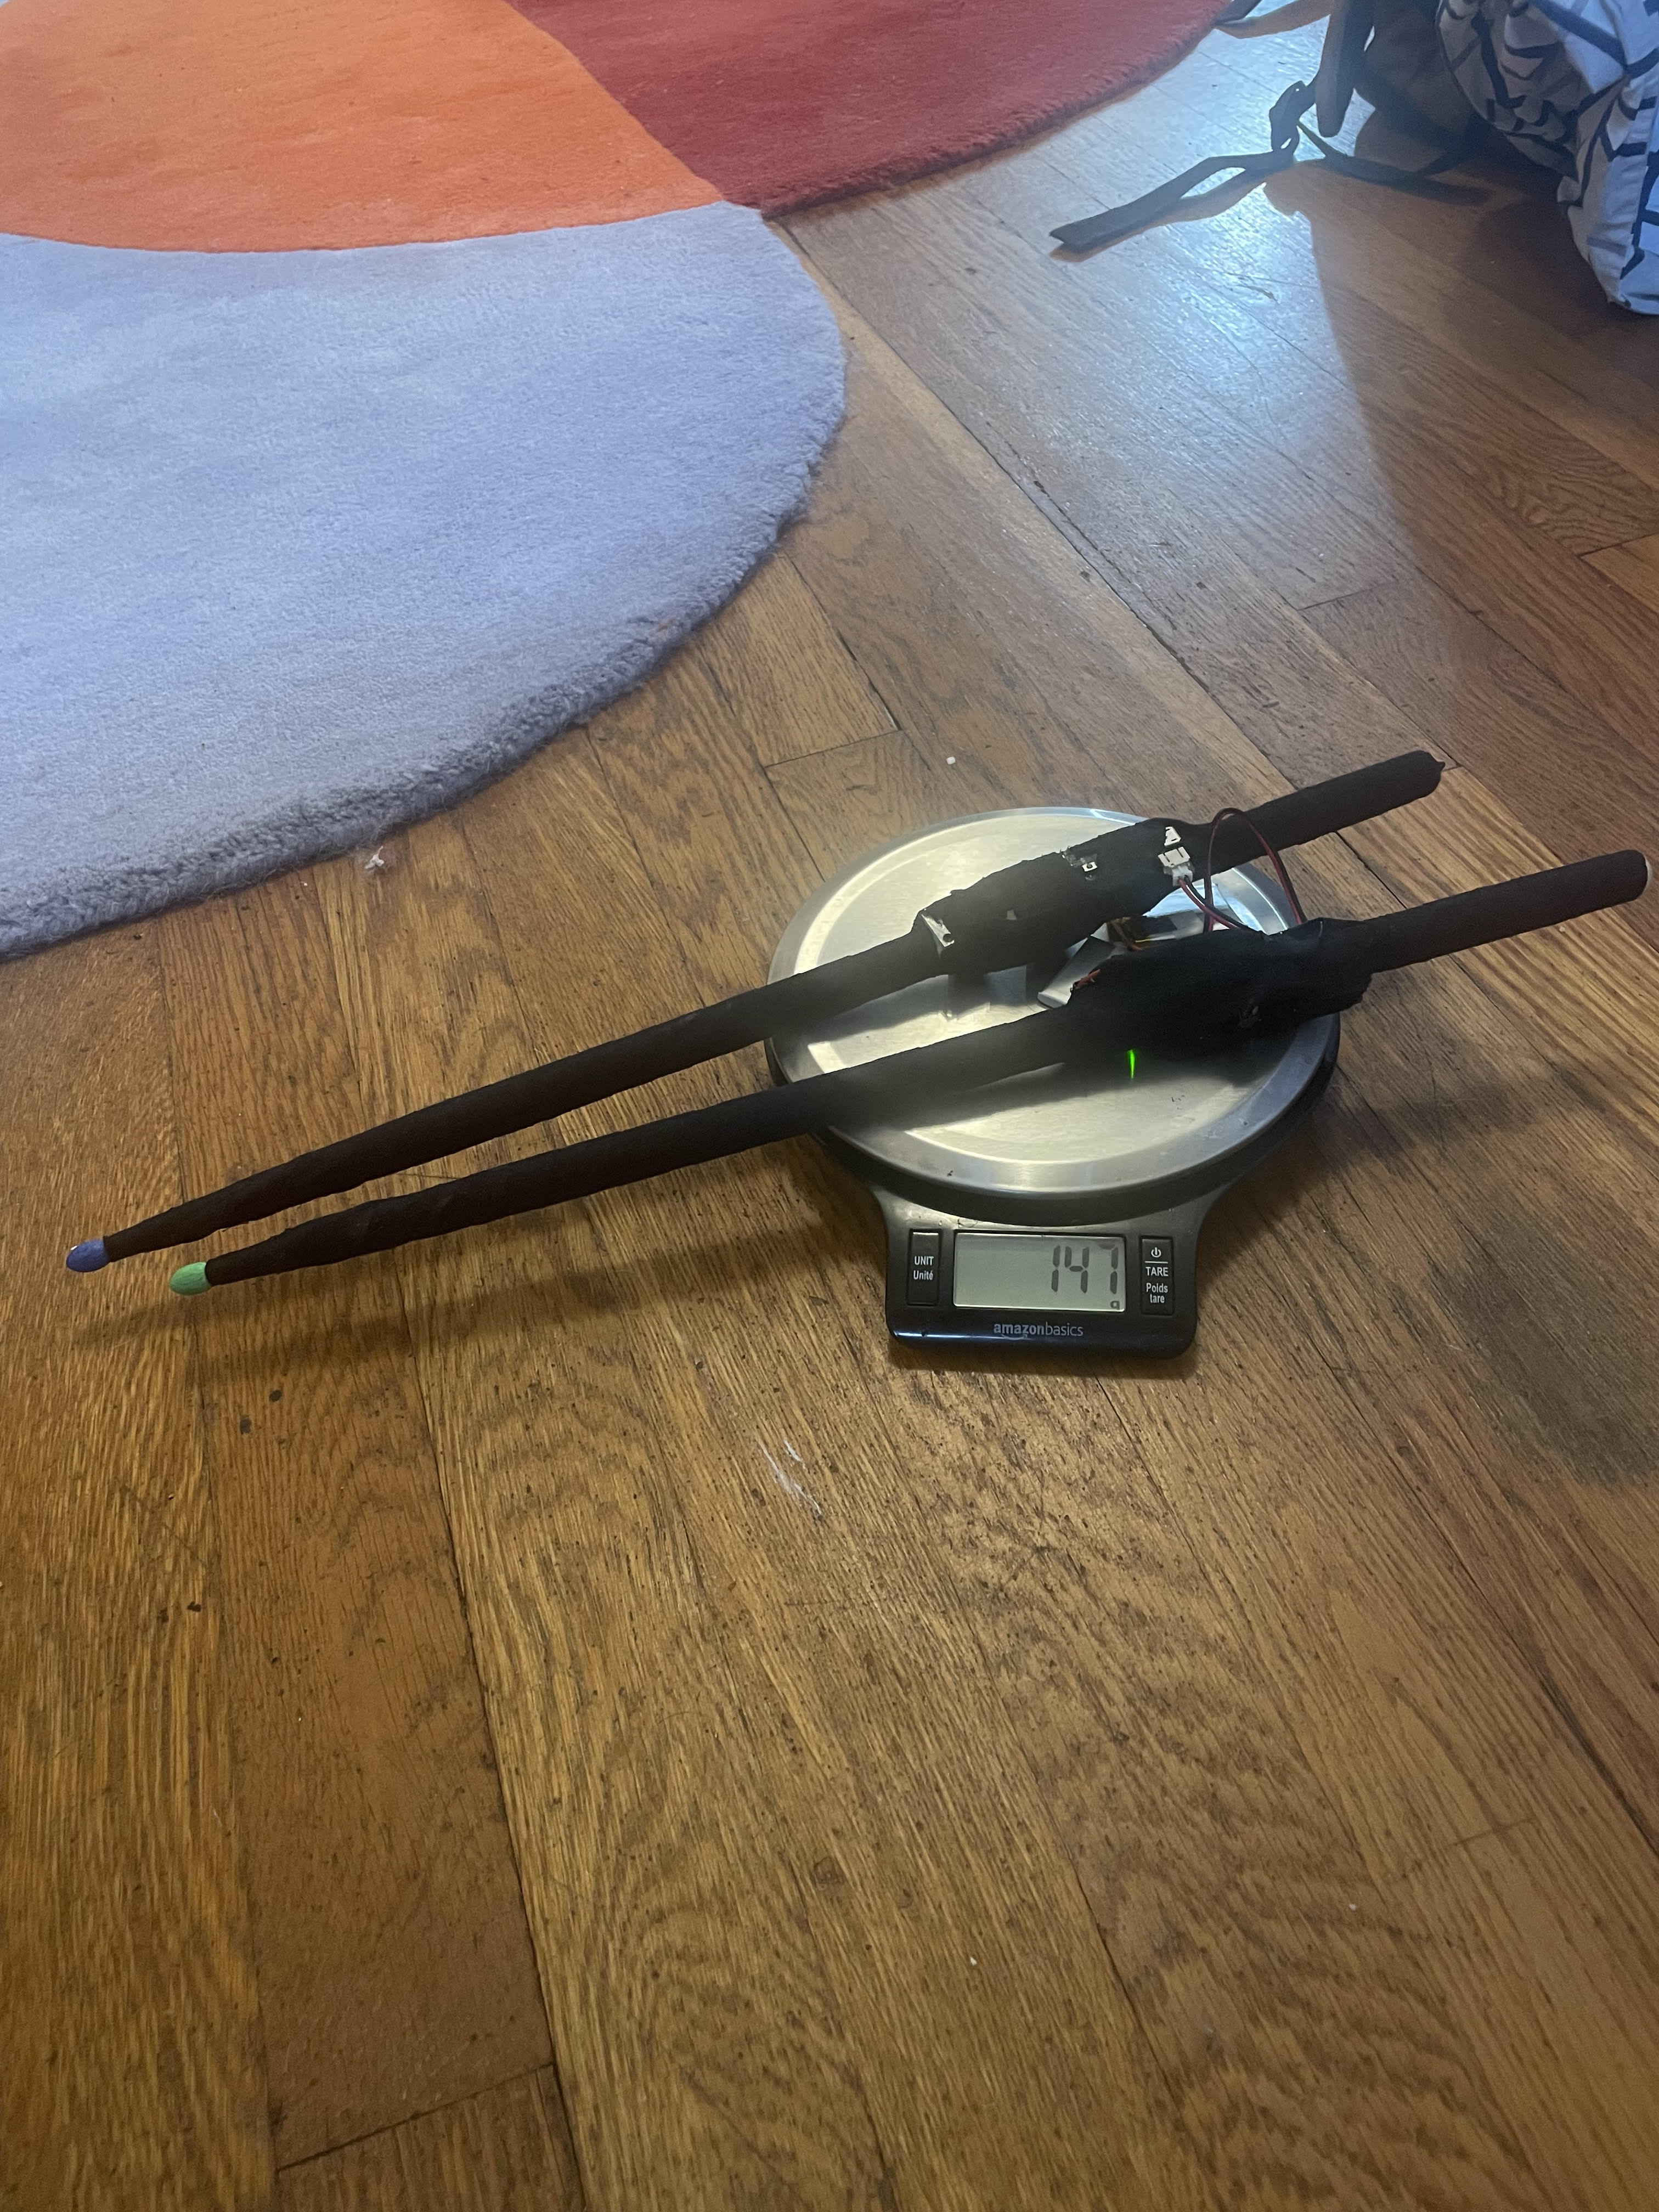
8.) Weight requirements (drumsticks combined less than 190.4g and connective components below 14.45g). To verify these requirements we simply weighed the connective components (i.e. wires and athletic tape) as well as the entire drumsticks. The two drumsticks weighed a collective 147g and the connective components weighed 5.1g, both well below our requirements.
9.) Size requirements (minimum achievable layout area of 1644cm^2). To verify this, we configured the 4 drum pads in their minimum layout (all tangent to one another) and measured the height and width in their maximum dimensions. As expected, the layout measured 1644cm^2
Overall we are making good progress, are on schedule, and hope to complete our project this weekend so we can take our time in preparation for the Expo on Wednesday and get a head start on some of the final project submissions in the coming week.