Author: rkrzywda

Riley’s Status Report for 12/7

What did you personally accomplish this week on the project? Give files or photos that demonstrate your progress. Prove to the reader that you put sufficient effort into the project over the course of the week (12+ hours).

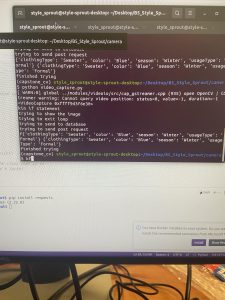
This week I assisted Allie in debugging the color model when running tflite. I wrote a script that classified 80 subsequent images and easily collated the results to view to quickly determine if any improvements were made with one model over the other. Unfortunately, we have not yet found a color model that functions properly on the Jetson, but the script was invaluable for testing and provided much of the timing testing data seen in the group status report. Additionally, I attempted testing with saved models and keras models, but the machine ran out of memory or simply crashed when that was attempted. 


As an alternative, I attempted to write a color detection algorithm based off the dominant objects, and I managed to detect the outlines of the clothing, but the module I used didn’t consistently grab the whole piece of clothing, but often only grabbed parts of it and parts of the background, making the average inaccurate. I was unable to find time to properly debug this this week with the chaos of the final week of classes, but we are confident that there is an alternative method available for us if the model remains stubborn in its unwillingness to function with the Jetson’s version of tensorflow. 


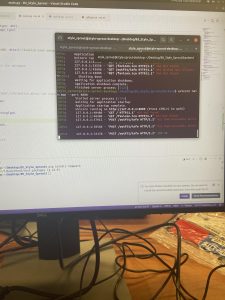
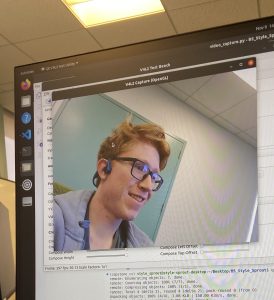
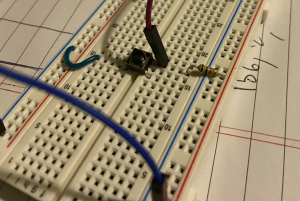
I also implemented a pushbutton and learnt about GPIO for the Jetson using their in-built Python GPIO API Jetson.GPIO. This took longer than expected since I had to learn that the Jetson only accepts 3.3V input for its pins and does not consistently detect a rising/falling edge if from above that value. I also had to determine that since internal pull up resistors are not supported by our edge device, I would have to implement one and add it to the small circuit. Once I made those adjustments, Falling edges were detected consistently and I was able to integrate it to be the trigger for a picture. 

Is your progress on schedule or behind? If you are behind, what actions will be taken to catch up to the proiect schedule?

My progress is on schedule.

What deliverables do you hope to complete in the next week?

I hope to help implement the color detection algorithm/test models to check for improvement. 

I also hope to make a stand/holder for the camera to allow for more intuitive use of the camera. 

Along with those items, I intend to make the pushbutton circuit smaller, explore options to miniaturize the circuit, and complete our final week of tasks. 

Team Status Report for 12/7

What are the most significant risks that could jeopardize the success of the project? How are these risks being managed? What contingency plans are ready?

The most significant risks that could jeopardize the success of the project is our color model. The original and quantized color model performs fine on local machines, however the quantized color model performs very poorly on the Jetson. We are still unsure of the specific reason for this since the quantized clothing type and usage models work fine on the Jetson with negligible accuracy losses. We are managing this risk by trying to find the root cause of this issue to make the color model work. If this fails, we will pivot to a new technique which is using the pixel values of the clothing to determine the color. This requires object detection to crop the input photo to just the clothing to prevent extraneous parts of the image affecting the pixel values we evaluate, which has been implemented. The rest of the work just involves predicting a color from the pixel values.

Were any changes made to the existing design of the system (requirements, block diagram, system spec, etc? Why was this change necessary, what costs does the change incur, and how will these costs be mitigated going forward?

No changes were made.

Provide an updated schedule if changes have occurred.

Our schedule has not changed.

This is also the place to put some photos of your progress or to brag about a component you got working.

Photos of our progress are located in our individual status reports. 

List all unit tests and overall system test carried out for experimentation of the system. List any findings and design changes made from your analysis of test results and other data obtained from the experimentation.

Classification Tests

For the classification unit tests, the non-quantized models were evaluated using our validation and sanity check datasets. This was done with 3 different trained models for each classification category(ResNet50, ResNet101, ResNet152) to determine which architecture performed the best. Specific graphs for this are located in Alanis’ individual status report, but the best performing architectures were ResNet50 for all the classification models. The validation datasets are 20% of the total dataset (the other 80% is used for training) and produced a 63% clothing type accuracy, 80% color accuracy, and 84% usage accuracy with the ResNet50. The sanity check dataset, which is made up of 80 images that represent the types of images taken by Style Sprout users(laid/hung/worn on a single color/pattern background, good lighting, centered) produced a 60% clothing type accuracy, 65% color accuracy, and 75% usage accuracy with the ResNet50. 


We also ran some other tests to determine how lighting and orientation affect the accuracy of the model. This included determining how image brightness, x and y translations, and rotations affect the model accuracies. Graphs and results are located in Alanis’ individual status report. 


The findings from the classification unit tests helped us determine the best model architectures(ResNet50) to use. Additionally, since the accuracies on our sanity check dataset did not meet our use case requirements, we changed our design to include a closet inventory page so users could change any incorrect labels to mitigate the low classification accuracy. 


S3 Upload Time Tests

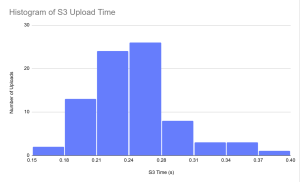
For the S3 upload time tests. We uploaded 80 images to s3 and recorded a timestamp before the upload and took another timestamp after the upload. We took the upload time to be the difference between these two timestamps and the results were overall positive. The upload time was in between 0.15 and 0.40 seconds for the 80 uploads we tested, and the consistency and speed of the upload was welcome news as it allowed us to more reliably ensure our timing requirements for classification. From these test results we determined that no major design changes needed to be made to accommodate S3 image storing.
Database Upload Time Tests

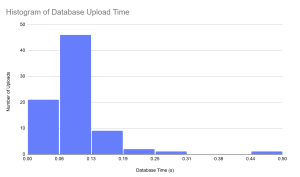
The Database Upload Time was tested much in the same way that the S3 Upload time was tested, by sending 80 images through the protocol and using timestamps to record timings. The results of this test gave an average of 0.09 seconds for database upload, which is well within our use case requirements and doesn’t necessitate a change in our design. There is a slight change between these values and the values I presented. I believe that this is just due to the difference in sending to a server hosted on the same computer and a server hosting on an adjacent computer on the same network. Either way the values fit well within our use case requirements.
Push Button Availability test

Push button availability was tested by pressing the push button 20 times and ensuring that for each of the presses, exactly one image would be taken by the camera. This test passed and we ensured that the pushbutton was successfully integrated into the existing structure. 


Jetson Model Accuracy Test

The accuracy of the models were tested on the Jetson with the same dataset that Alanis used as the “sanity check” dataset. On these 80 images we ran the models on the Jetson and got various accuracies and timings. The results we got we in line with the models run by Alanis on her version on tensorflow with the exception of color. We got a type accuracy of 65%,  and a usage accuracy of 67.5%. However, when testing the color on the Jetson using the “sanity check” dataset we got an accuracy of 16.25%. When I did manual testing I believe that it was biased towards colors that the model classified better but when we used a dataset that included a larger selection and more even distribution of colors it became clear that the accuracy for color was very low. This necessitated many attempted changed to the model, using different resnet models, saved_models and other methods but the accuracy either remained untouched or it was unfit for our use cases. 

Because of this issue, we are looking into a pixel based classification algorithm that would find the average color of a piece of clothing and classify it. We hope that with this method our timing is still acceptable and the accuracy is higher. 

We also obtained data relating to the time that it currently takes to classify each article of clothing. This is only one section of the scanning, as we still need to send to s3 and upload to the database but as we saw with the timings above, even with those timings we are below our use case requirement of 3s (average of 1.69s). (I want to mention that there is a small delay in the process not included in these timings, which is a 1.5s delay that displays the picture that the users took and sent. This is to allow the user to correct any errors that might have occurred for the subsequent pictures).
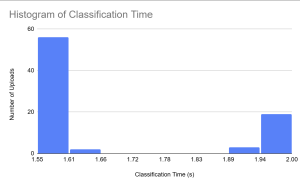
With this timing data, the timing data for s3, and the timing data for uploading it to the database we can get the average time for the total process not including delays for the user to prepare their clothing. And we determined that the average time was 2.03s for the entire process, which is well below our use case requirements of 3s.

Outfit Generation Speed Test (Backend/Frontend integration test)

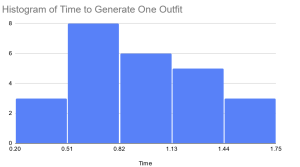
The outfit generation speed test was done by timing how long it took from pressing “Generate Outfit” to the outfit being displayed on the app. We did 25 trials. The longest amount of time it took for generation was 1.7s and the average was 0.904s, both of these are below our use case requirement of 2s.
Frontend/Backend Tests

We tested the functionality and safety of our settings popup page by ensuring that when users update the setting for how many times a piece of clothing can be used before dirty, and their location setting the new values they provide are validated. Validation is done both on the frontend and the backend for the uses before dirty. Validation for location is only done on the backend, and it works by calling the Open Weather Map API to see if the location exists. If either input is flagged as invalid in the backend, we send an exception to the frontend, which then displays an error message to the user to alert them that their inputs were invalid.  Both inputted fields must be valid for the update to go through.


We tested the functionality of our generate outfit page by ensuring that all outfits are generated “correctly”, clicking the generate outfit button causes new outfits to appear, clicking the dislike button updates the disliked outfit table in the database and causes a new outfit to appear, and clicking the select outfit button updates the number of uses for all items in the outfit, updates the user preferences table in the database, and brings the user back to the home page. If an outfit is generated, but there is not enough clothing available to generate one then a message will be displayed to the user that they need to scan in more clothing or do laundry to generate an outfit for this request.


A correctly generated outfit is defined below:

  • Cold Locations: Includes 1 jacket (if the user has an available jacket). May include a sweater, cardigan, etc (if the user has them available, with some chance). Always has a top/bottom outfit OR one-piece outfit (no shorts or tanks).
  • Neutral Locations: Excludes jackets but may include sweaters, cardigans, etc (if the user has them, with some chance). A top/bottom outfit OR one-piece outfit is also always returned.
  • Hot Locations: A top/bottom outfit OR one-piece outfit is always returned. No sweaters, jackets, hoodies, etc are ever returned.
  • All clothing items generated in outfits must match usage type (casual/formal) and be clean.


We tested the functionality of the privacy notice feature by ensuring that users who have not accepted the notice will have it on their page and can only use the app’s features after accepting it. We tested that accepting the notice is saved for the user. We also tested to ensure that an error message pops up to alert the user if they try to bypass the notice without accepting it. 


We tested the functionality of the laundry feature by ensuring that selecting the “do laundry” button causes all items to be marked as clean on the database. We also tested that when an outfit is generated and selected, that all items in the outfit have their number of uses increased in the database. If this number is higher than the user set value for “number of uses until dirty” this should update the item to be dirty. We also validated that dirty items are not part of generated outfits.


We tested the functionality of our closet inventory page by ensuring that no matter the number of clothing items in the database, at most 6 will appear on each page. We also tested that each clothing item in the database will appear on exactly one of the closet pages. This was done with a 0, 3, 6, 18, and 20 images/entries in the database. We also tested the scrolling functionality by ensuring that users could not scroll before the first page and could not scroll to the next inventory page if there were no more clothes to show. We also tested the popup to change labels by ensuring that if the GET request to get the current labels for an image failed, we would display a relevant error message if we were unable to connect to the backend or if there was an HTTP error in the response form the backend. We did this by making sure that the server was not running so that the frontend could not connect to it and by sending various HTTP error codes instead of the requested labels from the backend to the frontend. We also checked that when the user presses submit after changing the labels, a POST request with the changed labels was sent to the backend and the relevant fields in our database were updated. This was done by changing the labels for different clothes on each page and ensuring that our database was updated with the new labels provided.


We tested the user-friendliness of our app by giving 3 people a background on what our app does and how to use it. We then gave them the app and hardware to use Style Sprout and timed how long it took them to use different features. We also had them rate the app out of 10 based on intuitiveness and functionality. We defined intuitiveness as how easy it was to understand the features, and functionality as how easy it was to actually use them.

For the results of these tests, we met our intuitiveness requirements with an average 9/10. Time-wise we also passed the tests, with all features being doable within 10 seconds. However, we did not meet our functionality requirements and got an average of 5/10. Users explained that they struggled specifically with taking images with the camera, and struggled with centering their clothing in the images, leading to a decreased accuracy for classification. As a result, we are adding both a button and a camera stand to our final product to make this process easier for users. After adding these features, we hope to run this test again.

Riley’s Status Report for 11/30

What did you personally accomplish this week on the project? Give files or photos that demonstrate your progress. Prove to the reader that you put sufficient effort into the project over the course of the week (12+ hours.

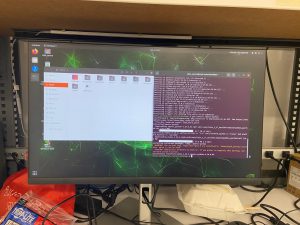
These past two weeks, we got tensorflow working on the Jetson. We ran into all sorts of issues, catalogued, here, here, here and here. Eventually I think that issue was that tensorflow simply wasn’t supported on the version of Jetpack that we had since we kept on running into tricky compilation errors with protobuf, or with some other obscure module that we typically never see when the compilation functions. So, we cleared our SD card, flashed a supported version of Jetpack (5.12) and then re-downloaded Jetpack and all of the other modules/installations that we needed. And this worked!

We then had an issue where the models with the base tensorflow used too much memory to run and ran very slowly on the Jetson, and we kept running out of memory whenever we tried with all three models. To fix this Allie managed to convert the models to their tflite versions, which worked quickly and without exceeding our space allowance.

I also added functionality on the backend for the user to start the scanning process themselves, preventing the need to do command line input.

Another thing that occurred was that I created an s3 bucket and included functionality to send images to the bucket, which can be retrieved by the frontend to show to users.

Finally, since the presentation is coming up, I wrote the script for the presentation, helped with a few slides, enacted some of the testing we wanted to show in the demo, and practiced for the final presentation.

The testing that I conducted was for the classification and speed of the model on the Xavier NX.

Systematically tested the classification on the Jetson Xavier NX using the following process. Tested 80 images, with at least 5 items of each clothing type, 5 items of each color, 4 formal items, 7 casual items, with at least 2 out of the five of each clothing type having bad framing and/or bad lighting. Please let us know if this should be changed to make it a stronger approach.

The results from this testing was 58% for usage, 46% for clothing type, and 63% for usage, which we believe that this might be due to the fact that since these pictures are taken by users, it is a lot harder to get the image in frame and centered as it expects, and the lighting is also incongruous with the expectations of the model. Additionally, when we made the model lightweight, it lost a few percentage points due to the quantization needed to decrease the size of the model.

When testing for speed, we tested it with the same 100 images that we used for classification to have a fair and accurate comparison, and I added timestamps before and after each of the major parts (classification, upload to s3, send to database). Then we simply subtracted the time that it took for each part by subtracting the timestamp after and the timestamp before and that was the time taken for one section. And when we added these sections up, we got the total time. And the results were as follows,

Section Maximum Time Taken Average Time Taken
Classification 2.12 1.79
Upload to s3 2.62 0.50 
Upload to database 0.06 0.02 
Total 4.8 2.30

As we can see this part of testing went very well and we managed to get the speed way below our usage case requirements!!

As you’ve designed, implemented and debugged your project, what new tools or new knowledge did you find it necessary to learn to be able to accomplish these tasks? What learning strategies did you use to acquire this new knowledge?

I found it necessary to learn how to work with an embedded computer. Previously I wasn’t really involved with hobby computers and my experience amounted to using Arduino for a few minor school projects. Needless to say, setting up the environment on this was a huge learning experience, as only certain versions are supported and much care must be taken to ensure that installations don’t destroy dependencies. Navigating through those minefields and familiarizing myself with developing primarily in linux was new knowledge. Luckily, NVIDIA had good resources to learn about the supported systems and modules, which I used along with Google and help from my teammates. 

Additionally, I learnt the basics of how to use s3, including creating, sharing and sending to a bucket. This was also a cool experience as it’s something used in corporate and I never had a chance to learn it. Amazon has a bunch of really good resources to get started and then questions to google, ChatGPT, and partners were more than enough to fill the gaps. 

I also learnt more about SQL and fastAPI, which is quite immediately relevant since I will be taking database systems next semester. I had learnt some of it before but watched a few videos to refamiliarize myself. 


Finally, I learnt about how to use openCV and its module methods to interface with a single web camera. Without openCV, it would have been much more difficult to interface with the camera and would have required us to go very deep in the embedded weeds. But after just watching a few videos and reading a few articles, we were able to read from our camera in about a week or two.

Is your progress on schedule or behind? If you are behind, what actions will be taken to catch up to the proiect schedule?

My progress is on schedule.

What deliverables do you hope to complete in the next week?

For next week, push button functionality needs to be added, this is important but in the worst-case scenario, it would be alright if users interacted with the keyboard since almost all Americans are familiar. Another thing that needs to be added is a casing/box attaching the camera with the light to make it more maneuverable and pleasing to the eye for the demo. Along with those items, touch-ups and the final report and demo are on the menu. 

One thing that we will also look at is some sort of alternative to classify color, since 46% accuracy is above chance but not ideal for us or for users. 

Riley’s Status Report for 11/16

 What did you personally accomplish this week on the project? Give files or photos that demonstrate your progress. Prove to the reader that you put sufficient effort into the project over the course of the week (12+ hours.

This week I fixed the camera bug that was preventing the openCV from displaying the images properly. Additionally I scaled the image to a level appropriate for the model and can continuously detect keyboard input to take pictures 4 seconds after the input was triggered. The issue with the openCV ended up being the fact that I needed to explicitly state what frame rate and resolution I was using, along with needing to add a delay for CV to display the image. 

Additionally, on Saturday I worked with Gabi to set up the Xavier NX with the database and API. We configured the hardware, finalized endpoints to send and store data and connected the server and the embedded computer. Currently I have gotten the device to send some dummy information to the backend server, which then can send a sql query to add the items to the database.

Below are images of my successful POST request via fastAPI.  The left image is showing the testing arguments I passed in successfully mirrored as a method to test the endpoint. The right image shows the fastAPI success, which is a little green OK at the bottom. If you see a couple of red failures above it, those issues were fixed 🙂

Is your progress on schedule or behind? If you are behind, what actions will be taken to catch up to the proiect schedule?

Progress is on schedule and nearly ready for the demo. Some more testing will be done between now and Wednesday but no new major features need to be added until the demo.

What deliverables do you hope to complete in the next week?

Next week I hope to set up a free trial with Amazon Educate and through that gain access to S3 file storage. With that we should have more capabilities in sending and storing images to display as a visual for the user. Additionally I hope to be able to detect the physical button input and use that as a trigger to take a picture. 

Verification Tests:

I tested the functionality of the camera by testing if the camera could display consistently between different boot ups and with the different frame rates and resolutions available. With the GUI the camera was able to consistently display and didn’t experience any issues in the testing. 

Additionally, I tested the cv code by running fifty different image capture requests and ensuring that each time, the event triggered as expected and displayed the image taken by openCV. This action worked 100% of the time. Further testing will be taken when the model is included in order to test if the results can be generated within 3 seconds for a sample dataset of fifty images taken by the camera. However since not all the models are ready and on the Jetson, this requirement will be tested in the coming weeks. 

Riley’s Status Report for 11/9

What did you personally accomplish this week on the project? Give files or photos that demonstrate your progress. Prove to the reader that you put sufficient effort into the project over the course of the week (12+ hours.

This week I coded up an endpoint to send the data to the database and added the required modules on the Xavier NX to achieve this (fastapi, config, msql). Additionally I tested out the code to take pictures only after certain user input. The user input was tracked correctly, but something went wrong with opencv where I got an error message “cannot query video position: status=0, value=-1, duration=-1,”. 

I ensured that the camera worked as expected using the qv4l2 gui. And I did have to fix an issue with it only showing a green screen, but I got the camera to work again. 

Even with the working camera the cv library wasn’t able to take a picture using the opened camera. This is an issue that I will be heavily troubleshooting next week as it is essential and not a hardware issue. 

Is your progress on schedule or behind? If you are behind, what actions will be taken to catch up to the proiect schedule?

Slightly behind schedule due to the camera not being able to take pictures but assuming that works as expected next week when I put more time into it, I will catch up.

What deliverables do you hope to complete in the next week?

Fix the camera issues, mock up a breadboard and connections to detect input on the pushbutton, and meet with Gabi to test sending data to the database from the XavierNX.

Riley’s Status Report for 11/2

What did you personally accomplish this week on the project? Give files or photos that demonstrate your progress. Prove to the reader that you put sufficient effort into the project over the course of the week (12+ hours.

This week I created the framework to take constant images and put them into the model. Unfortunately, due to other courses picking up in this time period for me, I was unable to complete more than that, specifically referring to my desire to link up the image and model results with the backend API. 

Is your progress on schedule or behind? If you are behind, what actions will be taken to catch up to the proiect schedule?

On Schedule still, I will work more next week Friday and Saturday after my work clears up.

What deliverables do you hope to complete in the next week?

Next week I hope to, with the help of Gabi, be able to link up the Jetson with the backend through the use of an API. Additionally, I would like to test inputting an image into a default model to ensure the acceptance of the cv image type. 

Riley’s Status Report for 10/26

What did you personally accomplish this week on the project? Give files or photos that demonstrate your progress. Prove to the reader that you put sufficient effort into the project over the course of the week (12+ hours.

In summary, my progress this week was installing VS Code and connecting Github on the Xavier NX, connecting the camera to the Xavier NX, and taking a picture using the camera using opencv. A lot more work went into this than the simple description allows for. Firstly, in the process of installing VS Code on the embedded device, I followed the instructions from VS Code after downloading the arm64 version. I originally downloaded the amd64 version, but that obviously didn’t work on the Xavier NX which uses arm. After I downloaded the deb file and followed the instructions I still ran into issues with the window not opening after clicking on the icon or typing code into the terminal. I tried debugging for a little while, and none of the most available resources (https://askubuntu.com/questions/1410992/vscode-not-opening-on-arm64-ubuntu-20-04 and https://askubuntu.com/questions/1022923/cannot-open-visual-studio-code) were unable to help. Eventually I stumbled upon a website that recommended running code —no-sandbox, which worked. To the best of my knowledge this occurs because in certain linux or other environments, launching the Chromium sandbox is impossible, so we needed to disable the feature and lose some safety features.  

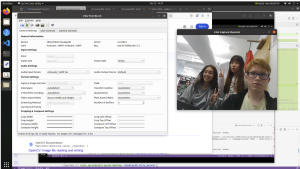
After that, I connected the camera to the Xavier NX, and followed these Arducam instructions, and it worked very well. I was able to set up, view and change the camera settings with the gui installed in the instructions.

After connecting the camera, the next step was to use opencv to take a picture from the camera. This was the most frustrating part to debug since despite the fact that opencv was downloaded, it kept saying the module was not installed. I tried to debug on my own for a little while, trying the typical google searches and websites but eventually I stalled out and pivoted to other work for a little while. Eventually Allie and Gabi were able to help debug and Allie found that we needed to put the python path to the modules in bashrc as it hadn’t been done. Once we followed this it worked and we were able to run openCV. This process took 3-4 hours of debugging and should have worked far earlier than in practice but my guess is that some part of our environment might have made it so the installation didn’t “stick” correctly until we put the path in bashrc.

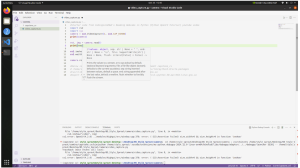
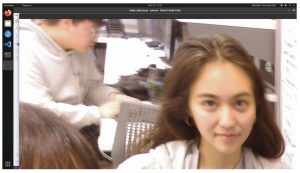
The actual openCV script that we used to take a still image can be found in many different places but I found it from a youtube video. I had to make a small modification to make it work with our camera, but the rest of the code is from the first demo of the video. Below is a picture of the code, with a couple extraneous print statements, and an image that was taken by our camera. The image looks slightly blurry due to the time it took to process and an unsteady hand. The time taken is something that we might have to reduce further, however I think this should well be possible and it’s just something from opencv that made the shutter window longer than it needed to be. After this I connected our github with the Xavier NX and pushed the code. 

OpenCV Starter Code

Resulting Image

If you want higher quality images please slack me! For some reason the process of moving it into the website really lowering the quality. I have higher quality versions that can I can show if desired!

Is your progress on schedule or behind? If you are behind, what actions will be taken to catch up to the proiect schedule?

On Schedule

What deliverables do you hope to complete in the next week?

Next week I want to make the openCV continuously send images using a script. Once this is done with a low enough time interval to meet our timing constraints, I will then try to move the models to the Xavier NX and run some of these images through the model or a sample model to ensure that the formatting of the images is as expected on both sides.

Riley’s Status Report for 10/19

What did you personally accomplish this week on the project? Give files or photos that demonstrate your progress. Prove to the reader that you put sufficient effort into the project over the course of the week (12+ hours.

The past two weeks, since the last status report I have primarily accomplished two things. The first, and more time consuming of which was the writing, editing and integration of the design report. This took a good amount of time to write, even though we had gone over all the information in various forms. Expanding on said information and collating it in a report format was not a trivial task for our team. Past that, this week over break I have received news that the camera has arrived, and in response I have begun the preparation to understand what format the camera will give and how to connect it while getting information to and from the Xavier NX. (might need to do research here). Specifically, I have looked at several OpenCV tutorials, and determined which image format the video will arrive in. With that information, it will be possible to lower the learning curve that comes with implementing and integrating the camera. Additionally, I have downloaded the frontend repo and have gotten acquainted with the structure.

Is your progress on schedule or behind? If you are behind, what actions will be taken to catch up to the proiect schedule?

My progress is on schedule, the hardware components took some time to arrive but not so much that there is any concern yet. Additionally. I have been able to do some work to speed up this integration as well in preparation. 

What deliverables do you hope to complete in the next week?

Next week I intend to receive the camera and detect images from it and store them in an openCV format, all on the Xavier NX. Additionally, if time allows I intend to download our model or a test model onto the Xavier NX, attempt to run it and send information to our API or simply collate it into a format to do just that without actually sending it depending on my and my teammates progress.

Riley’s Status Report for 10/5

What did you personally accomplish this week on the project? Give files or photos that demonstrate your progress. Prove to the reader that you put sufficient effort into the project over the course of the week (12+ hours.

This week I managed to boot up and get situated with the Xavier NX. I received the SD cards late last week so this week I was able to go to a computer lab and set up the Xavier. Before that though, I needed to flash the SD cards with the correct image to enable the Xavier to boot up. The current version of Jetpack (the NVIDIA embedded development environment) currently does not support the Xavier NX, so I found a previous version that would. I also downloaded an even earlier version in case the above one didn’t work, but it was thankfully unneeded. After that I followed the instructions for windows on the Getting Started Guide and downloaded SD Card Formatter and Etcher, and used my roommates SD Card reader to flash the microSD card. That went well, and then I went to the computer lab to boot up the embedded system. This process also went smoothly and it booted up with minimal issues. Finally, I set the settings, and installed openCV using pip on the Xavier. 

Is your progress on schedule or behind? If you are behind, what actions will be taken to catch up to the proiect schedule?

My progress is now on schedule, thankfully the installation process was smooth so even though some of the resources took longer to come in, it went well enough to catch up.

What deliverables do you hope to complete in the next week?

Hopefully the Arducam camera will come in soon and I can start connecting the output of the camera into the Xavier NX but if that doesn’t come in then I will start working on the openCV code to process the camera output and try to make the Xavier NX talk to the database. 

Riley’s Status Report for 9/28/2024

What did you personally accomplish this week on the project? Give files or photos that demonstrate your progress. Prove to the reader that you put sufficient effort into the project over the course of the week (12+ hours.

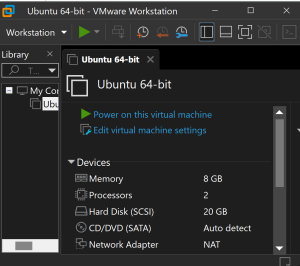
This week I received a couple of items, the LED light to get better consistency when scanning clothing, and more importantly, the Nvidia Jetson Xavier NX. One thing that I found was that to properly boot up the Xavier NX, a couple of additional materials were needed. A USB-Keyboard, HDMI Cable, a spare Monitor, and a 16GB SD card. The first 3 additional materials are easily acquired as we can make use of the computer labs along with our own supplies. However, we did not have an SD card capable of flashing the Xavier NX, so I promptly ordered one. We are still waiting for this SD card and the camera, so I was unable to start the physical boot up process. In the meantime, I worked on the design report and presentation, as it is upcoming. Additionally, I did a fair bit of research on the Xavier NX to try and determine what else I would need so I would be caught off guard again. Using resources such as the starting guide, the Jetpack SDK, the User Guide, the Developer Guide, and many more, I determined that an Ubuntu 22.04 Linux environment would lead to the least complications when using OpenCV and other modules on the Xavier NX. To do this, I downloaded VMWare and created a workstation with the requirements above. I chose not to use WSL because of the complications that can and have arisen when dealing with peripherals on my computer with WSL. Below is a small picture of the workstation. 

Is your progress on schedule or behind? If you are behind, what actions will be taken to catch up to the proiect schedule?

My progress is slightly behind, I hoped to be able to flash and boot up the Xavier NX this week, but I misjudged which materials were needed and am now waiting on the SD card to arrive. It was ordered with Amazon Prime so the delay should not be overwhelming, and as soon as I get that item, I will start the process next week. To catch up to the project schedule, next week I will also work on getting the required modules and development environment of the Xavier NX set up, beyond simply booting it up.

What deliverables do you hope to complete in the next week?

I hope to turn on the Xavier NX, download the required software and modules onto it, and run basic programs using the Xavier NX. I believe this should be possible but time consuming given the intricacies and unexpected issues that often crop up in installation and set-up.


Status Report: Slightly Behind but manageable